


If your computer has been locked and you are seeing a notification from the police, asking you to pay a fine via Ukash, MoneyPak or PaySafeCard, then you are reading this article to understand if it’s real and how to get rid of it.
The newest form of attack used by cyber criminals, is a piece of malware called Trojan Reveton, which will display a bogus notification that pretends to be from your local police department, and states that your computer has been blocked due to it being involved with the distribution of pornographic material, SPAM and copyrighted content.
This new form of malware will lock you out of your computer and applications, so whenever you’ll try to log on into your Windows operating system or Safe Mode with Networking, it will display instead a lock screen asking you to pay a non-existing fine in the form of a Ukash or PaySafeCard code.
Furthermore, to make its alert seem more authentic, this virus also has the ability to access your installed webcam so that the bogus Ukash notification shows what is happening in the room.
If your computer is infected with Ukash virus,then you’ll see a notification from your local police department, below you can see just a few examples on how this alerts might look:
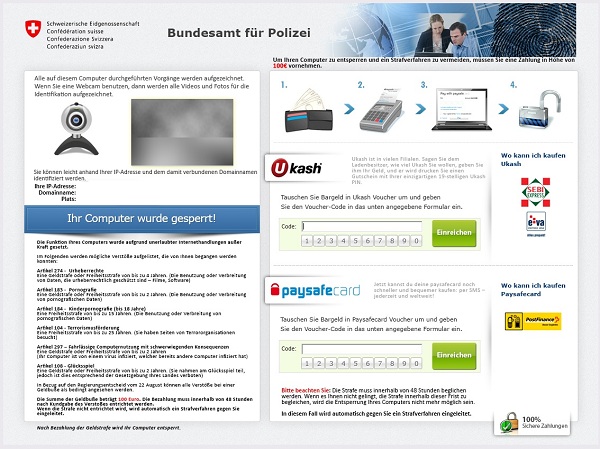

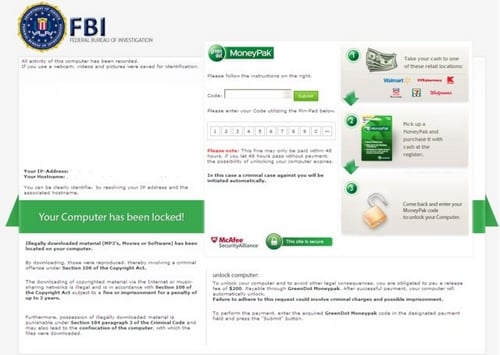
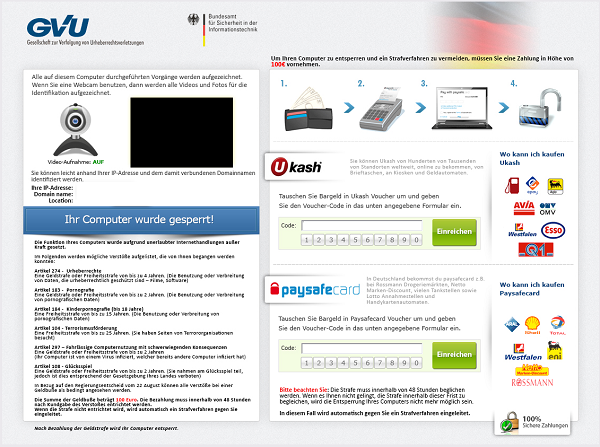
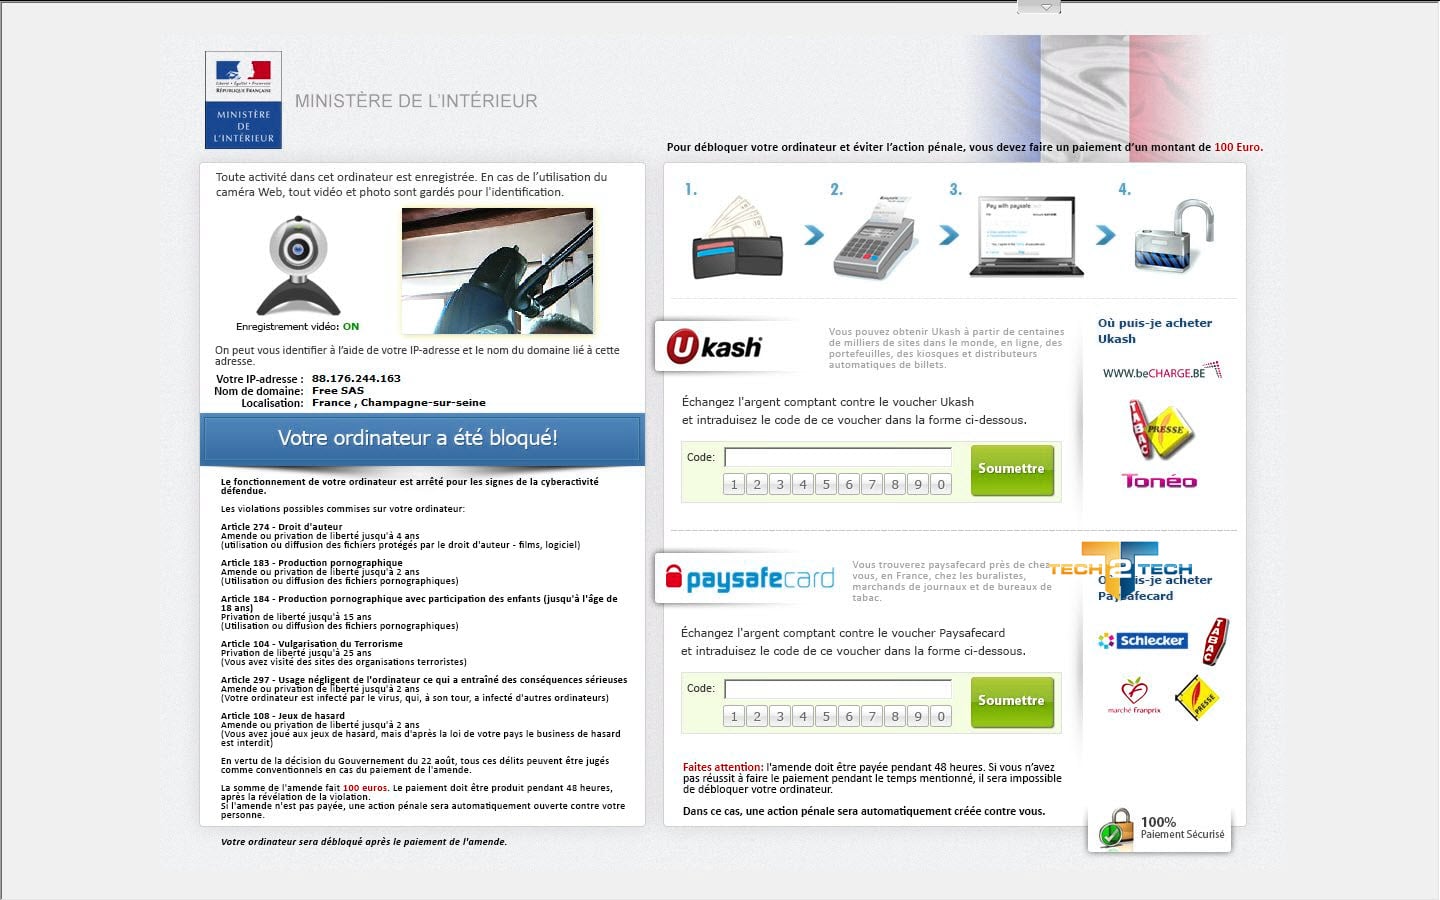

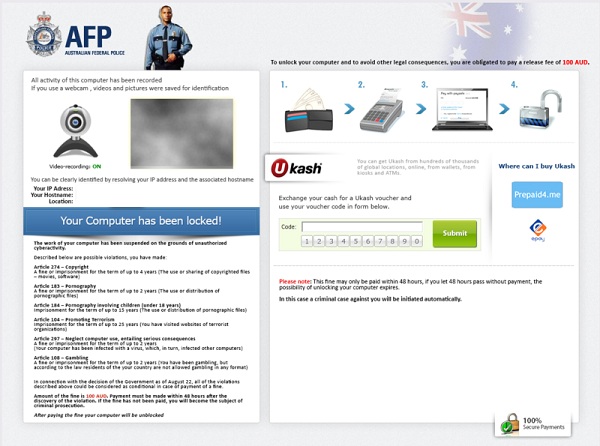

The Ukash Ransom is a scam and you should ignore any alert that this malicious software might generate and remove this trojan ransomware from your computer.
Under no circumstance should you send any money to this cyber criminals,as this could lead to identity theft,and if you have, you should request a refund from Ukash stating that you are the victim of a scam and computer virus.
Ukash Police Ransom – Virus Removal Guide
This page is a comprehensive guide, which will remove the Ukash infection from your your computer. Please perform all the steps in the correct order. If you have any questions or doubt at any point STOP and ask for our assistance.
The Ukash will start automatically when you login to your computer and display its screenlocker so that you are unable to access your computer, therefore we will need to remove this infection by using any of the below methods:
OPTION 1: Remove Ukash lock screen virus with System Restore
OPTION 2: Remove Ukash virus with with HitmanPro Kickstart
OPTION 3: Remove Ukash virus with Kaspersky Rescue Disk
OPTION 1: Remove Ukash lock screen virus with System Restore
System Restore helps you restore your computer’s system files to an earlier point in time. It’s a way to undo system changes to your computer without affecting your personal files, such as e‑mail, documents, or photos.
Because the Ukash virus will not allow you to start the computer in Windows regular mode, we will need to start System Restore from the Safe Mode with Command Prompt mode.
STEP 1: Restore Windows to a previous state using System Restore
- Reboot your computer into Safe Mode with Command Prompt. To do this, turn your computer off and then back on and immediately when you see anything on the screen, start tapping the F8 key on your keyboard.
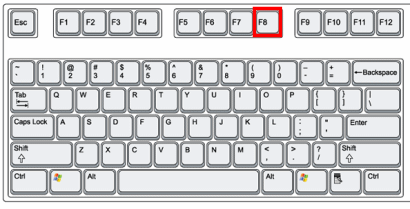
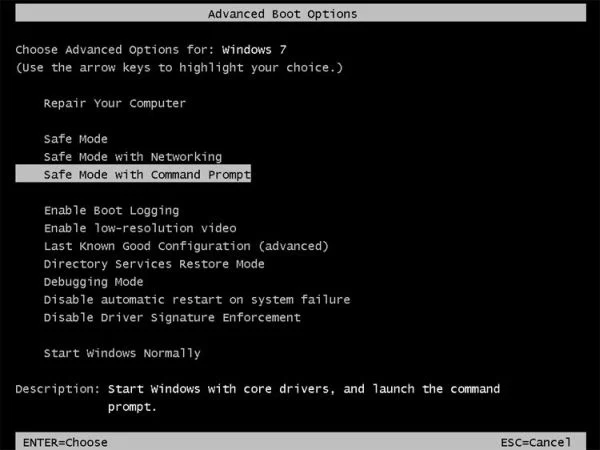
If you are using Windows 8, the trick is to hold the Shift button and gently tap the F8 key repeatedly, this will sometimes boot you into the new advanced “recovery mode”, where you can choose to see advanced repair options. On the next screen, you will need to click on the Troubleshoot option, then select Advanced Options and select Windows Startup Settings. Click on the Restart button, and you should now be able to see the Advanced Boot Options screen. - Using the arrow keys on your keyboard, select Safe Mode with Command Prompt and press Enter on your keyboard.
- At the command prompt, type rstrui.exe, and then press ENTER.
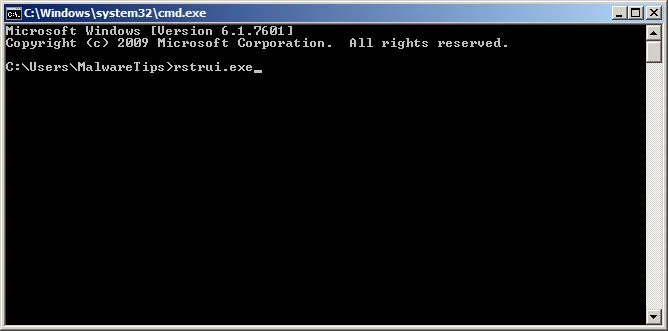
Alternatively, if you are using Windows Vista, 7 and 8, you can type: C:\windows\system32\rstrui.exe , and press Enter. And if you are a Windows XP user, type C:\windows\system32\restore\rstrui.exe, then press Enter. - System Restore should start, and you will display also a list of restore points. Try using a restore point created just before the date and time the Ukash lock screen virus has infected your computer.
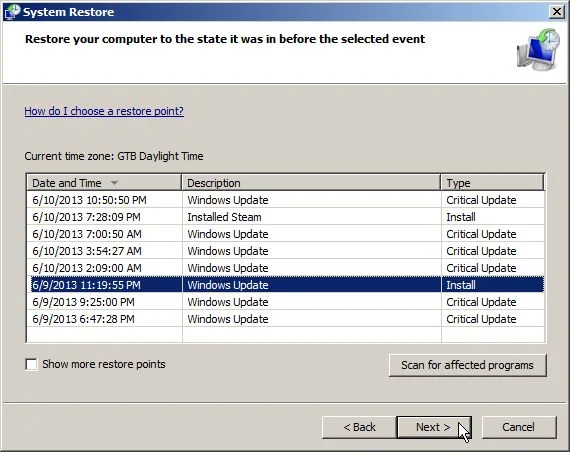
- When System Restore has completed its task, start your computer in Windows regular mode, and perform a scan with Malwarebytes Anti-Malware and HitmanPro, as seen in the next step.
STEP 2: Remove Ukash malicious files with Malwarebytes Anti-Malware Free
Even after using System Restore,
- You can download Malwarebytes Anti-Malware Free from the below link, then double-click on the icon named mbam-setup.exe to install this program.
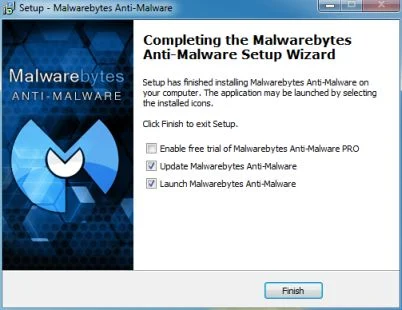
Download MalwarebytesFree official installer. Your download starts right away. - When the installation begins, keep following the prompts in order to continue with the setup process, then at the last screen click on the Finish button.
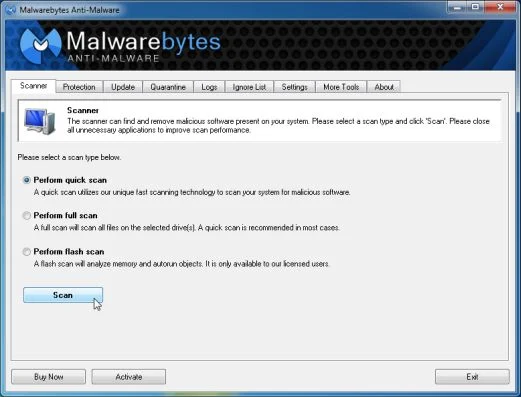
- On the Scanner tab, select Perform quick scan, and then click on the Scan button to start searching for the Ukash malicious files.
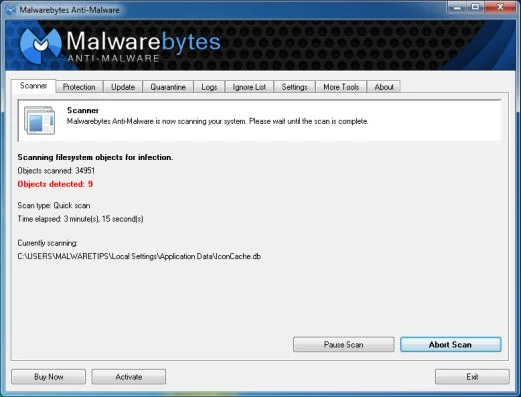
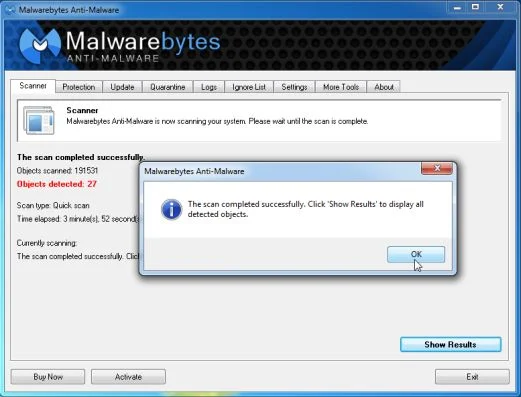
- Malwarebytes’ Anti-Malware will now start scanning your computer for Ukash virus as shown below.
- When the Malwarebytes Anti-Malware scan has finished, click on the Show Results button.
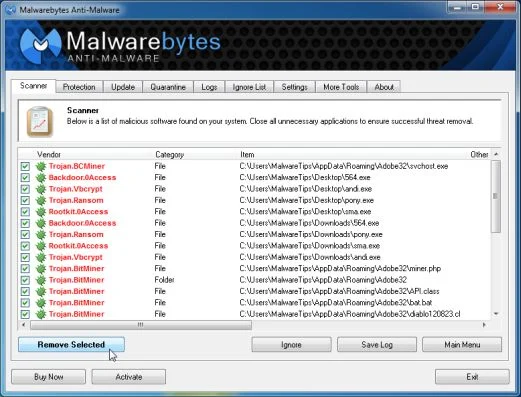
- You will now be presented with a screen showing you the computer infections that Malwarebytes Anti-Malware has detected. Make sure that everything is Checked (ticked), then click on the Remove Selected button.
STEP 3: Double-check for the Ukash virus with HitmanPro
- You can download HitmanPro from the below link:
Download HitmanProOfficial Sophos download. Free scan, free 30-day trial to remove threats. - Double-click on the file named HitmanPro.exe (for 32-bit versions of Windows) or HitmanPro_x64.exe (for 64-bit versions of Windows). When the program starts you will be presented with the start screen as shown below.
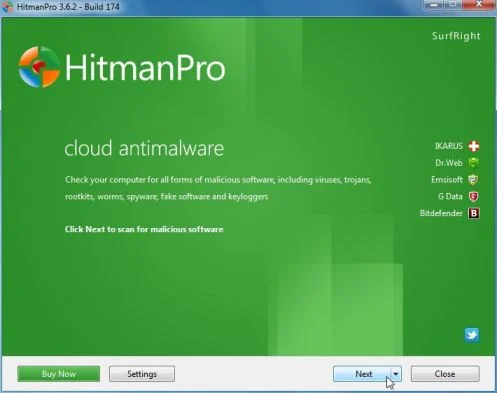
Click on the Next button, to install HitmanPro on your computer.
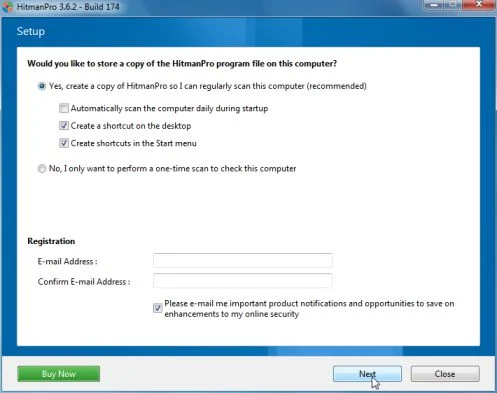
- HitmanPro will now begin to scan your computer for Ukash malicious files.
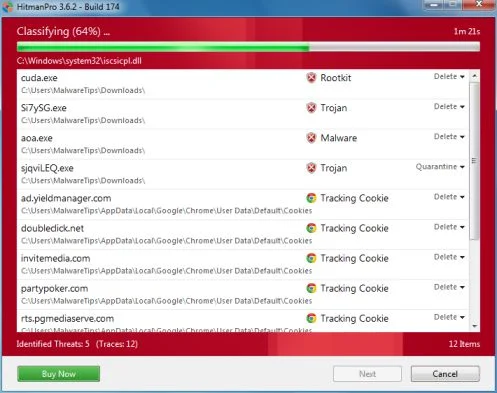
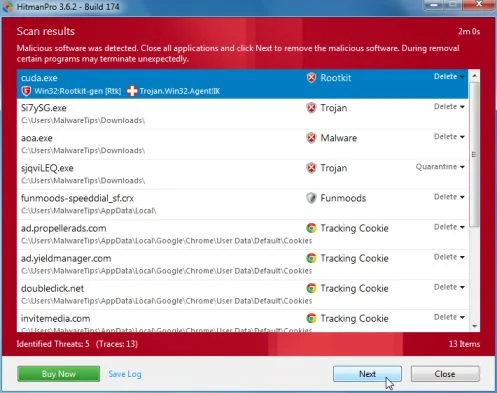
- When it has finished it will display a list of all the malware that the program found as shown in the image below. Click on the Next button, to remove Ukash virus.
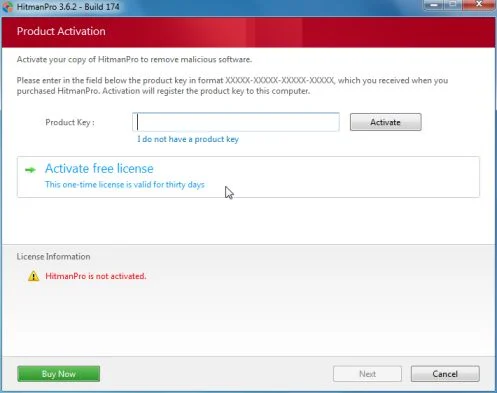
- Click on the Activate free license button to begin the free 30 days trial, and remove all the malicious files from your computer.
OPTION 2: Remove Ukash virus with with HitmanPro Kickstart
If you cannot start your computer into Safe Mode with Command Prompt mode, we can use the HitmanPro Kickstart program to bypass Ukash lock screen.
As the Ukash ransomware infection locks you out of your computer, you will need to create a bootable USB drive that contains the HitmanPro Kickstart program.
We will then boot your computer using this bootable USB drive and use it to clean the infection so that you are able to access Windows normally again.
You will also need a USB drive, which will have all of its data erased and will then be formatted. Therefore, only use a USB drive that does not contain any important data.
- Using a “clean” (non-infected) computer, please download HitmanPro Kickstart from the below link.
Download HitmanProOfficial Sophos download. Free scan, free 30-day trial to remove threats. - Once HitmanPro has been downloaded, please insert the USB flash drive that you would like to erase and use for the installation of HitmanPro Kickstart. Then double-click on the file named HitmanPro.exe (for 32-bit versions of Windows) or HitmanPro_x64.exe (for 64-bit versions of Windows).
To create a bootable HitmanPro USB drive, please follow the instructions from this video:
- Now, remove the HitmanPro Kickstart USB drive and insert it into the Ukash infected computer.
- Once you have inserted the HitmanPro Kickstart USB drive, turn off the infected computer and then turn it on. As soon as you power it on, look for text on the screen that tells you how to access the boot menu.

The keys that are commonly associated with enabling the boot menu are F10, F11 or F12. - Once you determine the proper key (usually the F11 key) that you need to press to access the Boot Menu, restart your computer again and start immediately tapping that key. Next, please perform a scan with HitmanPro Kickstart as shown in the video below.
- HitmanPro will now reboot your computer and Windows should start normally. Then please Malwarebytes Anti-Malware and HitmanPro, and scan your computer for any left over infections.

OPTION 3: Remove Ukash virus with Kaspersky Rescue Disk
If any of the above methods did not clean your infected computer, we can use a Kaspersky Rescue Disk Bootable to clean the Windows registry and to perform a system scan to remove the Ukash virus.
To create a bootable Kaspersky Rescue Disk, we will need the following items:
- A clean (non-infected) computer with Internet access
- A blank DVD or CD
- A computer with a DVD or CD burner
STEP 1: Download and create a bootable Kaspersky Rescue Disk CD
- You can download Kaspersky Rescue Disk utility from link below:
Download Kaspersky Rescue DiskOpens the download page in a new tab. - To create the bootable rescue disk, we will need to use the ImgBurn program. You can download ImgBurn from the below link, then install this program.
Download ImgBurnOpens the download page in a new tab. - Insert your blank DVD or CD in your burner, then start ImgBurn and click on the Write image file to disc button.
- Under Source click on the Browse for file button, then navigate to the location where you previously saved the Kaspersky Rescue Disk utility (kav_rescue_10.iso), then click on the Write button.
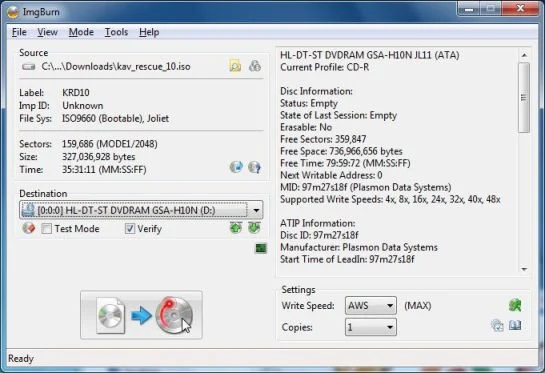
That’s it, ImgBurn will now begin writing your bootable Kaspersky Rescue Disk.
STEP 2: Start your computer using the Kaspersky Rescue Disk
- Once you’ve got the Kasperky Rescue Disk in hand, insert it into the infected computer, and turn off and then turn it on again.
- As soon as you power it on, you will see a screen that tells you to press any key to enter the menu, so please tap any key to boot your machine from the Kaspersky Rescue Disk.

- In the next screen, you will need to chose a language, then you click on Kaspersky Rescue Disk. Graphic Mode and press ENTER, to start the Kaspersky Rescue Disk.
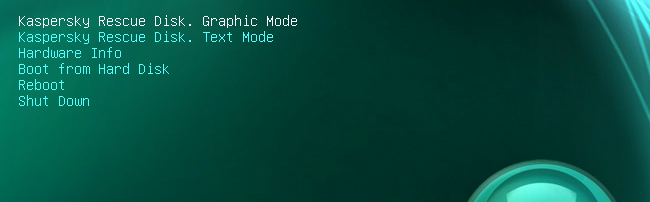
STEP 3: Scan your system with Kaspersky Rescue Disk
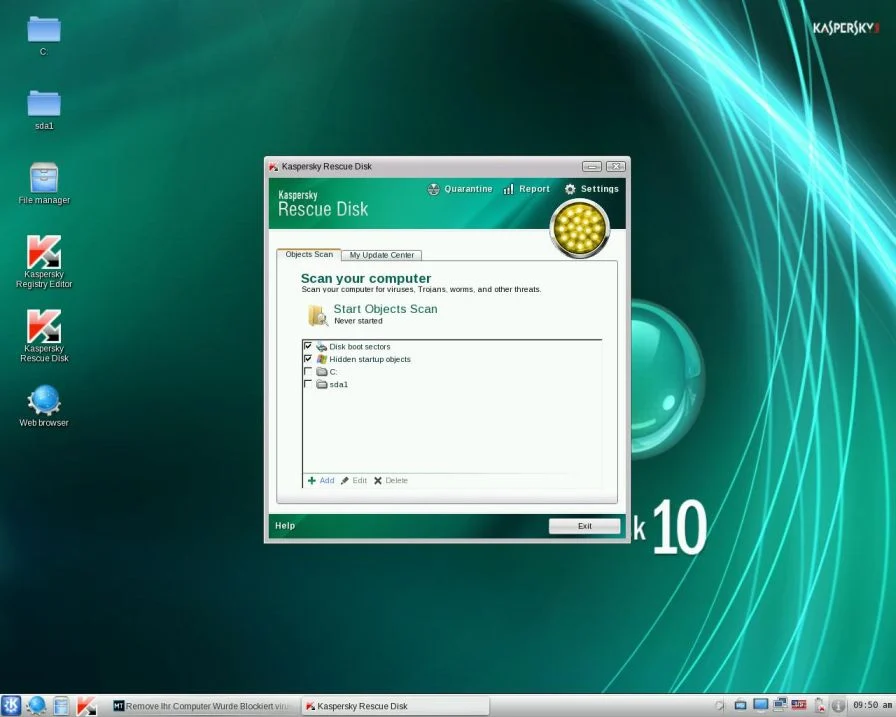
- Within a few short seconds you should see the full working environment, with the Kaspersky Rescue Disk screen front and center as shown below.
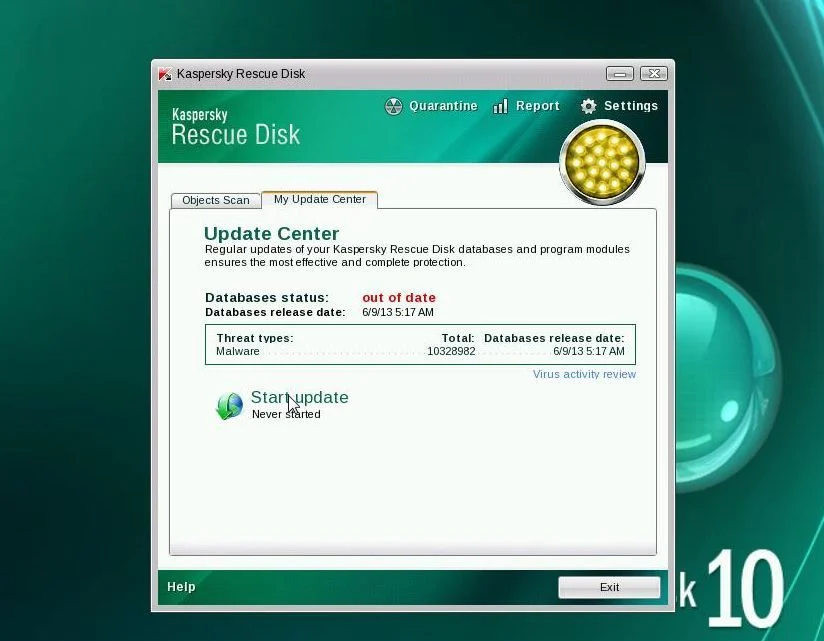
- Switch tabs over to the My Update Center, and then click the Start update button to load the latest anti-virus definitions. Please be patience while this process its completed.
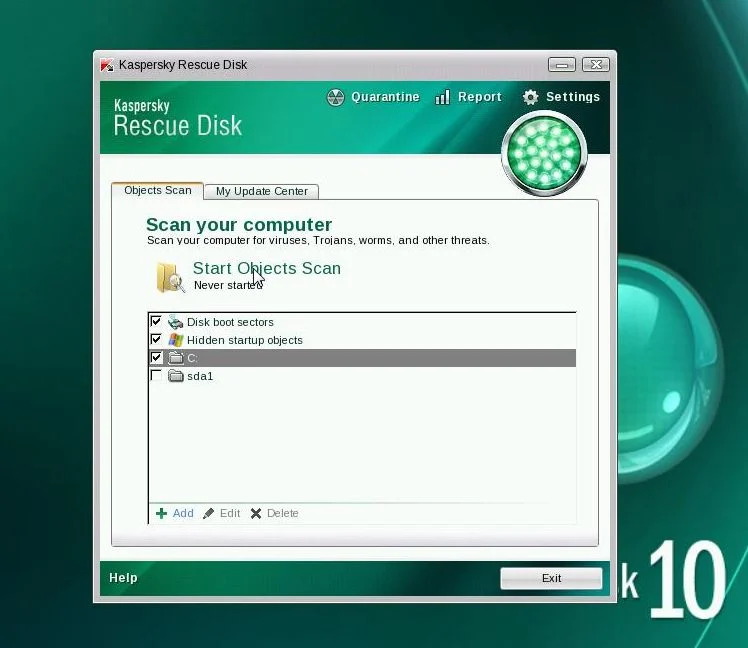
- Switch back over to the Objects Scan tab, select the drives you want to scan, and then click the Start Objects Scan button.
- When Kaspersky Antivirus will detect the Ukash virus, you’ll be prompted to select an action. When this happens, please select Quarantine or Delete to remove this infection from your computer.

- When the antivirus scan has completed, you can restart back into Windows regular mode, by clicking on the Kaspersky Start button
 (lower left corner), and selecting Restart.
Once your computer will start in Windows regular more, download Malwarebytes Anti-Malware and HitmanPro, and scan your computer for any left over infections.

Your computer should now be free of the Ukash infection. If your current anti-virus solution let this infection through, you may want to consider purchasing the PRO version of Malwarebytes Anti-Malware to protect against these types of threats in the future.
If you are still experiencing problems while trying to remove Ukash virus from your machine, please start a new thread in our Malware Removal Assistance forum.

Join the discussion
140 commentsShare your experience or ask a question about this article.
Your progress
Did these steps help?
Let us know how the guide worked for you.
Describe what you see and the step you reached. Keep passwords and other private information out.
Discussion
Used Method 2 : Restore Windows followed by Step 2 : Scan with Malwarebytes
You are a life saver. Deadline for uni tomorrow, only took a quick break to watch tv online!! Naughty girl x
Awesome!!!Thanks.
PS. Used System Restore to remove this virus!
Hello Kall,
Yes, if AVG has definitions for your particular infection , then it can, however Malwarebytes and HitmanPro are products dedicated to malware removal so usually do a better job at cleaning up. Anyway both are free for use,so I see no reason why you shouldn’t try them. :)
In reply to Stelian Pilici
Many thanks. They were needed and worked fine. Your help is greatly appreciated.
Thank you so much! this has been perfect! I’m so busy preparing for exams and this has saved my life! Thank you so much for your help! Merry Xmas and a very very very happy new year! God Bless!
Wish I found your guide earlier. Been trying a few other steps by an antivirus company with little success. This sprung up on Christmas day for me, and I’m sure you’ve saved me countless hours of frustration that I now can spend with my family instead.
Thank you very much, it is much appreciated.
Thanks mate, your a life saver. I had to go with option 2, its great work to have backup ways to fix the problem.
Cant thank you enough
Does the Malwarebytes work alongside Norton Security? This virus actually disabled my Norton Security and when I got my computer back on I had to reinstall it. Norton is telling me my computer is safe so do I need to do anything else?
In reply to Natalie
Hello Natalie,
Yes, Malwarebytes and HitmanPro are designed to work alongside NIS 2013… :D
And for your peace of mind,you can perform a scan with the following tools:
1.Run a scan with Kaspersky Virus Removal Tool
1. Click here to download the Kaspersky Virus Removal Tool and double click the setup file to run it.
2.Follow the onscreen prompts until it is installed
3.Click the Options button (the ‘Gear’ icon), then make sure only the following are ticked:
System Memory
Hidden startup objects
Disk boot sectors
Local Disk (C:)
Also any other drives (Removable that you may have)
4.Then click on Actions on the left hand side, click Select Action, then make sure both Disinfect and Delete if disinfection fails are ticked.
5.Click on Automatic ScanStart Scanning button, to run the scan
2.Run a scan with Eset Online Scanner.
1.Download ESET Online Scanner utility from here and double click on the Eset installer program (esetsmartinstaller_enu.exe).
2.Check Yes, I accept the Terms of Use and click the Start button.
3.Check Scan archives and push the Start button.
4.ESET will then download updates for itself, install itself, and begin scanning your computer. Please be patient as this can take some time.
5.When the scan completes, push Finish
Stay safe!
In reply to Stelian Pilici
Brilliant, thanks for your help! They all say my laptop is now secure!
In reply to Stelian Pilici
Thank you so much! You saved my new laptop! Easy to use guide & it works so well
All sorted very quickly
You are a lifesaver! I only had to use method one and it worked! I will 100% recommend this website! Have a very merry christmas!
Thank you very much for these straight-forward and easy instructions to follow. I was able to remove this virus without losing any of my documents.
dude thanks so much i really appreciate your help. so having rebooted the pc, is it normal that when you scan your system there is 0 objects detected?
In reply to deep cjs
Hello deep cjs,
Did you scan with Malwarebytes and HitmanPro, and they didn’t find any threats?If yes,then you’re good to know!
Stay safe and Merry Christmas!
THANK YOU it worked straight away and I recommend this website to anyone with a virus
Thanks so much dude, I thought I was screwed until you helped. Defiantly recommend this for people reading.
Dear Stelian,
Just a quick line to thank you tremendously for the advice, worked a treat. I only needed to Method 1, but it was reassuring to know there was a contingecy backup if required.
I will definitely pass your article on to my circle of associates.
Thanks again, my best regards to you and your family for the Xmas and all the best for 2013.
Sincerely,
Peter
Thank you, thank you a million times. You just saved my ass, if my roommate came home and found this on his computer…. lets just say he is alot bigger than me and quick to anger. I dont how i’m gonna repay you man but you definatley earned yourself some good karma. thank you again from a friend in canada.
In reply to myhero
Dude if it werent for u i dont know wat i would do
Hey that rhymed* :P
well that saved my ass thanks bro ur the best