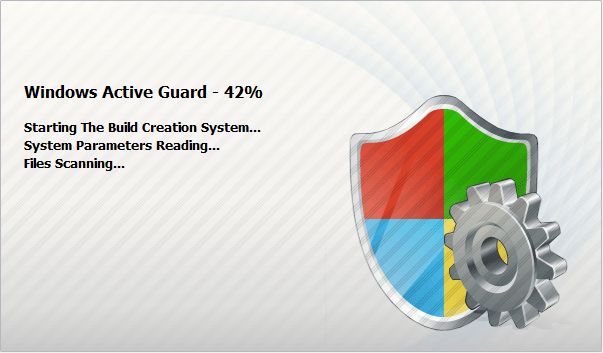
Windows Active Guard is a malicious program also known as rogue security software, which will display fake security alerts in an attempt to scare you into buying this fake security product.
In addition, Windows Active Guard has also hijacked your PC,blocking your from running files,so now when your trying to open and executable file (file ending with .exe), this program will instead display bogus alerts.
We strongly advise you to follow our Windows Active Guard removal guide and ignore any alerts that this malicious software might generate.
Under no circumstance should you buy this rogue security software as this could lead to identity theft,and if you have, you should contact your credit card company and dispute the charge stating that the program is a scam and a computer virus.
If your computer is infected with Windows Active Guard,then you are seeing this images:


Windows Active Guard Removal Guide
STEP 1: Run HitmanPro in ForceBreach Mode to remove Windows Active Guard
- Download the latest official version of HitmanPro.
HITMANPRO DOWNLOAD LINK (This link will open a download page in a new window from where you can download HitmanPro) - Start HitmanPro in Force Breach mode,to do this hold down the left CTRL-key when you start HitmanPro and all non-essential processes are terminated, including the malware process.
- Click on Next to install HitmanPro on your system.
![HitmanPro installation process [Image: Starting HitmanPro]](//malwaretips.com/images/removalguide/hitmanpro36-start.png)
- The setup screen is displayed, from which you can decide whether you wish to install HitmanPro on your machine or just perform a one-time scan, select a option then click on Next to start a system scan.
![HitmanPro setup options [Image: HitmanPro installation screen]](//malwaretips.com/images/removalguide/hitmanpro36-installation.png)
- HitmanPro will start scanning your system for malicious files as seen in the image below.
![HitmanPro while scanning for Windows Active Guard virus [Image: HitmanPron scanning for Windows Active Guard ]](//malwaretips.com/images/removalguide/hitmanpro36-scan.png)
- Once the scan is complete,you’ll see a screen which will display all the malicious files that the program has found.Click on Next to remove this malicious files.
![HitmanPro displaying scan results [Image: HitmanPro scan results]](//malwaretips.com/images/removalguide/hitmanpro36-results.png)
- Click Activate free license to start the free 30 days trial and remove the malicious files.
![Activate the HitmanPro free 30 days trial to remove any detected infections [Image: Activate HitmanPro license]](//malwaretips.com/images/removalguide/hitmanpro36-activation.png)
- HitmanPro will now start removing the infected objects.If this program will ask you to restart your computer,please allow this request.
STEP 2: Run a scan with Malwarebytes Anti-Malware Free to check for any left over Windows Active Guard malicious files
- Download the latest official version of Malwarebytes Anti-Malware Free.
MALWAREBYTES ANTI-MALWARE DOWNLOAD LINK (This link will open a download page in a new window from where you can download Malwarebytes Anti-Malware Free) - Start the Malwarebytes’ Anti-Malware installation process by double clicking on mbam-setup file.
![Malwarebytes Anti-Malware Installer [Image: Malwarebytes Installer]](//malwaretips.com/images/removalguide/malwarebytes-setup.png)
- When the installation begins, keep following the prompts in order to continue with the setup process. Do not make any changes to default settings and when the program has finished installing, make sure you leave both the Update Malwarebytes’ Anti-Malware and Launch Malwarebytes’ Anti-Malware checked. Then click on the Finish button. If Malwarebytes’ prompts you to reboot, please do not do so.
![Malwarebytes last setup screen [Image: Finishing Malwarebytes installation]](//malwaretips.com/images/removalguide/update-malwarebytes.png)
- Malwarebytes Anti-Malware will now start and you’ll be prompted to start a trial period , please select ‘Decline‘ as we just want to use the on-demand scanner.
![Decline trial period in Malwarebytes Anti-Malware [Image: Decline Malwarebytes trial]](//malwaretips.com/images/removalguide/malwarebytes-trial.png)
- On the Scanner tab,select Perform full scan and then click on the Scanbutton to start scanning your computer.
![Perform a Full System Scan with Malwarebytes Anti-Malware [Image: Starting a full system sca]](//malwaretips.com/images/removalguide/start-scan-malwarebytes.png)
- Malwarebytes’ Anti-Malware will now start scanning your computer for Windows Active Guard malicious files as shown below.
![Malwarebytes Anti-Malware scanning for Windows Active Guard [Image: Malwarebytes scanning for malicious files]](//malwaretips.com/images/removalguide/scan-malwarebytes.png)
- When the scan is finished a message box will appear, click OK to continue.
![Malwarebytes when the system scan has finished [Image: Malwarebytes scan results]](//malwaretips.com/images/removalguide/results-malwarebytes.png)
- You will now be presented with a screen showing you the malware infections that Malwarebytes’ Anti-Malware has detected.Please note that the infections found may be different than what is shown in the image.Make sure that everything is Checked (ticked) and click on the Remove Selected button.
![Removing the infections found by Malwarebytes [Image: Infections found by Malwarebytes]](//malwaretips.com/images/removalguide/detection-malwarebytes.png)
- Malwarebytes’ Anti-Malware will now start removing the malicious files.After completing this task it will display a message stating that it needs to reboot,please allow this request.


![HitmanPro installation process [Image: Starting HitmanPro]](http://malwaretips.com/images/removalguide/hitmanpro36-start.png)
![HitmanPro setup options [Image: HitmanPro installation screen]](http://malwaretips.com/images/removalguide/hitmanpro36-installation.png)
![HitmanPro while scanning for Windows Active Guard virus [Image: HitmanPron scanning for Windows Active Guard ]](http://malwaretips.com/images/removalguide/hitmanpro36-scan.png)
![HitmanPro displaying scan results [Image: HitmanPro scan results]](http://malwaretips.com/images/removalguide/hitmanpro36-results.png)
![Activate the HitmanPro free 30 days trial to remove any detected infections [Image: Activate HitmanPro license]](http://malwaretips.com/images/removalguide/hitmanpro36-activation.png)
![Malwarebytes Anti-Malware Installer [Image: Malwarebytes Installer]](http://malwaretips.com/images/removalguide/malwarebytes-setup.png)
![Malwarebytes last setup screen [Image: Finishing Malwarebytes installation]](http://malwaretips.com/images/removalguide/update-malwarebytes.png)
![Decline trial period in Malwarebytes Anti-Malware [Image: Decline Malwarebytes trial]](http://malwaretips.com/images/removalguide/malwarebytes-trial.png)
![Perform a Full System Scan with Malwarebytes Anti-Malware [Image: Starting a full system sca]](http://malwaretips.com/images/removalguide/start-scan-malwarebytes.png)
![Malwarebytes Anti-Malware scanning for Windows Active Guard [Image: Malwarebytes scanning for malicious files]](http://malwaretips.com/images/removalguide/scan-malwarebytes.png)
![Malwarebytes when the system scan has finished [Image: Malwarebytes scan results]](http://malwaretips.com/images/removalguide/results-malwarebytes.png)
![Removing the infections found by Malwarebytes [Image: Infections found by Malwarebytes]](http://malwaretips.com/images/removalguide/detection-malwarebytes.png)
![Remove Search with AI Redirect [Virus Removal Guide] 3 ProtectedSearch Search Virus](https://malwaretips.com/blogs/wp-content/uploads/2018/12/ProtectedSearch-Search-290x190.jpg)


