

A routine-looking alert says your inbox needs attention. Several incoming messages may remain unavailable until you confirm the mailbox’s current status.
The request feels like ordinary maintenance, especially during a busy workday. Its calm appearance makes the next click unusually easy to misjudge.
Overview
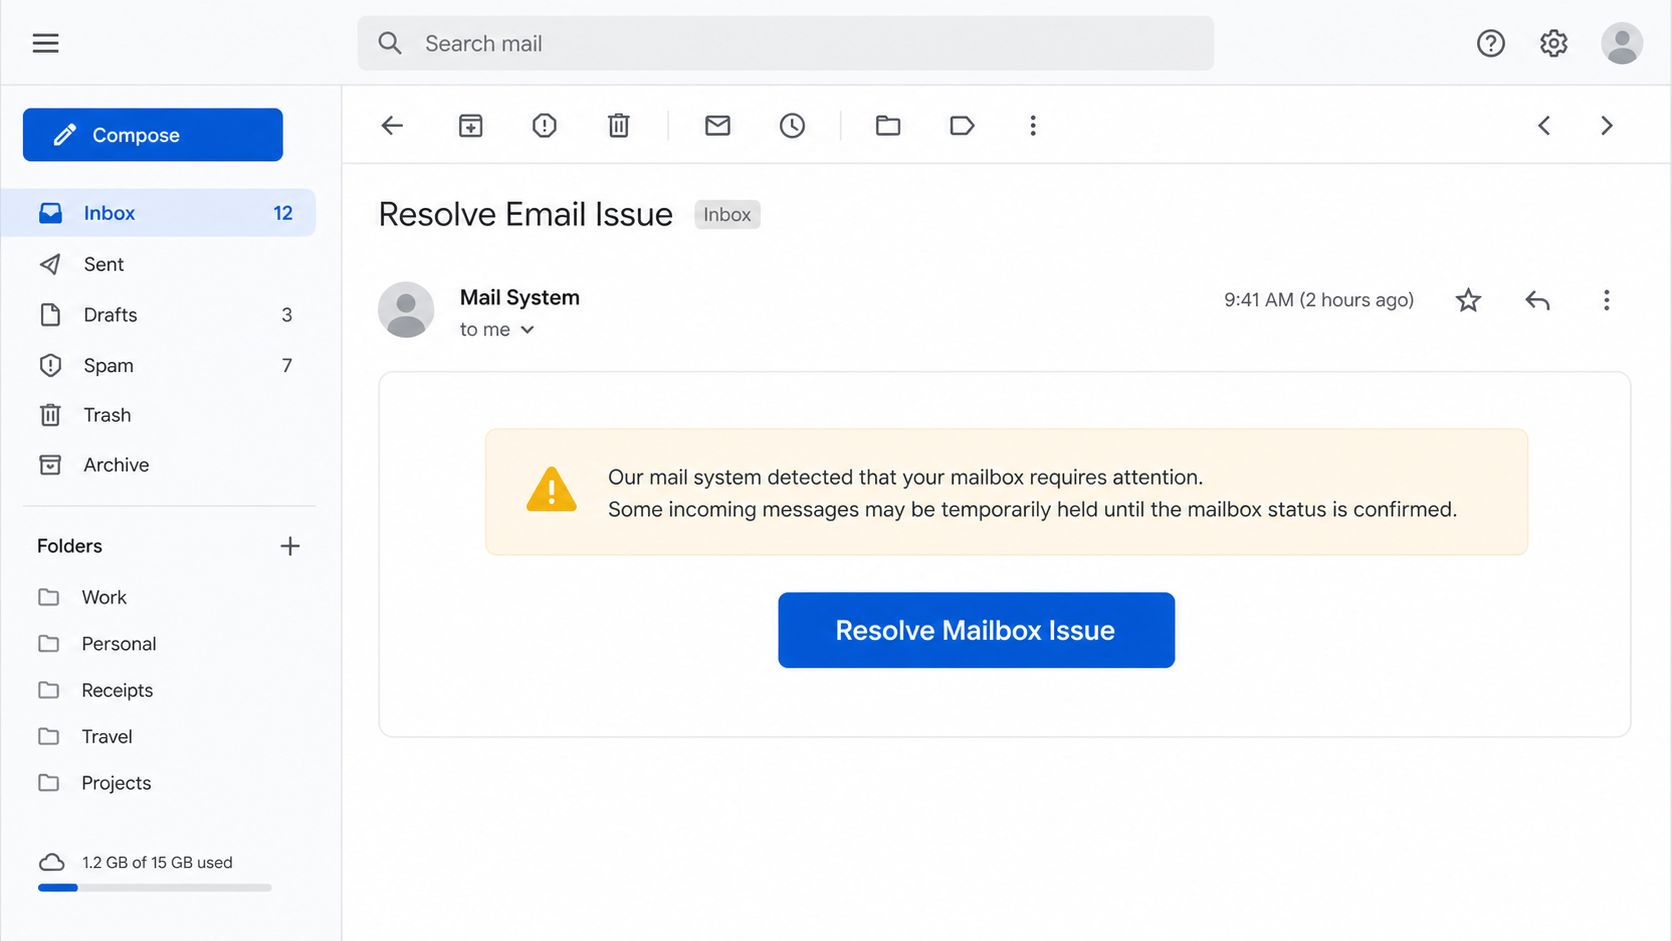
The notice pretends to come from a mail system
The campaign uses subjects such as “Resolve Email Issue” and describes itself as a mailbox or system notification.
It claims incoming messages are temporarily held until the account owner updates or confirms mailbox status.
A blue “Resolve Mailbox Issue” button offers the only apparent path forward.
No real sender names, held subjects, delivery codes, or server details are provided.
The button leads to credential theft
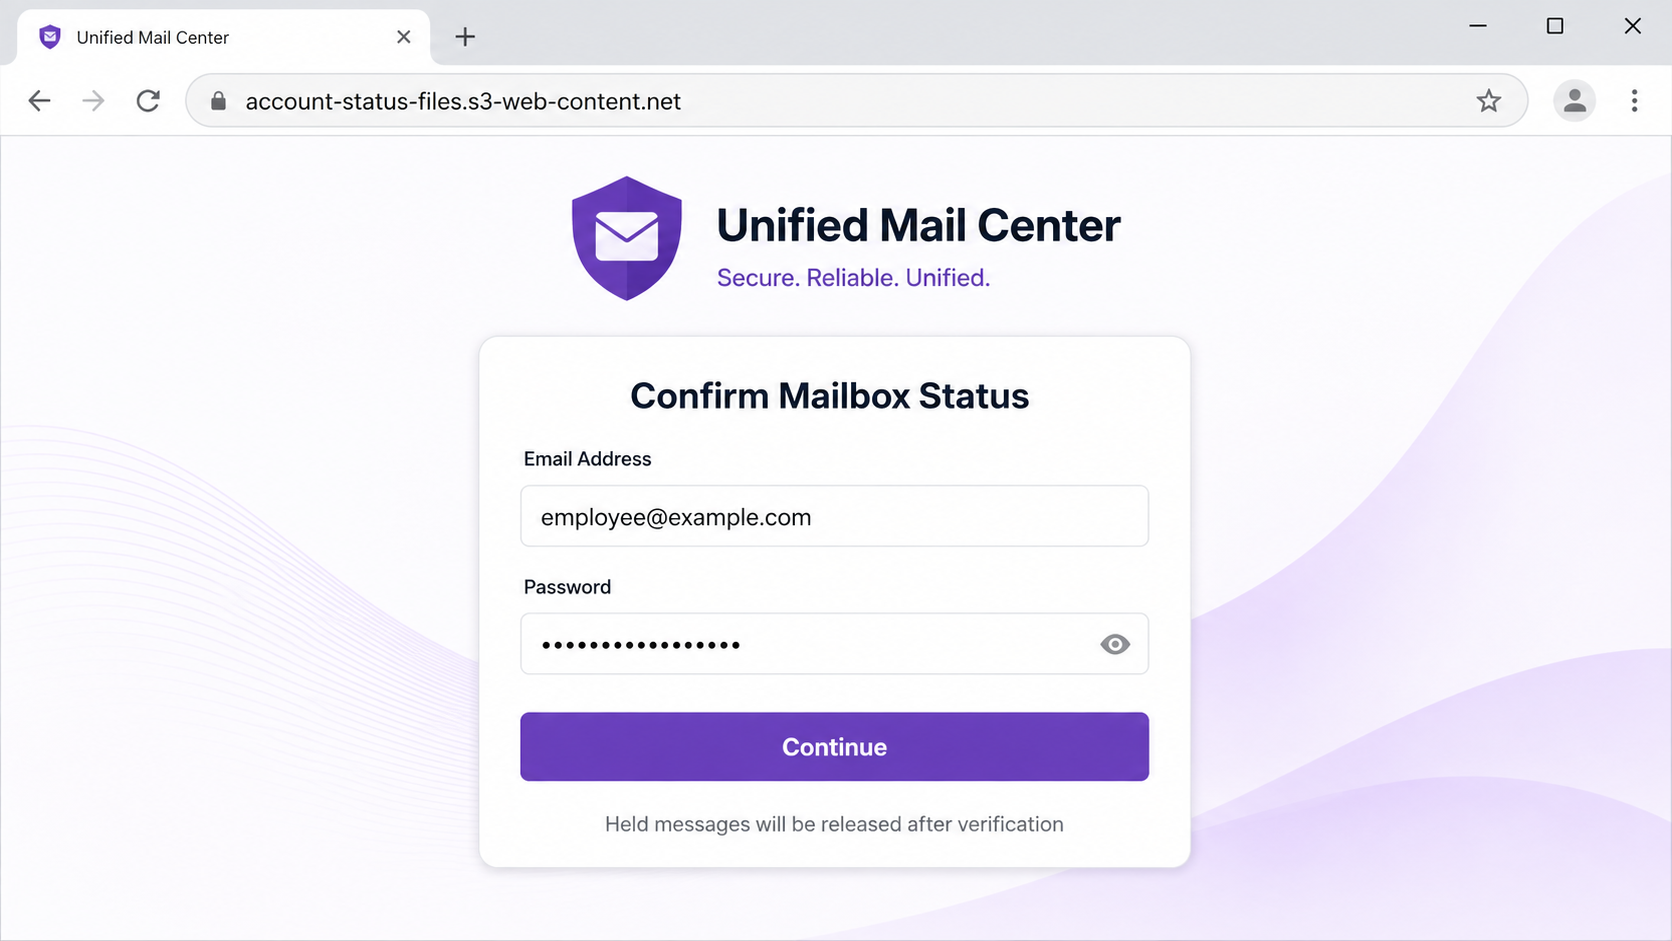
The reviewed link opened a counterfeit sign-in page styled to resemble a familiar online account.
The user’s email may already be filled in. That small personalization trick makes the page seem connected to the original mailbox.
Entering a password sends it to the operators. The form does not release mail or repair any account setting.
The fake page used cloud-storage infrastructure, but that does not mean the storage provider created or approved the campaign.
The message avoids one specific brand
Generic language lets attackers reach corporate addresses, custom domains, school accounts, and personal inboxes with one design.
The victim often supplies the missing context by imagining an overdue invoice, client answer, or password-reset message.
Signals that deserve immediate caution include:
- A vague mailbox problem delivered without technical details.
- Claims that unnamed messages are being held.
- A single button framed as the required repair.
- A login address unrelated to the normal provider.
- An email address embedded inside the destination link.
- A page that asks for the same password used for email.
- No matching warning inside the genuine account.
- A sender that cannot be tied to your administrator.
Why the “Held Messages” Story Works
People depend on email for tasks they cannot see coming. A missing message could concern money, work, travel, family, or security.
The lure creates uncertainty instead of naming a transaction. Each recipient mentally chooses the message they fear losing most.
Unlike an obvious prize, mailbox maintenance sounds boring. Boring requests often receive less skeptical attention.
The email also imitates a familiar support sequence: notice, problem summary, and one repair button.
Modern mail systems do quarantine or delay messages. That truthful background makes a false warning plausible.
Real systems normally show quarantine details within an authenticated portal. They do not require a password through an unrelated storage link.
A correct email address on the page is not proof. The attacker already needed that address to send the lure.
Logos are equally weak evidence. Brand graphics can be copied in seconds and embedded in remote pages.
The safest verification begins outside the message. Use a saved bookmark, known application, or help desk contact.
If the alleged issue appears nowhere in the real account, the email has not proven anything.
What Criminals Can Do With Mailbox Access
A mailbox contains more than conversations. It acts as an identity hub for many other services.
Password-reset links can give an intruder access to shopping, social, cloud, and workplace accounts.
Search results inside the inbox may reveal invoices, identification documents, account numbers, travel plans, and personal relationships.
Business accounts are especially useful for payment redirection. An attacker can study ongoing discussions before changing bank details.
They may register a forwarding rule that copies new messages without disrupting normal delivery.
Another rule can hide security alerts or replies in obscure folders, delaying discovery.
The intruder can impersonate the owner when requesting documents or sending new phishing links.
Because recipients recognize the address, secondary messages may bypass their usual caution.
Access can persist through application passwords, delegated users, OAuth permissions, or stolen session cookies after the main password changes.
Recovery therefore requires more than choosing a new password. Every persistence setting needs review.
How the Update Your Mailbox Status Email Scam Works
Step 1: A mailbox list receives a generic warning
Attackers distribute the notice to addresses gathered from leaks, company websites, contact pages, and automated domain patterns.
The template avoids provider-specific facts, allowing it to match many organizations without customization.
A system-like sender name makes the message blend with automated notifications already in the inbox.
Step 2: Unspecified held mail creates urgency
The email claims some messages remain pending until the mailbox is confirmed.
It does not explain who sent them, when they arrived, or why the normal spam controls cannot handle them.
That missing detail is intentional. Curiosity encourages action before investigation.
Step 3: The button leaves the trusted mail environment
Clicking “Resolve Mailbox Issue” directs the browser to an external site controlled or abused by the attackers.
The page may be stored on a mainstream cloud platform, giving the URL a technical but unfamiliar appearance.
Infrastructure reputation is not page authenticity. Anyone with an account can sometimes upload public web content.
Step 4: The fake form mirrors a sign-in experience
The page displays account colors, a generic logo, and the recipient’s email address.
It asks for the password supposedly needed to release the held messages.
Some versions request repeated entry, a telephone number, or a one-time code to capture more information.
Step 5: The victim’s input is collected
The form sends credentials to a remote collection point instead of an identity provider.
A loading animation or incorrect-password error buys time and may encourage a second password attempt.
The browser can then redirect to a genuine login page, making the earlier failure look like a temporary glitch.
Step 6: Attackers enter the real account
They test the credentials quickly because password changes or automated risk controls may block later access.
When multifactor authentication appears, the victim may receive a follow-up prompt or telephone call requesting the code.
A successful session is used to inspect correspondence, steal files, and establish hidden persistence.
Step 7: The compromised inbox supports new fraud
Contacts may receive believable document shares, payment updates, or mailbox notices from the trusted account.
The attacker can reset other services, impersonate executives, or sell access to another criminal group.
Quiet account use can continue for weeks before the owner notices a missing message or unusual payment.
How to Verify a Mailbox Warning
Close the email and open your mailbox through the application or bookmark you normally use.
Look for a quarantine, storage, security, or administration notice inside account settings.
Check the service-status page through a separately typed address if delivery problems are widespread.
Work users should ask their internal help desk. Forward the message as an attachment when administrators need complete headers.
Examine the link text and actual destination. A label can say “mailbox” while pointing anywhere.
Read the domain from right to left, focusing on the registered name before the first slash.
Words such as secure, verify, status, and mail inside a long subdomain provide no ownership proof.
Inspect the reply-to field. A mismatch with the visible sender strengthens the phishing assessment.
Do not use “unsubscribe” on a credential lure. That button can confirm the address or lead to another dangerous page.
Mark the message as phishing and delete it after preserving anything your security team requests.
Why Mobile Users Can Miss the Warning Signs
Phones show less of a long destination address. The registered domain may disappear beyond the visible edge of the screen.
A large button is easier to tap than inspect, especially when a notification interrupts another task.
Mobile pages also resemble applications. Full-screen layouts can hide the browser controls that reveal where the form is hosted.
Password managers help only when users notice that saved credentials are not offered on the unfamiliar domain.
Copying the link into a note for inspection can still trigger previews or accidental access. Report the message instead.
Work profiles and personal profiles may share notification space, making a corporate-looking alert feel relevant on either account.
Attackers design buttons for thumbs and short attention spans. The page can request a password before any explanatory detail appears.
One-time codes are particularly vulnerable to urgency. A victim may approve a prompt simply to make repeated notifications stop.
Read every approval screen. A legitimate prompt should identify the service, device, location, and action you initiated.
If you did not begin a login, deny the request and report it. Repeated prompts can signal active password use.
Do not call a number from the phishing page for help. Telephone support can continue the same theft through social engineering.
Use another device to reach the provider’s official support if the phone browser behaves unexpectedly.
How Attackers Hide After They Sign In
Immediate spam from the account would alert the owner. Sophisticated operators often remain quiet while studying valuable correspondence.
They may mark selected security notices as read, move them to archives, or delete them permanently.
A forwarding rule can target only invoices or messages containing terms such as payment, wire, or statement.
Reply addresses may be altered so a victim’s contacts continue conversations with the attacker outside the genuine mailbox.
Calendar invitations and cloud shares provide alternative channels for persistence and new phishing.
Regular review of settings and sign-in history can uncover these changes before a financial request appears.
Review deleted items and recoverable folders before retention limits expire. Attackers may remove the very notices that reveal their access.
Compare suspicious session times with sent, moved, and forwarded messages to understand the exposure window.
If sensitive personal data was accessed, organizations may have contractual or legal notification duties. Involve qualified counsel rather than guessing.
Resetting every employee unnecessarily creates confusion. Use logs and campaign recipients to focus containment while monitoring the wider environment.
Administrators should search message traces for the sender, subject, linked host, and matching HTML fragments.
Different subjects may carry the same destination. URL relationships often reveal a broader campaign than text alone.
Block confirmed indicators at the email gateway, DNS filter, browser, and endpoint layers where available.
Short-lived domains can vanish quickly, but preserved evidence still supports account review and abuse reporting.
If the address appeared in a public leak, expect related password-reset and telephone attacks after the phishing attempt.
Criminals combine fragments from several places. A correct employer or telephone number does not validate their identity.
Customer-support teams should have a script for mailbox warnings so users receive consistent verification guidance.
A real outage may coincide with a phishing wave. Continue using official status pages and known support channels.
Never lower security simply to restore mail faster. Attackers want the urgent workaround to feel reasonable.
Once resolved, update internal examples with sanitized screenshots. Recent local examples are more memorable than generic awareness posters.
Track whether anyone approved multifactor prompts after the email arrived. Those events may identify compromised credentials before visible mailbox misuse.
Users who reported without clicking still provide valuable intelligence. Their messages can protect colleagues who received the same campaign later.
Company, Address, and Fulfillment Checks
Find the organization actually responsible for your mailbox
Your employer, hosting company, school, or chosen email provider has an established support route.
Contact that organization independently. The vague “Mail System” identity in the email is not accountable.
Compare domains instead of visual branding
Check the sending domain, reply-to address, linked domain, and genuine login domain side by side.
Differences matter more than matching colors or logos. Record the complete addresses before the page disappears.
Do not blame an abused cloud provider
Cloud storage can host legitimate files and malicious pages. The platform name alone does not identify the criminal.
Send an abuse report with the exact URL, time, and screenshot so the provider can investigate.
Trace delivery and account activity
Mail administrators can use headers and login logs to establish origin, recipients, suspicious sessions, and subsequent rule changes.
That operational trail is more useful than a postal address because the product being “delivered” is stolen access.
What to Do if You Have Fallen Victim to This Scam
- Use the genuine provider directly. Open a saved bookmark or trusted application, then replace the exposed email password immediately.
- Terminate unfamiliar access. Sign out all sessions and remove devices, application passwords, connected applications, and delegated users you do not recognize.
- Review hidden routing. Examine forwarding addresses, inbox rules, filters, aliases, and automatic replies for attacker-created persistence.
- Strengthen verification. Enable an authenticator or security key. Never approve a prompt or share a code triggered by the attacker.
- Secure connected accounts. Change reused passwords and inspect services that can be reset through the affected mailbox.
- Notify workplace security. Business users should report quickly so administrators can preserve logs, block indicators, and warn coworkers.
- Review sensitive conversations. Contact suppliers or customers if payment details, documents, or confidential threads may have been accessed.
- Check the device with Malwarebytes. This is especially important if the page downloaded a file, requested an extension, or installed remote software.
- Use AdGuard for added filtering. It can reduce contact with known phishing and malvertising domains, but it cannot undo stolen credentials.
- Save evidence. Keep the original message, headers, destination URL, security alerts, account logs, and screenshots.
- Report the infrastructure. Notify the mail provider, cloud host, domain registrar, impersonated organization, and appropriate cybercrime authority.
- Monitor for follow-up attacks. Criminals may send new reset messages, fake support calls, or payment requests using information already collected.
Is Your Device Infected? Run a Free Malware Scan
Slow performance, constant pop-ups, or strange behavior? These are classic signs of a malware infection. The fastest way to find out is to scan your device with Malwarebytes Free — one of the most trusted malware removal tools available.
The free version detects and removes the most common threats, including:
- Adware — the cause of those annoying pop-ups
- Browser hijackers — unwanted redirects and changed homepages
- Trojans and spyware — hidden programs stealing your data
- Potentially unwanted programs (PUPs) — software you never asked for
👉 Select your device below — Windows, Mac, or Android — then follow the simple steps to download Malwarebytes, scan your system, and remove any threats it finds. The scan usually takes 5 to 20 minutes.
Run a Malware Scan with Malwarebytes for Windows
Malwarebytes is one of the most popular and trusted anti-malware tools for Windows — and it’s completely free for removing infections. It catches threats that many antivirus programs miss, including adware, browser hijackers, and trojans. Follow the steps below to scan and clean your PC in just a few minutes.
Download Malwarebytes
Click the button below to download the latest version of Malwarebytes for Windows from the official source. The free version is all you need — it will scan your computer and remove adware, browser hijackers, and other malicious software at no cost.
Download MalwarebytesOfficial installer for Windows 11 and 10. Your download starts right away.Want real-time protection? See Malwarebytes Premium Malwarebytes Free for WindowsScans and removes malware at no cost
-
Install Malwarebytes
When the download finishes, open your Downloads folder and double-click the MBSetup file. If Windows shows a User Account Control pop-up, click “Yes” to allow the installation.

Follow the On-Screen Prompts to Install Malwarebytes
The setup wizard will walk you through a few quick screens:
-
Choose where you’re installing the program — “Personal Computer” or “Work Computer” — then click Next.

-
Malwarebytes will now install on your device. This usually takes under a minute.

-
When installation is complete, the “Welcome to Malwarebytes” screen will open automatically.

-
On the final screen, click Open Malwarebytes to launch the program.

-
Enable “Scan for Rootkits”
Before scanning, turn on rootkit detection so Malwarebytes can find even the most hidden threats. Click the Settings gear icon on the left side of the screen.

In the settings menu, find “Scan for rootkits” and click the toggle so it turns blue.

Done? Click “Dashboard” in the left pane to return to the main screen.
Start the Scan
Click the blue Scan button. Malwarebytes will automatically update its virus database and start checking your computer for malware.

-
Wait for the Scan to Finish
The scan checks your entire system for browser hijackers and other malicious programs, so it can take 5 to 20 minutes depending on your computer. Feel free to do something else — just check back occasionally to see the progress.

-
Quarantine the Detected Threats
When the scan is done, you’ll see a list of everything Malwarebytes found — malware, adware, and potentially unwanted programs. Click the “Quarantine” button to remove all of them at once.

Malwarebytes will now remove the malicious files and registry entries and move them safely into quarantine.

-
Restart Your Computer
Some threats can only be fully removed after a reboot. If Malwarebytes asks you to restart, click Yes. Once you’re logged back in, Malwarebytes has finished removing the threats it found.

That’s it — your Windows PC is now clean of trojans, adware, and other malware, and should be back to running smoothly.
If you are still having problems with your computer after completing these instructions, then please follow one of the steps:
- Run a computer scan with ESET Online Scanner
- Ask for help in our Windows Malware Removal Help & Support forum.
Run a Malware Scan with Malwarebytes for Mac
Malwarebytes for Mac is a free on-demand scanner that removes the malware other security software tends to miss — adware, browser hijackers, and unwanted programs included. Cleaning an infected Mac with Malwarebytes has always been completely free, and it’s our go-to recommendation. Follow the steps below to scan and clean your Mac in just a few minutes.
-
Download Malwarebytes for Mac
Click the button below to download the latest version of Malwarebytes for Mac.
Download MalwarebytesOfficial installer for macOS. Your download starts right away.Want real-time protection? See Malwarebytes PremiumMalwarebytes Free for MacScans and removes malware at no cost -
Open the Malwarebytes setup file
When the download finishes, open your Downloads folder and double-click the setup file to begin the installation.

-
Follow the On-Screen Prompts to Install Malwarebytes
The Malwarebytes for Mac Installer will guide you through a few quick screens. Click “Continue” and keep following the prompts until the installation completes.



When the installation is complete, Malwarebytes opens to the Welcome to Malwarebytes screen. Click “Get started“.
-
Select “Personal Computer” or “Work Computer”
Malwarebytes will ask what type of computer you’re installing it on. Click either Personal Computer or Work Computer, whichever applies.

-
Start the Scan
Click the “Scan” button. Malwarebytes will automatically update its detection database and begin checking your Mac for malware.

-
Wait for the Scan to Finish
Malwarebytes will scan your Mac for adware, browser hijackers, and other malicious programs. This can take a few minutes, so feel free to do something else — just check back occasionally to see the progress.

-
Quarantine the Detected Threats
When the scan is done, you’ll see a list of everything Malwarebytes found. Click the “Quarantine” button to remove all the threats at once.

-
Restart Your Mac
Malwarebytes will now remove all the malicious files it found. Some threats can only be fully removed after a reboot — if Malwarebytes asks you to restart, allow it. Once you’re logged back in, your Mac is clean.

That’s it — your Mac is now free of adware, rogue browser extensions, and other potentially harmful software.
If you are still experiencing problems while trying to remove a malicious program from your computer, please ask for help in our Mac Malware Removal Help & Support forum.
Run a Malware Scan with Malwarebytes for Android
Malwarebytes for Android automatically detects and removes dangerous threats like malware and ransomware so you don’t have to worry about your most-used device being compromised. Aggressive detection of adware and potentially unwanted programs keeps your Android phone or tablet running smooth.
-
Download Malwarebytes for Android.
You can download Malwarebytes for Android by clicking the link below.
Get Malwarebytes for AndroidOpens Google Play in a new tab.Want real-time protection? See Malwarebytes Premium for AndroidMalwarebytes for AndroidScans your phone and removes malware at no cost -
Install Malwarebytes for Android on your phone.
In the Google Play Store, tap “Install” to install Malwarebytes for Android on your device.

When the installation process has finished, tap “Open” to begin using Malwarebytes for Android. You can also open Malwarebytes by tapping on its icon in your phone menu or home screen.

-
Follow the on-screen prompts to complete the setup process
When Malwarebytes will open, you will see the Malwarebytes Setup Wizard which will guide you through a series of permissions and other setup options.
This is the first of two screens that explain the difference between the Premium and Free versions. Swipe this screen to continue.
Tap on “Got it” to proceed to the next step.
Malwarebytes for Android will now ask for a set of permissions that are required to scan your device and protect it from malware. Tap on “Give permission” to continue.
Tap on “Allow” to permit Malwarebytes to access the files on your phone.
-
Update database and run a scan with Malwarebytes for Android
You will now be prompted to update the Malwarebytes database and run a full system scan.

Click on “Update database” to update the Malwarebytes for Android definitions to the latest version, then click on “Run full scan” to perform a system scan.

-
Wait for the Malwarebytes scan to complete.
Malwarebytes will now start scanning your phone for adware and other malicious apps. This process can take a few minutes, so we suggest you do something else and periodically check on the status of the scan to see when it is finished.

-
Click on “Remove Selected”.
When the scan has been completed, you will be presented with a screen showing the malware infections that Malwarebytes for Android has detected. To remove the malicious apps that Malwarebytes has found, tap on the “Remove Selected” button.

-
Restart your phone.
Malwarebytes for Android will now remove all the malicious apps that it has found. To complete the malware removal process, Malwarebytes may ask you to restart your device.
That’s it — your Android phone is now clean — no more malicious apps, adware, or browser redirects.
If you are still having problems with your phone after completing these instructions, then please follow one of the steps:
- Restore your phone to factory settings by going to Settings > General management > Reset > Factory data reset.
- Ask for help in our Mobile Malware Removal Help & Support forum.
Stay Protected: Block Ads and Malicious Sites
Now that your device is clean, keep it that way. Most infections start with a malicious ad or a fake download button — so blocking them at the source is your best defense.
We recommend AdGuard, which blocks malicious ads, phishing pages, and dangerous redirects before they can reach you.
👉 Download AdGuard and browse safely
Frequently Asked Questions
Are my incoming messages really being held?
The examined email did not prove that claim. Check quarantine and status information inside your genuine mailbox.
Why was my email already shown on the page?
The address can be encoded in the link sent to you. Personalization does not mean the page accessed your account.
Is Amazon or another cloud provider behind the scam?
No evidence supports that conclusion. Attackers can abuse legitimate hosting services without their involvement.
What if I clicked but entered nothing?
The credential risk is lower, but close the page, remove unexpected downloads or permissions, and run a security scan.
Can multifactor authentication protect me?
It helps greatly, especially with security keys. Real-time phishing can still target codes or approval prompts.
Should I contact the sender?
No. Confirm the situation through your real provider or administrator and report the sender through your mail system.
The Bottom Line
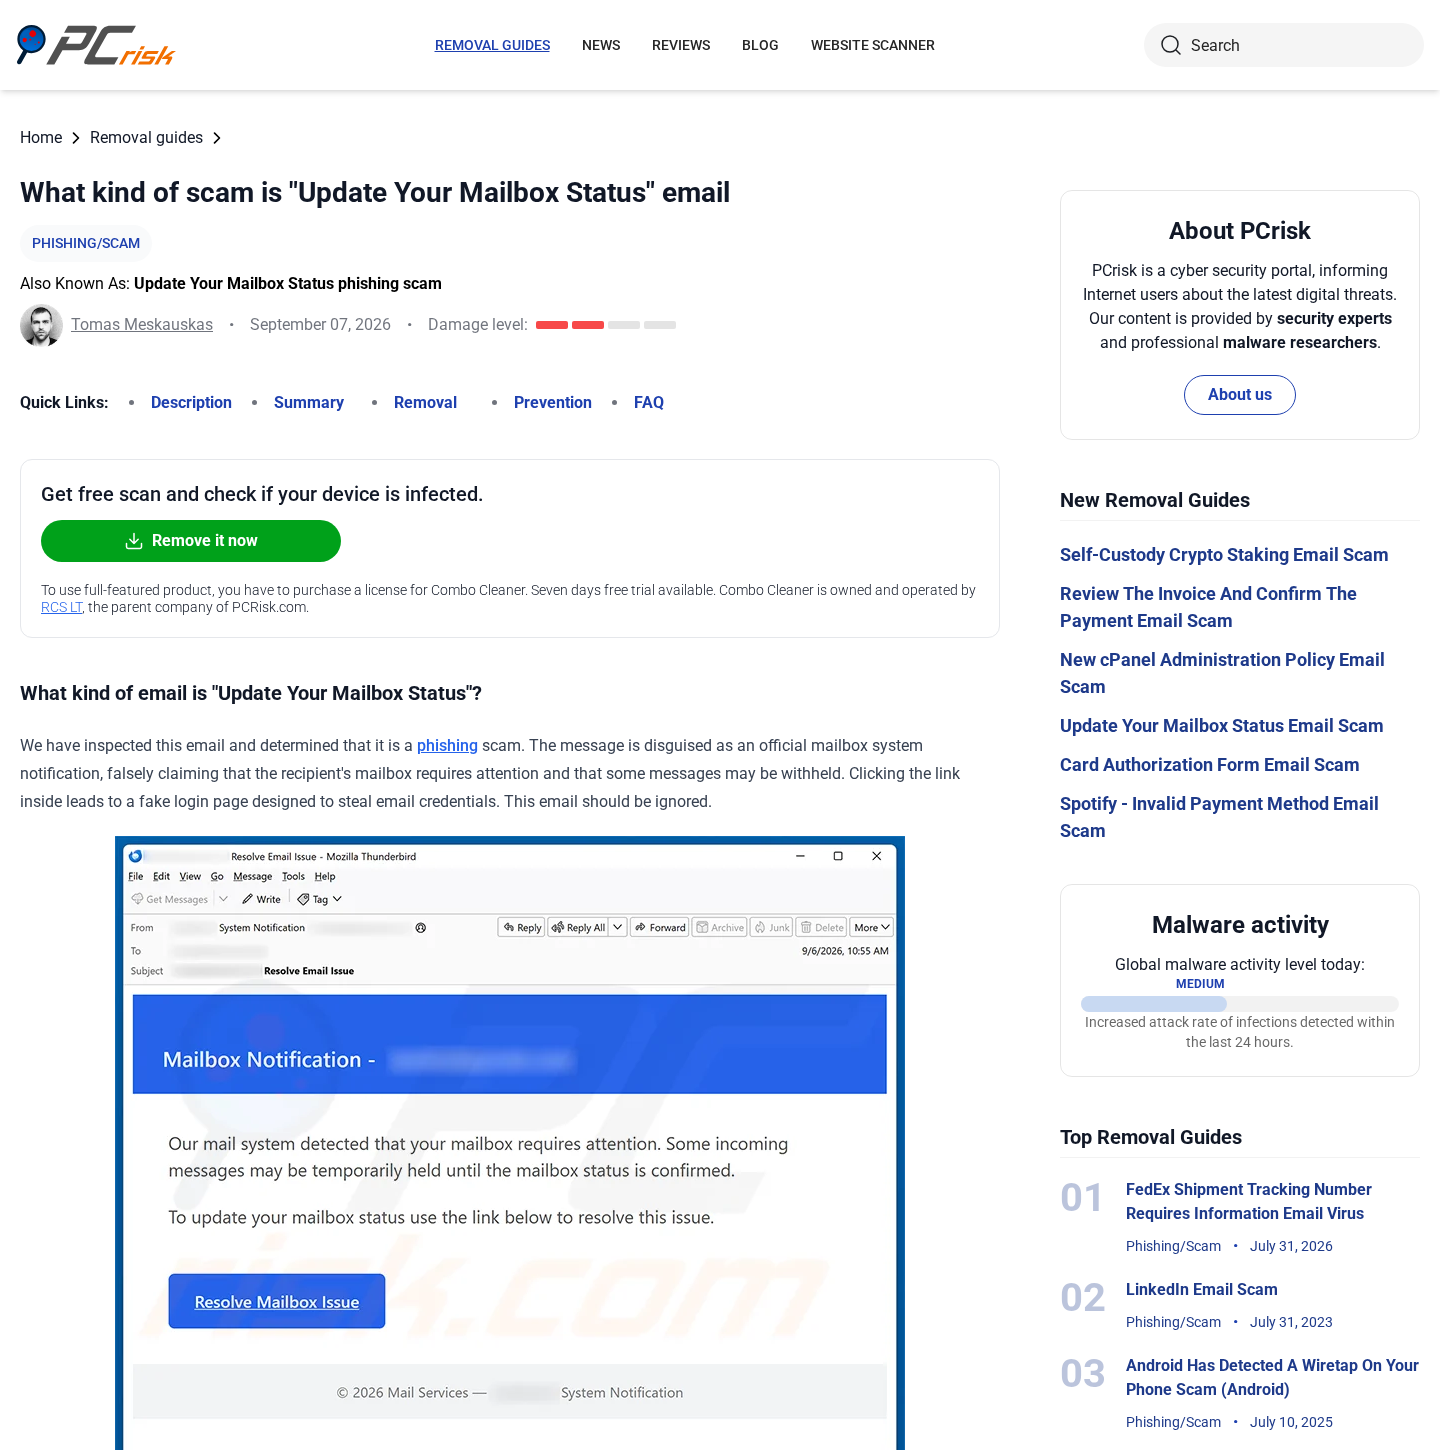
The Update Your Mailbox Status email uses an invisible delivery problem to push recipients toward a counterfeit password form.
Do not repair email through an unsolicited link. Enter your account independently, and secure it promptly if any credential was submitted.

Join the discussion
0 commentsShare your experience or ask a question about this article.
Discussion
Start the conversation
Have a question or something useful to share? Add the first comment.