


In recent weeks, there has been an increase in email scams targeting unsuspecting consumers. One of the latest scams to emerge involves a fraudulent Kohls Loyalty Program email. Scammers are sending out emails claiming to be part of the 2023 Kohls Loyalty Program, with the aim of tricking recipients into clicking on a malicious link. This article will discuss the details of this scam, how to identify it, and how to protect yourself from falling victim to it.

What is the Kohls Loyalty Program email scam?
The scam starts with an email that appears to be from Kohls, offering recipients the opportunity to join their 2023 Loyalty Program. The email contains a link, which when clicked, directs users to a fake survey website designed to steal personal information. This fake website also takes potential victims to spam and scam websites, where they may be tricked into purchasing unwanted goods and services or have their credit card information stolen and used fraudulently.
Here is the text of the Kohls Loyalty Program email scam:
Kohls Department
Thank you for shopping with us!
2023 LOYALTY PROGRAM
Participate And Receive a Brand New FREE Rachel Ray Cucina Cookware set. All it takes is less than a minute of your time.
The scam begins with an email that appears to be from Kohls Department, expressing gratitude for your patronage and introducing their 2023 Loyalty Program. The email entices recipients with a tempting offer: participate and receive a free Rachel Ray Cucina Cookware set. It further claims that joining the program takes less than a minute of the recipient’s time. When users click on the link provided in the email, they are directed to a fraudulent survey website designed to harvest personal information. This malicious site also redirects potential victims to spam and scam websites that may deceive them into purchasing unwanted products or services, or worse, steal their credit card information for fraudulent use.
How to Identify the Kohls Loyalty Program email scam
The Kohls Loyalty Program email scam can be identified by paying attention to a few key details:
- Sender’s email address: The scam emails typically originate from an email address that does not belong to Kohls. Look for inconsistencies in the domain name or suspicious-looking email addresses.
- Spelling and grammar: Fraudulent emails often contain spelling and grammar mistakes, which can be a red flag indicating that the email is not legitimate.
- The link provided: Hover over the link in the email without clicking on it to see the actual URL. If it does not direct to an official Kohls website, it is likely a scam.
- Urgency and pressure: Scam emails often create a sense of urgency, pressuring recipients to act quickly. Be cautious of emails that require immediate action to avoid missing out on rewards or benefits.
- Unsolicited offers: If you did not sign up for Kohl’s communications or their loyalty program, receiving an unsolicited email with an offer to join should raise suspicion.
Protecting Yourself from the Kohls Loyalty Program email scam
To protect yourself from falling victim to the Kohls Loyalty Program email scam, follow these best practices:
- Do not click on any links in suspicious emails. Instead, visit the company’s official website by typing the URL directly into your browser.
- Keep your computer’s antivirus software and operating system updated to help protect against potential threats.
- Be cautious when sharing personal information online. Only provide sensitive data on secure websites (look for the padlock symbol and “https” in the URL) and to trusted sources.
- Enable two-factor authentication on your accounts whenever possible. This provides an extra layer of security, making it more difficult for scammers to gain access.
- Report suspicious emails to the company being impersonated. In this case, contact Kohl’s customer service to inform them of the scam and provide any relevant details.
Check Your Device for Malware
The Kohls Loyalty Program email scam can distribute malware or redirect to other malicious sites, if you suspect your device is infected with malware, you can scan it for free with Malwarebytes. To check your computer or phone for Trojans, browser hijackers, or other malware and remove them for free, run a scan with Malwarebytes Free.
Malwarebytes runs on Windows, Mac, and Android. Click the tab below for the device you want to scan, then follow the steps to remove any malware it finds.
Scan Your Computer with Malwarebytes for Windows
Malwarebytes is one of the most popular and trusted anti-malware tools for Windows — and it’s completely free for removing infections. It catches threats that many antivirus programs miss, including adware, browser hijackers, and trojans. Follow the steps below to scan your PC and remove what Malwarebytes finds.
Download Malwarebytes
Click the button below to download the latest version of Malwarebytes for Windows from the official source. The free version is all you need — it will scan your computer and remove adware, browser hijackers, and other malicious software at no cost.
Download MalwarebytesOfficial installer for Windows 11 and 10. Your download starts right away.Want real-time protection? See Malwarebytes Premium Malwarebytes Free for WindowsScans and removes malware at no cost
-
Install Malwarebytes
When the download finishes, open your Downloads folder and double-click the MBSetup file. If Windows shows a User Account Control pop-up, click “Yes” to allow the installation.
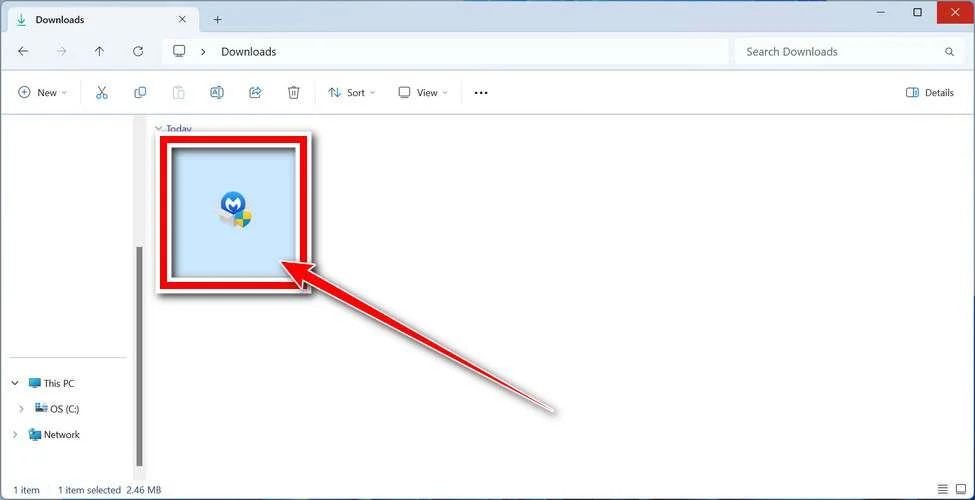
Follow the On-Screen Prompts to Install Malwarebytes
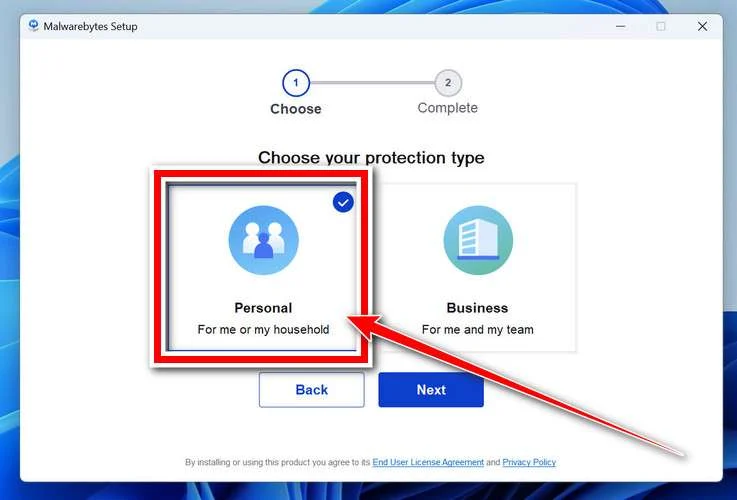
The setup wizard will walk you through a few quick screens:
-
Choose where you’re installing the program — “Personal Computer” or “Work Computer” — then click Next.
-
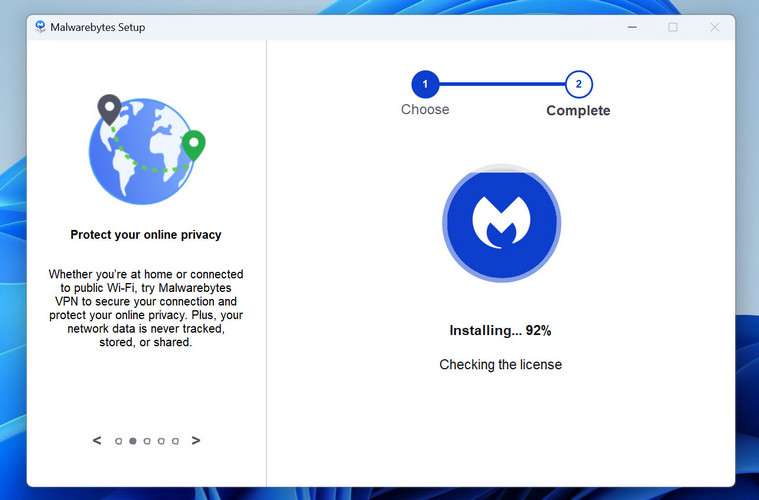
Malwarebytes will now install on your device. This usually takes under a minute.
-
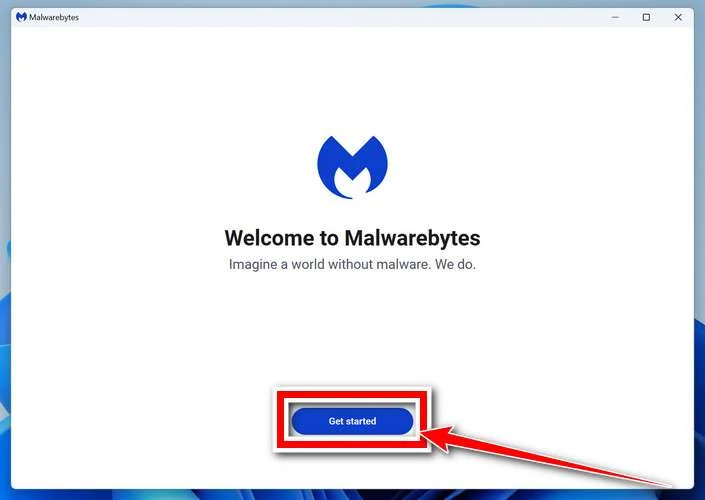
When installation is complete, the “Welcome to Malwarebytes” screen will open automatically.
-
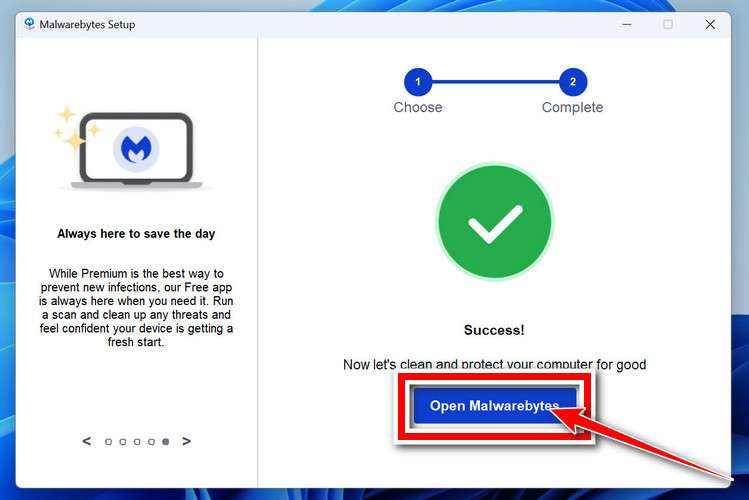
On the final screen, click Open Malwarebytes to launch the program.
-
Optional: Check for rootkits with a Custom Scan
You don’t need to change any settings for a normal scan. The standard Threat Scan in the next step is enough for most problems, so you can go straight to it.
If you also want to check for rootkits, use a Custom Scan. In current versions of Malwarebytes, rootkit scanning is only available there:
- On the Scanner tile, click the three-dot menu and select Advanced Scan.
- Choose Custom Scan. In its options, check Scan for rootkits.
- Select your system drive (usually C:\) as the location to scan, then start the scan. It takes longer than a Threat Scan.
- When it finishes, review and quarantine the results as described in the steps below.
Rootkit scanning isn’t available on Windows devices with ARM processors.
Start the Scan
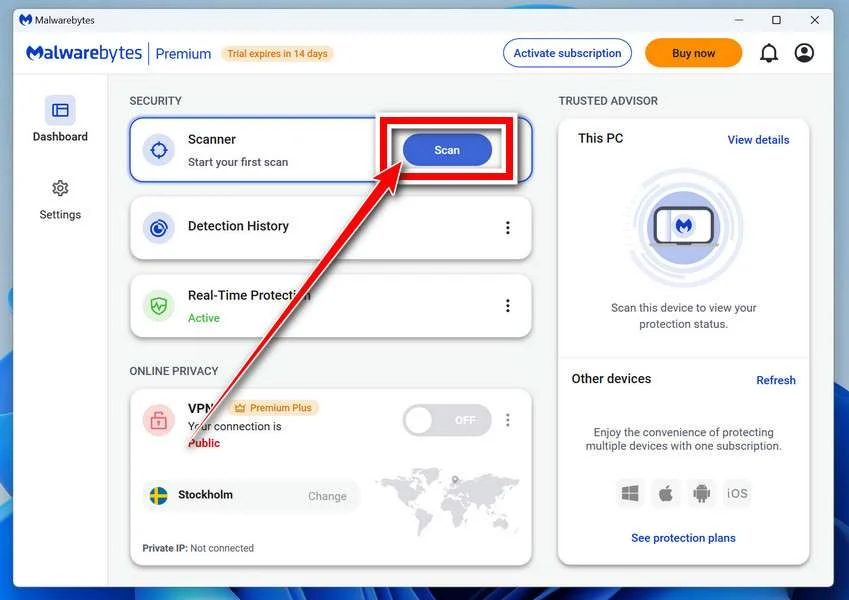
Click the blue Scan button. Malwarebytes will automatically update its virus database and start checking your computer for malware.
-
Wait for the Scan to Finish
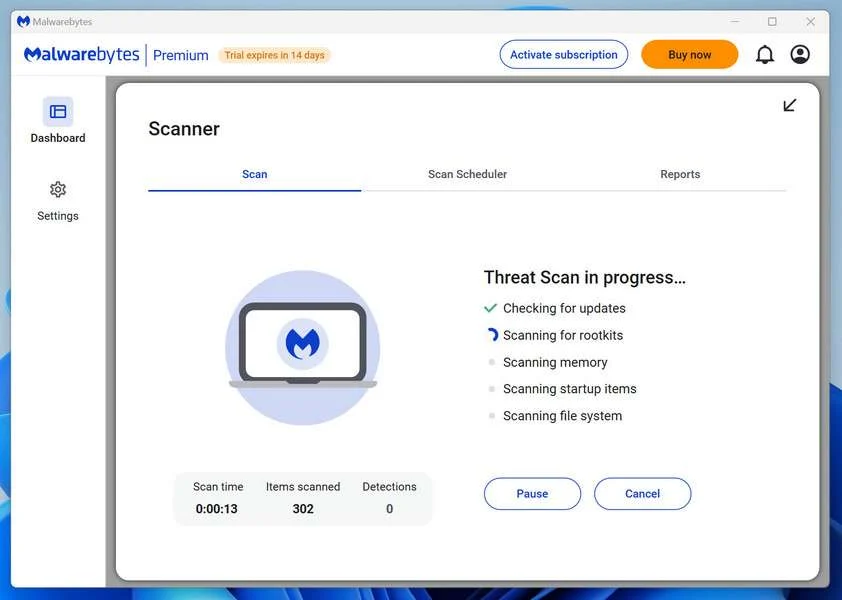
The scan checks your entire system for browser hijackers and other malicious programs, so it can take 5 to 20 minutes depending on your computer. Feel free to do something else — just check back occasionally to see the progress.
-
Quarantine the Detected Threats
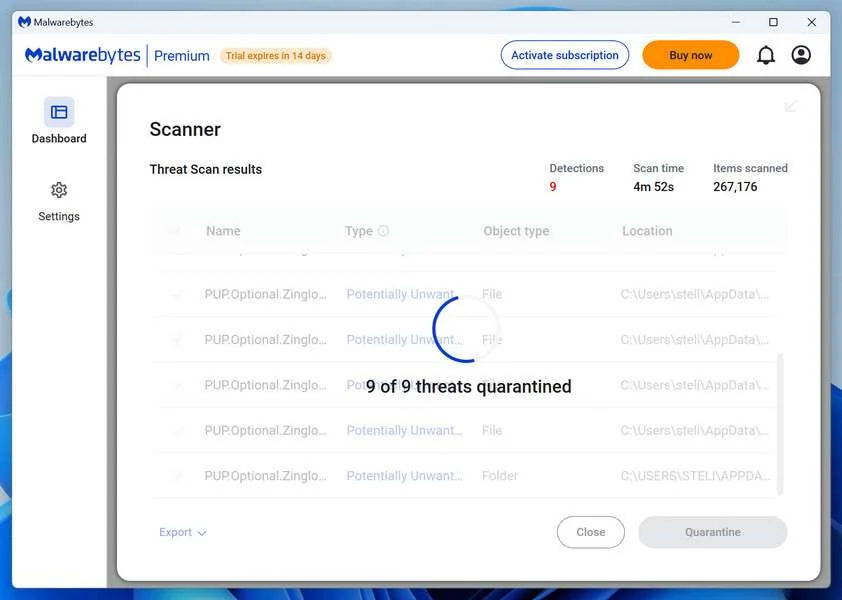
When the scan is done, you’ll see a list of everything Malwarebytes found — malware, adware, and potentially unwanted programs. Click the “Quarantine” button to remove all of them at once.
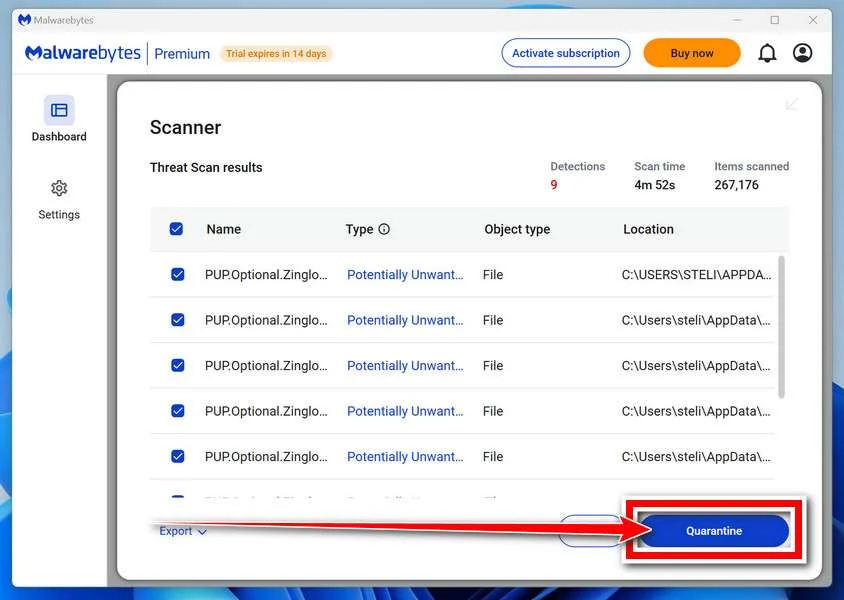
Malwarebytes will now remove the malicious files and registry entries and move them safely into quarantine.
-
Restart Your Computer
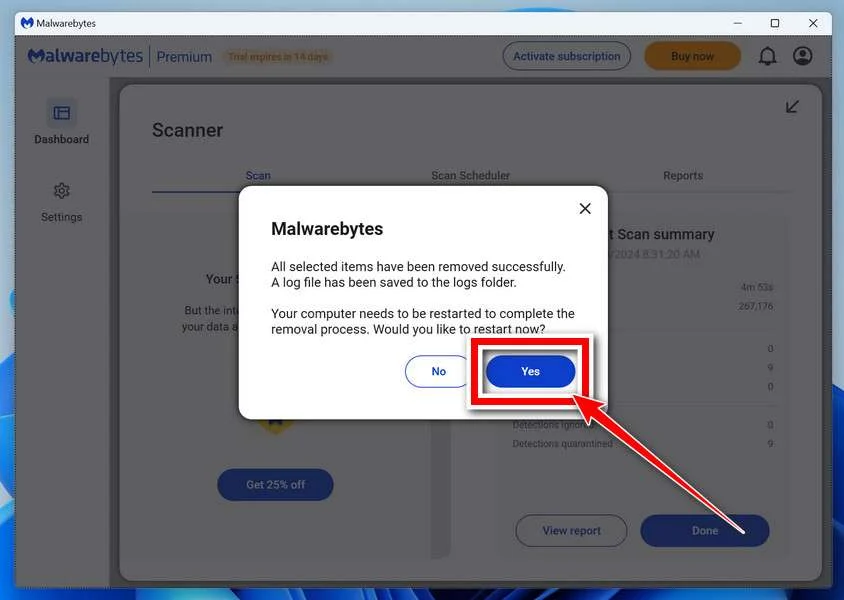
Some threats can only be fully removed after a reboot. If Malwarebytes asks you to restart, click Yes. Once you’re logged back in, Malwarebytes has finished removing the threats it found.
When the scan is done, check whether the problems you noticed have stopped. If they continue, see the options below.
If you are still having problems with your computer after completing these instructions, then please follow one of the steps:
- Run a computer scan with ESET Online Scanner
- Ask for help in our Windows Malware Removal Help & Support forum.
Scan Your Mac with Malwarebytes for Mac
Malwarebytes for Mac is a free on-demand scanner that removes the malware other security software tends to miss — adware, browser hijackers, and unwanted programs included. Cleaning an infected Mac with Malwarebytes has always been completely free, and it’s our go-to recommendation. Follow the steps below to scan your Mac and remove what Malwarebytes finds.
-
Download Malwarebytes for Mac
Click the button below to download the latest version of Malwarebytes for Mac.
Download MalwarebytesOfficial installer for macOS. Your download starts right away.Want real-time protection? See Malwarebytes PremiumMalwarebytes Free for MacScans and removes malware at no cost -
Open the Malwarebytes setup file
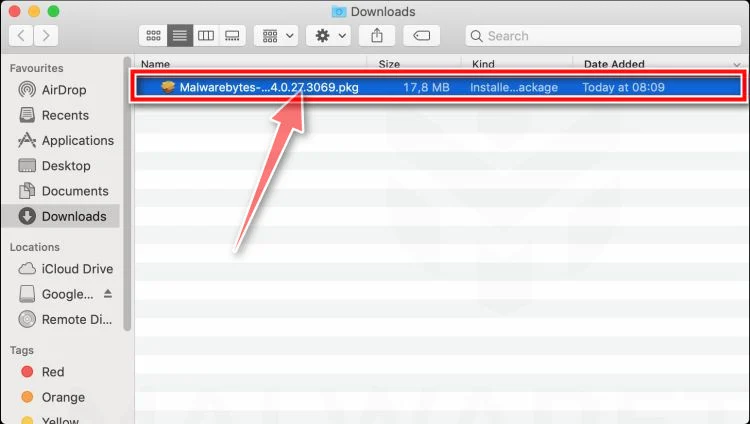
When the download finishes, open your Downloads folder and double-click the setup file to begin the installation.
-
Follow the On-Screen Prompts to Install Malwarebytes
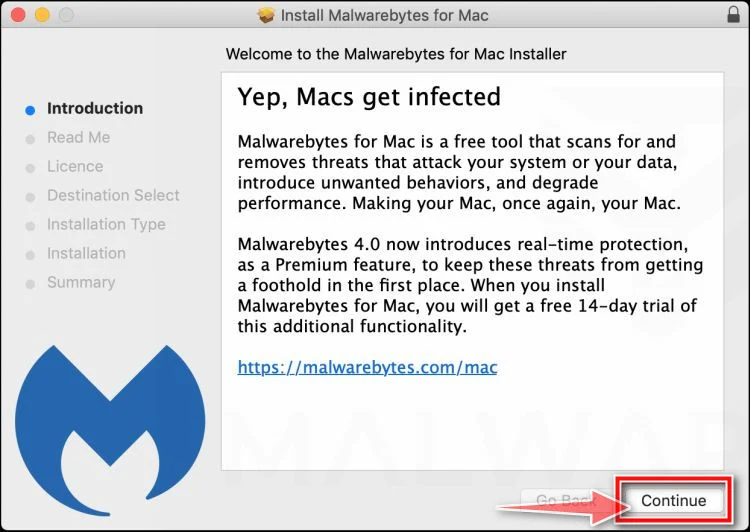
The Malwarebytes for Mac Installer will guide you through a few quick screens. Click “Continue” and keep following the prompts until the installation completes.
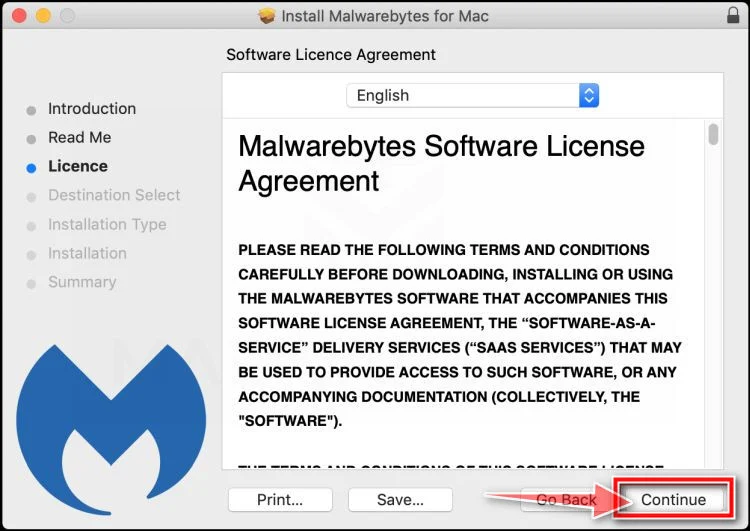
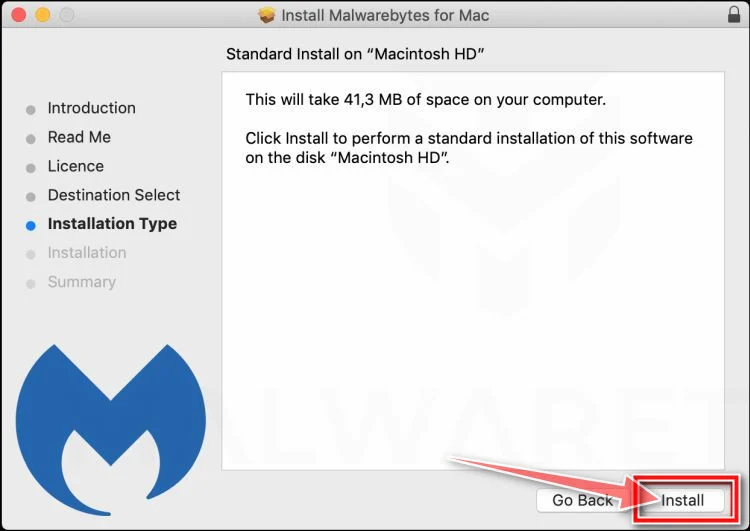
When the installation is complete, Malwarebytes opens to the Welcome to Malwarebytes screen. Click “Get started“.
Malwarebytes needs Full Disk Access to check your whole Mac. When it asks, open System Settings > Privacy & Security > Full Disk Access, turn on Malwarebytes (it may be listed as Malwarebytes Protection), and confirm with your password or Touch ID. Then return to Malwarebytes. On macOS Monterey and earlier, this setting is in System Preferences > Security & Privacy > Privacy.
-
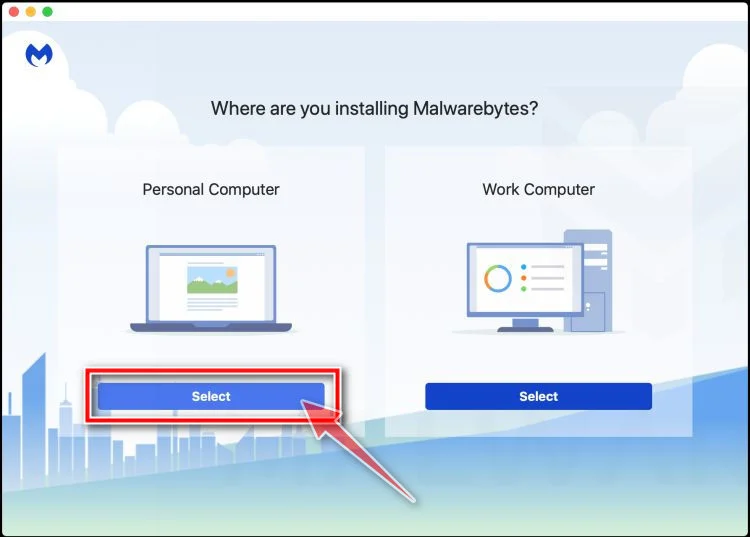
Select “Personal Computer” or “Work Computer”
Malwarebytes will ask what type of computer you’re installing it on. Click either Personal Computer or Work Computer, whichever applies.
-
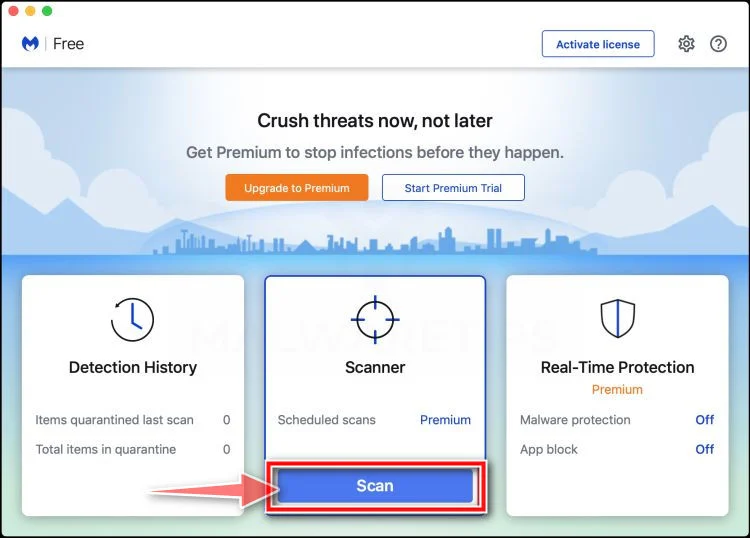
Start the Scan
Click the “Scan” button. Malwarebytes will automatically update its detection database and begin checking your Mac for malware.
-
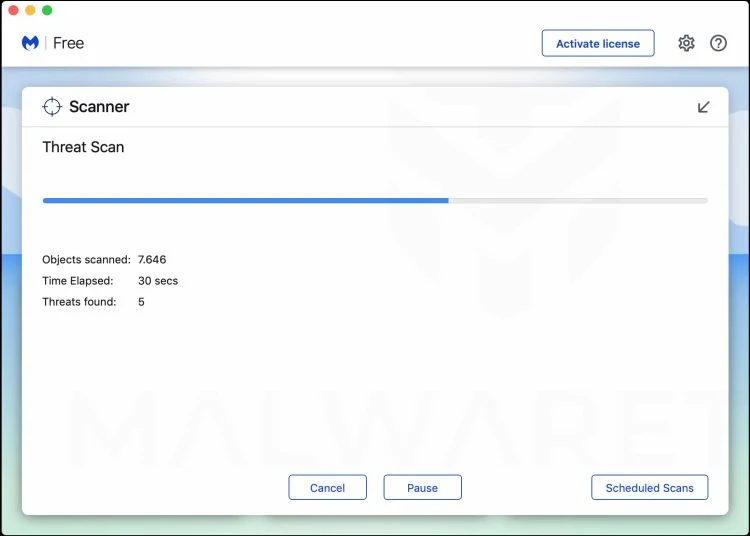
Wait for the Scan to Finish
Malwarebytes will scan your Mac for adware, browser hijackers, and other malicious programs. This can take a few minutes, so feel free to do something else — just check back occasionally to see the progress.
-
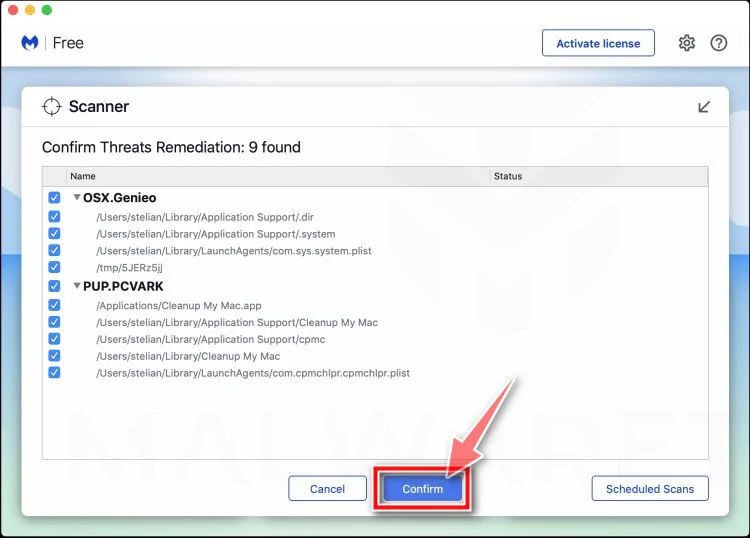
Quarantine the Detected Threats
When the scan is done, you’ll see a list of everything Malwarebytes found. Click the “Quarantine” button to remove all the threats at once.
-
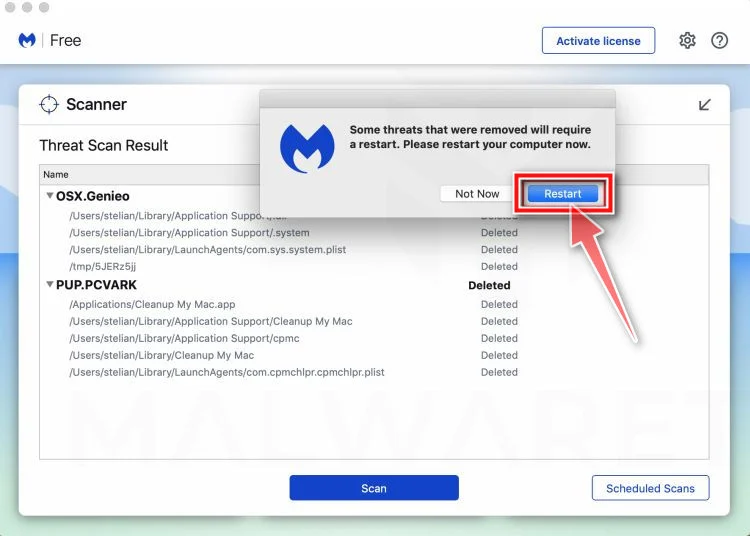
Restart Your Mac
Malwarebytes will now remove all the malicious files it found. Some threats can only be fully removed after a reboot — if Malwarebytes asks you to restart, allow it. Once you’re logged back in, check whether the problems you noticed have stopped. If they come back, save the scan report and ask for help in our forum.
If the problems you noticed continue after the scan, see the options below.
If you are still experiencing problems while trying to remove a malicious program from your computer, please ask for help in our Mac Malware Removal Help & Support forum.
Scan Your Phone with Malwarebytes for Android
Malwarebytes for Android scans your phone or tablet for malware, adware, and potentially unwanted apps. The free version scans only when you start a scan. Real-time protection, which checks apps automatically, is part of the paid Premium version.
-
Download Malwarebytes for Android.
You can download Malwarebytes for Android by clicking the link below.
Get Malwarebytes for AndroidOpens Google Play in a new tab.Want real-time protection? See Malwarebytes Premium for AndroidMalwarebytes for AndroidScans your phone and removes malware at no cost -
Install Malwarebytes for Android on your phone.
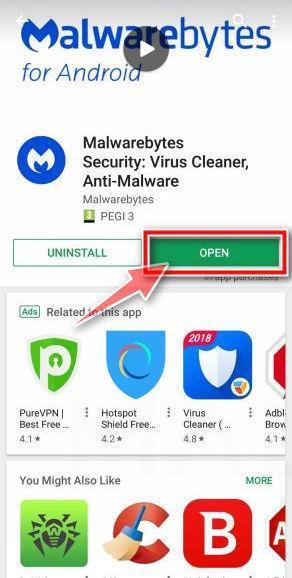
In the Google Play Store, tap “Install” to install Malwarebytes for Android on your device.
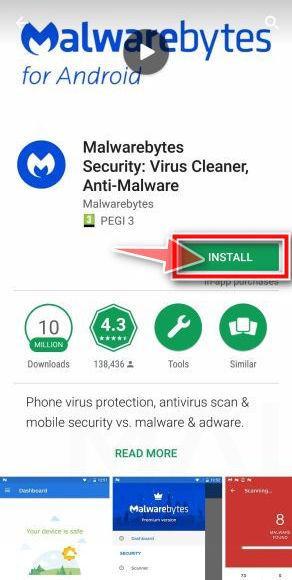
When the installation process has finished, tap “Open” to begin using Malwarebytes for Android. You can also open Malwarebytes by tapping on its icon in your phone menu or home screen.
-
Follow the on-screen prompts to complete the setup process
When Malwarebytes opens, it walks you through a short setup. Tap Get started and follow the prompts. If you see an offer for a trial or a paid plan, read it before you accept. You can skip it and keep using the free scanner.
Malwarebytes will ask for permission to access the files on your phone so it can scan them. Tap Allow, or turn on the permission in the Android screen that opens, then return to Malwarebytes.
-
Run a scan with Malwarebytes for Android
On the main screen, tap Scan now. In some versions, you open the menu, tap Scanner, and then tap Run a scan.
-
Wait for the Malwarebytes scan to complete.
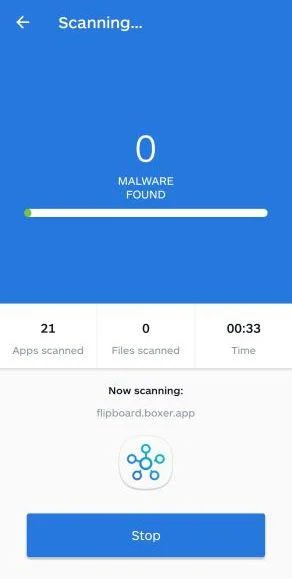
Malwarebytes will now start scanning your phone for adware and other malicious apps. This process can take a few minutes, so we suggest you do something else and periodically check on the status of the scan to see when it is finished.
-
Remove the detected apps.
When the scan has been completed, you will see a list of the threats that Malwarebytes for Android has detected. Next to each detected item, tap the menu icon (three dots), then choose to uninstall the app or delete the file. Android then asks you to confirm. Tap OK or Uninstall to remove the app.
-
Restart your phone.
When the detected apps are removed, restart your phone if Malwarebytes asks you to. Then check whether the problems you noticed have stopped.
If the problems you noticed continue after the scan, see the options below.
If you are still having problems with your phone after completing these instructions, then please follow one of the steps:
- Ask for help in our Mobile Malware Removal Help & Support forum.
- Only as a last resort, reset your phone to factory settings. Read the warning below first.
- Back up your photos, videos, files, and messages, for example to your Google account or a computer.
- Make sure you know your Google account email and password. The phone asks for them after the reset. If you changed the password recently, Google recommends waiting 24 hours before you reset.
- On a Samsung phone, also make sure you know your Samsung account password.
- If you use an authenticator app for two-step verification, move your accounts to another device or save your backup codes first.

Join the discussion
0 commentsShare your experience or ask a question about this article.
Discussion
Start the conversation
Have a question or something useful to share? Add the first comment.