


If you are seeing a fake alerts from Windows Pro Security Scanner then you’re probably reading this article so you can understand how to get rid of it.Thankfully we’ve got the instructions to help you get rid of this virus.
First off all , you should know that Windows Pro Security Scanner is a rogue security software that will display fake alerts, claiming malware has been detected on your computer.This security alerts are professional looking pop-ups and when you click on them, you’re advised to buy Windows Pro Security Scanner in order to remove the detected threats.
In reality, none of the reported issues are real, and are only used to scare you into buying Windows Pro Security Scanner and stealing your personal financial information.
If you’ve got a Windows Pro Security Scanner infection , you’ll be seeing this screens :
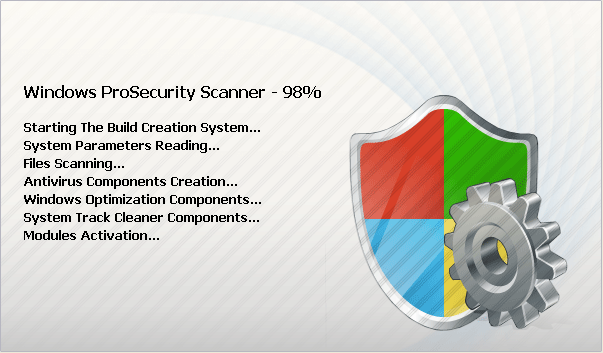
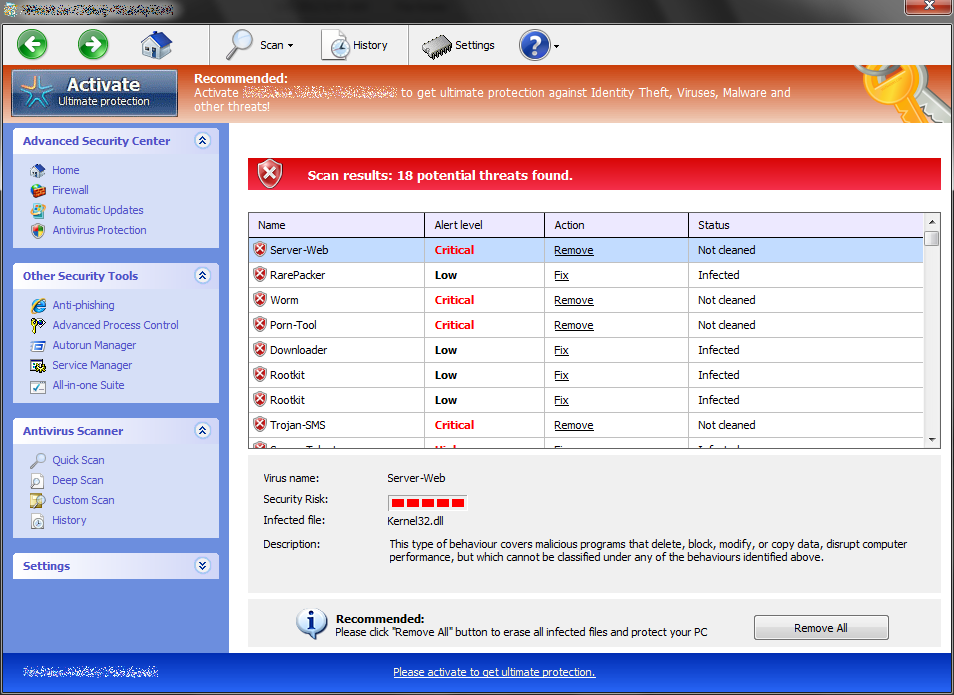
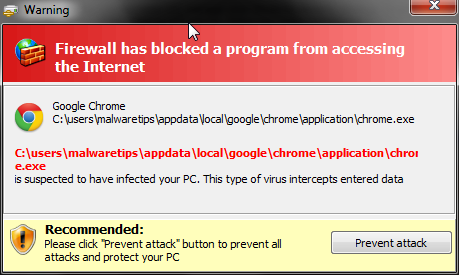

We strongly advise you to follow our Windows Pro Security Scanner removal guide and ignore any alerts that this malicious software might generate.Under no circumstance should you buy this rogue security software as this could lead to identity theft.
Registration codes for Windows Pro Security Scanner
As an optional step,you can use one of the following license key to register Windows Pro Security Scanner and stop the fake alerts.
0W000-000B0-00T00-E0020
Please keep in mind that entering the above registration code will NOT remove Windows Pro Security Scanner from your computer , instead it will just stop the fake alerts so that you’ll be able to complete our removal guide more easily.
Removal Instructions for Windows Pro Security Scanner
STEP 1 : Start your computer in Safe Mode with Networking
- Remove all floppy disks, CDs, and DVDs from your computer, and then restart your computer.
- Press and hold the F8 key as your computer restarts.Please keep in mind that you need to press the F8 key before the Windows start-up logo appears.
- On the Advanced Boot Options screen, use the arrow keys to highlight Safe Mode with Networking , and then press ENTER.

- Log on to your computer with a user account that has administrator rights

STEP 2: Remove Windows Pro Security Scanner malicious proxy server
Windows Pro Security Scanner may add a proxy server which prevents the user from accessing the internet,follow the below instructions to remove the proxy.
- Start Internet Explorer
 and if you are using Internet Explorer 9 ,click on the gear icon
 (Tools for Internet Explorer 8 users) ,then select Internet Options.

- Go to the tab Connections.At the bottom, click on LAN settings.
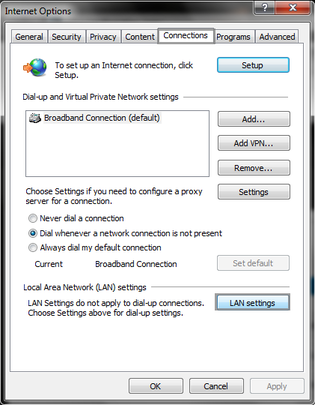
- Uncheck the option Use a proxy server for your LAN. This should remove the malicious proxy server and allow you to use the internet again.

 and if you are using Internet Explorer 9 ,click on the gear icon
 (Tools for Internet Explorer 8 users) ,then select Internet Options.


If you are a Firefox users, go to Firefox(upper left corner) → Options → Advanced tab → Network → Settings → Select No Proxy
STEP 3: Run RKill to terminate known malware processes associated with Windows Pro Security Scanner.
RKill is a program that will attempt to terminate all malicious processes associated with Windows Pro Security Scanner,so that we will be able to perform the next step without being interrupted by this malicious software.
Because this utility will only stop Windows Pro Security Scanner running process, and does not delete any files, after running it you should not reboot your computer as any malware processes that are configured to start automatically will just be started again.
- While your computer is in Safe Mode with Networking ,please download the latest official version of RKill.Please note that we will use a renamed version of RKILL so that Windows Pro Security Scanner won’t block this utility from running.
Download RKillYour download starts right away. - Double-click on the iExplore.exe icon in order to automatically attempt to stop any processes associated with Windows Pro Security Scanner.

- RKill will now start working in the background, please be patient while the program looks for various malware programs and tries to terminate them.

IF you are having problems starting or running RKill, you can download any other renamed versions of RKill from here. - When Rkill has completed its task, it will generate a log. You can then proceed with the rest of the guide.
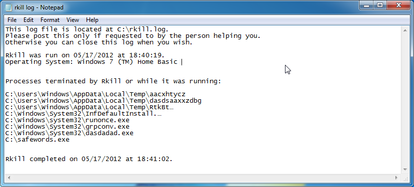


WARNING: Do not reboot your computer after running RKill as the malware process will start again , preventing you from properly performing the next step.
STEP 4: Remove Windows Pro Security Scanner malicious files with Malwarebytes Anti-Malware FREE
- Download the latest official version of Malwarebytes Anti-Malware FREE.
Download MalwarebytesFree official installer. Your download starts right away. - Install Malwarebytes’ Anti-Malware by double clicking on mbam-setup.

- When the installation begins, keep following the prompts in order to continue with the installation process. Do not make any changes to default settings and when the program has finished installing, make sure you leave both the Update Malwarebytes’ Anti-Malware and Launch Malwarebytes’ Anti-Malware checked. Then click on the Finishbutton. If Malwarebytes’ prompts you to reboot, please do not do so.

- Malwarebytes Anti-Malware will now start and you’ll be prompted to start a trial period , please select ‘Decline‘ as we just want to use the on-demand scanner.

- On the Scanner tab,please select Perform full scan and then click on the Scan button to start scanning your computer for any possible infections.

- Malwarebytes’ Anti-Malware will now start scanning your computer for Windows Pro Security Scanner malicious files as shown below.

- When the scan is finished a message box will appear, click OK to continue.

- You will now be presented with a screen showing you the malware infections that Malwarebytes’ Anti-Malware has detected.Please note that the infections found may be different than what is shown in the image.Make sure that everything is Checked (ticked) and click on the Remove Selectedbutton.

- Malwarebytes’ Anti-Malware will now start removing the malicious files.If during the removal process Malwarebytes will display a message stating that it needs to reboot, please allow this request.


STEP 5: Double check your system for any left over infections with HitmanPro
- This step can be performed in Normal Mode ,so please download the latest official version of HitmanPro.
Download HitmanProOfficial Sophos download. Free scan, free 30-day trial to remove threats. - Double click on the previously downloaded fileto start the HitmanPro installation.

IF you are experiencing problems while trying to starting HitmanPro, you can use the “Force Breach” mode.To start this program in Force Breach mode, hold down the left CTRL-key when you start HitmanPro and all non-essential processes are terminated, including the malware process. (How to start HitmanPro in Force Breach mode – Video) - Click on Next to install HitmanPro on your system.

- The setup screen is displayed, from which you can decide whether you wish to install HitmanPro on your machine or just perform a one-time scan, select a option then click on Next to start a system scan.

- HitmanPro will start scanning your system for malicious files. Depending on the size of your hard drive, and the performance of your computer, this step will take several minutes.

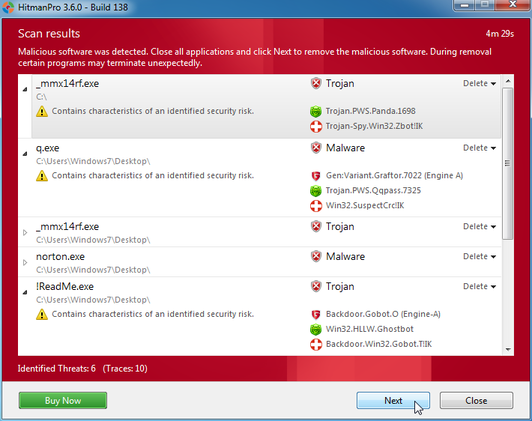
- Once the scan is complete,a screen displaying all the malicious files that the program found will be shown as seen in the image below.After reviewing each malicious object click Next.
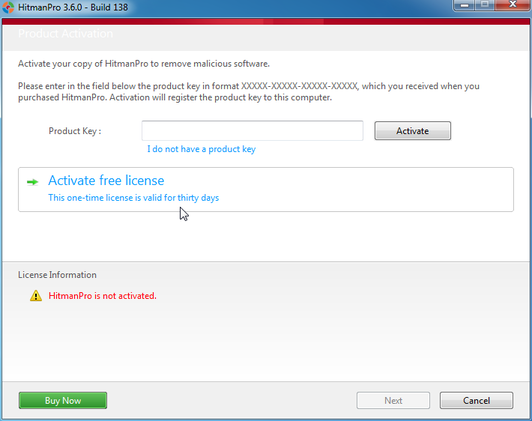
- Click Activate free license to start the free 30 days trial and remove the malicious files.
- HitmanPro will now start removing the infected objects, and in some instances, may suggest a reboot in order to completely remove the malware from your system. In this scenario, always confirm the reboot action to be on the safe side.


STEP 6: Remove the residual damage from Windows Pro Security Scanner
Windows Pro Security Scanner may also modify your HOSTS file default settings, which can cause browser redirects or errors while trying to access antivirus and security websites.
To protect itself,Windows Pro Security Scanner has changed the permissions of the HOSTS file so you can’t edit or delete it.
- Please download the following batch fileto revert your HOSTS file permissions:
Download HostFix.batYour download starts right away. - Click on hostfix.bat and allow this file to run.Once it starts you will see a small black window that opens and then quickly goes away, then you should be able access your HOSTS file.
- Download and run the Microsoft Fix it 50267 to revert your host file to its original settings.Please note that if you have added custom entries to your HOSTS file then you will need to add them again after restoring the default HOSTS file.
Download Microsoft Fix it 50267Opens the download page in a new tab.
If you are still experiencing problems while trying to remove Windows Pro Security Scanner from your machine, please start a new thread in our Malware Removal Assistance forum.
What’s next? Join our amazing community and build up your malware defenses !

Join the discussion
13 commentsShare your experience or ask a question about this article.
Your progress
Did these steps help?
Let us know how the guide worked for you.
Describe what you see and the step you reached. Keep passwords and other private information out.
Discussion
Stelian,
I want to thank you for posting this information. You saved my PC. It’s great to know that there are still some honest people in the world. Keep up the great work helping others.
JW
Helped Greatly! Very easy to follow.
Thanks – did the trick!
thank you so much
Thankyou! It took about 21/2 hours but it worked! :D
The Malwarebytes program took almost 2 hours to find everything- we had 844 pieces of malware. Whoa. :O
Cheers.
Awesome. It worked and it is easy to follow.
You rock!
Big big thanks!! I was afraid I had created a giant mess, but with your detailed instructions it was quite an easy fix.
Fantastic. Simple to follow and removed loads of virus’s.
Thank you!!!!!For all those who are looking for a fix for this infection, follow this guide …
Thanks so much for the fix. It took 1.5 hours, but now my computer is running smoothly.
Thank you very much, this helped remove the virus, no problem!
In reply to Kirk
Glad to see that you’ve manage to remove this infection… Stay safe Kirk!;D