Xbox Live Networking Service Process: Why Is It Running?

Task Manager is a powerful tool in Windows that allows users to monitor and manage running processes on their computer. It provides valuable insights into the performance and resource usage of various applications and services. One process that users often come across in Task Manager is the “Xbox Live Networking Service” process. This article aims to explore why this process is running and its significance in the Windows ecosystem.
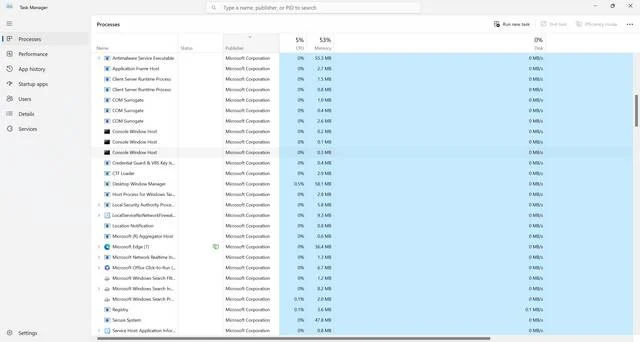
Windows Task Manager

Understanding Xbox Live Networking Service

The Xbox Live Networking Service is a background process that is installed alongside the Xbox app on Windows. It is responsible for facilitating communication between your PC and Xbox Live servers. Xbox Live is an online gaming service provided by Microsoft, allowing gamers to connect, play, and communicate with each other.

When you launch the Xbox app or any game that utilizes Xbox Live features, the Xbox Live Networking Service process starts running in the background. It ensures a seamless gaming experience by handling tasks such as matchmaking, party chat, and multiplayer connectivity.

Why Does Xbox Live Networking Service Run in Task Manager?

Seeing the Xbox Live Networking Service process running in Task Manager is completely normal and expected if you have the Xbox app installed on your Windows 10 PC. It is not a cause for concern or a sign of any malicious activity.

The process runs in the background to ensure that your PC can communicate with Xbox Live servers and provide you with the full range of online gaming features. It helps maintain a stable connection, enables multiplayer functionality, and allows you to interact with your friends on Xbox Live.

While the Xbox Live Networking Service process may consume some system resources, it is generally lightweight and should not significantly impact the performance of your PC. However, if you notice unusually high CPU or memory usage by this process, it could indicate an issue that needs further investigation.

Ensuring the Legitimacy of Xbox Live Networking Service

As with any process running on your computer, it is essential to verify the legitimacy of the Xbox Live Networking Service to ensure that it is not malware or a potential security threat. Here are a few steps you can take to confirm its authenticity:

  1. Check the file location: Right-click on the process in Task Manager and select “Open file location.” It should navigate you to the “C:\Program Files\Windows\Apps\Microsoft.GamingServices_<version>” folder. If the file location is different or suspicious, it may indicate a problem.
  2. Scan for viruses and malware: It is always a good practice to regularly scan your computer for viruses and malware. You can use reputable antivirus software or Malwarebytes Free to perform a thorough scan and ensure the integrity of your system.
  3. Update Windows and Xbox app: Keeping your operating system and applications up to date is crucial for security. Make sure you have the latest Windows updates installed, as well as the most recent version of the Xbox app.

Conclusion

The Xbox Live Networking Service process running in Task Manager is a legitimate component of the Xbox app on Windows 10. It plays a vital role in facilitating communication between your PC and Xbox Live servers, enabling online gaming features and multiplayer functionality.

While it is normal for the process to run in the background, it is essential to ensure its legitimacy by checking the file location and regularly scanning your computer for viruses and malware. By following these steps, you can ensure a secure and enjoyable gaming experience on your Windows 10 PC.

10 Rules to Avoid Online Scams

Here are 10 practical safety rules to help you avoid malware, online shopping scams, crypto scams, and other online fraud. Each tip includes a quick “if you already got hit” action.

  1. Stop and verify before you click, log in, download, or pay.

    warning sign

    Most scams win by creating urgency. Verify using a trusted method: type the website address yourself, use the official app, or call a known number (not the one in the message).

    If you already clicked: close the page, do not enter passwords, and run a malware scan.

  2. Keep your operating system, browser, and apps updated.

    updates guide

    Updates patch security holes used by malware and malicious ads. Turn on automatic updates where possible.

    If you saw a scary “update now” pop-up: close it and update only through your device settings or the official app store.

  3. Use layered protection: antivirus plus an ad blocker.

    shield guide

    Antivirus helps block malware. An ad blocker reduces scam redirects, phishing pages, and malvertising.

    If your browser is acting weird: remove unknown extensions, reset the browser, then run a full scan.

  4. Install apps, software, and extensions only from official sources.

    install guide

    Avoid cracked software, “keygens,” and random downloads. During installs, choose Custom/Advanced and decline bundled offers you do not recognize.

    If you already installed something suspicious: uninstall it, restart, and scan again.

  5. Treat links and attachments as untrusted by default.

    cursor sign

    Phishing often impersonates delivery services, banks, and popular brands. If it is unexpected, do not open attachments or log in through the message.

    If you entered credentials: change the password immediately and enable 2FA.

  6. Shop safely: research the store, then pay with protection.

    trojan horse

    Be cautious with brand-new stores, “closing sale” stories, and prices that make no sense. Prefer credit cards or PayPal for dispute options. Avoid wire transfers, gift cards, and crypto payments.

    If you already paid: contact your card issuer or PayPal quickly to dispute the transaction.

  7. Crypto rule: never pay a “fee” to withdraw or recover money.

    lock sign

    Common patterns include fake profits, then “tax,” “gas,” or “verification” fees. Another is a “recovery agent” who demands upfront crypto.

    If you already sent crypto: stop paying, save evidence (wallet addresses, TXIDs, chats), and report the scam to the platform used.

  8. Secure your accounts with unique passwords and 2FA (start with email).

    lock sign

    Use a password manager and unique passwords for every account. Enable 2FA using an authenticator app when possible.

    If you suspect an account takeover: change passwords, sign out of all devices, and review recent logins and recovery settings.

  9. Back up important files and keep one backup offline.

    backup sign

    Backups protect you from ransomware and device failure. Keep at least one backup on an external drive that is not always connected.

    If you suspect infection: do not connect backup drives until the system is clean.

  10. If you think you are a victim: stop losses, document evidence, and escalate fast.

    warning sign

    Move quickly. Speed matters for disputes, account recovery, and limiting damage.

    • Stop payments and contact: do not send more money or respond to the scammer.
    • Call your bank or card issuer: block transactions, replace the card if needed, and start a dispute or chargeback.
    • Secure your email first: change the email password, enable 2FA, and remove unfamiliar recovery options.
    • Secure other accounts: change passwords, enable 2FA, and log out of all sessions.
    • Scan your device: remove suspicious apps or extensions, then run a full malware scan.
    • Save evidence: screenshots, emails, order pages, tracking pages, wallet addresses, TXIDs, and chat logs.
    • Report it: to the payment provider, marketplace, social platform, exchange, or wallet service involved.

These rules are intentionally simple. Most online losses happen when decisions are rushed. Slow down, verify independently, and use payment methods and account controls that give you recourse.