

Jinshi Headphones entered social feeds with the kind of offer that invites a second look: sleek over-ear styling, premium features, and two pairs for an unusually low price.
A bargain can be genuine, disappointing, or carefully dressed to resemble something better. The useful questions begin with the advertisement, then continue through delivery and refund support.

Overview
Jinshi sold a premium impression at a budget price
The advertisements presented Jinshi as modern wireless headphones with an upscale appearance. Promotions commonly emphasized sound quality, comfort, noise reduction, and a buy-one-get-one arrangement.
Prices around $40 or $50 made the offer feel plausible enough to try, yet far below many established headphones carrying similar feature language.
The creative relied heavily on polished product images. Shoppers could easily assume the photographed build quality and listed capabilities matched the units arriving by mail.
That assumption is the core issue. Independent buyer accounts repeatedly describe receiving inexpensive generic headphones that looked and performed differently from the premium presentation.
Complaints point toward quality and representation problems
Reported problems include lightweight plastic construction, weak audio, disappointing microphones, ineffective noise cancellation, long shipping times, and packaging associated with generic P9-style headphones.
Some buyers say an item arrived, which separates Jinshi from a straightforward non-delivery store. The dispute concerns what was represented versus what was actually supplied.
That distinction does not excuse misleading marketing. A cheap product can still be sold deceptively when photographs, specifications, testimonials, or comparison claims create a materially different expectation.
Customer accounts also describe difficulty obtaining meaningful assistance. A low-value product becomes a larger problem when return shipping, silence, or restrictive conditions make refunds impractical.
- Advertisements create the appearance of a premium headphone brand.
- A steep bundle discount encourages fast purchasing.
- Delivery may take longer than shoppers expect.
- Some buyers report receiving basic generic headphones.
- Refund efforts can cost time and additional shipping money.
The storefront’s current condition raises further concerns
During this investigation, the main Jinshi domain no longer displayed a normal product catalog. The sparse website offered little reassurance about continuing sales or support.
A disappearing or stripped storefront matters after purchase. Customers may lose access to the original listing, delivery promises, feature claims, and refund instructions they relied upon.
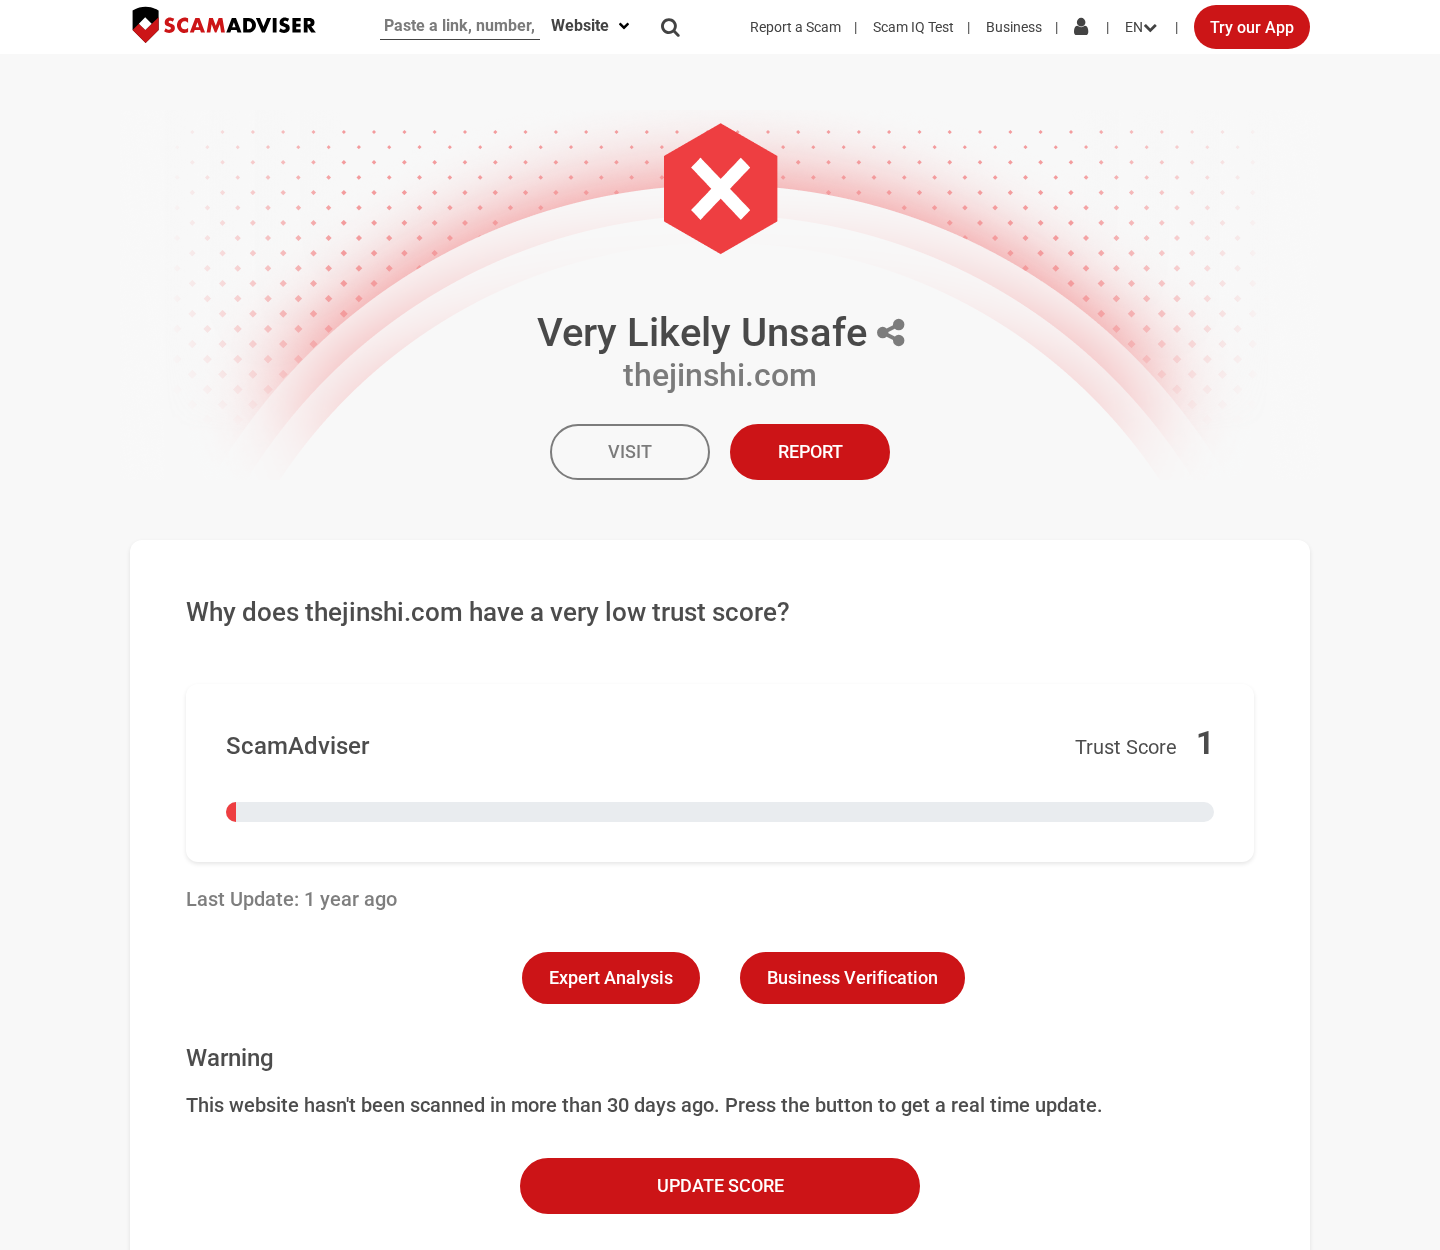
Automated reputation services and public review pages also show warning signals. Those services are not proof by themselves, but they reinforce the need for payment protection.
How the Jinshi Headphones Sales Funnel Works
Step 1: A polished social advertisement defines the product
Many shoppers meet Jinshi through an advertisement rather than an established electronics retailer. That means the advertiser controls the first impression and the available comparison points.
Professional lighting, smooth renders, close-up textures, and lifestyle scenes can make unfamiliar headphones look like a mature consumer brand.
Feature labels such as premium sound or advanced noise cancellation carry strong meaning for buyers, even when technical measurements and precise component details are absent.
The advertisement may also use comments, reaction counts, or urgency signals to suggest broad popularity. Those visual cues should not replace independent product testing.
Step 2: The bundle offer discourages comparison shopping
A buy-one-get-one offer changes the shopper’s calculation. Instead of examining whether one headset is worth $40, the customer imagines receiving two valuable devices.
Countdown timers, limited inventory, or temporary discounts create pressure to complete checkout before researching the company or searching the product images.
Generic electronics frequently appear under multiple names. A reverse-image search or model-number search may reveal visually identical headphones selling elsewhere for much less.
When a product lacks a verifiable model number, detailed manual, independent laboratory measurements, and manufacturer support, comparison becomes intentionally difficult.
Step 3: Broad claims replace measurable specifications
Established audio products normally disclose battery capacity, codec support, charging standard, driver size, weight, warranty terms, and the type of noise-control technology used.
A vague claim of noise cancellation can describe several very different things. Passive ear-cup isolation is not the same as active electronic noise cancellation.
Similarly, “high-definition sound” has no fixed consumer meaning without measurements or test methods. It can decorate a listing while offering little basis for verification.
Shoppers should treat unsupported superlatives as advertising language. The absence of precise data matters more when the photographs imply an expensive engineering standard.
Step 4: Fulfillment reveals the real item
After checkout, tracking may show a lengthy international route or limited updates. The final package can be smaller and more generic than the branded presentation suggested.
Buyer reports describe P9 Pro Max-style headphones, a widely sold inexpensive design. Packaging, labeling, controls, and materials may not resemble the polished product identity.
A product arriving does not settle whether the sale was fair. The relevant comparison is between the listing’s promises and the item’s actual appearance, features, and performance.
Photograph the unopened parcel, shipping label, retail box, accessories, model markings, and headphones immediately. These images can support a claim that merchandise was materially misrepresented.
Step 5: Testing exposes feature gaps
Consumers may discover that controls feel fragile, audio lacks clarity, the microphone performs poorly, or background noise remains unchanged when the advertised feature is activated.
Battery performance can also differ from broad claims. Testing should be documented with dates, device settings, playback volume, and observed operating time.
Do not dismantle the product during the return window. Sellers can reject a refund when they claim the item was altered, damaged, or used beyond inspection.
Compare the received model number with the order confirmation and archived listing. A mismatch is often easier to demonstrate than a subjective disagreement about sound quality.
Check each advertised control independently. Test pairing, volume, calls, charging, microphone pickup, and any dedicated noise-control mode while another person records the results.
Measure listening time from a full charge under normal volume. A dated test log gives a payment provider more useful evidence than saying the battery feels poor.
Inspect both units in a bundle. Generic shipments can contain different firmware, battery behavior, accessories, or build quality despite appearing identical.
Keep protective films and packaging until the dispute ends. Missing packaging can become an avoidable excuse for refusing a return.
Step 6: The refund process becomes the final barrier
A dissatisfied buyer may be offered a small partial refund to keep the product. That option can save the merchant the cost and risk of an international return.
If a return is required, the customer may have to pay tracked postage. Shipping two boxed headphones overseas can approach the value of the original purchase.
Support delays can consume the card dispute period. Repeated requests for photographs or videos may appear helpful while preventing a clear return authorization.
Set a personal deadline. If the seller does not provide a workable remedy promptly, contact the payment provider before valuable dispute rights expire.
What Buyers Report Receiving
A generic design instead of a distinct premium product
Several independent accounts identify the delivered item as a low-cost P9-style headset. Similar devices are widely available under numerous seller names and packaging variations.
This does not prove every parcel contains the identical model. It does show why shoppers should look beyond the Jinshi branding and compare physical identifiers.
Check the Bluetooth device name, printed model code, charging port, control layout, voice prompts, and instruction booklet against inexpensive marketplace listings.
Performance below the advertising impression
Complaints describe sound and microphone performance more typical of entry-level novelty headphones. The gap appears especially noticeable when buyers expected credible active noise cancellation.
Audio quality is partly subjective, but advertised functions are testable. A button labeled for noise control should produce a meaningful, repeatable change under ordinary conditions.
Record a short demonstration if a feature does not operate. Pairing screens and settings pages can also show whether promised modes or codecs are absent.
Ask the seller to identify any companion application before installing it. Download only through an official app store, then examine the developer name and requested permissions.
Customer service that does not resolve the mismatch
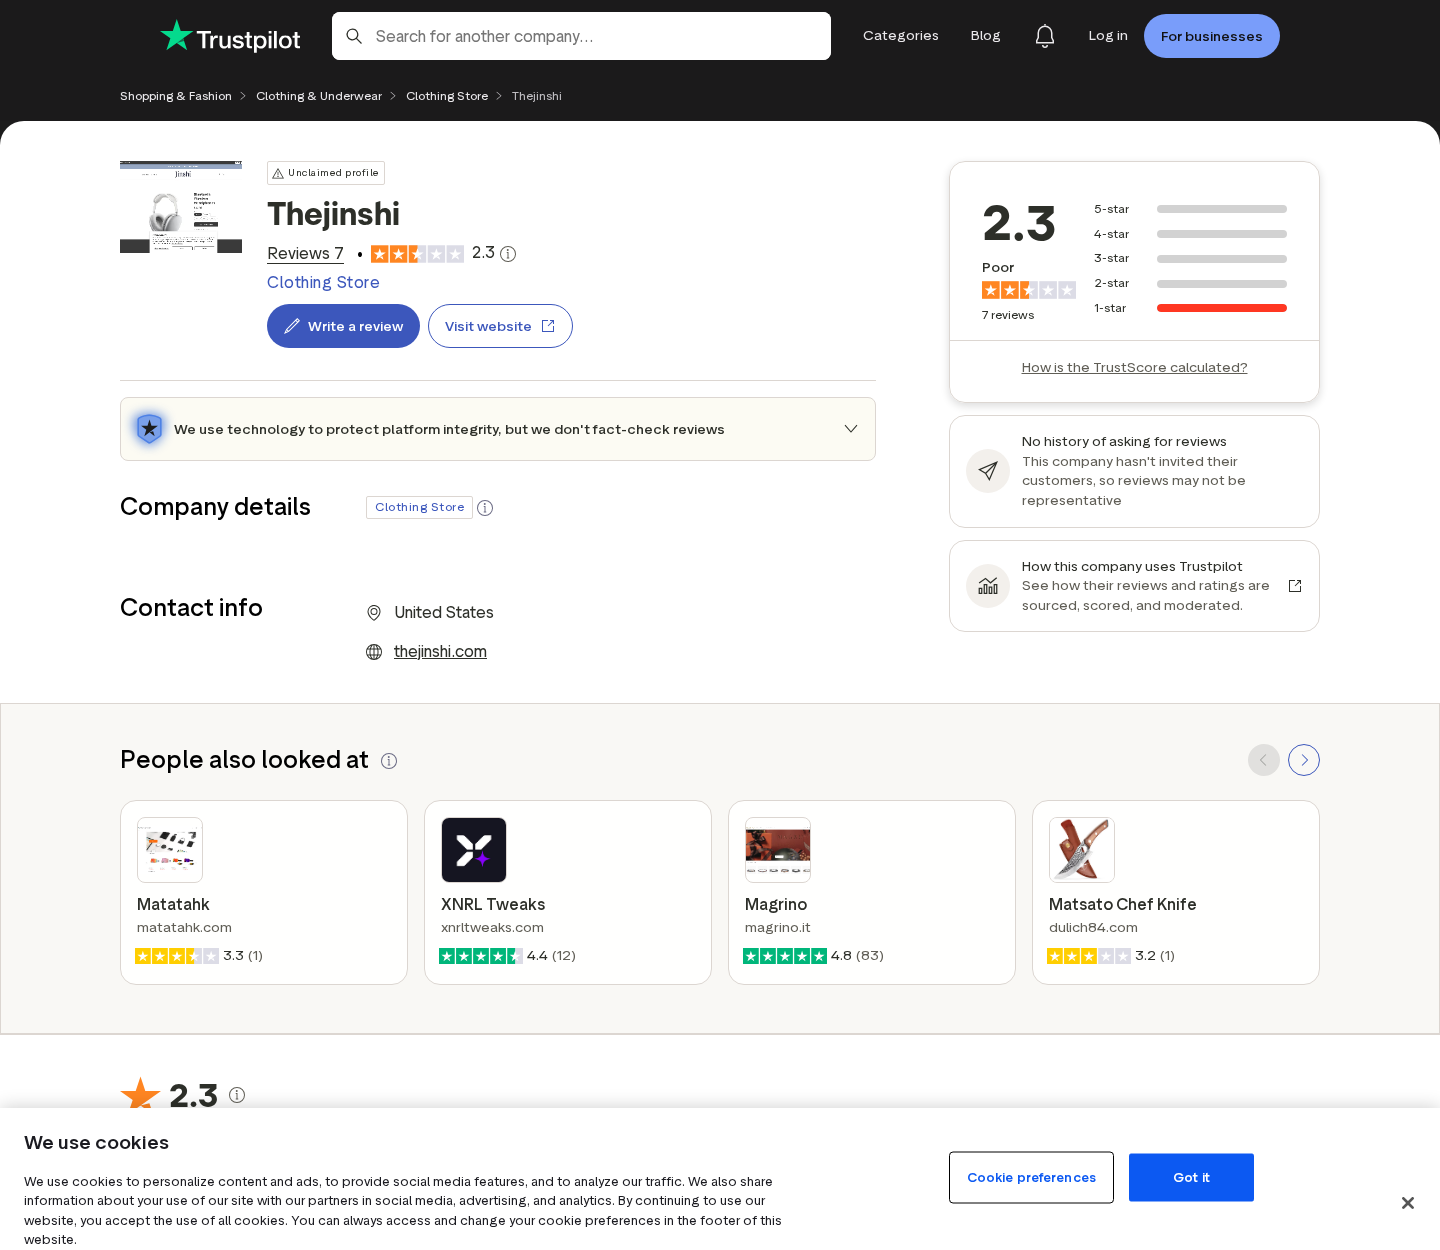
Low public ratings reflect frustration with the product and the remedy process. Review counts can change, so the pattern and specific evidence matter more than one score.
Look for reports containing order dates, photographs, tracking histories, model details, and support replies. Those accounts are more useful than unsupported praise or anger.
Remember that review websites cannot verify every statement. They provide leads, while the original listing, parcel, product markings, and merchant correspondence form stronger evidence.
A real object does not guarantee an honest listing
Bait-and-switch concerns do not require an empty package. They arise when the supplied product materially differs from what a reasonable customer understood they were purchasing.
A seller may argue that colors, accessories, or packaging vary. That explanation does not cover nonexistent features, a different model, or dramatic quality differences.
The fairest conclusion is evidence-based: Jinshi appears connected with real shipments, but complaints and the current storefront create substantial representation and refund concerns.
Company, Address, and Fulfillment Checks
The brand identity is difficult to verify
A trustworthy electronics seller should identify the legal company responsible for sales, warranty service, data handling, and returns. That identity should remain consistent everywhere.
Search the business name in official registries and compare it with the card statement. A logo alone does not establish who accepted the payment.
When the website becomes sparse or inactive, archived receipts and transaction records become essential. Save them before links stop working.
The domain history does not provide stable reassurance
Public domain records associated with Jinshi have produced differing dates over time, which may indicate changes, expiration, or re-registration. Avoid relying on one age badge.
The more important live fact is that the storefront examined here no longer resembled a functioning headphone shop. Product pages and support pathways were limited.
A store that retreats after a sales campaign leaves buyers dependent on email. That makes refunds, warranty claims, and specification disputes harder to resolve.
Support details should work before checkout
Send a pre-purchase question about active noise cancellation, the exact model number, warranty coverage, and return destination. Specific answers reveal more than a generic reassurance.
Call any published number and confirm it represents the named merchant. Search the address to determine whether it is an office, warehouse, home, mailbox, or unrelated business.
Silence before payment predicts poor support afterward. Do not assume a credit-card dispute will compensate for an avoidable warning.
Fulfillment origin affects realistic refund costs
A domestic-looking advertisement can still be fulfilled from another country. The shipping origin and required return address may be entirely different.
Ask where returns go and who pays postage for merchandise that is not as described. Obtain the answer in writing before placing the order.
Cheap mass-produced electronics can also present battery and charger risks. Stop using headphones that overheat, swell, smell unusual, or charge erratically.
What to Do if You Have Fallen Victim to This Scam
- Archive the original offer. Save the product page, advertisement, feature claims, order confirmation, price, discount language, delivery promise, and refund policy before the pages disappear.
- Document what arrived. Photograph the shipping label, unopened package, box, product markings, accessories, defects, and any differences from the listing.
- Request a specific remedy. Tell the seller whether the item was defective, counterfeit, or not as described. Ask for a prepaid return label and full refund by a clear deadline.
- Contact the payment provider promptly. If support fails, dispute the transaction using accurate evidence. Explain the exact representation mismatch instead of making unsupported claims.
- Check for unexpected billing. Review card activity for duplicate amounts or merchants you do not recognize. Replace the card if its details appear compromised.
- Scan devices after unusual downloads. Run Malwarebytes if the seller directed you to install an unofficial driver, configuration tool, extension, or tracking application.
- Limit malicious promotions. AdGuard can reduce deceptive shopping advertisements and known harmful pages, but product research and payment protection remain necessary.
- Report unsafe merchandise. Stop charging a hot or damaged battery, move it away from flammable materials, and notify the relevant product-safety and consumer-protection authority.
Is Your Device Infected? Run a Free Malware Scan
Slow performance, constant pop-ups, or strange behavior? These are classic signs of a malware infection. The fastest way to find out is to scan your device with Malwarebytes Free — one of the most trusted malware removal tools available.
The free version detects and removes the most common threats, including:
- Adware — the cause of those annoying pop-ups
- Browser hijackers — unwanted redirects and changed homepages
- Trojans and spyware — hidden programs stealing your data
- Potentially unwanted programs (PUPs) — software you never asked for
👉 Select your device below — Windows, Mac, or Android — then follow the simple steps to download Malwarebytes, scan your system, and remove any threats it finds. The scan usually takes 5 to 20 minutes.
Run a Malware Scan with Malwarebytes for Windows
Malwarebytes is one of the most popular and trusted anti-malware tools for Windows — and it’s completely free for removing infections. It catches threats that many antivirus programs miss, including adware, browser hijackers, and trojans. Follow the steps below to scan and clean your PC in just a few minutes.
Download Malwarebytes
Click the button below to download the latest version of Malwarebytes for Windows from the official source. The free version is all you need — it will scan your computer and remove adware, browser hijackers, and other malicious software at no cost.
Download MalwarebytesOfficial installer for Windows 11 and 10. Your download starts right away.Want real-time protection? See Malwarebytes Premium Malwarebytes Free for WindowsScans and removes malware at no cost
-
Install Malwarebytes
When the download finishes, open your Downloads folder and double-click the MBSetup file. If Windows shows a User Account Control pop-up, click “Yes” to allow the installation.

Follow the On-Screen Prompts to Install Malwarebytes
The setup wizard will walk you through a few quick screens:
-
Choose where you’re installing the program — “Personal Computer” or “Work Computer” — then click Next.

-
Malwarebytes will now install on your device. This usually takes under a minute.

-
When installation is complete, the “Welcome to Malwarebytes” screen will open automatically.

-
On the final screen, click Open Malwarebytes to launch the program.

-
Enable “Scan for Rootkits”
Before scanning, turn on rootkit detection so Malwarebytes can find even the most hidden threats. Click the Settings gear icon on the left side of the screen.

In the settings menu, find “Scan for rootkits” and click the toggle so it turns blue.

Done? Click “Dashboard” in the left pane to return to the main screen.
Start the Scan
Click the blue Scan button. Malwarebytes will automatically update its virus database and start checking your computer for malware.

-
Wait for the Scan to Finish
The scan checks your entire system for browser hijackers and other malicious programs, so it can take 5 to 20 minutes depending on your computer. Feel free to do something else — just check back occasionally to see the progress.

-
Quarantine the Detected Threats
When the scan is done, you’ll see a list of everything Malwarebytes found — malware, adware, and potentially unwanted programs. Click the “Quarantine” button to remove all of them at once.

Malwarebytes will now remove the malicious files and registry entries and move them safely into quarantine.

-
Restart Your Computer
Some threats can only be fully removed after a reboot. If Malwarebytes asks you to restart, click Yes. Once you’re logged back in, Malwarebytes has finished removing the threats it found.

That’s it — your Windows PC is now clean of trojans, adware, and other malware, and should be back to running smoothly.
If you are still having problems with your computer after completing these instructions, then please follow one of the steps:
- Run a computer scan with ESET Online Scanner
- Ask for help in our Windows Malware Removal Help & Support forum.
Run a Malware Scan with Malwarebytes for Mac
Malwarebytes for Mac is a free on-demand scanner that removes the malware other security software tends to miss — adware, browser hijackers, and unwanted programs included. Cleaning an infected Mac with Malwarebytes has always been completely free, and it’s our go-to recommendation. Follow the steps below to scan and clean your Mac in just a few minutes.
-
Download Malwarebytes for Mac
Click the button below to download the latest version of Malwarebytes for Mac.
Download MalwarebytesOfficial installer for macOS. Your download starts right away.Want real-time protection? See Malwarebytes PremiumMalwarebytes Free for MacScans and removes malware at no cost -
Open the Malwarebytes setup file
When the download finishes, open your Downloads folder and double-click the setup file to begin the installation.

-
Follow the On-Screen Prompts to Install Malwarebytes
The Malwarebytes for Mac Installer will guide you through a few quick screens. Click “Continue” and keep following the prompts until the installation completes.



When the installation is complete, Malwarebytes opens to the Welcome to Malwarebytes screen. Click “Get started“.
-
Select “Personal Computer” or “Work Computer”
Malwarebytes will ask what type of computer you’re installing it on. Click either Personal Computer or Work Computer, whichever applies.

-
Start the Scan
Click the “Scan” button. Malwarebytes will automatically update its detection database and begin checking your Mac for malware.

-
Wait for the Scan to Finish
Malwarebytes will scan your Mac for adware, browser hijackers, and other malicious programs. This can take a few minutes, so feel free to do something else — just check back occasionally to see the progress.

-
Quarantine the Detected Threats
When the scan is done, you’ll see a list of everything Malwarebytes found. Click the “Quarantine” button to remove all the threats at once.

-
Restart Your Mac
Malwarebytes will now remove all the malicious files it found. Some threats can only be fully removed after a reboot — if Malwarebytes asks you to restart, allow it. Once you’re logged back in, your Mac is clean.

That’s it — your Mac is now free of adware, rogue browser extensions, and other potentially harmful software.
If you are still experiencing problems while trying to remove a malicious program from your computer, please ask for help in our Mac Malware Removal Help & Support forum.
Run a Malware Scan with Malwarebytes for Android
Malwarebytes for Android automatically detects and removes dangerous threats like malware and ransomware so you don’t have to worry about your most-used device being compromised. Aggressive detection of adware and potentially unwanted programs keeps your Android phone or tablet running smooth.
-
Download Malwarebytes for Android.
You can download Malwarebytes for Android by clicking the link below.
Get Malwarebytes for AndroidOpens Google Play in a new tab.Want real-time protection? See Malwarebytes Premium for AndroidMalwarebytes for AndroidScans your phone and removes malware at no cost -
Install Malwarebytes for Android on your phone.
In the Google Play Store, tap “Install” to install Malwarebytes for Android on your device.

When the installation process has finished, tap “Open” to begin using Malwarebytes for Android. You can also open Malwarebytes by tapping on its icon in your phone menu or home screen.

-
Follow the on-screen prompts to complete the setup process
When Malwarebytes will open, you will see the Malwarebytes Setup Wizard which will guide you through a series of permissions and other setup options.
This is the first of two screens that explain the difference between the Premium and Free versions. Swipe this screen to continue.
Tap on “Got it” to proceed to the next step.
Malwarebytes for Android will now ask for a set of permissions that are required to scan your device and protect it from malware. Tap on “Give permission” to continue.
Tap on “Allow” to permit Malwarebytes to access the files on your phone.
-
Update database and run a scan with Malwarebytes for Android
You will now be prompted to update the Malwarebytes database and run a full system scan.

Click on “Update database” to update the Malwarebytes for Android definitions to the latest version, then click on “Run full scan” to perform a system scan.

-
Wait for the Malwarebytes scan to complete.
Malwarebytes will now start scanning your phone for adware and other malicious apps. This process can take a few minutes, so we suggest you do something else and periodically check on the status of the scan to see when it is finished.

-
Click on “Remove Selected”.
When the scan has been completed, you will be presented with a screen showing the malware infections that Malwarebytes for Android has detected. To remove the malicious apps that Malwarebytes has found, tap on the “Remove Selected” button.

-
Restart your phone.
Malwarebytes for Android will now remove all the malicious apps that it has found. To complete the malware removal process, Malwarebytes may ask you to restart your device.
That’s it — your Android phone is now clean — no more malicious apps, adware, or browser redirects.
If you are still having problems with your phone after completing these instructions, then please follow one of the steps:
- Restore your phone to factory settings by going to Settings > General management > Reset > Factory data reset.
- Ask for help in our Mobile Malware Removal Help & Support forum.
Stay Protected: Block Ads and Malicious Sites
Now that your device is clean, keep it that way. Most infections start with a malicious ad or a fake download button — so blocking them at the source is your best defense.
We recommend AdGuard, which blocks malicious ads, phishing pages, and dangerous redirects before they can reach you.
👉 Download AdGuard and browse safely
Frequently Asked Questions
Are Jinshi Headphones completely fake?
Buyer reports indicate that products were shipped, so “fake” should describe alleged presentation or feature problems, not automatically mean that no physical item exists.
What headphones did customers say they received?
Several accounts describe inexpensive P9 Pro Max-style units or similar generic headphones. Packaging and model markings should be compared with the original order.
Do Jinshi Headphones have real active noise cancellation?
Complaints question the claimed performance. Buyers should demand a precise specification and test whether activating the feature produces a clear difference.
Why does the buy-one-get-one offer matter?
The bundle makes the price appear more valuable and can discourage careful comparison. Two inexpensive generic products may still be worth less than the advertised single item.
Can I return Jinshi Headphones?
Return success depends on the seller’s current response and the accepted terms. Request written instructions quickly, then preserve payment-dispute deadlines if the remedy is impractical.
Is thejinshi.com still operating normally?
During this review, the domain appeared stripped down and did not provide the reassurance of a normal active electronics storefront.
The Bottom Line
Jinshi appears to have sold real headphones, but the evidence raises serious questions about product identity, advertised capabilities, build quality, and the practical value of refunds.
Treat the offer as high risk. Demand exact specifications, pay through a protected method, archive every claim, and avoid buying when the merchant identity or return destination remains unclear.

Join the discussion
0 commentsShare your experience or ask a question about this article.
Discussion
Start the conversation
Have a question or something useful to share? Add the first comment.