

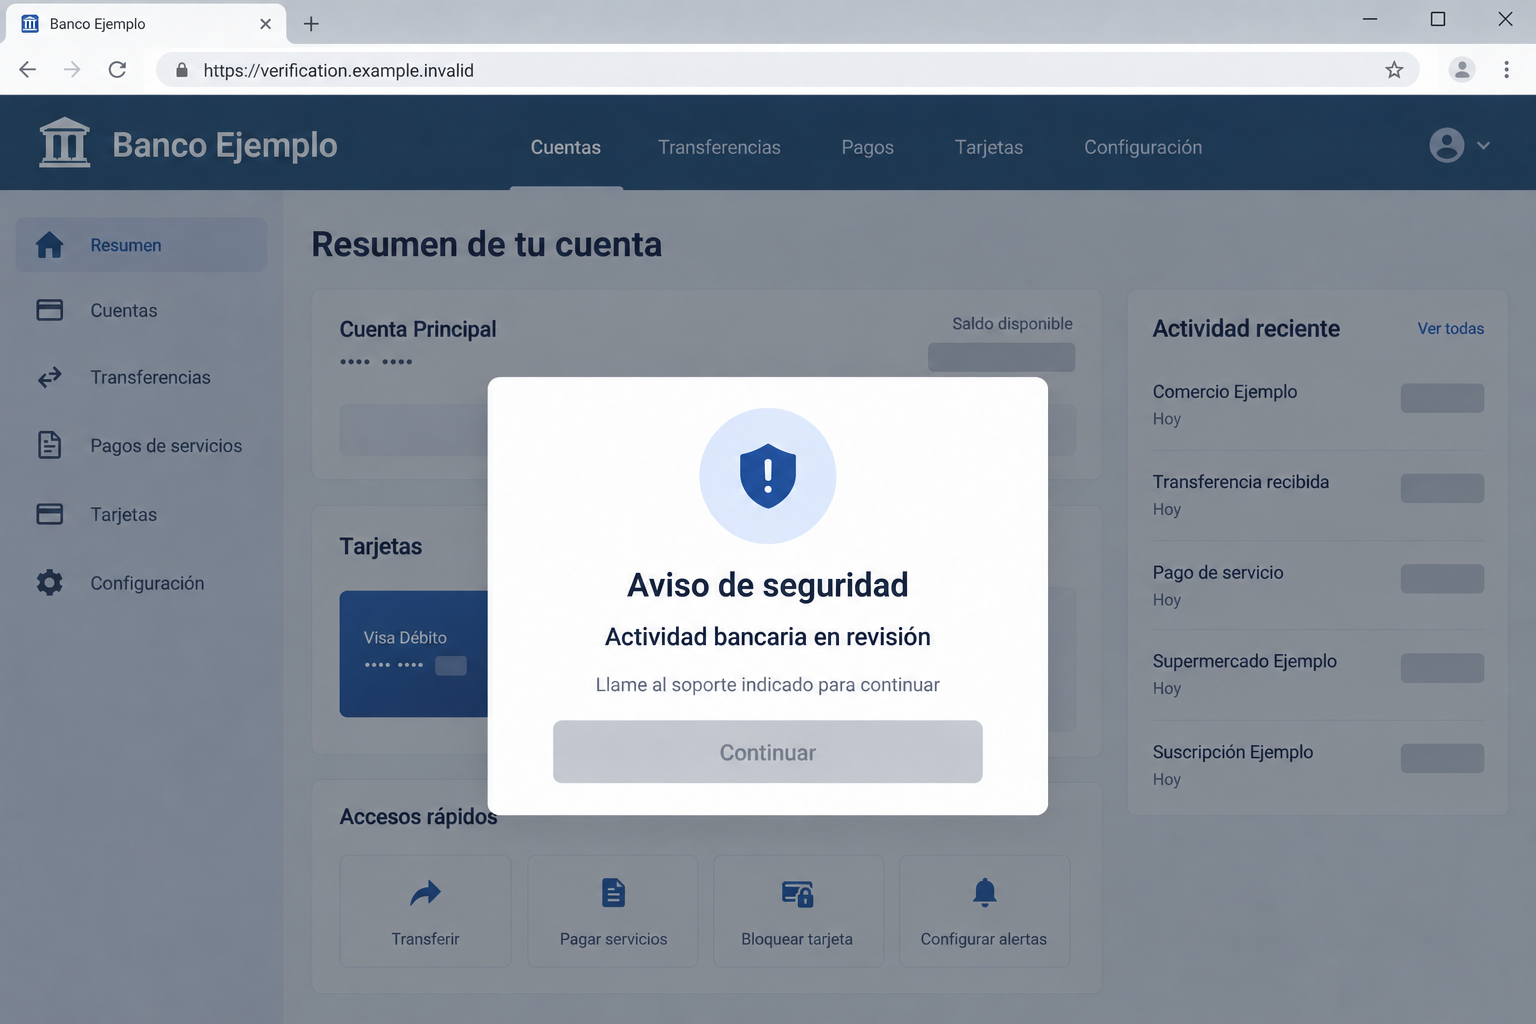
A banking warning takes over your screen just as you are checking an account. It looks urgent, and the instructions seem designed to help.
When SCMBANKER is involved, the alert, the computer, and the next conversation all deserve a closer look. Here is where to start.
Overview
A Windows infection built around banking activity
SCMBANKER is a malicious Windows toolkit connected with an operator-assisted banking fraud operation. Its documented targeting includes Mexican financial services.
The name refers to the malware, not a bank application you should install. Researchers also track the surrounding operation as REF6045.
A person can intervene after infection. That matters because the threat is not limited to a stolen password or a single automatic transfer.
The computer may become part of a conversation designed to make you trust a caller, approve a payment, or follow an apparently necessary security procedure.
What makes the warning different from an ordinary bank alert
The documented toolkit combines banking-session monitoring with misleading screen warnings, browser redirection, and changes to copied payment details.
Those functions can reinforce one another. An alert appearing while your bank is open feels more convincing than a random message arriving out of nowhere.
- A verification page asks you to execute instructions outside the browser.
- An unexpected bank warning directs you toward a telephone conversation.
- A copied destination changes before a transfer is submitted.
- Remote-control software appears without a support session you arranged.
These are reasons to stop and investigate. None of them, standing alone, identifies SCMBANKER with certainty; preserve the actual security alert and installation history.
Removal and account protection are separate jobs
A credible SCMBANKER finding requires attention to both Windows and your financial accounts. Cleaning the machine does not cancel a payment already authorized.
Likewise, changing a bank password on the same compromised computer may expose the replacement. Use a different, trusted device for sensitive recovery work.
You do not need to understand every script before asking your bank for help. Describe what appeared, what you ran, and what you approved.
Why the Bank Warning Can Feel So Convincing
Most people recognize a suspicious email more easily than a warning that arrives inside an ordinary task. Timing supplies the apparent credibility.
If you have just signed into a bank, a security interruption can seem connected to that login. You may assume the bank detected something unusual.
But a compromised computer can display content that the bank never sent. A logo and an account-related message do not establish the warning’s origin.
The practical distinction is who controls the communication. A number supplied by the interruption keeps you inside the same untrusted interaction.
A number from your bank card or independently opened banking app gives you another route. You can ask whether the bank actually placed a restriction.
Do not test the warning by supplying a verification code. That code may approve the very activity you are trying to prevent.
How the SCMBANKER Infection and Banking Fraud Unfold
Step 1: A verification page moves you outside normal browsing
The documented delivery uses a counterfeit CAPTCHA-style challenge. A familiar verification task becomes an instruction to run something on Windows.
This is the critical change. Selecting pictures or checking a box happens inside the page; executing pasted instructions gives software access beyond it.
A real browsing challenge should not need you to open a command window to prove you are human. Stop when verification turns into computer administration.
Do not copy the command into another window to see whether it looks harmless. Avoid running it altogether, even if the page insists that validation failed.
If you already executed it, write down the approximate time and page address. That information is more useful than repeatedly returning to the challenge.
Step 2: Installation is disguised as something Windows needs
The infection chain includes a misleading update screen and repeated permission prompts. These interruptions can encourage a frustrated user to accept just to regain control.
An administrator prompt describes a request for elevated access. It does not certify that the program requesting access is safe or necessary.
Think about the task you started. A bank login or browser verification does not normally require an unrelated Windows installer to obtain administrator privileges.
If prompts keep returning, do not treat persistence as proof that Windows needs your consent. Record the displayed publisher and ask for trusted technical assistance.
Repeatedly clicking approval can turn an irritating interruption into a more serious compromise. Taking the computer offline gives you space to make better decisions.
Step 3: Banking activity becomes a trigger for the operator
Once active, SCMBANKER can watch for financial activity and create opportunities for intervention. The observed toolkit includes screenshots and collection of typed information.
That makes an apparently private banking session unsafe. You cannot judge exposure solely by whether the account password was stored in your browser.
A caller who knows which service you were using may sound unusually informed. Knowledge of your activity is not proof of employment by that service.
Move the conversation to a verified bank channel. Tell the bank that malware may have displayed the warning or revealed details of your session.
For business banking, include your finance or security team immediately. Payment approval rights and shared accounts may widen the incident beyond one person’s login.
Step 4: The warning steers you toward another risky action
A misleading bank overlay can direct the user to a telephone number. Browser redirection can also place a counterfeit sign-in page in the path.
The next instruction may appear to resolve the first problem. That connection is exactly why each new request needs independent verification.
Do not enter fresh credentials after an unexpected redirect. Close the interaction and use the bank’s established route on a clean device.
Be particularly cautious about requests to read out authentication codes, approve notifications, or transfer money for protection. Describe those requests to the genuine bank instead.
The documented capability does not tell us what every operator said to every recipient. Your messages and transaction records determine what happened in your case.
Step 5: Payment details or remote access create another opening
SCMBANKER can replace copied financial identifiers, including Mexican CLABE account numbers. A pasted destination may therefore differ from the one you intended to pay.
Compare the complete recipient details before authorizing a transfer. Checking only a few familiar digits is weaker than reviewing the actual account and beneficiary.
The operation also abuses Remote Utilities, a legitimate remote-support product. Unauthorized configuration is the concern, not the mere existence of that software.
Ask who installed it, why access was granted, and whether unattended control remains enabled. On an employer-managed computer, let the responsible team make that assessment.
Do not remove an approved company tool simply because its name appears in a malware report. Establish which installation and configuration belong to the incident.
What to Check Without Guessing at a Diagnosis
Preserve the sequence rather than chasing every suspicious file
Start with your own timeline: the page you visited, instructions executed, permission prompts, bank warning, telephone interaction, and any transfer afterward.
Save security detections and transaction confirmations. Include filenames and timestamps, but keep passwords, codes, and full financial records out of public posts.
A toolkit can leave several components, and its startup behavior can survive a reboot. Deleting one visible file is not a dependable cleanup plan.
A technician can use the timeline to decide what to inspect. Randomly deleting system files may damage Windows while leaving the relevant malware untouched.
Separate an attempted transfer from a completed one
The confirmation screen you saw may not be enough. Ask the bank whether the payment was submitted, pending, rejected, or completed.
Provide the destination, amount, time, and reference number through the bank’s secure channel. A prompt report can help its fraud team assess available action.
Do not promise yourself a reversal, and do not assume nothing can be done. The bank needs the real payment status before advising you.
If no transfer occurred, explain any credentials or codes supplied. Account restrictions and session review may still be appropriate.
What to Do if SCMBANKER Is Detected
Start with a plan that addresses active access and financial consequences together. Neither a bank call nor a device scan covers the whole situation by itself.
If you are unable to operate Windows safely because the warning keeps returning, use another device to arrange help. Do not let the interruption choose your technician.
For account approvals, read the transaction details from the genuine bank service. A caller’s explanation cannot replace the amount, recipient, and purpose shown by that service.
If family members use the same PC, ask which accounts they accessed during the exposure window. They may need their own recovery steps rather than your password change.
Business accounts need particular coordination. Tell the person responsible for payment approvals before a pending request is treated as ordinary work.
Use a written checklist to divide responsibilities. Record who contacted the bank, who handled Windows cleanup, and which account sessions were revoked.
When a step is incomplete, leave it marked incomplete. A removed warning should not cause the remaining financial checks to disappear from the recovery plan.
Disconnect the affected computer and pause financial activity. Unplug Ethernet or turn off its network connection. Avoid opening banking, email, and payment accounts on that machine.
For a work device, contact your security team before deleting evidence. Give them the verification-page history and the approximate execution time.
Reach your bank through a trusted channel. Use your card, statement, or established app on a clean device. Explain the screen warning and suspected remote access.
Ask it to review recent payments, beneficiaries, security changes, and active sessions. Mention any approval code or notification you accepted during the incident.
Secure the accounts that were accessible. Replace exposed passwords from a safe device, starting with email and financial services. Review recovery details and revoke unfamiliar sessions where available.
A password change alone may leave an existing session active. Follow the service’s own account-recovery instructions rather than trusting links sent by the suspicious caller.
Complete a trusted Windows malware scan. Use updated Malwarebytes or your organization’s approved security software. Preserve detection results, quarantine findings, and follow any required restart.
Microsoft Defender Offline can provide an additional scan outside the usual Windows session. Save work first and follow Microsoft’s instructions for your Windows version.
Review unauthorized remote-control and startup access. Have a qualified technician distinguish legitimate support installations from attacker-added access. Removal should cover persistence, not just a download in the browser.
If security tools cannot restore confidence, consider a clean Windows reinstall from official media. Back up essential documents without carrying unknown installers or scripts forward.
Keep a written record of financial and technical follow-up. Store bank case numbers, transaction references, and scan reports together. Report confirmed fraud through the appropriate local authorities.
Do not pay someone who promises guaranteed recovery. A caller requesting another transfer to undo the first loss may simply be extending the fraud.
Reduce the chance of another verification trap. Update Windows and the browser after cleanup. AdGuard can reduce exposure to unwanted advertising, but it cannot authorize a suspicious command safely.
Make one household rule clear: browsing verification must never require pasted Windows commands. Explain it to anyone else using the computer.
Is Your Device Infected? Run a Free Malware Scan
Slow performance, constant pop-ups, or strange behavior? These are classic signs of a malware infection. The fastest way to find out is to scan your device with Malwarebytes Free — one of the most trusted malware removal tools available.
The free version detects and removes the most common threats, including:
- Adware — the cause of those annoying pop-ups
- Browser hijackers — unwanted redirects and changed homepages
- Trojans and spyware — hidden programs stealing your data
- Potentially unwanted programs (PUPs) — software you never asked for
👉 Select your device below — Windows, Mac, or Android — then follow the simple steps to download Malwarebytes, scan your system, and remove any threats it finds. The scan usually takes 5 to 20 minutes.
Run a Malware Scan with Malwarebytes for Windows
Malwarebytes is one of the most popular and trusted anti-malware tools for Windows — and it’s completely free for removing infections. It catches threats that many antivirus programs miss, including adware, browser hijackers, and trojans. Follow the steps below to scan and clean your PC in just a few minutes.
Download Malwarebytes
Click the button below to download the latest version of Malwarebytes for Windows from the official source. The free version is all you need — it will scan your computer and remove adware, browser hijackers, and other malicious software at no cost.
Download MalwarebytesOfficial installer for Windows 11 and 10. Your download starts right away.Want real-time protection? See Malwarebytes Premium Malwarebytes Free for WindowsScans and removes malware at no cost
-
Install Malwarebytes
When the download finishes, open your Downloads folder and double-click the MBSetup file. If Windows shows a User Account Control pop-up, click “Yes” to allow the installation.

Follow the On-Screen Prompts to Install Malwarebytes
The setup wizard will walk you through a few quick screens:
-
Choose where you’re installing the program — “Personal Computer” or “Work Computer” — then click Next.

-
Malwarebytes will now install on your device. This usually takes under a minute.

-
When installation is complete, the “Welcome to Malwarebytes” screen will open automatically.

-
On the final screen, click Open Malwarebytes to launch the program.

-
Enable “Scan for Rootkits”
Before scanning, turn on rootkit detection so Malwarebytes can find even the most hidden threats. Click the Settings gear icon on the left side of the screen.

In the settings menu, find “Scan for rootkits” and click the toggle so it turns blue.

Done? Click “Dashboard” in the left pane to return to the main screen.
Start the Scan
Click the blue Scan button. Malwarebytes will automatically update its virus database and start checking your computer for malware.

-
Wait for the Scan to Finish
The scan checks your entire system for browser hijackers and other malicious programs, so it can take 5 to 20 minutes depending on your computer. Feel free to do something else — just check back occasionally to see the progress.

-
Quarantine the Detected Threats
When the scan is done, you’ll see a list of everything Malwarebytes found — malware, adware, and potentially unwanted programs. Click the “Quarantine” button to remove all of them at once.

Malwarebytes will now remove the malicious files and registry entries and move them safely into quarantine.

-
Restart Your Computer
Some threats can only be fully removed after a reboot. If Malwarebytes asks you to restart, click Yes. Once you’re logged back in, Malwarebytes has finished removing the threats it found.

That’s it — your Windows PC is now clean of trojans, adware, and other malware, and should be back to running smoothly.
If you are still having problems with your computer after completing these instructions, then please follow one of the steps:
- Run a computer scan with ESET Online Scanner
- Ask for help in our Windows Malware Removal Help & Support forum.
Run a Malware Scan with Malwarebytes for Mac
Malwarebytes for Mac is a free on-demand scanner that removes the malware other security software tends to miss — adware, browser hijackers, and unwanted programs included. Cleaning an infected Mac with Malwarebytes has always been completely free, and it’s our go-to recommendation. Follow the steps below to scan and clean your Mac in just a few minutes.
-
Download Malwarebytes for Mac
Click the button below to download the latest version of Malwarebytes for Mac.
Download MalwarebytesOfficial installer for macOS. Your download starts right away.Want real-time protection? See Malwarebytes PremiumMalwarebytes Free for MacScans and removes malware at no cost -
Open the Malwarebytes setup file
When the download finishes, open your Downloads folder and double-click the setup file to begin the installation.

-
Follow the On-Screen Prompts to Install Malwarebytes
The Malwarebytes for Mac Installer will guide you through a few quick screens. Click “Continue” and keep following the prompts until the installation completes.



When the installation is complete, Malwarebytes opens to the Welcome to Malwarebytes screen. Click “Get started“.
-
Select “Personal Computer” or “Work Computer”
Malwarebytes will ask what type of computer you’re installing it on. Click either Personal Computer or Work Computer, whichever applies.

-
Start the Scan
Click the “Scan” button. Malwarebytes will automatically update its detection database and begin checking your Mac for malware.

-
Wait for the Scan to Finish
Malwarebytes will scan your Mac for adware, browser hijackers, and other malicious programs. This can take a few minutes, so feel free to do something else — just check back occasionally to see the progress.

-
Quarantine the Detected Threats
When the scan is done, you’ll see a list of everything Malwarebytes found. Click the “Quarantine” button to remove all the threats at once.

-
Restart Your Mac
Malwarebytes will now remove all the malicious files it found. Some threats can only be fully removed after a reboot — if Malwarebytes asks you to restart, allow it. Once you’re logged back in, your Mac is clean.

That’s it — your Mac is now free of adware, rogue browser extensions, and other potentially harmful software.
If you are still experiencing problems while trying to remove a malicious program from your computer, please ask for help in our Mac Malware Removal Help & Support forum.
Run a Malware Scan with Malwarebytes for Android
Malwarebytes for Android automatically detects and removes dangerous threats like malware and ransomware so you don’t have to worry about your most-used device being compromised. Aggressive detection of adware and potentially unwanted programs keeps your Android phone or tablet running smooth.
-
Download Malwarebytes for Android.
You can download Malwarebytes for Android by clicking the link below.
Get Malwarebytes for AndroidOpens Google Play in a new tab.Want real-time protection? See Malwarebytes Premium for AndroidMalwarebytes for AndroidScans your phone and removes malware at no cost -
Install Malwarebytes for Android on your phone.
In the Google Play Store, tap “Install” to install Malwarebytes for Android on your device.

When the installation process has finished, tap “Open” to begin using Malwarebytes for Android. You can also open Malwarebytes by tapping on its icon in your phone menu or home screen.

-
Follow the on-screen prompts to complete the setup process
When Malwarebytes will open, you will see the Malwarebytes Setup Wizard which will guide you through a series of permissions and other setup options.
This is the first of two screens that explain the difference between the Premium and Free versions. Swipe this screen to continue.
Tap on “Got it” to proceed to the next step.
Malwarebytes for Android will now ask for a set of permissions that are required to scan your device and protect it from malware. Tap on “Give permission” to continue.
Tap on “Allow” to permit Malwarebytes to access the files on your phone.
-
Update database and run a scan with Malwarebytes for Android
You will now be prompted to update the Malwarebytes database and run a full system scan.

Click on “Update database” to update the Malwarebytes for Android definitions to the latest version, then click on “Run full scan” to perform a system scan.

-
Wait for the Malwarebytes scan to complete.
Malwarebytes will now start scanning your phone for adware and other malicious apps. This process can take a few minutes, so we suggest you do something else and periodically check on the status of the scan to see when it is finished.

-
Click on “Remove Selected”.
When the scan has been completed, you will be presented with a screen showing the malware infections that Malwarebytes for Android has detected. To remove the malicious apps that Malwarebytes has found, tap on the “Remove Selected” button.

-
Restart your phone.
Malwarebytes for Android will now remove all the malicious apps that it has found. To complete the malware removal process, Malwarebytes may ask you to restart your device.
That’s it — your Android phone is now clean — no more malicious apps, adware, or browser redirects.
If you are still having problems with your phone after completing these instructions, then please follow one of the steps:
- Restore your phone to factory settings by going to Settings > General management > Reset > Factory data reset.
- Ask for help in our Mobile Malware Removal Help & Support forum.
Stay Protected: Block Ads and Malicious Sites
Now that your device is clean, keep it that way. Most infections start with a malicious ad or a fake download button — so blocking them at the source is your best defense.
We recommend AdGuard, which blocks malicious ads, phishing pages, and dangerous redirects before they can reach you.
👉 Download AdGuard and browse safely
Returning to Banking After Cleanup
Resume sensitive use only when the computer has been cleaned or rebuilt and the account-side checks are complete. A quiet screen is not that confirmation.
Before the first payment, verify saved beneficiaries against trusted records. If the bank replaced credentials or issued new access instructions, use its verified communication channel.
Watch for another call referring to the incident. Knowing the details does not make the caller genuine, especially if those details were exposed during the compromise.
Keep the recovery process manageable. One record containing completed scans, account changes, and bank responses prevents important tasks from getting lost between conversations.
If someone else operates the account, tell them what happened. They need to recognize unexpected approval requests rather than unwittingly completing the operator’s next step.
For a business, confirm who can add beneficiaries and approve transfers. Temporary restrictions may be more useful than assuming one employee’s password change resolved everything.
Frequently Asked Questions
What is SCMBANKER?
It is a Windows malware toolkit associated with operator-assisted banking fraud. Its documented functions include financial monitoring, deceptive warnings, redirection, and payment-detail manipulation.
Does seeing a CAPTCHA mean my computer is infected?
No. The important exposure in this delivery pattern is running the page’s Windows instructions. Simply encountering a challenge is not proof that SCMBANKER installed.
Is the bank warning a genuine restriction?
Verify that independently with your bank. Malware can display an imitation warning while the bank’s website is open, so the appearance alone is unreliable.
Is Remote Utilities itself malware?
No. It is legitimate software that attackers can misuse. The relevant questions are who installed it and whether the access was authorized.
Will removing SCMBANKER undo a transfer?
Removal addresses the device, not the banking transaction. Contact your bank immediately about the actual payment status and any available fraud response.
Do I need to reset every account I own?
Prioritize accounts used or accessible during the exposure, including the email that controls recovery. Broaden the review if detection results show additional information was collected.
The Bottom Line
Do not follow a bank warning into a caller-directed security procedure. SCMBANKER can turn a compromised Windows session into a convincing, coordinated financial trap.
If you ran the verification instructions or received a credible detection, isolate the computer, contact the genuine bank, and complete removal before returning to financial activity.








