

Your documents suddenly have unfamiliar endings, and a text note appears among them. The files you need are still visible, but opening them no longer works.
Then the message introduces a deadline. Before changing filenames, trying an unlocker, or contacting anyone in the note, take stock of what can still be protected.
Overview
Identifying the reported file changes
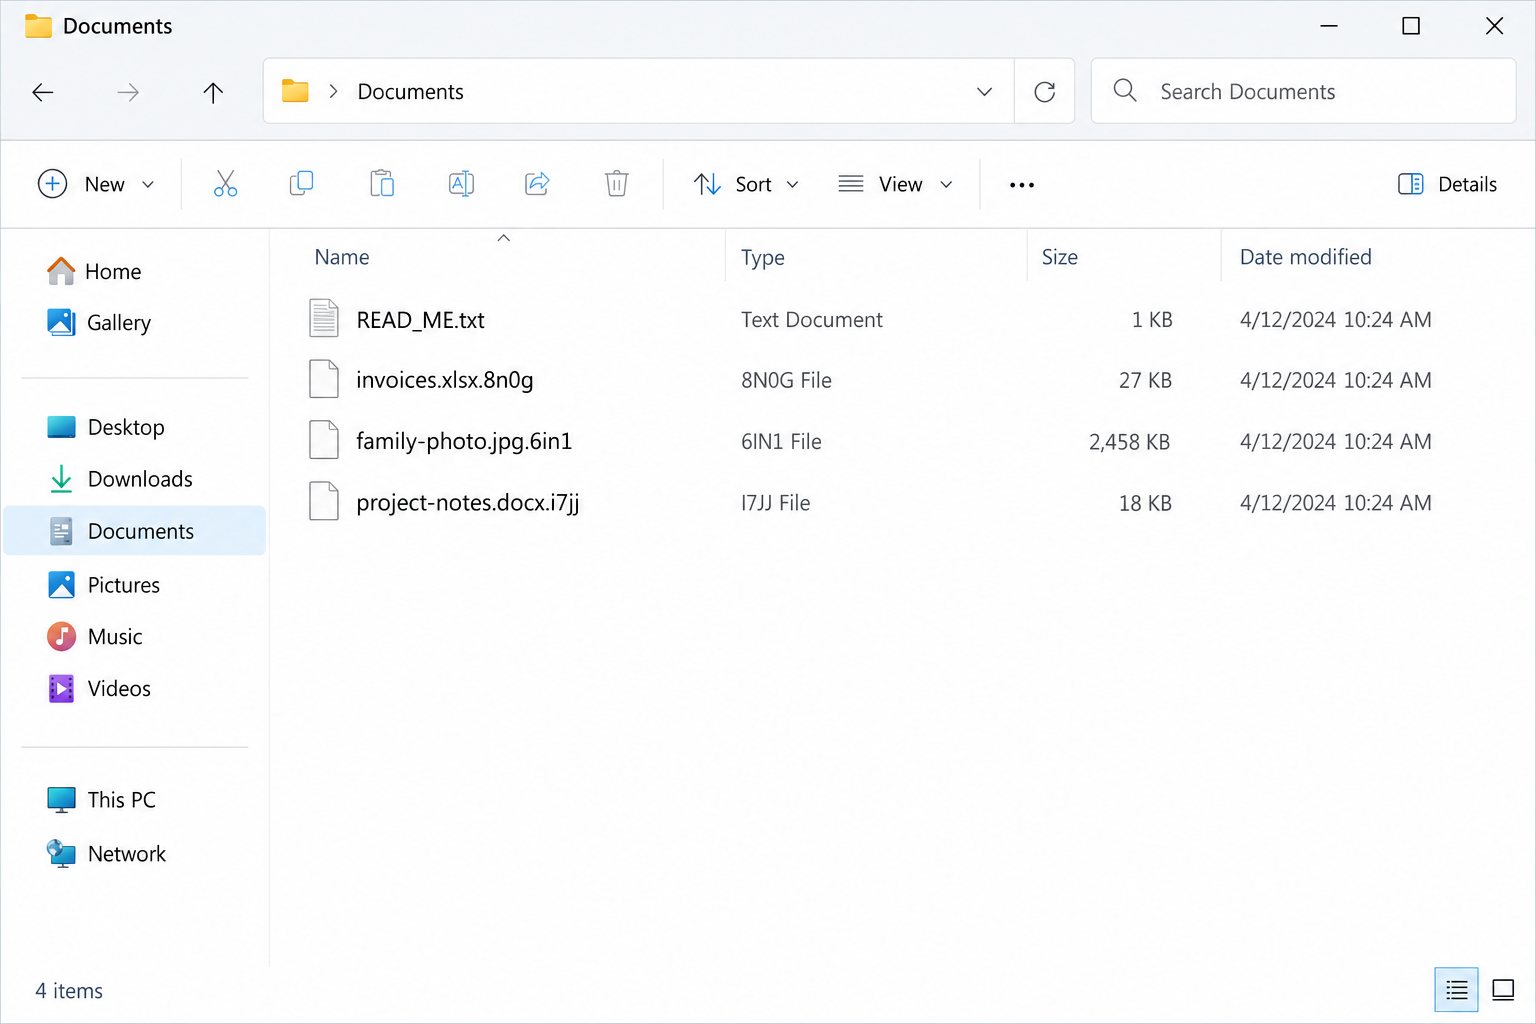
SAMURAI-SEC ransomware locks files and pressures their owner to contact the attackers. Reported variants use four-character suffixes or a .samurai extension.
The associated text notes are named READ_ME.txt or read_it.txt. Keep the complete filenames and the note together when seeking identification.
The lead illustration is a representative file list, not a capture of a victim’s computer. Similar-looking filenames alone do not establish a complete diagnosis.
The note adds a data-publication threat
The demand claims sensitive information was copied and sets a 48-hour contact deadline. It steers communication toward SimpleX, with an email fallback after 24 hours.
It also discourages outside security assistance and attempts to stop the reader from interrupting the encryption. Those instructions serve the extortionist, not the owner.
Treat the copying claim as something to investigate. A ransom note does not prove which records left a particular system or that every threatened leak exists.
Removal and recovery solve different problems
Removing ransomware addresses the malicious program. Restoring readable documents requires another route, such as surviving backups, valid earlier copies, or a genuinely compatible decryptor.
The malware has been associated with Chaos-family code. That reported relationship does not establish that an older family decryptor supports your affected files.
- Isolate the affected equipment and keep backup storage out of its reach.
- Preserve the note, original filenames, and a small set of nonconfidential samples.
- Do not rename the entire collection or overwrite encrypted originals while experimenting.
- Assess possible information exposure separately from the availability of file backups.
What the Ransom Note Can and Cannot Tell You
A note gives investigators identifiers, but it is written by the person demanding money. Read its threats without accepting its technical claims as verified findings.
The claim that data was copied matters even if you have a good backup. Restoring a spreadsheet does not retract another person’s copy of it.
At the same time, do not announce a confirmed leak solely because the attacker says one occurred. Investigators should assess relevant logs and any credible evidence supplied.
Separate the questions: what stopped working, what access existed, what information may have left, and what can be restored safely.
That separation helps you prioritize. A family photo archive needs a different confidentiality response from payroll records or customer identification documents.
Business owners should involve their incident-response contacts and appropriate advisers. Applicable reporting or notification duties depend on the information and jurisdiction involved.
Do not use the ransom deadline as your incident plan. It is designed to steer attention toward the attacker’s preferred communication and payment process.
SimpleX is a legitimate communication application. Mentioning it in an extortion note does not make the service responsible for the attack.
The same distinction applies to email providers. An address used by an attacker is an indicator to preserve, not proof against everyone using that provider.
Keep those contact details in your private incident record. You do not need to test them or open the criminal’s links to preserve the note.
How a SAMURAI-SEC Ransomware Incident Unfolds
Step 1: An attacker obtains an execution opportunity
The exact entry route cannot be established from changed filenames alone. Investigate recent downloads, messages, account access, and system alerts rather than guessing from the note.
Ransomware can follow a malicious attachment, unsafe installer, or earlier intrusion. Those are possible routes to assess, not verified delivery methods in every SAMURAI-SEC incident.
At a business, the apparent starting point may not be the first compromised device. One workstation’s damage can be the visible result of broader access.
Record when you first noticed a problem and what changed beforehand. Preserve relevant logs before routine cleanup or reinstalling removes them.
Step 2: File access turns into unavailable data
When ransomware changes a file’s contents, the ordinary application may no longer recognize it. The extra suffix is a visible sign, not the damage’s entire cause.
Removing that suffix cannot reverse the mathematical transformation. A document may retain a familiar icon after renaming while still containing unreadable data.
Keep untouched copies. Future identification or recovery may need both the original name and the affected contents.
Do not reconnect external drives to discover which ones are safe. Assess surviving copies from an unaffected environment and avoid exposing your only backup.
Step 3: The note tries to take control of the response
The extortion demand arrives when the owner is already worried. It offers an apparent path to relief while discouraging alternatives.
The instruction to keep encryption running is particularly dangerous. Containing damage takes priority over obeying a message written to preserve the attacker’s leverage.
There is a real evidence tradeoff around shutdown. Disconnecting a machine and powering it off are different actions, and volatile evidence can disappear when power is lost.
Seek trusted assistance when you cannot contain an actively damaging system. Do not keep it connected merely because the note warns against interruption.
Step 4: The situation becomes a recovery and confidentiality problem
A usable backup may restore operations. It does not settle whether accounts remain accessible to an intruder or whether private information was copied.
Likewise, paying does not verify that the attacker will provide a working tool or delete anything. Those promises cannot replace independent recovery checks.
Prioritize essential records and systems, but restore them only into a controlled environment. Reintroducing a good copy to unresolved access can create another loss.
Document what remains available. A careful inventory can reveal older exports, cloud history, or copies already held by trusted colleagues.
What to Do If SAMURAI-SEC Has Affected Your Files
Contain the affected device. Disconnect network connections and accessible backup storage. For company equipment, contact the incident team through a separate trusted channel.
Do not assume isolation decrypts files or ends all local activity. It limits access while the appropriate response is arranged.
Preserve identifiers before changing the system. Keep the note, complete filenames, discovery time, and relevant security messages.
Use nonsensitive samples for public identification services. Ask qualified assistance about disk imaging or memory evidence if the incident warrants it.
Keep surviving backups separate. Do not connect every storage device to the affected machine in search of a quick restore.
Verify earlier versions from an unaffected system. Record which copy predates the damage and which account or device protects it.
Arrange removal through a trusted route. Personal systems can be assessed with genuine security software; business systems need coordinated investigation.
Malwarebytes can help remove malicious software on personal systems. It cannot restore encrypted files, and cleanup should follow appropriate evidence preservation.
Ask whether a clean rebuild is appropriate if integrity is uncertain. Obtain installers from recognized sources, not from the extortion note.
Secure relevant online access. From clean equipment, replace exposed credentials and investigate unauthorized sessions or recovery changes.
Prioritize accounts holding backups and administrative authority. Cleaning one computer does not close an intruder’s separate online access.
Investigate the publication allegation. Identify the sensitive records involved and have qualified responders assess evidence of access or copying.
Do not equate a threat with a verified breach finding. Do not assume successful file restoration makes confidentiality concerns disappear.
Check recovery options on duplicates. Use recognized tool listings and verify exact compatibility before testing.
No verified public SAMURAI-SEC decryptor was established for this guide. That is not a promise that one cannot become available later.
Report the extortion and keep financial records. If payment occurred, preserve transaction references and correspondence without continuing the attacker’s process.
Seek legitimate recovery assistance. Be especially skeptical of unsolicited offers promising a private unlocker or guaranteed success for an advance cryptocurrency payment.
For later browsing, AdGuard can help limit some malicious ads. It does not remove ransomware, identify stolen data, or decrypt documents.
Is Your Device Infected? Run a Free Malware Scan
Slow performance, constant pop-ups, or strange behavior? These are classic signs of a malware infection. The fastest way to find out is to scan your device with Malwarebytes Free — one of the most trusted malware removal tools available.
The free version detects and removes the most common threats, including:
- Adware — the cause of those annoying pop-ups
- Browser hijackers — unwanted redirects and changed homepages
- Trojans and spyware — hidden programs stealing your data
- Potentially unwanted programs (PUPs) — software you never asked for
👉 Select your device below — Windows, Mac, or Android — then follow the simple steps to download Malwarebytes, scan your system, and remove any threats it finds. The scan usually takes 5 to 20 minutes.
Run a Malware Scan with Malwarebytes for Windows
Malwarebytes is one of the most popular and trusted anti-malware tools for Windows — and it’s completely free for removing infections. It catches threats that many antivirus programs miss, including adware, browser hijackers, and trojans. Follow the steps below to scan and clean your PC in just a few minutes.
Download Malwarebytes
Click the button below to download the latest version of Malwarebytes for Windows from the official source. The free version is all you need — it will scan your computer and remove adware, browser hijackers, and other malicious software at no cost.
Download MalwarebytesOfficial installer for Windows 11 and 10. Your download starts right away.Want real-time protection? See Malwarebytes Premium Malwarebytes Free for WindowsScans and removes malware at no cost
-
Install Malwarebytes
When the download finishes, open your Downloads folder and double-click the MBSetup file. If Windows shows a User Account Control pop-up, click “Yes” to allow the installation.

Follow the On-Screen Prompts to Install Malwarebytes
The setup wizard will walk you through a few quick screens:
-
Choose where you’re installing the program — “Personal Computer” or “Work Computer” — then click Next.

-
Malwarebytes will now install on your device. This usually takes under a minute.

-
When installation is complete, the “Welcome to Malwarebytes” screen will open automatically.

-
On the final screen, click Open Malwarebytes to launch the program.

-
Enable “Scan for Rootkits”
Before scanning, turn on rootkit detection so Malwarebytes can find even the most hidden threats. Click the Settings gear icon on the left side of the screen.

In the settings menu, find “Scan for rootkits” and click the toggle so it turns blue.

Done? Click “Dashboard” in the left pane to return to the main screen.
Start the Scan
Click the blue Scan button. Malwarebytes will automatically update its virus database and start checking your computer for malware.

-
Wait for the Scan to Finish
The scan checks your entire system for browser hijackers and other malicious programs, so it can take 5 to 20 minutes depending on your computer. Feel free to do something else — just check back occasionally to see the progress.

-
Quarantine the Detected Threats
When the scan is done, you’ll see a list of everything Malwarebytes found — malware, adware, and potentially unwanted programs. Click the “Quarantine” button to remove all of them at once.

Malwarebytes will now remove the malicious files and registry entries and move them safely into quarantine.

-
Restart Your Computer
Some threats can only be fully removed after a reboot. If Malwarebytes asks you to restart, click Yes. Once you’re logged back in, Malwarebytes has finished removing the threats it found.

That’s it — your Windows PC is now clean of trojans, adware, and other malware, and should be back to running smoothly.
If you are still having problems with your computer after completing these instructions, then please follow one of the steps:
- Run a computer scan with ESET Online Scanner
- Ask for help in our Windows Malware Removal Help & Support forum.
Run a Malware Scan with Malwarebytes for Mac
Malwarebytes for Mac is a free on-demand scanner that removes the malware other security software tends to miss — adware, browser hijackers, and unwanted programs included. Cleaning an infected Mac with Malwarebytes has always been completely free, and it’s our go-to recommendation. Follow the steps below to scan and clean your Mac in just a few minutes.
-
Download Malwarebytes for Mac
Click the button below to download the latest version of Malwarebytes for Mac.
Download MalwarebytesOfficial installer for macOS. Your download starts right away.Want real-time protection? See Malwarebytes PremiumMalwarebytes Free for MacScans and removes malware at no cost -
Open the Malwarebytes setup file
When the download finishes, open your Downloads folder and double-click the setup file to begin the installation.

-
Follow the On-Screen Prompts to Install Malwarebytes
The Malwarebytes for Mac Installer will guide you through a few quick screens. Click “Continue” and keep following the prompts until the installation completes.



When the installation is complete, Malwarebytes opens to the Welcome to Malwarebytes screen. Click “Get started“.
-
Select “Personal Computer” or “Work Computer”
Malwarebytes will ask what type of computer you’re installing it on. Click either Personal Computer or Work Computer, whichever applies.

-
Start the Scan
Click the “Scan” button. Malwarebytes will automatically update its detection database and begin checking your Mac for malware.

-
Wait for the Scan to Finish
Malwarebytes will scan your Mac for adware, browser hijackers, and other malicious programs. This can take a few minutes, so feel free to do something else — just check back occasionally to see the progress.

-
Quarantine the Detected Threats
When the scan is done, you’ll see a list of everything Malwarebytes found. Click the “Quarantine” button to remove all the threats at once.

-
Restart Your Mac
Malwarebytes will now remove all the malicious files it found. Some threats can only be fully removed after a reboot — if Malwarebytes asks you to restart, allow it. Once you’re logged back in, your Mac is clean.

That’s it — your Mac is now free of adware, rogue browser extensions, and other potentially harmful software.
If you are still experiencing problems while trying to remove a malicious program from your computer, please ask for help in our Mac Malware Removal Help & Support forum.
Run a Malware Scan with Malwarebytes for Android
Malwarebytes for Android automatically detects and removes dangerous threats like malware and ransomware so you don’t have to worry about your most-used device being compromised. Aggressive detection of adware and potentially unwanted programs keeps your Android phone or tablet running smooth.
-
Download Malwarebytes for Android.
You can download Malwarebytes for Android by clicking the link below.
Get Malwarebytes for AndroidOpens Google Play in a new tab.Want real-time protection? See Malwarebytes Premium for AndroidMalwarebytes for AndroidScans your phone and removes malware at no cost -
Install Malwarebytes for Android on your phone.
In the Google Play Store, tap “Install” to install Malwarebytes for Android on your device.

When the installation process has finished, tap “Open” to begin using Malwarebytes for Android. You can also open Malwarebytes by tapping on its icon in your phone menu or home screen.

-
Follow the on-screen prompts to complete the setup process
When Malwarebytes will open, you will see the Malwarebytes Setup Wizard which will guide you through a series of permissions and other setup options.
This is the first of two screens that explain the difference between the Premium and Free versions. Swipe this screen to continue.
Tap on “Got it” to proceed to the next step.
Malwarebytes for Android will now ask for a set of permissions that are required to scan your device and protect it from malware. Tap on “Give permission” to continue.
Tap on “Allow” to permit Malwarebytes to access the files on your phone.
-
Update database and run a scan with Malwarebytes for Android
You will now be prompted to update the Malwarebytes database and run a full system scan.

Click on “Update database” to update the Malwarebytes for Android definitions to the latest version, then click on “Run full scan” to perform a system scan.

-
Wait for the Malwarebytes scan to complete.
Malwarebytes will now start scanning your phone for adware and other malicious apps. This process can take a few minutes, so we suggest you do something else and periodically check on the status of the scan to see when it is finished.

-
Click on “Remove Selected”.
When the scan has been completed, you will be presented with a screen showing the malware infections that Malwarebytes for Android has detected. To remove the malicious apps that Malwarebytes has found, tap on the “Remove Selected” button.

-
Restart your phone.
Malwarebytes for Android will now remove all the malicious apps that it has found. To complete the malware removal process, Malwarebytes may ask you to restart your device.
That’s it — your Android phone is now clean — no more malicious apps, adware, or browser redirects.
If you are still having problems with your phone after completing these instructions, then please follow one of the steps:
- Restore your phone to factory settings by going to Settings > General management > Reset > Factory data reset.
- Ask for help in our Mobile Malware Removal Help & Support forum.
Stay Protected: Block Ads and Malicious Sites
Now that your device is clean, keep it that way. Most infections start with a malicious ad or a fake download button — so blocking them at the source is your best defense.
We recommend AdGuard, which blocks malicious ads, phishing pages, and dangerous redirects before they can reach you.
👉 Download AdGuard and browse safely
Remove SAMURAI-SEC Ransomware From the Affected Computer
Use our ransomware-removal procedure below after considering evidence preservation. Scanning and quarantine address infection, not the separate task of reconstructing your documents.
Contain the incident before running cleanup tools
Disconnect the affected computer from Wi-Fi and wired networks. Unplug external storage and leave backup drives disconnected while you assess what happened.
Pause synchronization from a clean device where possible. Otherwise, encrypted versions may replace usable cloud copies while you are trying to rescue them.
At work, contact your IT or incident-response team immediately. A ransomware screen on one computer may be the visible part of a larger intrusion.
Keep the ransom note, filenames, discovery time, and any security alerts. A specialist may need disk or memory evidence before cleanup changes the machine.
If you cannot isolate a computer and encryption is visibly continuing, seek immediate assistance about shutting it down. Powering off can lose volatile evidence.
Do not repeatedly restart, reinstall, or experiment with utilities. Those actions can overwrite recovery evidence without addressing the underlying access problem.
Use trusted scanners on an isolated personal computer
For a home computer, arrange cleanup after preserving the evidence you need. Obtain security tools through their official websites using an unaffected system.
Malwarebytes can scan for malicious programs and related unwanted software. It is an infection-removal tool, not a way to decrypt already encrypted documents.
Install a current copy, update its detection data when safely possible, and run the available comprehensive scan. Review detections before applying the recommended quarantine actions.
Keep the scan report. It can help distinguish the ransomware payload from another infection, a suspicious installer, or a remote-access program.
Windows Security also provides scan options. Microsoft Defender Offline restarts into an offline scanning environment, so save your work before starting it.
Follow Microsoft’s ransomware protection guidance rather than instructions in the criminal’s note. A note telling you to disable protection is not trustworthy advice.
If Windows will not start or the scanners cannot operate, stop improvising. Use reputable technical assistance instead of downloading a supposed one-click emergency decryptor.
Do not upload the executable to unfamiliar recovery websites or run it elsewhere for testing. A second execution can create another incident.
Verify the environment before restoring anything
A completed scan is useful, but it cannot establish that every account, remote session, or networked computer is safe.
Check for unauthorized remote-access software, suspicious accounts, changed security settings, and unknown scheduled tasks. Business environments require coordinated investigation beyond this home-computer checklist.
Change exposed passwords from a clean device. Prioritize email, cloud storage, administrator access, and any account whose credentials were saved on the affected system.
Enable multifactor authentication where supported and revoke suspicious sessions. Simply changing the password may leave an existing signed-in session active.
A trusted reinstall may be appropriate when system integrity remains uncertain. Preserve recoverable data first, and reinstall from authentic installation media.
AdGuard can help reduce exposure to malicious advertising during future browsing. It neither cleans an infected system nor reverses file encryption.
Keep backup media offline until cleanup and access checks are complete. Reconnecting your only good copy too early can turn a recovery opportunity into another loss.
Recover Files Affected by SAMURAI-SEC
Keep the variants’ different suffixes and note names in your identification record. Tool compatibility depends on the actual malware and encryption, not just a familiar family label.
Make a recovery copy, not another damaged original
Keep an untouched copy of the encrypted data whenever practical. Include the ransom note and retain the original directory structure.
Use a separate destination for recovery experiments. Never let a utility overwrite your only encrypted copy or replace an intact backup.
Before sharing samples, consider their sensitivity. Choose an ordinary, nonconfidential file and ask the service about handling rules if business or personal information is involved.
The note’s name, complete filename suffix, and contact details can help identify a variant. An extension alone is not enough to establish decryption compatibility.
For example, two infections can use the same suffix while generating different keys. A familiar family name can also hide a newer, unsupported version.
Record the exact error or result from each attempt. Keep a simple checklist so another helper does not repeat risky tests on the same files.
Check recognized decryption projects
Visit the No More Ransom decryption catalog from a clean browser. Look for the actual variant and read the tool’s requirements carefully.
A tool for a related family does not automatically unlock your files. Some decryptors support only older versions, certain keys, or specific encryption mistakes.
Download through the catalog’s trusted vendor link, not a sponsored search result or an unsolicited message offering guaranteed recovery.
Test only a duplicate sample first. Successful decryption should produce a usable document or image, not merely remove the added extension.
If the utility reports an unsupported file or key, stop. Changing the filename to resemble a supported variant does not change its encrypted contents.
When no compatible tool is available, preserve your encrypted archive. Researchers sometimes release new tools later, but future recovery cannot be promised.
Look for copies that existed before encryption
Check disconnected drives, backup software, cloud version history, another computer, and files previously sent to trusted contacts. You may have more copies than you remember.
Cloud synchronization is not automatically a backup. Confirm that an earlier usable version survives and that the account itself has not been compromised.
Restore into a cleaned environment. Open a selection of documents, photos, and project files before assuming the recovered collection is complete.
Compare important dates and contents. An older spreadsheet might open perfectly while still missing the transactions you needed to recover.
Windows Previous Versions or existing snapshots may offer additional copies. Availability depends on prior configuration and whether those snapshots survived the incident.
Do not create new restore points expecting them to contain yesterday’s files. Recovery depends on copies that already existed before the damage.
Deleted-file recovery utilities are a different category. They may locate unencrypted originals in some circumstances, but they do not mathematically decrypt overwritten data.
If you want a specialist to investigate that possibility, minimize writes to the affected storage. Continued installations can overwrite remnants that might otherwise be recoverable.
Evaluate recovery offers without surrendering control
Be wary of anyone who contacts you first, claims exclusive access to a secret decryptor, or requests an advance payment in cryptocurrency.
Ask a recovery provider what method it intends to use, what evidence supports success, and whether it would negotiate with the attacker.
Get the scope, fee, privacy terms, and limitations in writing. A legitimate assessment should distinguish a possibility from a demonstrated recovery result.
Do not provide remote administrator access to an unknown helper. Recovery desperation can make a second scam feel like the only remaining option.
If you already paid, retain receipts, transaction references, wallet addresses, and correspondence. Contact the payment provider promptly and report the extortion.
Recovery is sometimes partial. Prioritize irreplaceable files, verify them individually, and keep your evidence archive until the investigation and restoration decisions are settled.
Use deleted-file recovery only for the right kind of opportunity
Our EaseUS Data Recovery Wizard link concerns recovery of deleted originals where remnants survive. It is not a SAMURAI-SEC decryptor.
That possibility depends on what happened to the unencrypted file and whether storage overwrote it. It cannot be promised from the extension or note.
Minimize writes if a specialist is assessing remnants. Installing utilities onto the same affected disk can work against the recovery you are hoping to attempt.
Test restored output on a separate destination. Open representative documents and compare their contents, not merely their filenames.
Confirm the backup is useful, not merely present
A backup folder may contain already damaged versions. Check when the copy was created and whether ordinary applications can read the important files.
Start with material essential for immediate operations. Then assess less urgent archives without reconnecting unnecessary resources.
If you find a partial collection, keep it. A small verified set can be more valuable than an apparently complete archive nobody has tested.
Document missing items as well as restored ones. That helps future assistance avoid repeating work or overwriting the surviving evidence.
Frequently Asked Questions
Which extensions are associated with SAMURAI-SEC?
Reported variants use four-character endings or .samurai. Preserve the complete suffix and associated note for identification rather than relying on one example.
Can I fix the files by removing the added extension?
No. Renaming changes the label, not the affected contents. Avoid mass changes that obscure evidence or overwrite your preserved collection.
Does the note prove my information was published?
No. Its copying and publication statements are allegations to investigate. Assess actual evidence while treating potentially sensitive exposure seriously.
Will Malwarebytes recover my encrypted documents?
Malwarebytes is for malicious-software detection and removal. Readable file recovery requires usable copies or a compatible recovery method evaluated separately.
Is a Chaos decryptor guaranteed to work on SAMURAI-SEC?
No. A reported family relationship does not establish compatibility. Consult recognized projects and test only copies using the tool’s specific requirements.
Should I comply with the instruction not to contact security experts?
No. The attacker benefits from isolating you from assistance. Use trusted responders, preserve evidence, and do not let the demand dictate your recovery plan.
The Bottom Line
SAMURAI-SEC needs containment, trusted removal, and a separate file-recovery plan. Do not keep the attack running or trust an unlocker because the note demands it.
Protect your surviving copies and investigate possible data exposure. Work from verified backups and compatible tools, not promises made under an extortion deadline.








