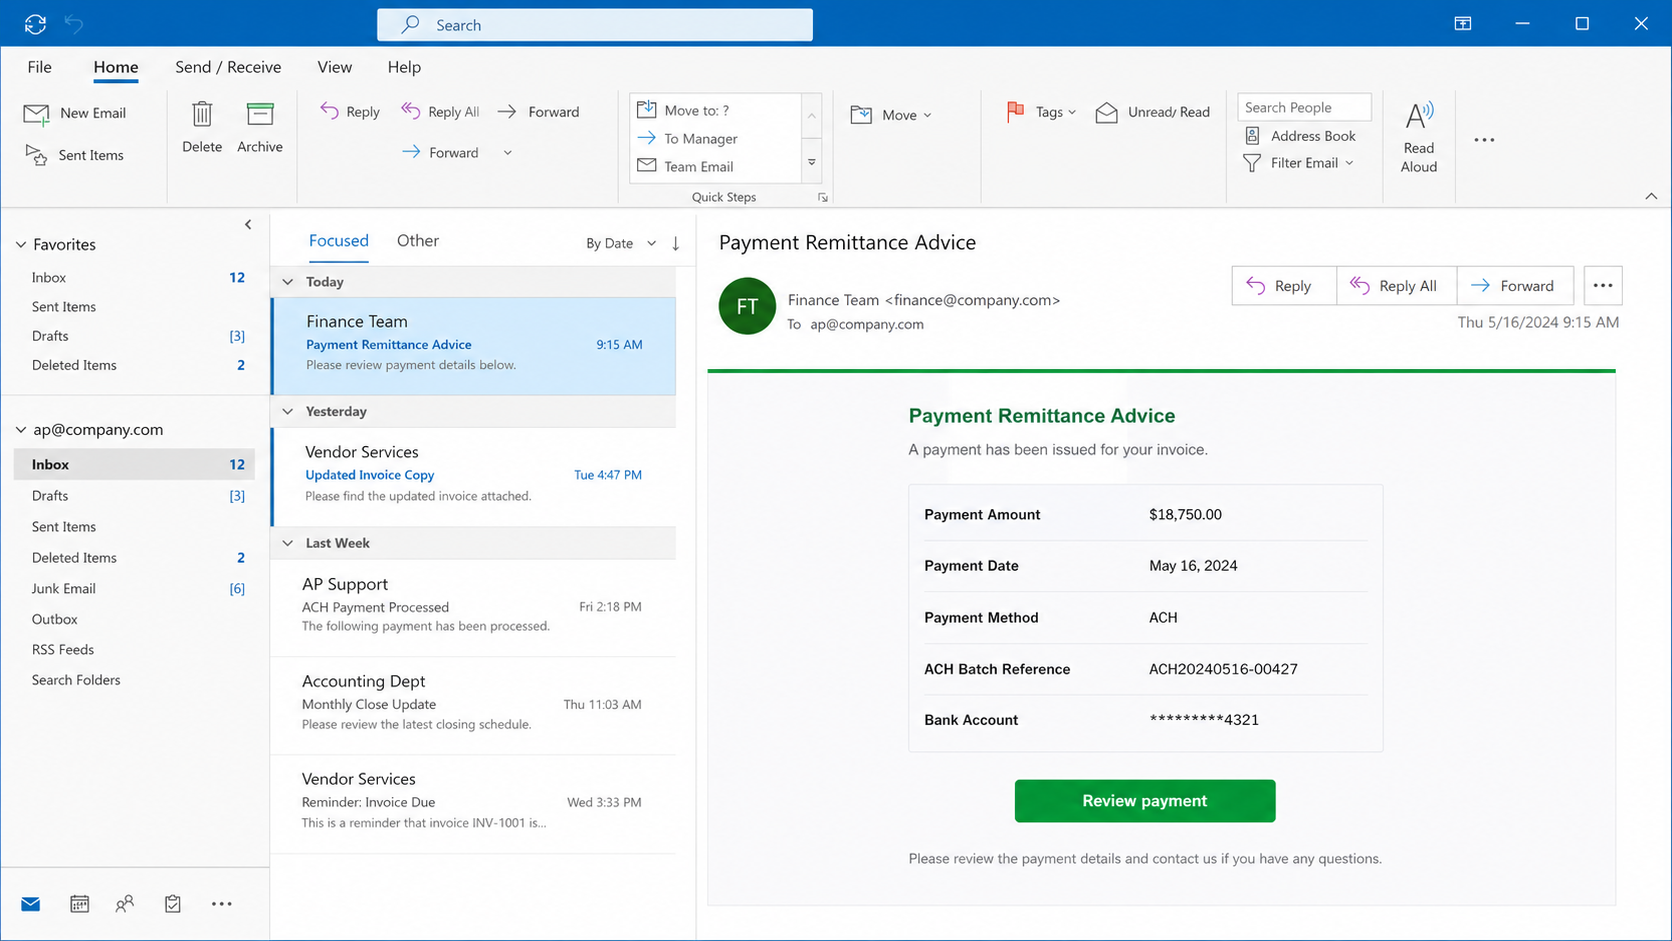
A vendor-payment email can look like something to clear before lunch. A batch number, an ACH label, and a masked account can make the notice feel settled.
This version arrives as a routine remittance task. Its single button asks for a review, which sounds harmless until the route changes completely.
Overview
A completed-looking payment is the lure
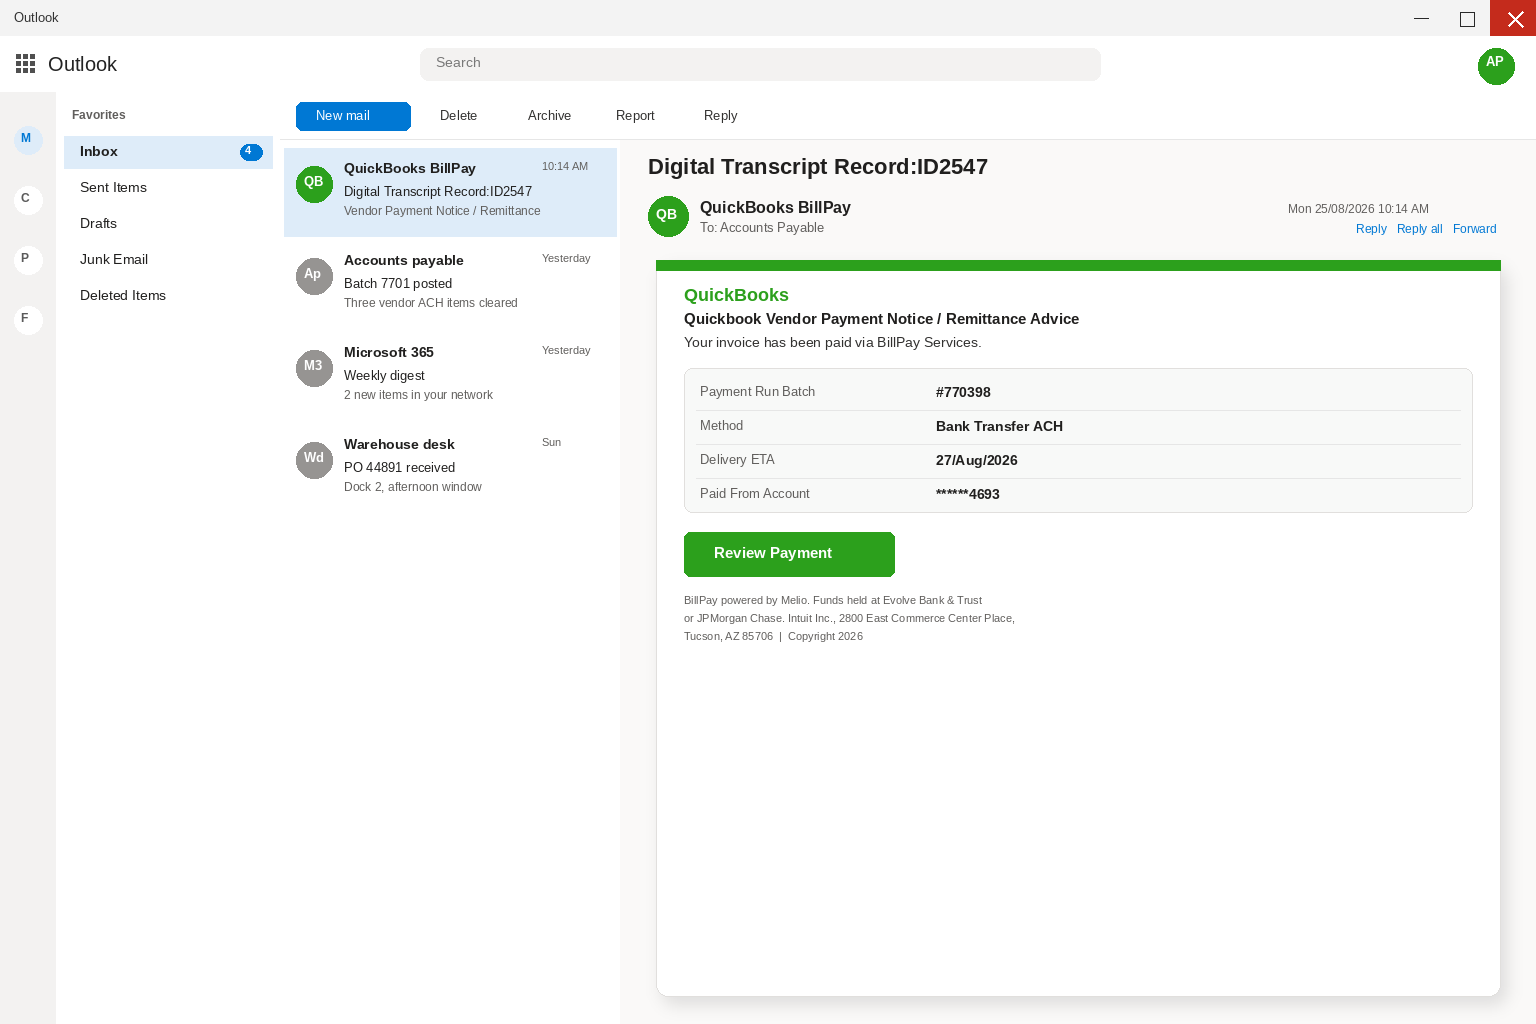
The message uses the language of back-office work. It presents an ACH payment, a payment-run batch, a delivery estimate, and an account number with most digits hidden.
Those details are meant to make the recipient feel late to a process that already happened. The button then feels like a record-check, not a new interaction.
A real finance team can verify an outgoing payment from its normal ledger. It does not need an unfamiliar email to choose the portal where that verification happens.
The masked account is useful decoration because it suggests privacy and specificity. Until it matches the organization’s own records, it should be treated as unverified text.
QuickBooks styling can be borrowed
QuickBooks is a genuine accounting product, so its name carries weight in accounts-payable inboxes. Criminals know that a familiar product name can do much of the persuasion.
A green header, a reference number, and a tiny legal footer are not proof of origin. They are visual details that can be copied into an ordinary email template.
The same is true when a notice mentions Bill Pay, Melio, a bank, or a support address. A string of real names may decorate a page without identifying its operator.
The review link is where the risk changes
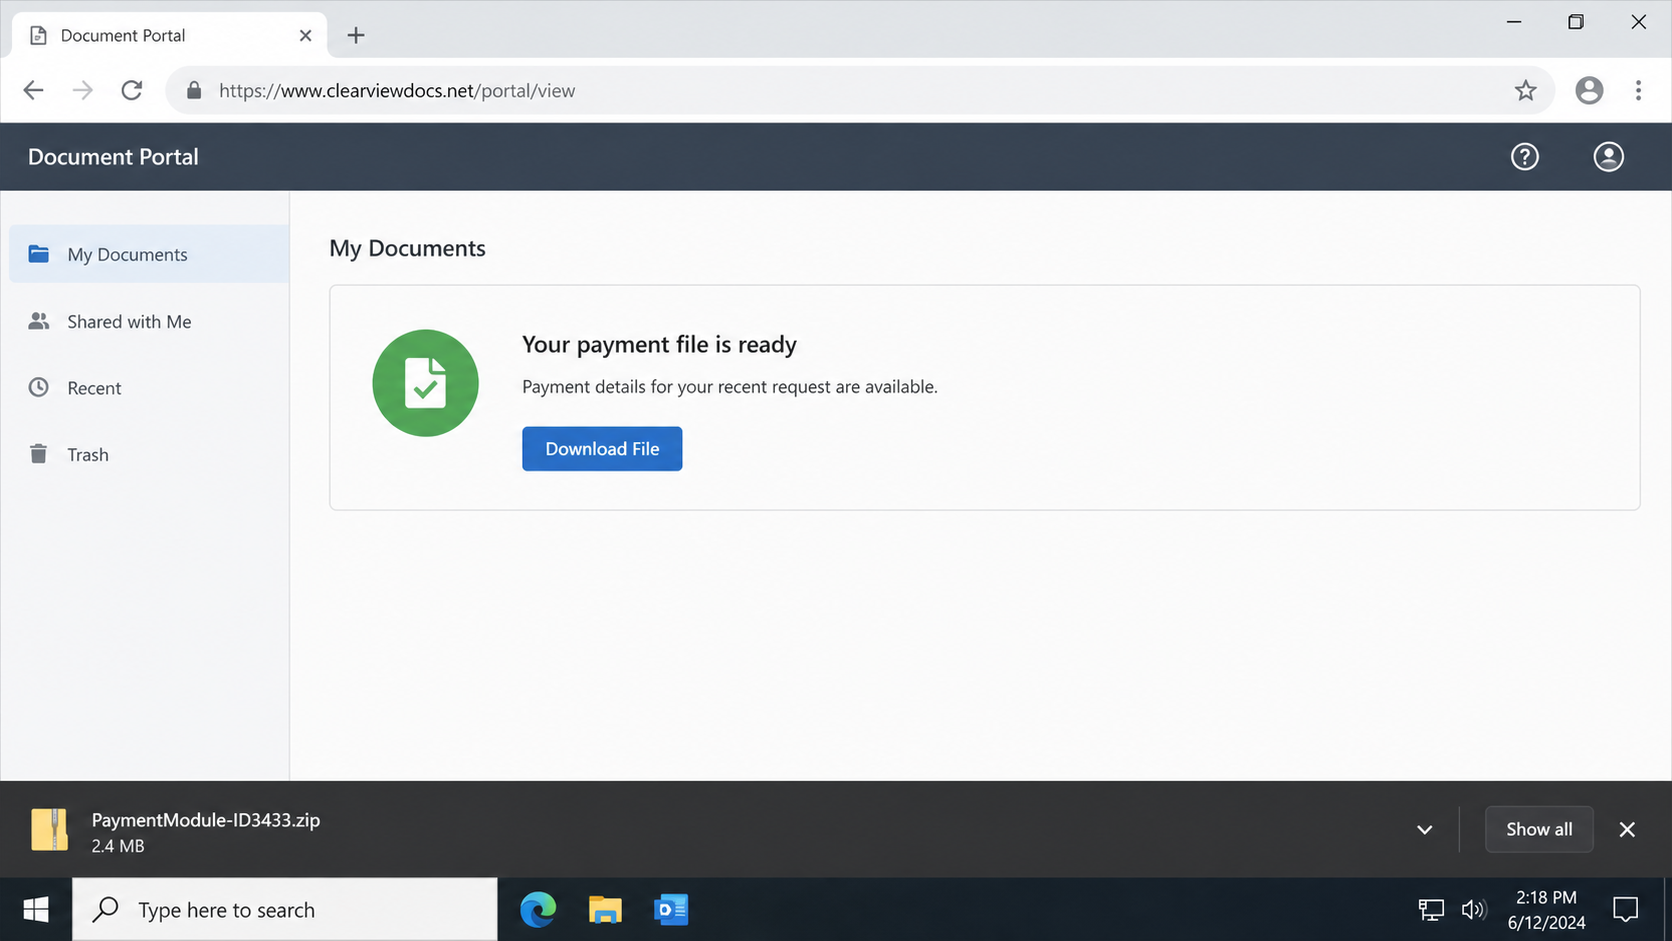
The captured payment notice directed readers away from a familiar accounting workflow. The later page used document-signing language and offered an unexpected downloadable archive.
That sequence matters. A remittance is information, while a ZIP file, installer, browser prompt, or script introduces a device-security problem that payment confirmation never requires.
Do not open an archive merely to discover whether a remittance is genuine. Confirm the payment through the company file, vendor record, or a known finance contact instead.
The email presents an ACH payment with a believable batch reference.
Its branding borrows the look of a familiar accounting product.
The Review Payment button leads outside the normal finance workflow.
An unexpected archive is a security warning, not a payment document.
Why This Payment Notice Feels Convincing
Routine work makes people move quickly
Accounts-payable staff open invoices, remittances, tax forms, and payment notices all day. A criminal does not need a dramatic story when ordinary volume already creates pressure.
The strongest lure often looks dull. It asks the reader to review a posted payment, not to claim a prize or fix an impossible computer emergency.
That low-drama approach is effective because a finance worker may recognize the workflow even when the sender has no connection to the company.
The table supplies false reassurance
A visible batch number can look especially persuasive because legitimate accounting systems generate many numbers. Yet a reference number has no value until it matches the books.
Masked card or account digits create another illusion of privacy. They can be invented, copied from unrelated material, or selected simply because partial digits look authentic.
A date and estimated delivery time make the email feel current. Neither detail proves that money moved, that a vendor was paid, or that QuickBooks sent anything.
Impersonated brands exploit existing trust
QuickBooks, banks, and document-signing services are useful names because recipients already expect them to handle sensitive records. Familiarity can replace careful verification when someone is busy.
A finance employee should separate the brand mentioned in a message from the domain delivering it. Those are different facts, and the latter deserves closer attention.
A copied logo is not a security control. A button does not become legitimate because it sits beneath a logo that resembles software the reader uses.
How The Scam Works
Step 1: A payment notice reaches a business inbox
The subject line and display name suggest a vendor payment or digital transcript. The body is brief, so the recipient can absorb the supposed problem in a few seconds.
The notice may refer to ACH processing, a payment run, or a remittance advice. Those terms belong to real business operations, which makes their misuse frustratingly effective.
At this stage, the attacker needs only one thing: attention from someone who has authority to inspect vendor payments or can forward the email to that person.
Step 2: Borrowed finance language lowers suspicion
The table looks settled rather than urgent. It may list a batch, a payee, a payment channel, a date, and a partially hidden account reference.
That presentation prompts a useful instinct, checking the record. The problem is that the email tries to dictate the method of checking it.
Legitimate verification happens inside the accounting system or through an existing vendor contact. It does not begin by following a surprise link inside an unsolicited notice.
Step 3: Review Payment moves the reader off the ledger
The button wording is deliberately modest. Review Payment sounds like a passive action, although it transfers control from the company’s normal books to an outside website.
Hovering may reveal an unrelated destination, but a recipient should not treat hovering as the only defense. The safer response is to open the known accounting system directly.
If no matching payment appears there, the email has already failed the most important test. The link does not need a second chance to explain itself.
Step 4: A document portal story replaces the remittance
Some versions redirect to a page styled like a signing service. It can claim that a package is being prepared or that a signature is needed before details appear.
The switch is significant because the reader requested payment information, not a new document package. Changing the story midstream is a classic sign of a deceptive funnel.
Document-signing brands are often copied because office workers see them frequently. The familiar design can make an unusual download request seem like one extra administrative step.
Step 5: An unexpected archive appears
The reviewed route offered a file named PaymentModule-ID3433.zip. A ZIP archive may be saved automatically by a browser, even though the recipient only intended to examine a payment.
Downloading an archive is not the same as running it, but it is still a clear stop sign. Do not extract the file or preview its contents.
Do not send the archive around casually, either. A colleague should not have to take the same risk to answer a payment question.
Archive names can be made to sound technical and routine. That wording should not override the basic mismatch between a remittance review and software-like files.
Step 6: A run prompt tries to convert doubt into execution
The next instruction may tell the reader to open a file, enable something, or run an installer so a signature or report can load. That is the dangerous escalation.
Business payment notices do not require a recipient to execute software. A legitimate finance record can be viewed in a browser, a trusted application, or a verified vendor portal.
If the archive includes scripts, executables, or an unexpected setup file, treat it as potentially harmful. Let an IT or security team handle preservation and analysis.
Step 7: The incident can turn into a second scam
After a recipient clicks or downloads something, follow-up callers may claim they can remove malware, cancel the payment, or repair an accounting account for a fee.
They may request remote access, another download, a one-time code, or payment through an unusual method. Their knowledge of the original email is not proof they are legitimate.
Use internal incident channels, a known bank number, or official product support. Do not let a new caller take ownership of a problem created by the first message.
Company, Address, and Fulfillment Checks
The brand is not the sender
QuickBooks branding identifies a product, not the person operating a mailbox or link. Compare the sender domain with the company’s genuine communications before trusting a payment request.
A copied trademark, bank name, or copyright line cannot establish who controls the destination. The domain, account record, and known vendor relationship carry more weight.
The payment details must exist in the books
Search the actual accounting file for the batch, vendor, amount, and payment date. If the record is absent, treat the email as unverified regardless of its formatting.
Ask the approved vendor contact to confirm through a saved phone number or an established thread. Never use contact details provided by the suspicious notice.
Support must come through the real workflow
A generic support address or unexpected callback number can route victims to the same operation. Use the finance directory, vendor master file, or official product support page instead.
A real support team can identify the account through its existing records. It will not need a forwarded archive or a surprise remote-access session to verify a remittance.
Payment records should remain traceable
Valid payment evidence includes a ledger entry, vendor confirmation, bank trace, and auditable approval path. A web page that ends with a download offers none of those safeguards.
When a message asks for software execution, the issue is no longer only accounting. It becomes a possible malware incident requiring containment and professional review.
What to Do if You Have Fallen Victim to This Scam
Preserve the facts, then stop interacting. Record the sender, subject, approximate time, destination URL, and the archive name if it appeared. Close the webpage and leave the file unopened. Do not test the ZIP, reply to the sender, or forward the live link to a coworker. A screenshot of the email is safer than another click.
If any file ran, isolate the computer immediately. Disconnect Wi-Fi and unplug Ethernet. On a managed workplace device, contact IT or the incident-response team before shutting it down, because they may need to preserve evidence. On a home computer, keep it away from banking, email, shared folders, and company systems until it has been assessed.
Tell the right people quickly. Notify the finance lead, IT, and the real vendor if their name was used. Give them the email and file name without sending active links or opening the archive again. Prompt reporting can prevent another staff member from following the same button while the campaign remains active.
Verify the payment from a clean, known route. Use a different trusted device if the first computer ran anything. Open QuickBooks or the accounting tool the normal way, then search the purported batch and vendor. Call the vendor only through a number already stored in the vendor record or printed on a prior verified invoice.
Secure accounts that were used on the affected device. From a clean device, change the work-email password and any banking, vendor, or accounting passwords saved in the same browser. Review forwarding rules, mailbox delegates, recent sign-ins, connected applications, and sent mail. Enable multi-factor authentication where it is not already required.
Run reputable protection, then seek expert help when needed. Use Malwarebytes to perform a full scan for unwanted files and known malicious behavior. AdGuard can help block many deceptive ads and dangerous destinations during everyday browsing, although it cannot make an archive safe. A scan result should guide next steps, but a executed file on a business system still merits IT review.
Report the campaign and watch financial records. Report the email through the mail provider and file a report with the FTC at ReportFraud.gov if you are in the United States. Watch vendor records, bank activity, and mailbox alerts for changes you did not authorize. Be wary of anyone who contacts you later claiming they can recover money or clean the computer for a fee.
Is Your Device Infected? Run a Free Malware Scan
Slow performance, constant pop-ups, or strange behavior? These are classic signs of a malware infection. The fastest way to find out is to scan your device with Malwarebytes Anti-Malware Free — one of the most trusted malware removal tools available.
The free version detects and removes the most common threats, including:
Adware — the cause of those annoying pop-ups
Browser hijackers — unwanted redirects and changed homepages
Trojans and spyware — hidden programs stealing your data
Potentially unwanted programs (PUPs) — software you never asked for
👉 Select your device below — Windows, Mac, or Android — then follow the simple steps to download Malwarebytes, scan your system, and remove any threats it finds. The whole process takes about 5 minutes.
Malwarebytes for WindowsMalwarebytes for MacMalwarebytes for Android
Run a Malware Scan with Malwarebytes for Windows
Malwarebytes is one of the most popular and trusted anti-malware tools for Windows — and it’s completely free for removing infections. It catches threats that many antivirus programs miss, including adware, browser hijackers, and trojans. Follow the steps below to scan and clean your PC in just a few minutes.
Download Malwarebytes
Click the button below to download the latest version of Malwarebytes for Windows from the official source. The free version is all you need — it will scan your computer and remove adware, browser hijackers, and other malicious software at no cost.
(The link opens in a new page where your download will start)
Install Malwarebytes
When the download finishes, open your Downloads folder and double-click the MBSetup file. If Windows shows a User Account Control pop-up, click “Yes” to allow the installation.
Follow the On-Screen Prompts to Install Malwarebytes
The setup wizard will walk you through a few quick screens:
Choose where you’re installing the program — “Personal Computer” or “Work Computer” — then click Next.
Malwarebytes will now install on your device. This usually takes under a minute.
When installation is complete, the “Welcome to Malwarebytes” screen will open automatically.
On the final screen, click Open Malwarebytes to launch the program.
Enable “Scan for Rootkits”
Before scanning, turn on rootkit detection so Malwarebytes can find even the most hidden threats. Click the Settings gear icon on the left side of the screen.
In the settings menu, find “Scan for rootkits” and click the toggle so it turns blue.
Done? Click “Dashboard” in the left pane to return to the main screen.
Start the Scan
Click the blue Scan button. Malwarebytes will automatically update its virus database and start checking your computer for malware.
Wait for the Scan to Finish
The scan checks your entire system for browser hijackers and other malicious programs, so it can take several minutes. Feel free to do something else — just check back occasionally to see the progress.
Quarantine the Detected Threats
When the scan is done, you’ll see a list of everything Malwarebytes found — malware, adware, and potentially unwanted programs. Click the “Quarantine” button to remove all of them at once.
Malwarebytes will now remove the malicious files and registry entries and move them safely into quarantine.
Restart Your Computer
Some threats can only be fully removed after a reboot. If Malwarebytes asks you to restart, click Yes. Once you’re logged back in, your PC is clean and you can continue with the next steps in this guide.
When the scan finishes, click Quarantine to remove everything Malwarebytes found. That’s it — your Windows PC is now clean of trojans, adware, and other malware, and should be back to running smoothly.
If your current antivirus allowed this malicious program on your computer, you may want to consider purchasing Malwarebytes Premium to protect against these types of threats in the future. If you are still having problems with your computer after completing these instructions, then please follow one of the steps:
Malwarebytes for Mac is a free on-demand scanner that removes the malware other security software tends to miss — adware, browser hijackers, and unwanted programs included. Cleaning an infected Mac with Malwarebytes has always been completely free, and it’s our go-to recommendation. Follow the steps below to scan and clean your Mac in just a few minutes.
Download Malwarebytes for Mac
Click the button below to download the latest version of Malwarebytes for Mac.
When the download finishes, open your Downloads folder and double-click the setup file to begin the installation.
Follow the On-Screen Prompts to Install Malwarebytes
The Malwarebytes for Mac Installer will guide you through a few quick screens. Click “Continue” and keep following the prompts until the installation completes.
When the installation is complete, Malwarebytes opens to the Welcome to Malwarebytes screen. Click “Get started“.
Select “Personal Computer” or “Work Computer”
Malwarebytes will ask what type of computer you’re installing it on. Click either Personal Computer or Work Computer, whichever applies.
Start the Scan
Click the “Scan” button. Malwarebytes will automatically update its detection database and begin checking your Mac for malware.
Wait for the Scan to Finish
Malwarebytes will scan your Mac for adware, browser hijackers, and other malicious programs. This can take a few minutes, so feel free to do something else — just check back occasionally to see the progress.
Quarantine the Detected Threats
When the scan is done, you’ll see a list of everything Malwarebytes found. Click the “Quarantine” button to remove all the threats at once.
Restart Your Mac
Malwarebytes will now remove all the malicious files it found. Some threats can only be fully removed after a reboot — if Malwarebytes asks you to restart, allow it. Once you’re logged back in, your Mac is clean.
Once the scan is done, remove every threat it detected. Your Mac is now free of adware, rogue browser extensions, and other potentially harmful software.
If your current antivirus allowed a malicious program on your computer, you might want to consider purchasing the full-featured version of Malwarebytes Anti-Malware to protect against these types of threats in the future. If you are still experiencing problems while trying to remove a malicious program from your computer, please ask for help in our Mac Malware Removal Help & Support forum.
Run a Malware Scan with Malwarebytes for Android
Malwarebytes for Android automatically detects and removes dangerous threats like malware and ransomware so you don’t have to worry about your most-used device being compromised. Aggressive detection of adware and potentially unwanted programs keeps your Android phone or tablet running smooth.
Download Malwarebytes for Android.
You can download Malwarebytes for Android by clicking the link below.
In the Google Play Store, tap “Install” to install Malwarebytes for Android on your device.
When the installation process has finished, tap “Open” to begin using Malwarebytes for Android. You can also open Malwarebytes by tapping on its icon in your phone menu or home screen.
Follow the on-screen prompts to complete the setup process
When Malwarebytes will open, you will see the Malwarebytes Setup Wizard which will guide you through a series of permissions and other setup options. This is the first of two screens that explain the difference between the Premium and Free versions. Swipe this screen to continue. Tap on “Got it” to proceed to the next step. Malwarebytes for Android will now ask for a set of permissions that are required to scan your device and protect it from malware. Tap on “Give permission” to continue. Tap on “Allow” to permit Malwarebytes to access the files on your phone.
Update database and run a scan with Malwarebytes for Android
You will now be prompted to update the Malwarebytes database and run a full system scan.
Click on “Update database” to update the Malwarebytes for Android definitions to the latest version, then click on “Run full scan” to perform a system scan.
Wait for the Malwarebytes scan to complete.
Malwarebytes will now start scanning your phone for adware and other malicious apps. This process can take a few minutes, so we suggest you do something else and periodically check on the status of the scan to see when it is finished.
Click on “Remove Selected”.
When the scan has been completed, you will be presented with a screen showing the malware infections that Malwarebytes for Android has detected. To remove the malicious apps that Malwarebytes has found, tap on the “Remove Selected” button.
Restart your phone.
Malwarebytes for Android will now remove all the malicious apps that it has found. To complete the malware removal process, Malwarebytes may ask you to restart your device.
After the scan, tap Remove Selected to delete all detected threats. Your Android phone is now clean — no more malicious apps, adware, or browser redirects.
If your current antivirus allowed a malicious app on your phone, you may want to consider purchasing the full-featured version of Malwarebytes to protect against these types of threats in the future. If you are still having problems with your phone after completing these instructions, then please follow one of the steps:
Restore your phone to factory settings by going to Settings > General management > Reset > Factory data reset.
Now that your device is clean, keep it that way. Most infections start with a malicious ad or a fake download button — so blocking them at the source is your best defense.
We recommend AdGuard, which blocks malicious ads, phishing pages, and dangerous redirects before they can reach you.
Do legitimate QuickBooks notices ever mention vendor payments?
They can, but an unexpected notice should be checked inside the organization’s real accounting workflow. The brand name alone cannot prove the email or link is genuine.
Why is the ZIP archive such an important warning sign?
A remittance is a record, not software. An archive can hide scripts, installers, or other files that do not belong in a basic payment review.
What if the batch number looks convincing?
Search for it in the real books. A believable number can be invented, copied, or unrelated, while a genuine payment leaves a trace in normal internal records.
Could the email itself infect a computer?
Simply reading an ordinary message is usually not enough. The larger danger begins when links are followed, downloads are opened, credentials are entered, or software is run.
Should a finance worker contact the sender for clarification?
Use an established vendor contact instead. Replying to the suspicious address can confirm that the mailbox is monitored and keep the conversation under attacker control.
What if I clicked but did not open the ZIP?
Close the page, preserve the email, and report it. The immediate risk is lower than after execution, but the message should still be treated as a security event.
The Bottom Line
The QuickBooks Vendor Payment Email Scam disguises an unfamiliar route as a routine remittance review. Its accounting details are designed to make the next click feel ordinary.
Check payment records inside the tools your organization already trusts. A payment notice that ends with an archive or run prompt should be treated as a possible malware trap.
10 Rules to Avoid Online Scams
Here are 10 practical safety rules to help you avoid malware, online shopping scams, crypto scams, and other online fraud. Each tip includes a quick “if you already got hit” action.
Stop and verify before you click, log in, download, or pay.
Most scams win by creating urgency. Verify using a trusted method: type the website address yourself, use the official app, or call a known number (not the one in the message).
If you already clicked: close the page, do not enter passwords, and run a malware scan.
Keep your operating system, browser, and apps updated.
Updates patch security holes used by malware and malicious ads. Turn on automatic updates where possible.
If you saw a scary “update now” pop-up: close it and update only through your device settings or the official app store.
Use layered protection: antivirus plus an ad blocker.
Antivirus helps block malware. An ad blocker reduces scam redirects, phishing pages, and malvertising.
If your browser is acting weird: remove unknown extensions, reset the browser, then run a full scan.
Install apps, software, and extensions only from official sources.
Avoid cracked software, “keygens,” and random downloads. During installs, choose Custom/Advanced and decline bundled offers you do not recognize.
If you already installed something suspicious: uninstall it, restart, and scan again.
Treat links and attachments as untrusted by default.
Phishing often impersonates delivery services, banks, and popular brands. If it is unexpected, do not open attachments or log in through the message.
If you entered credentials: change the password immediately and enable 2FA.
Shop safely: research the store, then pay with protection.
Be cautious with brand-new stores, “closing sale” stories, and prices that make no sense. Prefer credit cards or PayPal for dispute options. Avoid wire transfers, gift cards, and crypto payments.
If you already paid: contact your card issuer or PayPal quickly to dispute the transaction.
Crypto rule: never pay a “fee” to withdraw or recover money.
Common patterns include fake profits, then “tax,” “gas,” or “verification” fees. Another is a “recovery agent” who demands upfront crypto.
If you already sent crypto: stop paying, save evidence (wallet addresses, TXIDs, chats), and report the scam to the platform used.
Secure your accounts with unique passwords and 2FA (start with email).
Use a password manager and unique passwords for every account. Enable 2FA using an authenticator app when possible.
If you suspect an account takeover: change passwords, sign out of all devices, and review recent logins and recovery settings.
Back up important files and keep one backup offline.
Backups protect you from ransomware and device failure. Keep at least one backup on an external drive that is not always connected.
If you suspect infection: do not connect backup drives until the system is clean.
If you think you are a victim: stop losses, document evidence, and escalate fast.
Move quickly. Speed matters for disputes, account recovery, and limiting damage.
Stop payments and contact: do not send more money or respond to the scammer.
Call your bank or card issuer: block transactions, replace the card if needed, and start a dispute or chargeback.
Secure your email first: change the email password, enable 2FA, and remove unfamiliar recovery options.
Secure other accounts: change passwords, enable 2FA, and log out of all sessions.
Scan your device: remove suspicious apps or extensions, then run a full malware scan.
Save evidence: screenshots, emails, order pages, tracking pages, wallet addresses, TXIDs, and chat logs.
Report it: to the payment provider, marketplace, social platform, exchange, or wallet service involved.
These rules are intentionally simple. Most online losses happen when decisions are rushed. Slow down, verify independently, and use payment methods and account controls that give you recourse.
Hello! I'm Lapain Epuran, your go-to source for detailed and honest product reviews. From tech gadgets to miracle cures, I provide insights to help you make informed choices. Join me as we discover what's truly worth your time and money.