Fiasco Ransomware Exposed: .secure Files and Data Theft Threat Explained
Written by: Lapain Epuran
Published on:
A spreadsheet opens as unreadable data, then a customer list shows the same .secure ending. A text note claims the network lost more than files.
Fiasco ransomware adds a second pressure point by threatening exposure. The most important early task is separating confirmed damage from claims that still require investigation.
Overview
Fiasco encrypts files and adds .secure
Fiasco is ransomware identified during analysis of malware samples. It encrypts accessible files and appends .secure after their existing names and extensions.
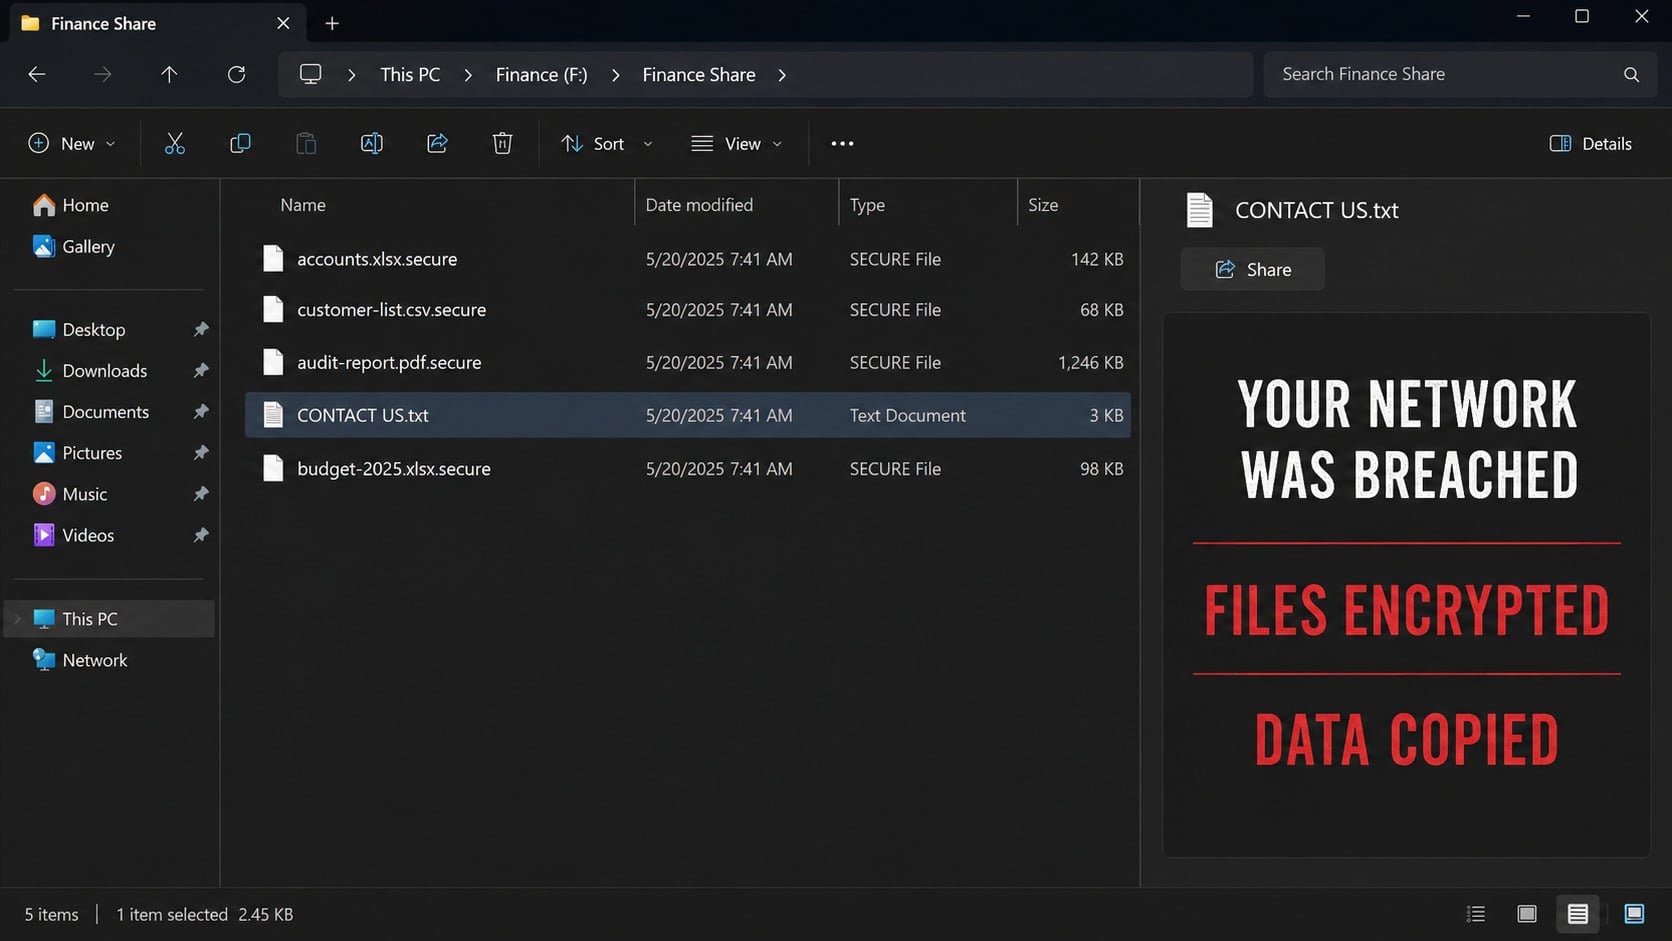
A file called accounts.xlsx becomes accounts.xlsx.secure. The familiar portion remains readable, but the application cannot interpret the altered contents without valid decryption.
The generic extension creates an identification challenge because unrelated malware may also use .secure. The ransom-note name and exact message provide essential supporting evidence.
Removing the added word never reverses encryption. Keep the full names intact and test recovery only on copies stored away from the compromised environment.
CONTACT US.txt claims both encryption and data theft
The examined sample created a note named CONTACT US.txt. It said the network was breached, files were encrypted with AES, and sensitive information was copied.
The message listed personal records, financial materials, customer information, confidential documents, accounting data, and audit reports as alleged theft targets.
Victims were threatened with publication if they refused contact. The note instructed them to use Session messenger and identify the operator with the key g1ds7.
No ransom amount appeared in the initial note. Pricing and payment instructions would presumably arrive after the victim entered the private conversation.
The exposure claim must be investigated, not dismissed or assumed
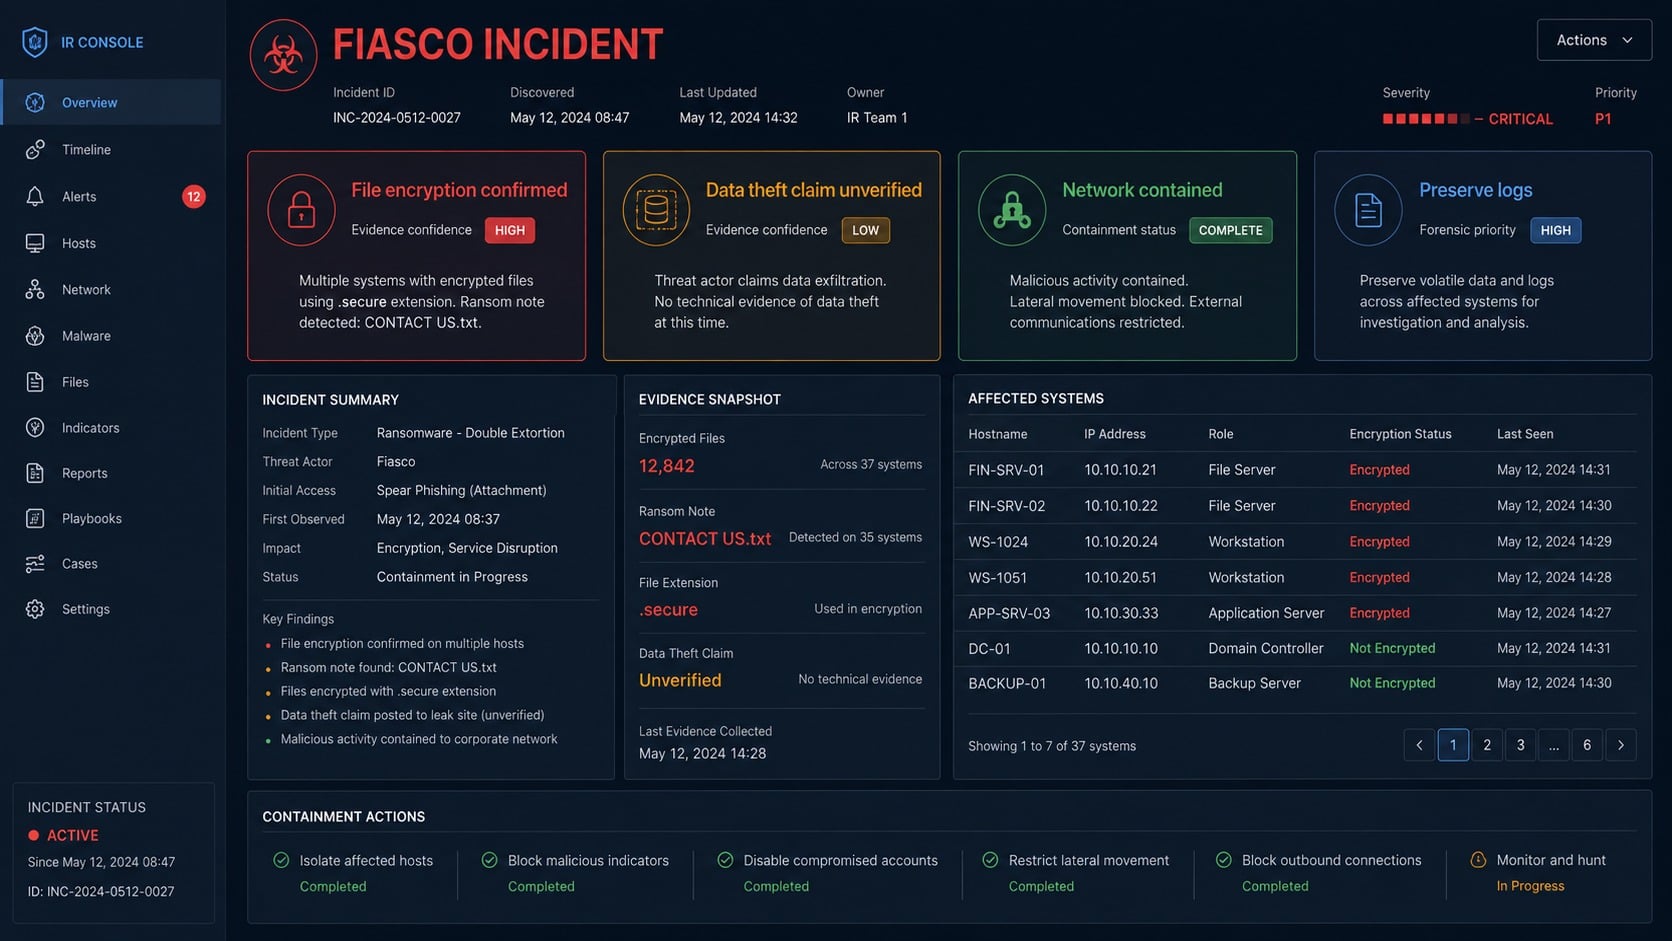
File encryption is directly visible. Data theft is an attacker assertion until logs, network records, forensic artifacts, or published samples support it.
That uncertainty does not make the claim harmless. Organizations should investigate possible exfiltration promptly and evaluate contractual, regulatory, insurance, and notification obligations.
Paying cannot retrieve data already copied. A criminal may keep, sell, leak, or reuse information regardless of any promise made during negotiation.
Incident response must therefore run two tracks: eradicate the intrusion and restore operations, while separately determining whether protected information left the environment.
Encrypted filenames receive the extension .secure.
The ransom note is named CONTACT US.txt.
The note claims AES encryption was used.
The attacker alleges sensitive data was exfiltrated.
Session messenger and the key g1ds7 are specified.
No initial ransom amount is printed.
The note warns against law enforcement, recovery companies, middlemen, and third-party tools. Those warnings attempt to isolate the victim from independent expertise.
A demand for secrecy benefits the operator. Businesses should use out-of-band communication because compromised email or collaboration accounts may still be monitored.
Do not discuss the incident through an affected system. Move coordination to a verified clean channel while technical teams preserve evidence and contain access.
How the Fiasco Ransomware Attack Works
Step 1: An attacker obtains an execution path
Possible entry points include malicious attachments, links, Trojans, pirated software, fake updates, compromised downloads, remote access, stolen credentials, or vulnerable internet-facing services.
The encrypted extension cannot reveal which path was used. Investigators must trace activity backward from the earliest file changes and suspicious account access.
In a business environment, the initial compromise may precede encryption by days. Attackers can explore shares, elevate privileges, and identify valuable systems first.
Preserve firewall, endpoint, identity, email, VPN, cloud, and server logs immediately. Retention windows can erase the earliest evidence while recovery work continues.
Step 2: The intruder maps valuable systems and data
Before causing visible damage, an operator may identify file servers, backup repositories, accounting systems, customer databases, administrative accounts, and remote management tools.
Shared credentials and broad permissions make this stage easier. One compromised administrator can provide access to storage far beyond the original workstation.
Ransomware actors frequently target backups because reliable restoration weakens their leverage. Accessible snapshots, connected disks, and online repositories deserve immediate protection.
Network segmentation and least privilege limit this discovery. Flat networks allow a single foothold to expose unrelated departments, servers, and sensitive records.
Step 3: Information may be staged for exfiltration
Fiasco’s note claims valuable data was copied before encryption. Investigators should search for unusual archives, large outbound transfers, cloud uploads, and uncommon remote tools.
Look for access to customer, finance, human resources, legal, and audit repositories. Compare download volume and account behavior with each user’s normal work.
A missing alert does not disprove theft. Logs may be incomplete, encrypted, deleted, or absent on systems that never monitored outbound traffic closely.
Conversely, the note alone does not prove every listed category was taken. Criminals use broad language to maximize fear even when access was limited.
Step 4: Ransomware spreads to reachable storage
The payload can enumerate local disks, mapped drives, network shares, and synchronized folders available under its current privileges. Writable business data becomes the target.
Processes may be stopped to release open databases or documents for encryption. Security and recovery services can also be targeted to delay detection and restoration.
Administrators may notice unusual logins, remote process creation, disabled tools, or mass file access before .secure names appear. Those early signals deserve immediate escalation.
Disconnect affected segments when coordinated isolation is possible. Continuing normal traffic can allow lateral movement or encryption from one workstation into server-side data.
Step 5: Files are transformed and renamed
Fiasco encrypts content and appends .secure. Documents, financial records, customer lists, archives, photographs, and operational files can become inaccessible almost simultaneously.
The note claims AES encryption, but criminals’ technical statements are not independent evidence. Analysts must examine samples to confirm implementation and potential weaknesses.
Do not run unverified decryptors against production data. An incompatible tool can corrupt structure, overwrite metadata, or destroy a future recovery opportunity.
Preserve representative encrypted files from different systems and types. Matching headers, extensions, timestamps, and note content helps determine whether one incident affected everything.
The message combines operational loss with reputational and regulatory fear. It says files remain locked while allegedly stolen information may be published.
It withholds the price until contact, giving the operator room to estimate what the victim can pay. Organization size and visible data can shape the demand.
The Session key directs communication away from corporate channels. Private messaging also helps the attacker control timing, identity, and the documents exchanged during negotiation.
The warnings against authorities and responders are manipulative. Independent specialists can preserve evidence, evaluate recovery, and challenge unsupported statements in the note.
Step 7: Negotiation can create new risks
Contact confirms that a victim is active and concerned. Messages may reveal financial limits, insurance coverage, operational pressure, or the importance of specific data.
The operator may send sample decryptors or request files. Any executable received from a criminal must be isolated and analyzed before it approaches restored systems.
A payment can violate policies, sanctions, insurance conditions, or legal requirements depending on jurisdiction and recipient. Qualified counsel should review those issues.
Even if files decrypt, exposed data remains outside organizational control. Negotiation cannot substitute for breach assessment, credential resets, and notification decisions.
Step 8: Premature restoration allows recurrence
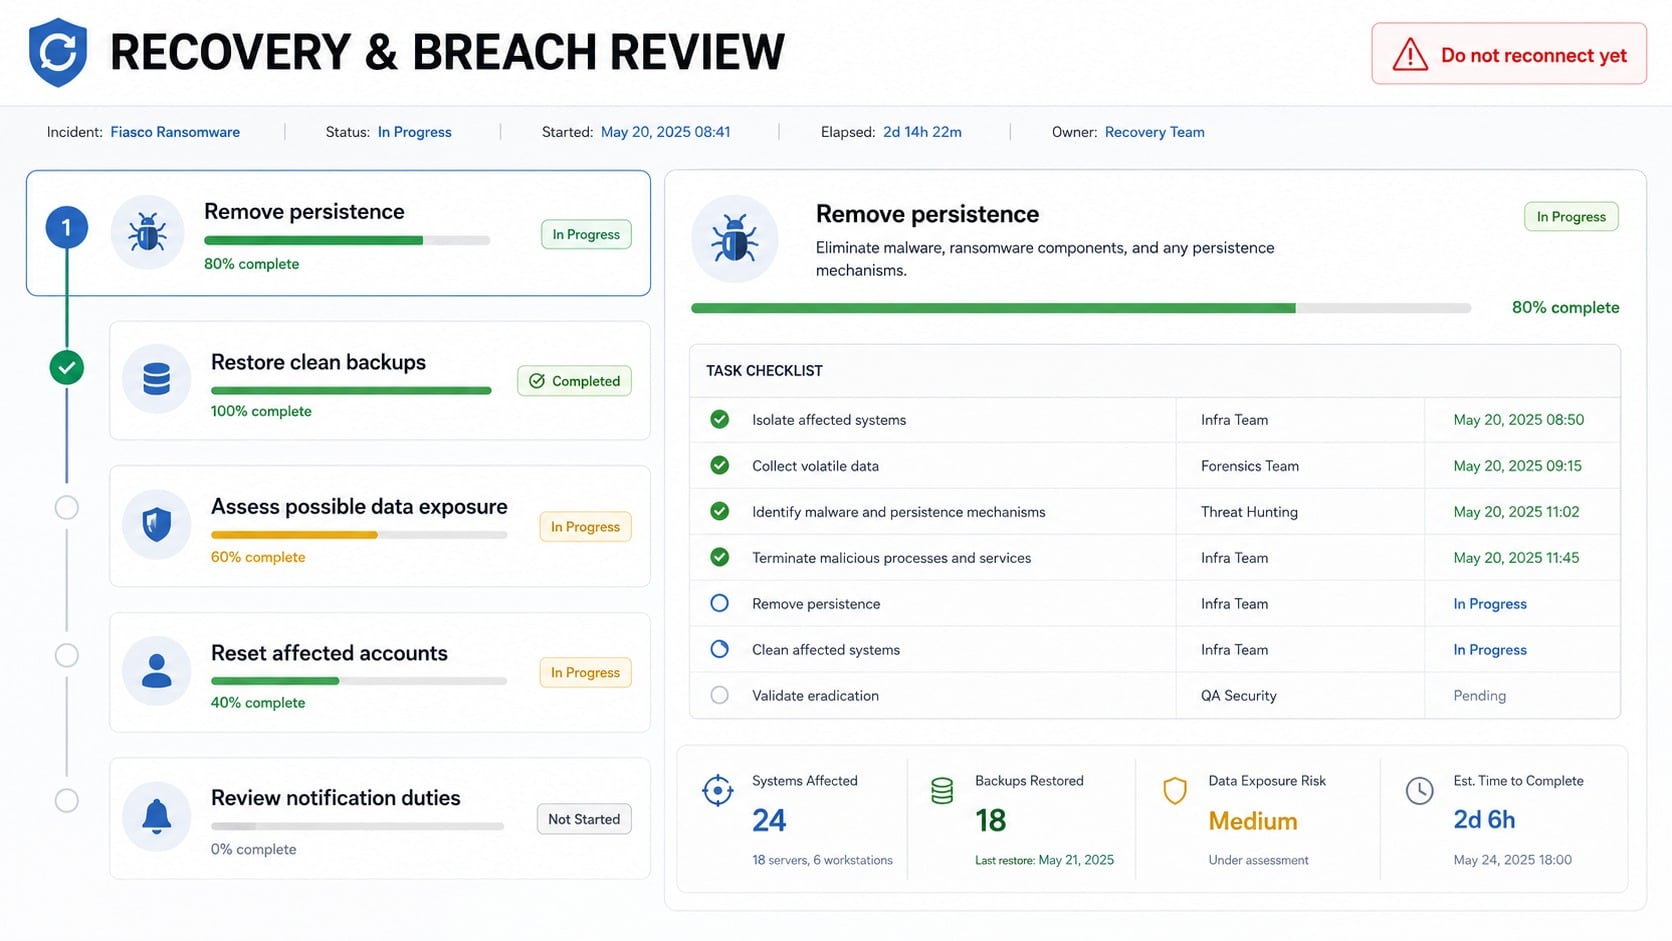
Teams under pressure may reconnect backups as soon as encryption stops. If persistence survives, the restored data can be encrypted or stolen again.
Rebuild critical systems on a clean network, rotate credentials, patch entry points, and validate security controls before restoring normal trust relationships.
Restore services by priority and monitor each stage. A phased approach reveals abnormal behavior without exposing the entire recovered environment at once.
Keep lessons from the incident. Update segmentation, logging, backup isolation, email controls, remote access, and response procedures using evidence from the actual intrusion.
Files, Note, Exfiltration, and Business Impact Checks
Identify Fiasco with multiple artifacts
Record full .secure filenames, CONTACT US.txt, the Session key, creation times, affected paths, and the exact wording of the displayed threat.
Because .secure is generic, do not identify the variant from that ending alone. Combine it with note text, malware detections, hashes, and forensic behavior.
Search every affected host and share. Differences in note content or encryption timing may reveal separate deployments, multiple operators, or an unrelated infection.
Submit only non-confidential samples to recognized identification services. Keep untouched originals offline and document every recovery copy created during testing.
Test the data-theft claim against available evidence
Review proxy, firewall, DNS, endpoint, identity, cloud, and storage logs for unusual outbound volume, archive creation, or access outside normal working patterns.
Determine which accounts opened sensitive repositories and whether those sessions came from expected devices and locations. Examine activity before encryption started.
Look for staging folders, compression tools, command-line archives, temporary cloud clients, and file-transfer utilities. Their presence requires context, not automatic conclusions.
If logs cannot establish the answer, document that limitation. Risk decisions should reflect both observed evidence and uncertainty rather than repeating the criminal’s claim as fact.
Assess people, contracts, and notification duties
Inventory the categories and jurisdictions of potentially accessed data. Customer records, employee information, health data, financial documents, and credentials can trigger different obligations.
Notify legal counsel, privacy staff, insurers, regulators, partners, and law enforcement according to applicable requirements and established response plans.
Communicate carefully with affected people. State what is known, what remains under investigation, what protections are offered, and how legitimate updates will arrive.
Watch for secondary phishing that references the breach. Criminals may use stolen context or public reporting to impersonate support, insurers, banks, or recovery services.
Build a trustworthy restoration path
Confirm backup integrity, access controls, and creation dates. A backup made after initial compromise may contain attacker tools even when it predates file encryption.
Scan affected and restored systems with Malwarebytes plus another reputable security product. Rebuild high-value systems when removal cannot establish reliable integrity.
AdGuard can reduce exposure to malicious advertising and known harmful pages. It does not investigate lateral movement, decrypt .secure files, or assess stolen records.
Reconnect in stages after credentials, remote access, vulnerabilities, and persistence are addressed. Continue monitoring for abnormal authentication, file access, and outbound traffic.
Use a separate clean directory service when rebuilding heavily affected environments. Restoring compromised identity infrastructure can reintroduce attacker-created trust and persistence.
Validate business applications with their owners, not only infrastructure teams. A server can boot successfully while accounting records or customer workflows remain inconsistent.
Preserve copies of public leak claims if they appear. Capture timestamps and filenames without downloading exposed personal information onto an uncontrolled workstation.
Monitor affected people for targeted impersonation. Knowledge of vendors, payroll cycles, or recent audits can make secondary fraud unusually convincing.
Review insurer instructions before retaining negotiators or recovery vendors. Coverage requirements may specify notification timing, approved providers, and evidence preservation obligations.
Close the incident only after technical, legal, privacy, and operational owners document remaining risk. Restored files alone do not resolve a double-extortion event.
What to Do if Fiasco Ransomware Infected Your Network
Coordinate isolation. Disconnect affected systems and segments, protect critical infrastructure, and move incident communication to a known-clean out-of-band channel.
Preserve volatile evidence. Capture memory, system images, security logs, active connections, ransom notes, filenames, and relevant cloud records before destructive cleanup.
Protect backups and identities. Restrict compromised accounts, secure backup administration, preserve immutable copies, and revoke suspicious remote or privileged sessions.
Engage qualified responders. Notify internal security, leadership, legal counsel, insurers, privacy staff, and law enforcement according to the response plan.
Investigate possible exfiltration. Examine file access, staging, archive creation, outbound transfers, cloud events, and gaps that limit certainty about stolen data.
Eradicate the intrusion. Run Malwarebytes and enterprise security tools, remove persistence, patch entry points, and rebuild systems that cannot be trusted. Add AdGuard where browser-delivered threats remain a concern.
Reset affected credentials. Replace administrator, email, VPN, cloud, service, and backup secrets from a clean environment, then review privileged memberships.
Restore by business priority. Use verified clean backups, validate applications and data, and reconnect systems gradually under enhanced monitoring.
Handle notification decisions. Base disclosures on verified evidence, legal duties, affected data, and documented uncertainty rather than the attacker’s broad wording.
Slow performance, constant pop-ups, or strange behavior? These are classic signs of a malware infection. The fastest way to find out is to scan your device with Malwarebytes Anti-Malware Free — one of the most trusted malware removal tools available.
The free version detects and removes the most common threats, including:
Adware — the cause of those annoying pop-ups
Browser hijackers — unwanted redirects and changed homepages
Trojans and spyware — hidden programs stealing your data
Potentially unwanted programs (PUPs) — software you never asked for
👉 Select your device below — Windows, Mac, or Android — then follow the simple steps to download Malwarebytes, scan your system, and remove any threats it finds. The whole process takes about 5 minutes.
Malwarebytes for WindowsMalwarebytes for MacMalwarebytes for Android
Run a Malware Scan with Malwarebytes for Windows
Malwarebytes is one of the most popular and trusted anti-malware tools for Windows — and it’s completely free for removing infections. It catches threats that many antivirus programs miss, including adware, browser hijackers, and trojans. Follow the steps below to scan and clean your PC in just a few minutes.
Download Malwarebytes
Click the button below to download the latest version of Malwarebytes for Windows from the official source. The free version is all you need — it will scan your computer and remove adware, browser hijackers, and other malicious software at no cost.
(The link opens in a new page where your download will start)
Install Malwarebytes
When the download finishes, open your Downloads folder and double-click the MBSetup file. If Windows shows a User Account Control pop-up, click “Yes” to allow the installation.
Follow the On-Screen Prompts to Install Malwarebytes
The setup wizard will walk you through a few quick screens:
Choose where you’re installing the program — “Personal Computer” or “Work Computer” — then click Next.
Malwarebytes will now install on your device. This usually takes under a minute.
When installation is complete, the “Welcome to Malwarebytes” screen will open automatically.
On the final screen, click Open Malwarebytes to launch the program.
Enable “Scan for Rootkits”
Before scanning, turn on rootkit detection so Malwarebytes can find even the most hidden threats. Click the Settings gear icon on the left side of the screen.
In the settings menu, find “Scan for rootkits” and click the toggle so it turns blue.
Done? Click “Dashboard” in the left pane to return to the main screen.
Start the Scan
Click the blue Scan button. Malwarebytes will automatically update its virus database and start checking your computer for malware.
Wait for the Scan to Finish
The scan checks your entire system for browser hijackers and other malicious programs, so it can take several minutes. Feel free to do something else — just check back occasionally to see the progress.
Quarantine the Detected Threats
When the scan is done, you’ll see a list of everything Malwarebytes found — malware, adware, and potentially unwanted programs. Click the “Quarantine” button to remove all of them at once.
Malwarebytes will now remove the malicious files and registry entries and move them safely into quarantine.
Restart Your Computer
Some threats can only be fully removed after a reboot. If Malwarebytes asks you to restart, click Yes. Once you’re logged back in, your PC is clean and you can continue with the next steps in this guide.
When the scan finishes, click Quarantine to remove everything Malwarebytes found. That’s it — your Windows PC is now clean of trojans, adware, and other malware, and should be back to running smoothly.
If your current antivirus allowed this malicious program on your computer, you may want to consider purchasing Malwarebytes Premium to protect against these types of threats in the future. If you are still having problems with your computer after completing these instructions, then please follow one of the steps:
Malwarebytes for Mac is a free on-demand scanner that removes the malware other security software tends to miss — adware, browser hijackers, and unwanted programs included. Cleaning an infected Mac with Malwarebytes has always been completely free, and it’s our go-to recommendation. Follow the steps below to scan and clean your Mac in just a few minutes.
Download Malwarebytes for Mac
Click the button below to download the latest version of Malwarebytes for Mac.
When the download finishes, open your Downloads folder and double-click the setup file to begin the installation.
Follow the On-Screen Prompts to Install Malwarebytes
The Malwarebytes for Mac Installer will guide you through a few quick screens. Click “Continue” and keep following the prompts until the installation completes.
When the installation is complete, Malwarebytes opens to the Welcome to Malwarebytes screen. Click “Get started“.
Select “Personal Computer” or “Work Computer”
Malwarebytes will ask what type of computer you’re installing it on. Click either Personal Computer or Work Computer, whichever applies.
Start the Scan
Click the “Scan” button. Malwarebytes will automatically update its detection database and begin checking your Mac for malware.
Wait for the Scan to Finish
Malwarebytes will scan your Mac for adware, browser hijackers, and other malicious programs. This can take a few minutes, so feel free to do something else — just check back occasionally to see the progress.
Quarantine the Detected Threats
When the scan is done, you’ll see a list of everything Malwarebytes found. Click the “Quarantine” button to remove all the threats at once.
Restart Your Mac
Malwarebytes will now remove all the malicious files it found. Some threats can only be fully removed after a reboot — if Malwarebytes asks you to restart, allow it. Once you’re logged back in, your Mac is clean.
Once the scan is done, remove every threat it detected. Your Mac is now free of adware, rogue browser extensions, and other potentially harmful software.
If your current antivirus allowed a malicious program on your computer, you might want to consider purchasing the full-featured version of Malwarebytes Anti-Malware to protect against these types of threats in the future. If you are still experiencing problems while trying to remove a malicious program from your computer, please ask for help in our Mac Malware Removal Help & Support forum.
Run a Malware Scan with Malwarebytes for Android
Malwarebytes for Android automatically detects and removes dangerous threats like malware and ransomware so you don’t have to worry about your most-used device being compromised. Aggressive detection of adware and potentially unwanted programs keeps your Android phone or tablet running smooth.
Download Malwarebytes for Android.
You can download Malwarebytes for Android by clicking the link below.
In the Google Play Store, tap “Install” to install Malwarebytes for Android on your device.
When the installation process has finished, tap “Open” to begin using Malwarebytes for Android. You can also open Malwarebytes by tapping on its icon in your phone menu or home screen.
Follow the on-screen prompts to complete the setup process
When Malwarebytes will open, you will see the Malwarebytes Setup Wizard which will guide you through a series of permissions and other setup options. This is the first of two screens that explain the difference between the Premium and Free versions. Swipe this screen to continue. Tap on “Got it” to proceed to the next step. Malwarebytes for Android will now ask for a set of permissions that are required to scan your device and protect it from malware. Tap on “Give permission” to continue. Tap on “Allow” to permit Malwarebytes to access the files on your phone.
Update database and run a scan with Malwarebytes for Android
You will now be prompted to update the Malwarebytes database and run a full system scan.
Click on “Update database” to update the Malwarebytes for Android definitions to the latest version, then click on “Run full scan” to perform a system scan.
Wait for the Malwarebytes scan to complete.
Malwarebytes will now start scanning your phone for adware and other malicious apps. This process can take a few minutes, so we suggest you do something else and periodically check on the status of the scan to see when it is finished.
Click on “Remove Selected”.
When the scan has been completed, you will be presented with a screen showing the malware infections that Malwarebytes for Android has detected. To remove the malicious apps that Malwarebytes has found, tap on the “Remove Selected” button.
Restart your phone.
Malwarebytes for Android will now remove all the malicious apps that it has found. To complete the malware removal process, Malwarebytes may ask you to restart your device.
After the scan, tap Remove Selected to delete all detected threats. Your Android phone is now clean — no more malicious apps, adware, or browser redirects.
If your current antivirus allowed a malicious app on your phone, you may want to consider purchasing the full-featured version of Malwarebytes to protect against these types of threats in the future. If you are still having problems with your phone after completing these instructions, then please follow one of the steps:
Restore your phone to factory settings by going to Settings > General management > Reset > Factory data reset.
Now that your device is clean, keep it that way. Most infections start with a malicious ad or a fake download button — so blocking them at the source is your best defense.
We recommend AdGuard, which blocks malicious ads, phishing pages, and dangerous redirects before they can reach you.
No. The extension is generic. Identification should combine CONTACT US.txt, the Session key, exact wording, malware detections, and forensic evidence.
Did Fiasco definitely steal our data?
The note claims exfiltration, but each incident requires evidence. Investigate seriously while distinguishing confirmed encryption from an allegation that remains unverified.
Can paying prevent publication?
No enforceable guarantee exists. Copied information can be retained, resold, or leaked after payment, so breach response remains necessary regardless of negotiation.
Will antivirus decrypt .secure files?
No. Security software can remove malicious components. File recovery depends on verified backups, a compatible decryptor, snapshots, or other clean copies.
Why does the note discourage outside help?
Isolation gives the attacker greater control. Independent responders can preserve evidence, assess unsupported claims, identify recovery options, and protect the victim during decisions.
Should we reconnect once encryption stops?
Not yet. Confirm eradication, rotate credentials, close the entry path, validate backups, and monitor staged restoration before rebuilding normal network trust.
The Bottom Line
Fiasco ransomware appends .secure and uses CONTACT US.txt to combine file loss with an alleged data leak, withholding payment terms until private contact begins.
Treat encryption and possible exposure as related but distinct investigations. Contain first, preserve facts, rebuild trust, restore carefully, and communicate from evidence rather than fear.
10 Rules to Avoid Online Scams
Here are 10 practical safety rules to help you avoid malware, online shopping scams, crypto scams, and other online fraud. Each tip includes a quick “if you already got hit” action.
Stop and verify before you click, log in, download, or pay.
Most scams win by creating urgency. Verify using a trusted method: type the website address yourself, use the official app, or call a known number (not the one in the message).
If you already clicked: close the page, do not enter passwords, and run a malware scan.
Keep your operating system, browser, and apps updated.
Updates patch security holes used by malware and malicious ads. Turn on automatic updates where possible.
If you saw a scary “update now” pop-up: close it and update only through your device settings or the official app store.
Use layered protection: antivirus plus an ad blocker.
Antivirus helps block malware. An ad blocker reduces scam redirects, phishing pages, and malvertising.
If your browser is acting weird: remove unknown extensions, reset the browser, then run a full scan.
Install apps, software, and extensions only from official sources.
Avoid cracked software, “keygens,” and random downloads. During installs, choose Custom/Advanced and decline bundled offers you do not recognize.
If you already installed something suspicious: uninstall it, restart, and scan again.
Treat links and attachments as untrusted by default.
Phishing often impersonates delivery services, banks, and popular brands. If it is unexpected, do not open attachments or log in through the message.
If you entered credentials: change the password immediately and enable 2FA.
Shop safely: research the store, then pay with protection.
Be cautious with brand-new stores, “closing sale” stories, and prices that make no sense. Prefer credit cards or PayPal for dispute options. Avoid wire transfers, gift cards, and crypto payments.
If you already paid: contact your card issuer or PayPal quickly to dispute the transaction.
Crypto rule: never pay a “fee” to withdraw or recover money.
Common patterns include fake profits, then “tax,” “gas,” or “verification” fees. Another is a “recovery agent” who demands upfront crypto.
If you already sent crypto: stop paying, save evidence (wallet addresses, TXIDs, chats), and report the scam to the platform used.
Secure your accounts with unique passwords and 2FA (start with email).
Use a password manager and unique passwords for every account. Enable 2FA using an authenticator app when possible.
If you suspect an account takeover: change passwords, sign out of all devices, and review recent logins and recovery settings.
Back up important files and keep one backup offline.
Backups protect you from ransomware and device failure. Keep at least one backup on an external drive that is not always connected.
If you suspect infection: do not connect backup drives until the system is clean.
If you think you are a victim: stop losses, document evidence, and escalate fast.
Move quickly. Speed matters for disputes, account recovery, and limiting damage.
Stop payments and contact: do not send more money or respond to the scammer.
Call your bank or card issuer: block transactions, replace the card if needed, and start a dispute or chargeback.
Secure your email first: change the email password, enable 2FA, and remove unfamiliar recovery options.
Secure other accounts: change passwords, enable 2FA, and log out of all sessions.
Scan your device: remove suspicious apps or extensions, then run a full malware scan.
Save evidence: screenshots, emails, order pages, tracking pages, wallet addresses, TXIDs, and chat logs.
Report it: to the payment provider, marketplace, social platform, exchange, or wallet service involved.
These rules are intentionally simple. Most online losses happen when decisions are rushed. Slow down, verify independently, and use payment methods and account controls that give you recourse.
Hello! I'm Lapain Epuran, your go-to source for detailed and honest product reviews. From tech gadgets to miracle cures, I provide insights to help you make informed choices. Join me as we discover what's truly worth your time and money.