Regulus Ransomware Virus: Removal, Recovery, and Decryption Guide
Written by: Lapain Epuran
Published on:
A folder that opened normally yesterday may suddenly contain unfamiliar endings and one alarming HTML file. That quiet change can mark a serious security incident.
Regulus leaves several clues, but each clue needs careful interpretation. The first decisions can protect evidence, backups, and systems that remain untouched.
Overview
Regulus Renames Encrypted Files With a Numbered Extension
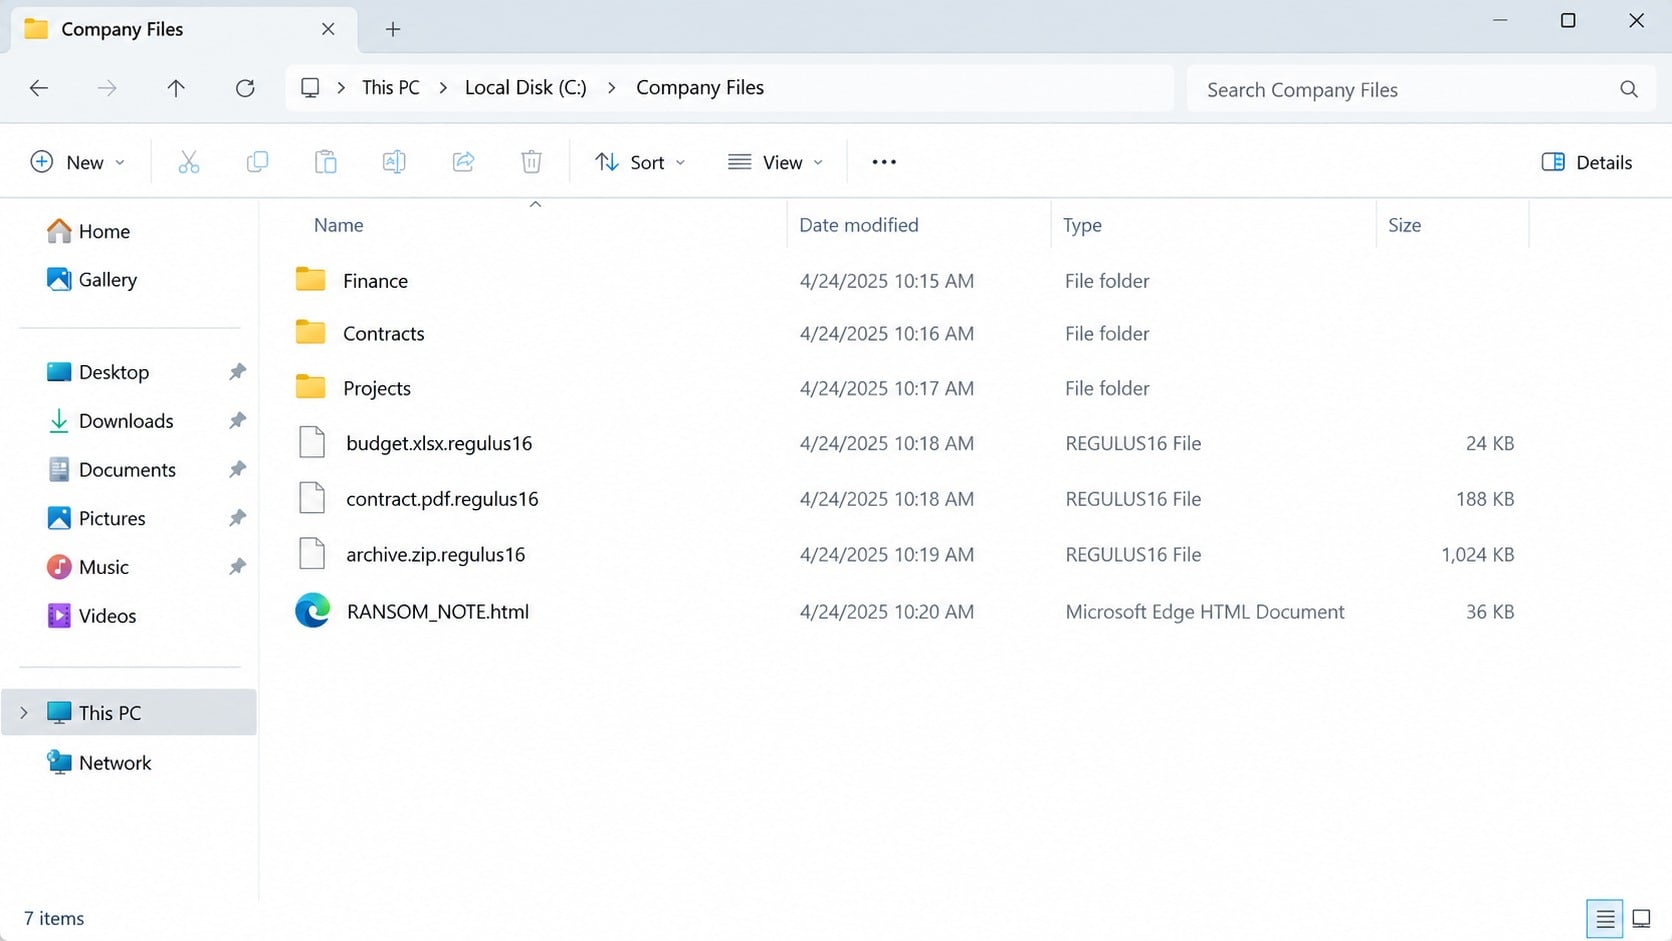
Regulus ransomware encrypts accessible data and appends an extension built around the word “regulus” followed by a number.
One observed variant used .regulus16. Other samples may use endings such as .regulus1 or .regulus2, so the final number is not fixed.
A document can retain its original filename while receiving the new ending. The application then cannot interpret the scrambled contents.
Changing the extension back does not reverse encryption. It only removes a visible clue while leaving the underlying data unreadable.
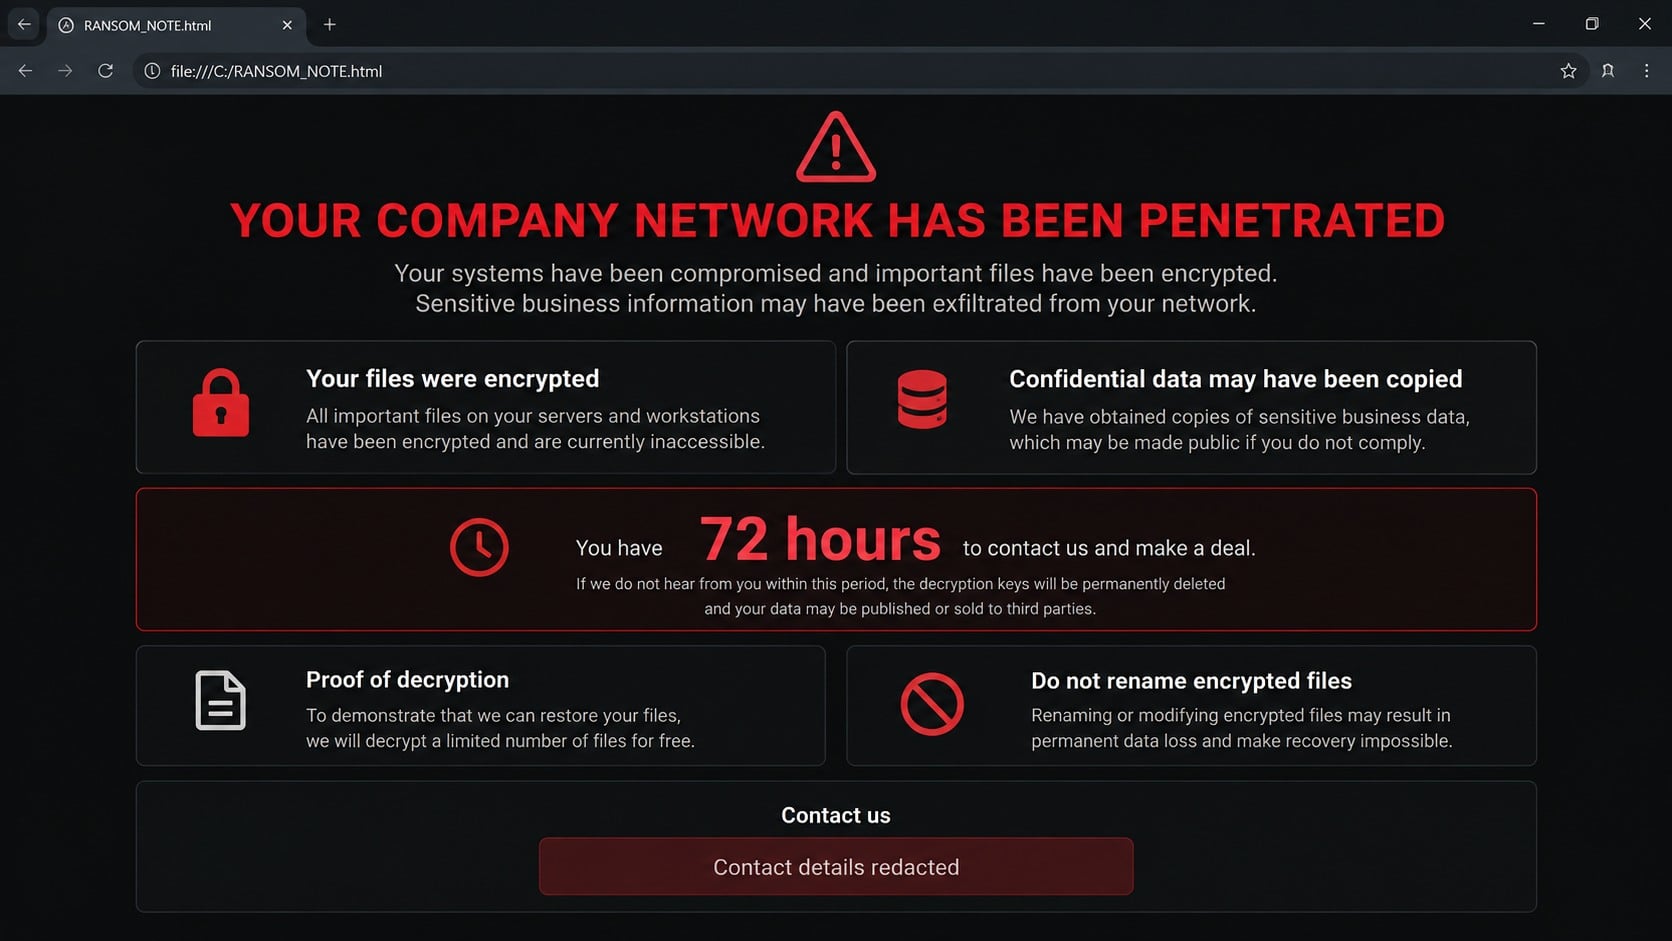
The malware also creates RANSOM_NOTE.html. That page explains the attackers’ demands and tries to move the victim into private negotiations.
The Note Claims Both Encryption and Data Theft
The operators claim they entered the organization, copied confidential information, and encrypted files across the network.
This is a double-extortion threat. Payment pressure comes from disrupted operations and the possibility that stolen information could be published.
The note reportedly threatens a higher price after 72 hours. That clock is designed to reduce careful technical, legal, and financial review.
Attackers may offer to decrypt two or three small files as proof. A successful sample only shows that they possess a working key for those files.
It does not prove they will provide a complete decryptor, delete copied data, or stop contacting the victim after payment.
Containment Comes Before Cleanup or Negotiation
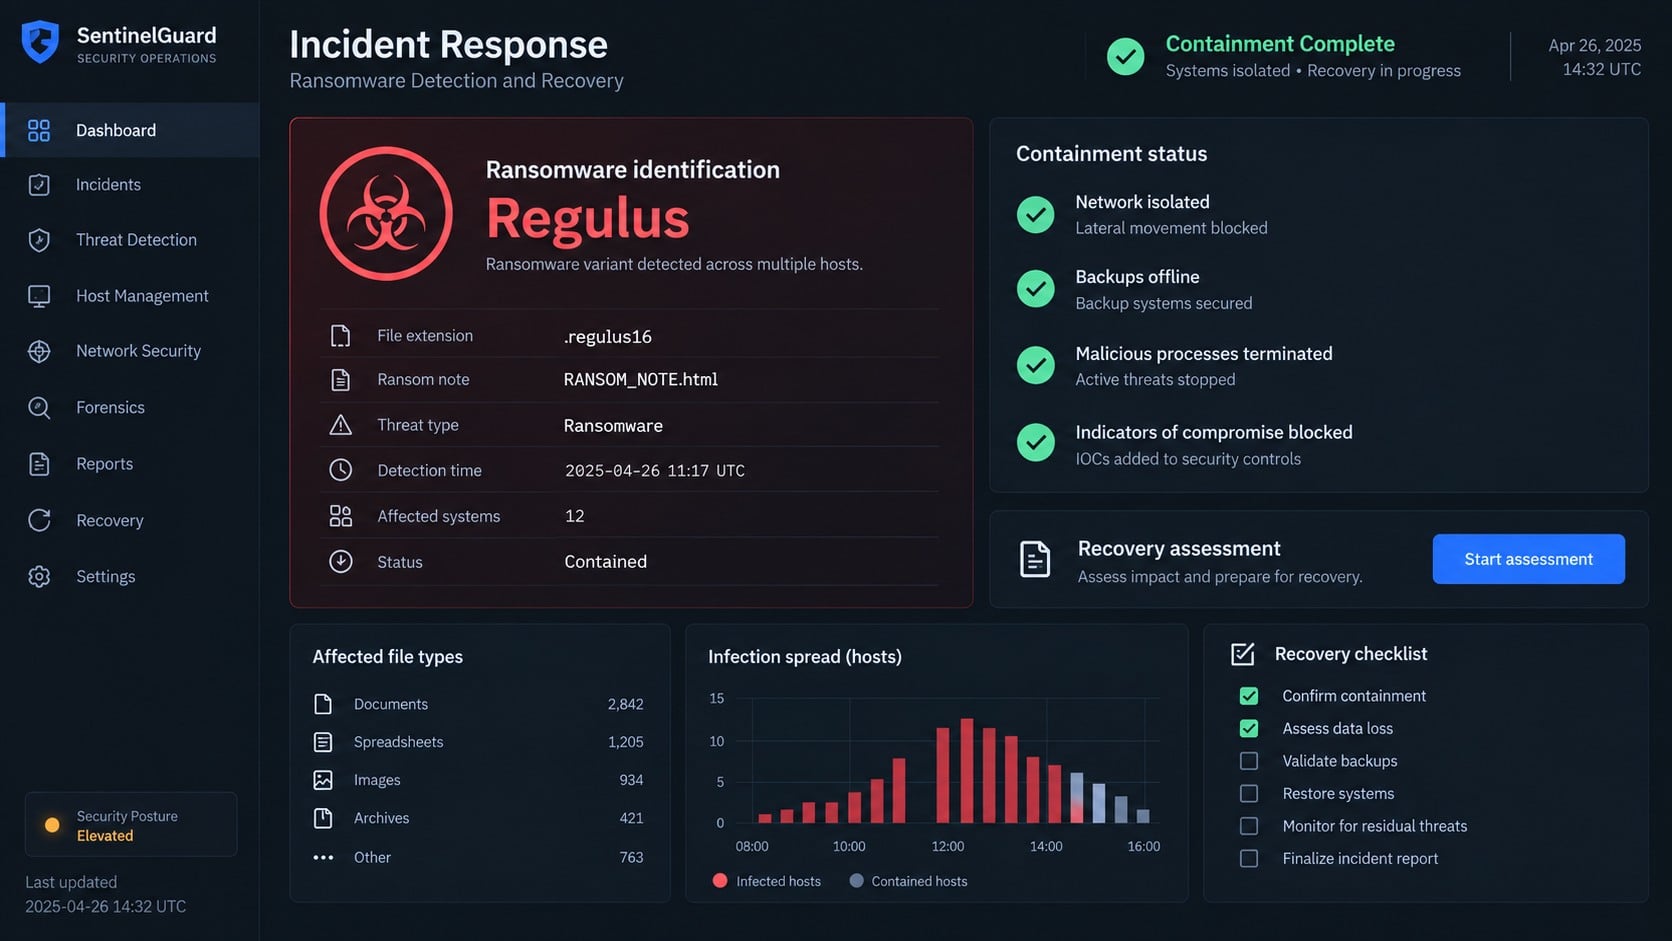
The first objective is stopping further spread while preserving enough evidence to understand the intrusion.
Disconnect affected machines from wired networks, Wi-Fi, shared storage, synchronization services, and attached backup devices.
Do not immediately wipe every computer. Logs, ransom notes, scheduled tasks, and malicious files may reveal entry points and affected accounts.
Encrypted files commonly receive a numbered .regulus extension.
RANSOM_NOTE.html presents the extortion instructions.
The note claims sensitive data was copied before encryption.
A 72-hour deadline pressures the victim to respond quickly.
Free sample decryption may be offered as supposed proof.
Removing the malware does not decrypt existing files.
Clean, offline backups remain the safest recovery foundation.
At the time of this investigation, no publicly confirmed free decryptor was available for the observed Regulus variant.
That status can change. Preserve encrypted copies and identification evidence even when immediate restoration is impossible.
How Regulus Ransomware Works
Step 1: An Intruder Gains an Initial Foothold
Regulus must execute somewhere before it can encrypt data. The exact entry path can differ between incidents.
Common ransomware entry points include stolen remote-access credentials, exposed services, malicious attachments, vulnerable software, and compromised administrator accounts.
The ransom note cannot reveal which route was used. Treat every unverified explanation from the attacker as self-serving.
Investigators should review authentication logs, remote-management activity, email events, endpoint detections, and recent software changes.
A single infected workstation may be the visible symptom of a broader account compromise. The initial access must be closed before restoration begins.
Step 2: The Attacker Explores Accounts and Network Resources
Serious ransomware operations often spend time identifying servers, shares, backups, privileged users, and security controls.
They may attempt to obtain administrator rights because ordinary accounts cannot reach every valuable directory.
Unusual logins, credential-dumping alerts, newly created users, disabled protections, and remote execution can appear during this phase.
Cloud storage and virtual infrastructure also require review. Encryption on one endpoint does not define the full boundary of the incident.
If the operator reached a domain administrator account, changing only one employee password leaves the central problem unresolved.
Step 3: Valuable Information May Be Collected for Extortion
The Regulus note claims confidential data was copied. That statement is a warning, not proof of exactly what left the network.
Investigators need firewall records, proxy logs, cloud audit trails, endpoint telemetry, and storage histories to evaluate possible exfiltration.
Large outbound transfers, archive creation, unfamiliar synchronization tools, or access to sensitive repositories can support the claim.
Absence of one alert does not prove nothing was taken. Logging gaps and deleted evidence can limit certainty.
Organizations should involve privacy counsel and appropriate incident specialists when regulated, customer, employee, health, or financial data may be affected.
Step 4: Regulus Encrypts Reachable Files
Once launched, the ransomware transforms file contents so normal applications can no longer read them.
Local folders, mapped drives, network shares, and connected storage may be exposed depending on permissions and connectivity.
The numbered extension makes affected files easy to spot, but it does not describe the encryption key or identify every compromised system.
Different endpoints may show different extension numbers. Grouping evidence by machine and timestamp helps reconstruct the sequence.
Encryption can continue while a device remains connected. Disconnecting network paths quickly can reduce additional damage.
Step 5: RANSOM_NOTE.html Delivers the Pressure Campaign
The HTML note tells the victim that the company network was breached and files were encrypted.
It also claims sensitive material was downloaded. That wording turns a technical recovery problem into a possible privacy and disclosure crisis.
A deadline threatens a more expensive demand after 72 hours. The attackers want urgency to replace consultation and evidence-based decisions.
The note may invite sample decryption of a few files. Never send documents containing personal, confidential, or legally protected information.
Preserve the original note offline. Do not use attacker contact details from an image, forwarded message, or unverified third party.
Step 6: The Attackers Try to Control the Conversation
Private communication allows the operators to size the victim, adjust the demand, and apply tailored pressure.
They may claim that payment guarantees deletion, silence, or a complete recovery tool. Criminal promises cannot be independently enforced.
A decryptor can also be slow, unstable, or incompatible with damaged files. Restoration testing remains necessary even after a tool appears to work.
Negotiation can create legal, sanctions, insurance, and reporting questions. Leadership should not improvise through a personal email account.
Decisions belong with incident response, legal counsel, insurers, and law enforcement where appropriate.
Step 7: Unclosed Access Can Trigger a Second Incident
Restoring files without removing persistence invites reinfection. The original credential, service, or tool may still provide access.
Attackers can leave remote utilities, scheduled tasks, startup entries, web shells, new users, or stolen session tokens.
Recovered servers should return through a controlled process using clean builds, patched software, rotated credentials, and monitored network segments.
Backups must be scanned before restoration. A backup created after compromise can preserve malicious components alongside business data.
Heightened monitoring should continue after recovery because reused credentials and delayed access attempts can appear later.
How to Identify a Regulus Infection
Check Extensions Without Renaming the Originals
Look for files ending in .regulus followed by a number. Record several complete filenames and their locations.
Do not bulk-rename them. Investigators and future decryptors may rely on the original encrypted names and extension pattern.
Create forensic copies before experimenting. Work only on duplicates when testing recovery methods.
Compare modification times across systems. A tight cluster can indicate when encryption started and which host acted first.
Preserve RANSOM_NOTE.html and Relevant Logs
Save the ransom note as evidence, but avoid opening unknown active content on an unprotected production machine.
Capture its filename, hash, timestamps, text, and storage locations. Redact attacker contacts before sharing screenshots publicly.
Export authentication, endpoint, firewall, VPN, cloud, email, and backup logs before normal retention periods overwrite them.
Document every containment change. Accurate timing helps distinguish attacker activity from the response team’s actions.
Confirm the Scope Instead of Judging One Computer
Search centrally for the extension, note filename, related detections, unusual processes, and newly created accounts.
Inspect servers, workstations, virtual hosts, cloud resources, and network appliances. An apparently clean screen does not prove a clean system.
Review backup consoles for deleted snapshots, changed retention, disabled jobs, and unexpected administrator activity.
Keep affected devices separated until their role is understood. Reconnecting them for convenience can restart access to shared data.
Validate the Identification With Trusted Specialists
Extension names can be copied by unrelated malware. Identification should combine the note, encrypted samples, behavior, and technical indicators.
Provide only non-sensitive samples to a reputable incident-response team or recognized malware identification service.
Ask whether a safe public decryptor exists for the exact variant. A tool for another ransomware family can damage copies or waste critical time.
Never download a supposed decryptor from an advertisement, unsolicited reply, or newly registered recovery website.
Can Regulus-Encrypted Files Be Recovered?
Recovery depends on the variant, available backups, system state, and whether unaffected copies exist elsewhere.
A clean offline backup is usually the most dependable route. It must predate the intrusion and remain isolated from compromised credentials.
Version history may help with selected cloud files, but administrators should first stop synchronization from damaged endpoints.
Shadow copies or local restore points may have been removed. Their presence should be checked, not assumed.
Some applications keep temporary, exported, cached, or emailed copies. Those sources can restore critical documents individually.
Specialists may recover data from unaffected replicas, snapshots, archives, recipients, or business partners.
Never run repair utilities directly against the only encrypted copy. Duplicate the data and preserve hashes before testing.
Keep encrypted files even if restoration is currently impossible. Future analysis or a later decryptor may improve the options.
Removal and decryption are separate tasks. Security software can stop malicious code without knowing the private key used earlier.
Likewise, restoring clean files does not prove the attacker’s access, persistence, or stolen credentials were eliminated.
What to Do If Regulus Encrypted Your Files
Stay methodical. The fastest-looking action can destroy evidence or reconnect the ransomware to valuable storage.
Isolate affected systems immediately.
Disconnect Ethernet, Wi-Fi, VPN access, mapped drives, synchronization clients, and attached storage. Keep the machine powered when specialists request live evidence.
Do not shut down critical infrastructure blindly. Coordinate operational technology, medical, or safety-sensitive systems with qualified responders.
Protect backups and unaffected accounts.
Pause automated replication from compromised systems. Restrict backup administration through a known-clean device and separate credentials.
Verify immutable and offline copies before announcing their availability. Attackers may monitor communications during response.
Preserve evidence before rebuilding.
Copy RANSOM_NOTE.html, sample encrypted files, logs, alerts, memory captures when appropriate, and a written incident timeline.
Record extension numbers by system. Avoid altering original files during experiments.
Engage the proper response team.
Contact internal security, incident-response specialists, legal counsel, cyber insurers, and law enforcement according to organizational policy.
Evaluate notification duties if personal or regulated information may have been exposed.
Rotate credentials from a clean environment.
Prioritize domain administrators, backup accounts, remote access, cloud consoles, email, service accounts, and identity providers.
Revoke active sessions, API keys, application passwords, and tokens. A password reset alone may leave other access alive.
Remove malicious access before restoring.
Use trusted tools and clean installation media. Malwarebytes can help detect malicious components on supported endpoints after evidence preservation.
AdGuard can reduce exposure to malicious advertising and phishing routes, but it cannot decrypt files or replace network containment.
Restore in a controlled order.
Rebuild essential systems, patch the entry point, validate backups, and test restored applications in an isolated segment.
Reconnect only after security review. Monitor authentication, outbound traffic, and endpoint activity throughout recovery.
Treat payment as a high-risk decision.
Payment does not guarantee complete decryption, deletion of stolen data, or freedom from another demand.
Obtain legal, sanctions, insurance, and law-enforcement guidance before any communication or transfer.
Report related fraud and warn stakeholders.
Inform affected customers, employees, partners, or regulators when required and when facts support notification.
Use verified channels. Attackers may impersonate responders or recovery firms after the incident becomes known.
Is Your Device Infected? Run a Free Malware Scan
Slow performance, constant pop-ups, or strange behavior? These are classic signs of a malware infection. The fastest way to find out is to scan your device with Malwarebytes Anti-Malware Free — one of the most trusted malware removal tools available.
The free version detects and removes the most common threats, including:
Adware — the cause of those annoying pop-ups
Browser hijackers — unwanted redirects and changed homepages
Trojans and spyware — hidden programs stealing your data
Potentially unwanted programs (PUPs) — software you never asked for
👉 Select your device below — Windows, Mac, or Android — then follow the simple steps to download Malwarebytes, scan your system, and remove any threats it finds. The whole process takes about 5 minutes.
Malwarebytes for WindowsMalwarebytes for MacMalwarebytes for Android
Run a Malware Scan with Malwarebytes for Windows
Malwarebytes is one of the most popular and trusted anti-malware tools for Windows — and it’s completely free for removing infections. It catches threats that many antivirus programs miss, including adware, browser hijackers, and trojans. Follow the steps below to scan and clean your PC in just a few minutes.
Download Malwarebytes
Click the button below to download the latest version of Malwarebytes for Windows from the official source. The free version is all you need — it will scan your computer and remove adware, browser hijackers, and other malicious software at no cost.
(The link opens in a new page where your download will start)
Install Malwarebytes
When the download finishes, open your Downloads folder and double-click the MBSetup file. If Windows shows a User Account Control pop-up, click “Yes” to allow the installation.
Follow the On-Screen Prompts to Install Malwarebytes
The setup wizard will walk you through a few quick screens:
Choose where you’re installing the program — “Personal Computer” or “Work Computer” — then click Next.
Malwarebytes will now install on your device. This usually takes under a minute.
When installation is complete, the “Welcome to Malwarebytes” screen will open automatically.
On the final screen, click Open Malwarebytes to launch the program.
Enable “Scan for Rootkits”
Before scanning, turn on rootkit detection so Malwarebytes can find even the most hidden threats. Click the Settings gear icon on the left side of the screen.
In the settings menu, find “Scan for rootkits” and click the toggle so it turns blue.
Done? Click “Dashboard” in the left pane to return to the main screen.
Start the Scan
Click the blue Scan button. Malwarebytes will automatically update its virus database and start checking your computer for malware.
Wait for the Scan to Finish
The scan checks your entire system for browser hijackers and other malicious programs, so it can take several minutes. Feel free to do something else — just check back occasionally to see the progress.
Quarantine the Detected Threats
When the scan is done, you’ll see a list of everything Malwarebytes found — malware, adware, and potentially unwanted programs. Click the “Quarantine” button to remove all of them at once.
Malwarebytes will now remove the malicious files and registry entries and move them safely into quarantine.
Restart Your Computer
Some threats can only be fully removed after a reboot. If Malwarebytes asks you to restart, click Yes. Once you’re logged back in, your PC is clean and you can continue with the next steps in this guide.
When the scan finishes, click Quarantine to remove everything Malwarebytes found. That’s it — your Windows PC is now clean of trojans, adware, and other malware, and should be back to running smoothly.
If your current antivirus allowed this malicious program on your computer, you may want to consider purchasing Malwarebytes Premium to protect against these types of threats in the future. If you are still having problems with your computer after completing these instructions, then please follow one of the steps:
Malwarebytes for Mac is a free on-demand scanner that removes the malware other security software tends to miss — adware, browser hijackers, and unwanted programs included. Cleaning an infected Mac with Malwarebytes has always been completely free, and it’s our go-to recommendation. Follow the steps below to scan and clean your Mac in just a few minutes.
Download Malwarebytes for Mac
Click the button below to download the latest version of Malwarebytes for Mac.
When the download finishes, open your Downloads folder and double-click the setup file to begin the installation.
Follow the On-Screen Prompts to Install Malwarebytes
The Malwarebytes for Mac Installer will guide you through a few quick screens. Click “Continue” and keep following the prompts until the installation completes.
When the installation is complete, Malwarebytes opens to the Welcome to Malwarebytes screen. Click “Get started“.
Select “Personal Computer” or “Work Computer”
Malwarebytes will ask what type of computer you’re installing it on. Click either Personal Computer or Work Computer, whichever applies.
Start the Scan
Click the “Scan” button. Malwarebytes will automatically update its detection database and begin checking your Mac for malware.
Wait for the Scan to Finish
Malwarebytes will scan your Mac for adware, browser hijackers, and other malicious programs. This can take a few minutes, so feel free to do something else — just check back occasionally to see the progress.
Quarantine the Detected Threats
When the scan is done, you’ll see a list of everything Malwarebytes found. Click the “Quarantine” button to remove all the threats at once.
Restart Your Mac
Malwarebytes will now remove all the malicious files it found. Some threats can only be fully removed after a reboot — if Malwarebytes asks you to restart, allow it. Once you’re logged back in, your Mac is clean.
Once the scan is done, remove every threat it detected. Your Mac is now free of adware, rogue browser extensions, and other potentially harmful software.
If your current antivirus allowed a malicious program on your computer, you might want to consider purchasing the full-featured version of Malwarebytes Anti-Malware to protect against these types of threats in the future. If you are still experiencing problems while trying to remove a malicious program from your computer, please ask for help in our Mac Malware Removal Help & Support forum.
Run a Malware Scan with Malwarebytes for Android
Malwarebytes for Android automatically detects and removes dangerous threats like malware and ransomware so you don’t have to worry about your most-used device being compromised. Aggressive detection of adware and potentially unwanted programs keeps your Android phone or tablet running smooth.
Download Malwarebytes for Android.
You can download Malwarebytes for Android by clicking the link below.
In the Google Play Store, tap “Install” to install Malwarebytes for Android on your device.
When the installation process has finished, tap “Open” to begin using Malwarebytes for Android. You can also open Malwarebytes by tapping on its icon in your phone menu or home screen.
Follow the on-screen prompts to complete the setup process
When Malwarebytes will open, you will see the Malwarebytes Setup Wizard which will guide you through a series of permissions and other setup options. This is the first of two screens that explain the difference between the Premium and Free versions. Swipe this screen to continue. Tap on “Got it” to proceed to the next step. Malwarebytes for Android will now ask for a set of permissions that are required to scan your device and protect it from malware. Tap on “Give permission” to continue. Tap on “Allow” to permit Malwarebytes to access the files on your phone.
Update database and run a scan with Malwarebytes for Android
You will now be prompted to update the Malwarebytes database and run a full system scan.
Click on “Update database” to update the Malwarebytes for Android definitions to the latest version, then click on “Run full scan” to perform a system scan.
Wait for the Malwarebytes scan to complete.
Malwarebytes will now start scanning your phone for adware and other malicious apps. This process can take a few minutes, so we suggest you do something else and periodically check on the status of the scan to see when it is finished.
Click on “Remove Selected”.
When the scan has been completed, you will be presented with a screen showing the malware infections that Malwarebytes for Android has detected. To remove the malicious apps that Malwarebytes has found, tap on the “Remove Selected” button.
Restart your phone.
Malwarebytes for Android will now remove all the malicious apps that it has found. To complete the malware removal process, Malwarebytes may ask you to restart your device.
After the scan, tap Remove Selected to delete all detected threats. Your Android phone is now clean — no more malicious apps, adware, or browser redirects.
If your current antivirus allowed a malicious app on your phone, you may want to consider purchasing the full-featured version of Malwarebytes to protect against these types of threats in the future. If you are still having problems with your phone after completing these instructions, then please follow one of the steps:
Restore your phone to factory settings by going to Settings > General management > Reset > Factory data reset.
Now that your device is clean, keep it that way. Most infections start with a malicious ad or a fake download button — so blocking them at the source is your best defense.
We recommend AdGuard, which blocks malicious ads, phishing pages, and dangerous redirects before they can reach you.
Ransomware victims often receive unsolicited offers from supposed negotiators, data-recovery companies, or researchers.
Some secretly contact the attackers and add a fee. Others collect payment for public tools or software that cannot decrypt the files.
Verify company registration, staff identities, technical history, contracts, privacy practices, and references through independent channels.
Ask who will handle evidence, where data will be stored, and whether subcontractors participate.
Never provide an encrypted archive containing sensitive information merely to receive a quick quote.
A trustworthy provider explains uncertainty, preserves evidence, and separates containment, investigation, restoration, and negotiation.
Frequently Asked Questions
Is Regulus ransomware the same as a Windows file extension problem?
No. The new extension marks encrypted data. Windows cannot repair cryptographic damage by changing the filename.
Keep the extension intact on original evidence and test any recovery method only on duplicate files.
Why does the extension contain a changing number?
Observed variants can append different numbers after .regulus. The number may help distinguish campaigns or builds, but it is not a decryption code.
Record the exact ending on each affected system and include it in the incident evidence.
Does deleting RANSOM_NOTE.html remove Regulus?
No. The note communicates the demand. Deleting it neither stops a running payload nor restores encrypted content.
Preserve one original copy, then rely on qualified analysis to remove every malicious component and access path.
Can Malwarebytes decrypt .regulus files?
Malwarebytes can detect and remove many threats, but threat removal is different from decrypting data already transformed by ransomware.
Use verified backups or a decryptor confirmed for the exact variant. Preserve encrypted copies when neither option is available.
Should I believe the claim that data was stolen?
Treat the claim seriously, but investigate it independently. The note alone cannot prove which files, if any, left the environment.
Review telemetry, legal obligations, sensitive repositories, and access histories before making public or regulatory statements.
Will paying guarantee that the attackers delete copied data?
No. A criminal can keep duplicates, resell information, demand more money, or lose access to the promised key.
Payment decisions require professional legal and incident guidance, not pressure from an artificial countdown.
The Bottom Line
Regulus is a ransomware incident, not merely a strange filename problem. Isolate systems, preserve evidence, investigate possible theft, and close the original access before restoration.
Clean offline backups offer the strongest recovery path. Keep encrypted copies, reject rushed promises, and rebuild through a documented process that protects the wider environment.
10 Rules to Avoid Online Scams
Here are 10 practical safety rules to help you avoid malware, online shopping scams, crypto scams, and other online fraud. Each tip includes a quick “if you already got hit” action.
Stop and verify before you click, log in, download, or pay.
Most scams win by creating urgency. Verify using a trusted method: type the website address yourself, use the official app, or call a known number (not the one in the message).
If you already clicked: close the page, do not enter passwords, and run a malware scan.
Keep your operating system, browser, and apps updated.
Updates patch security holes used by malware and malicious ads. Turn on automatic updates where possible.
If you saw a scary “update now” pop-up: close it and update only through your device settings or the official app store.
Use layered protection: antivirus plus an ad blocker.
Antivirus helps block malware. An ad blocker reduces scam redirects, phishing pages, and malvertising.
If your browser is acting weird: remove unknown extensions, reset the browser, then run a full scan.
Install apps, software, and extensions only from official sources.
Avoid cracked software, “keygens,” and random downloads. During installs, choose Custom/Advanced and decline bundled offers you do not recognize.
If you already installed something suspicious: uninstall it, restart, and scan again.
Treat links and attachments as untrusted by default.
Phishing often impersonates delivery services, banks, and popular brands. If it is unexpected, do not open attachments or log in through the message.
If you entered credentials: change the password immediately and enable 2FA.
Shop safely: research the store, then pay with protection.
Be cautious with brand-new stores, “closing sale” stories, and prices that make no sense. Prefer credit cards or PayPal for dispute options. Avoid wire transfers, gift cards, and crypto payments.
If you already paid: contact your card issuer or PayPal quickly to dispute the transaction.
Crypto rule: never pay a “fee” to withdraw or recover money.
Common patterns include fake profits, then “tax,” “gas,” or “verification” fees. Another is a “recovery agent” who demands upfront crypto.
If you already sent crypto: stop paying, save evidence (wallet addresses, TXIDs, chats), and report the scam to the platform used.
Secure your accounts with unique passwords and 2FA (start with email).
Use a password manager and unique passwords for every account. Enable 2FA using an authenticator app when possible.
If you suspect an account takeover: change passwords, sign out of all devices, and review recent logins and recovery settings.
Back up important files and keep one backup offline.
Backups protect you from ransomware and device failure. Keep at least one backup on an external drive that is not always connected.
If you suspect infection: do not connect backup drives until the system is clean.
If you think you are a victim: stop losses, document evidence, and escalate fast.
Move quickly. Speed matters for disputes, account recovery, and limiting damage.
Stop payments and contact: do not send more money or respond to the scammer.
Call your bank or card issuer: block transactions, replace the card if needed, and start a dispute or chargeback.
Secure your email first: change the email password, enable 2FA, and remove unfamiliar recovery options.
Secure other accounts: change passwords, enable 2FA, and log out of all sessions.
Scan your device: remove suspicious apps or extensions, then run a full malware scan.
Save evidence: screenshots, emails, order pages, tracking pages, wallet addresses, TXIDs, and chat logs.
Report it: to the payment provider, marketplace, social platform, exchange, or wallet service involved.
These rules are intentionally simple. Most online losses happen when decisions are rushed. Slow down, verify independently, and use payment methods and account controls that give you recourse.
Hello! I'm Lapain Epuran, your go-to source for detailed and honest product reviews. From tech gadgets to miracle cures, I provide insights to help you make informed choices. Join me as we discover what's truly worth your time and money.