

A browser can begin behaving strangely without any dramatic warning. One morning, every new tab may open a search page you never selected.
Homeinlook.com presents that change as a harmless convenience. A closer look reveals why the page, its redirects, and the software behind it deserve attention.
Overview
What Homeinlook.com is
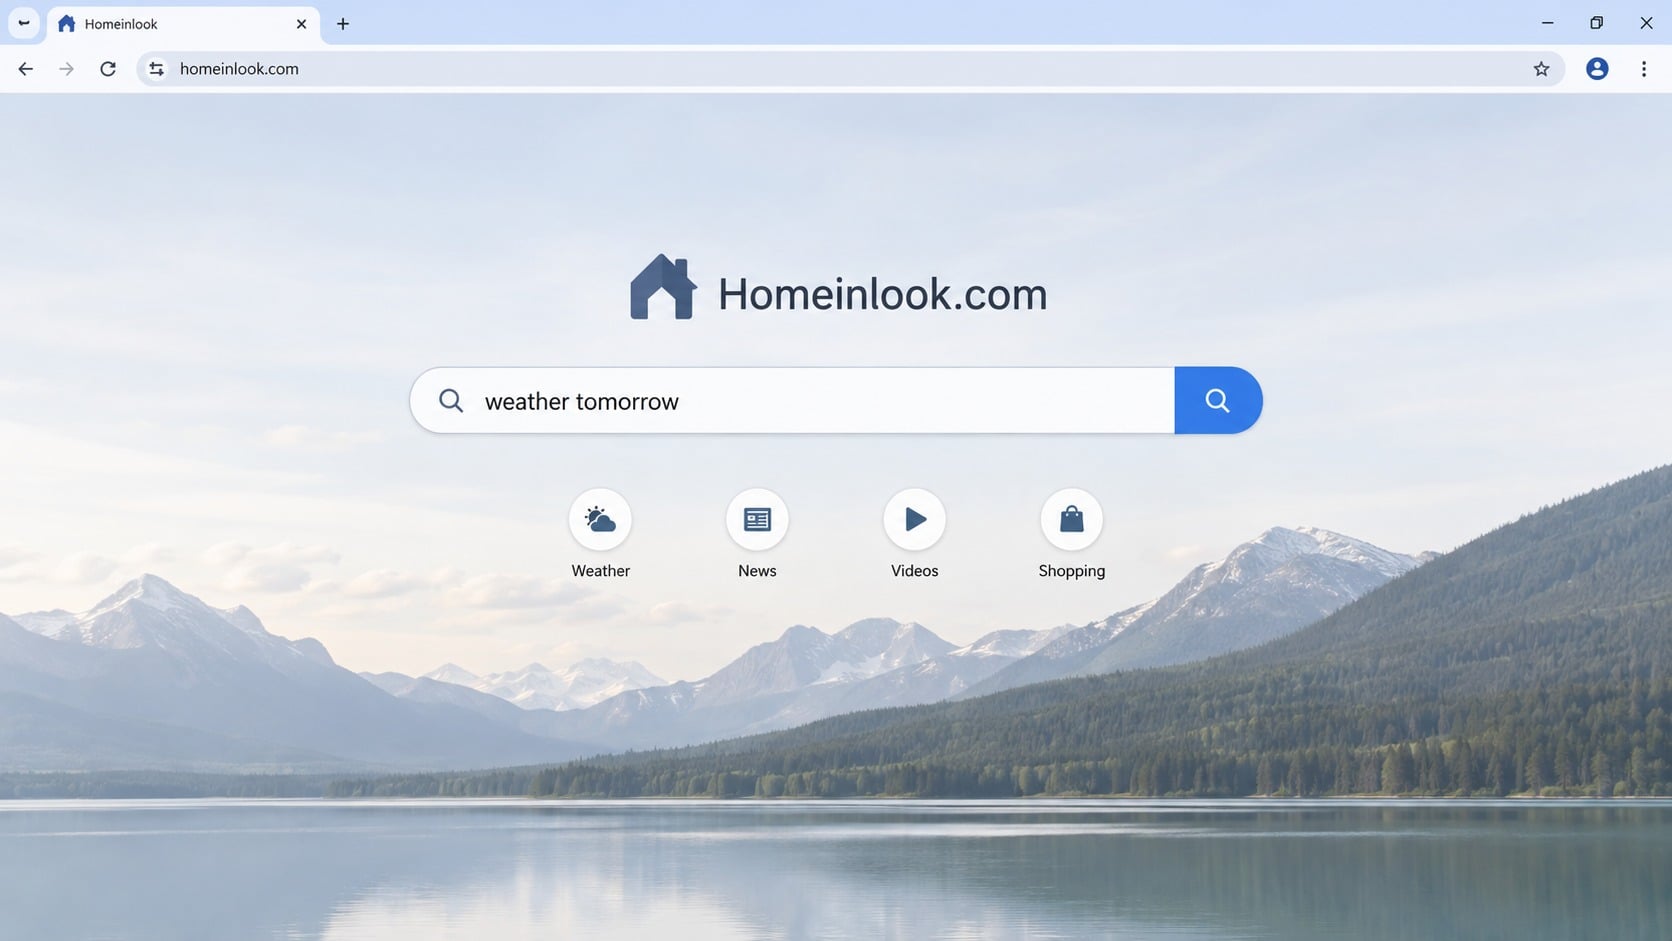
Homeinlook.com is promoted as a browser search page, but it does not operate like an independent search provider with transparent ownership and useful original results.
Observed searches are passed through another address, Searchinlook.com, before the visitor reaches results supplied by a legitimate search engine such as Bing.
That extra journey is not necessary for searching. It gives unknown operators an opportunity to record activity, change destinations, and profit from redirected traffic.
Why it keeps appearing
The page is commonly associated with browser-hijacking software. A hijacker changes the homepage, default search provider, or new-tab behavior without meaningful informed consent.
Some versions arrive as an extension. Others are bundled with a free installer whose setup screen hides additional offers behind rushed, vague, or preselected options.
Changing one browser setting may appear to work briefly. Persistence components can restore Homeinlook.com after a restart or when the browser opens again.
What makes the redirect risky
- Search queries travel through an unnecessary intermediary before reaching genuine results.
- The route can vary by location, browser profile, advertising campaign, or operator decision.
- An unwanted extension may receive permission to read browsing activity or alter visited pages.
- Sponsored results can be difficult to distinguish from ordinary search links.
- Repeated redirects may expose the browser to deceptive advertisements and notification prompts.
- Removal becomes harder when policy settings or background software recreate the change.
The visible page is only the front of the problem. The important question is what changed the browser and what privileges that component still holds.
How the Homeinlook.com Redirect Works
Step 1: An unwanted component enters during another installation
Browser hijackers frequently travel beside free utilities, unofficial installers, browser add-ons, media tools, converters, or software promoted through aggressive advertising networks.
The installer may describe the added component as a search assistant, browsing enhancement, useful start page, or quick-access feature rather than a settings-changing program.
Users who choose a recommended installation can accept every bundled offer together. The important disclosure may be buried in custom settings or presented with confusing wording.
Another route begins with a deceptive advertisement. Clicking it can open a page that requests an extension installation or claims a browser feature needs updating.
Rogue notification prompts can contribute too. They may send repeated advertisements toward installers that carry unwanted search tools.
The appearance of Homeinlook.com does not identify the original installer by itself. Reviewing recently added applications and extensions helps reconstruct that path.
Step 2: The browser’s preferred settings are replaced
After installation, the hijacker assigns Homeinlook.com to one or several browser preferences. Common targets include the startup page, homepage, search engine, and new-tab page.
The browser may still look normal until the user opens a tab or types a query into the address bar. Then the unwanted route becomes visible.
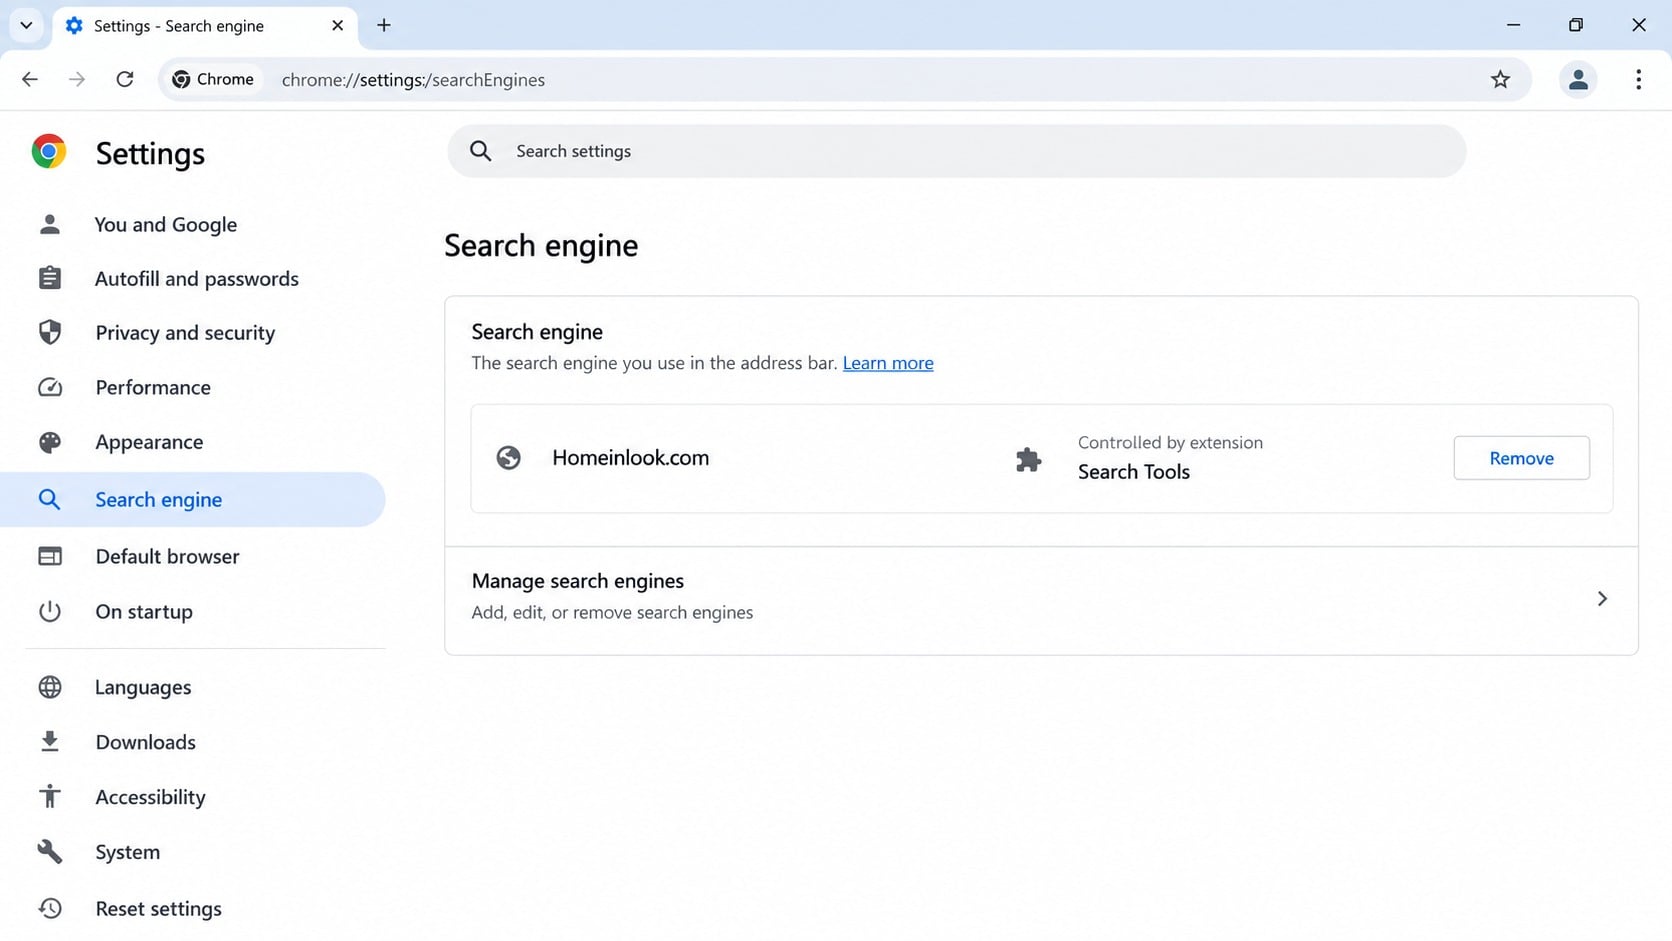
An extension can request broad permissions, including reading browsing history, modifying search settings, and changing content on visited websites.
Those privileges exceed what a simple shortcut needs. They create a technical path for surveillance, advertising injection, or repeated redirection.
Some hijackers also add a managed-browser policy. The browser then reports that a setting is “controlled by your organization,” even on a personal computer.
That message does not automatically mean an employer changed the device. On a home computer, an unfamiliar policy deserves immediate investigation.
Step 3: Searches are routed through tracking infrastructure
When a query is submitted, Homeinlook.com can forward it through Searchinlook.com. The second address then sends the browser to a real results provider.
The legitimate results at the end can disguise the unwanted middle step. Users may assume their browser merely adopted a different homepage theme.
However, the intermediary can receive the original query, referral details, browser information, approximate network location, and identifiers stored in cookies.
A search about health, employment, finances, relationships, or legal concerns can be sensitive even when it contains no account password.
The operator may use collected activity to build advertising profiles. It may also share information with marketing partners whose practices are not clearly disclosed.
Redirect destinations can change over time. A route ending safely today does not guarantee the same route will remain harmless tomorrow.
Step 4: Advertising and sponsored results create revenue
Redirect networks can earn money when users view sponsored placements, visit partner pages, or install additional software promoted along the route.
This business model rewards traffic volume rather than search quality. It also explains why the hijacker works hard to become the default path.
Ads shown near genuine results can lead to low-quality stores, fake security warnings, questionable subscriptions, or pages requesting browser notification permission.
Not every advertisement delivered through a redirect is malicious. The concern is that an opaque intermediary makes the source and accountability difficult to assess.
Search advertisements can imitate download buttons or customer-support pages. A hurried visitor may click the promoted result before noticing the actual destination.
The safest response is not to test random results. Removal should begin from browser settings and installed software, not through links displayed by the hijacker.
Step 5: Persistence reverses the user’s repairs
A basic homepage change may fail because the extension still controls search preferences. Removing only the visible address leaves the controlling component active.
Some unwanted applications run when Windows starts. They inspect browser files and restore the modified values after users select another provider.
Managed policies can also lock a field. The normal settings page may gray out the option or display a notice that an extension controls it.
Browser synchronization can spread an unwanted extension to another device. Reinstalling the browser while synchronization remains active may bring the problem back.
A complete cleanup therefore addresses extensions, local applications, startup entries, policies, notifications, and synchronized browser data in a sensible order.
If Homeinlook.com returns after every restart, that recurrence is evidence of persistence. It is not proof that the browser itself is permanently damaged.
Step 6: Collected activity can support further targeting
Browsing patterns help advertisers classify interests, but criminals can also use them to select more persuasive lures and fraudulent offers.
A person repeatedly searching for technical help may receive fake support ads. Someone researching loans could encounter deceptive credit or investment promotions.
Unwanted extensions sometimes access more than queries. Permissions may allow them to inspect page content, tabs, or data copied into forms.
That does not prove every Homeinlook-related component steals passwords. It does mean broad permissions should be treated as unnecessary exposure.
Saved credentials remain safer when they are protected by a reputable password manager and multi-factor authentication. Still, removing the intrusive component is essential.
Users should consider the entire browser profile potentially observed until the hijacker, its permissions, and any associated programs have been removed.
Why a Familiar Search Results Page Does Not Make It Safe
The final results may come from Bing or another established provider. That fact confirms only the last service in the chain, not the intermediary.
A redirect can borrow credibility from the destination. The user sees recognizable results and may overlook the brief appearance of an unfamiliar address.
Legitimate search providers do not need a mystery extension to force their adoption. They can be selected directly through the browser’s normal settings.
Likewise, a secure connection only encrypts traffic between the browser and a website. It does not verify that the site respects privacy or deserves trust.
Homeinlook.com should be evaluated by its behavior: forced settings, unnecessary routing, unclear control, and resistance to removal.
Those behaviors are consistent with a browser hijacker, even when the page looks clean and searches eventually produce ordinary results.
How to Identify the Homeinlook.com Browser Hijacker
Check the browser’s search and startup settings
Open the settings menu from the browser itself. Review the default search provider, homepage, startup pages, and new-tab behavior.
Look for Homeinlook.com, Searchinlook.com, or any entry you did not knowingly select. Also note whether the browser says an extension controls the setting.
Do not use a search result to reach settings. Type the browser’s internal settings page or navigate through its trusted menu.
Review every installed extension
Inspect the complete extension list, including disabled items. Names such as Search Tools, New Tab Assistant, or Browsing Helper deserve scrutiny when unfamiliar.
Open each extension’s details and examine permissions. Reading all website data or changing search settings is excessive for a decorative tab page.
Record suspicious names before removal. This makes it easier to recognize a returning component or find its companion application.
Inspect recent applications and browser policies
Sort installed programs by date and compare them with the day the redirects began. Unrecognized utilities installed together may belong to the same bundle.
On a personal device, investigate any newly applied browser policy. A policy that forces an extension or search provider can explain why ordinary changes fail.
Work-managed computers are different. Contact the administrator before removing legitimate policies or organization-approved extensions.
Compare behavior in a clean profile
Create a temporary browser profile without synchronization or extensions. If searches behave normally there, the existing profile likely contains the unwanted change.
Test cautiously and avoid entering sensitive information while diagnosing. The goal is to isolate the source, not to continue browsing through the redirect.
If every browser is affected, inspect system-level applications, proxy settings, and DNS configuration. A single affected browser more strongly suggests a profile or extension issue.
What to Do If Homeinlook.com Took Over Your Browser
- Stop using the redirected search. Close its tabs and avoid advertisements, notification prompts, downloads, or account sign-ins reached through the page.
- Remove suspicious extensions. Delete unfamiliar add-ons with search, new-tab, or browsing permissions. Restart the browser and confirm they do not return.
- Uninstall related applications. Review software added near the first incident. Remove unwanted bundles through the operating system’s normal application controls.
- Restore browser preferences. Select a trusted search provider, homepage, and startup page. Remove unknown notification permissions and clear suspicious site data.
- Check policies and startup items. Investigate unexpected managed settings on personal computers. Disable unknown startup programs that recreate browser changes.
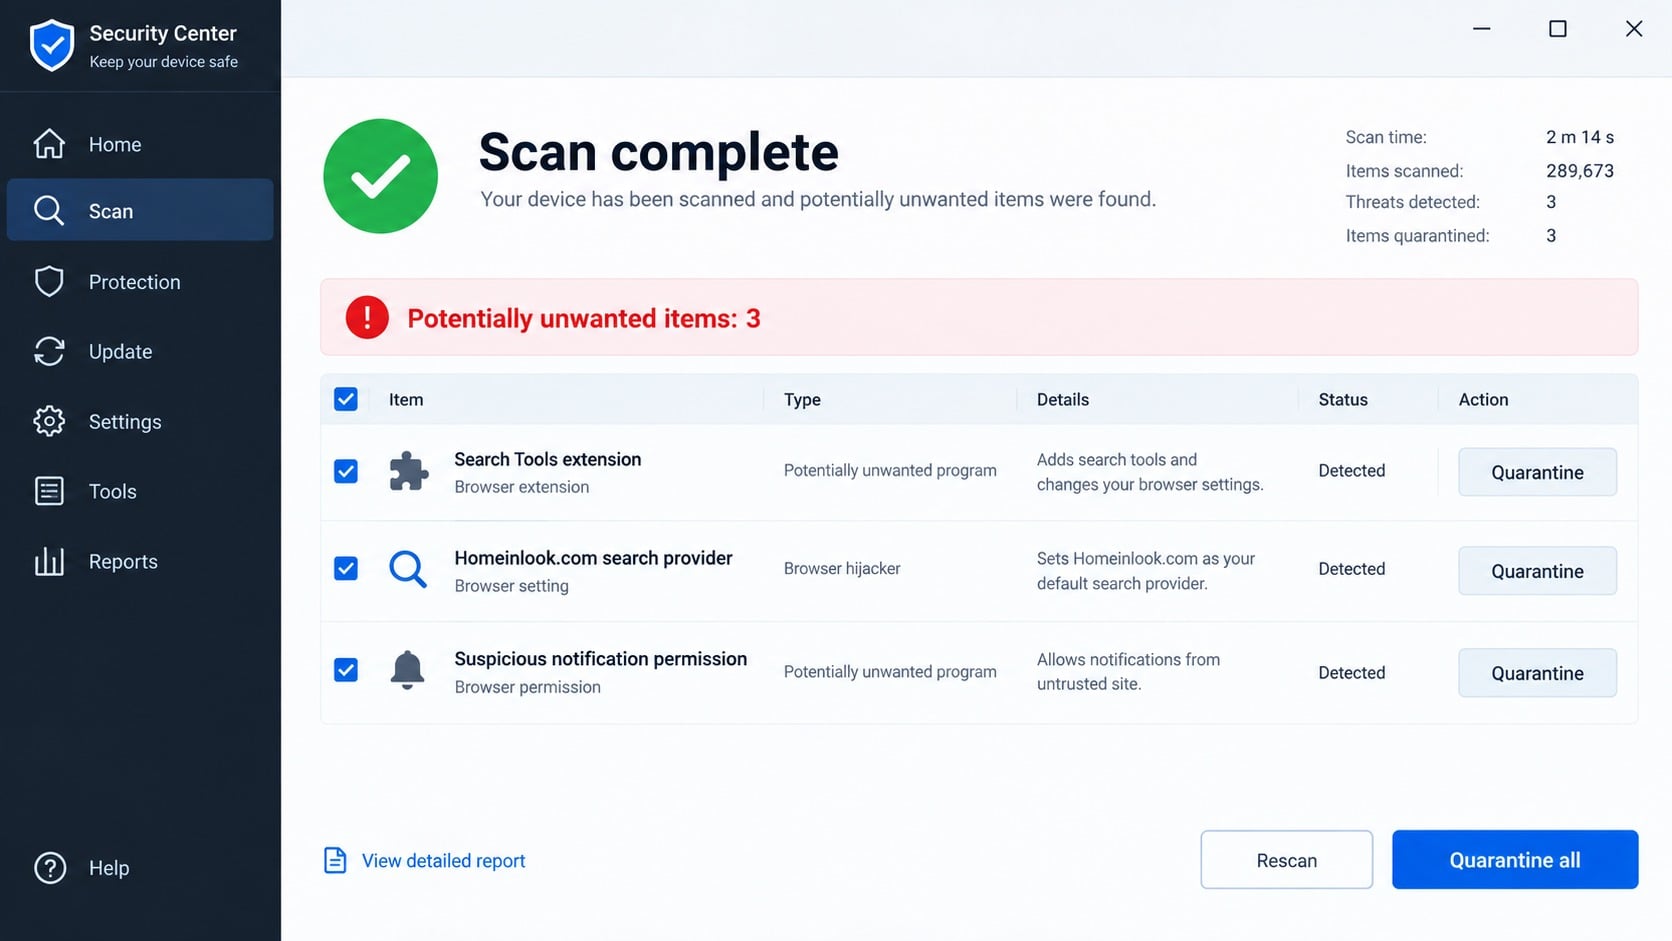
- Run a full Malwarebytes scan. Quarantine detected browser hijackers and potentially unwanted programs, then restart and scan again for persistence.
- Add AdGuard after cleanup. Use it to reduce malicious advertising and redirect exposure, but do not treat blocking as a substitute for removing the hijacker.
- Change exposed credentials when necessary. If you signed into sensitive accounts through redirected pages, change passwords from a clean device and enable multi-factor authentication.
Is Your Device Infected? Run a Free Malware Scan
Slow performance, constant pop-ups, or strange behavior? These are classic signs of a malware infection. The fastest way to find out is to scan your device with Malwarebytes Free — one of the most trusted malware removal tools available.
The free version detects and removes the most common threats, including:
- Adware — the cause of those annoying pop-ups
- Browser hijackers — unwanted redirects and changed homepages
- Trojans and spyware — hidden programs stealing your data
- Potentially unwanted programs (PUPs) — software you never asked for
👉 Select your device below — Windows, Mac, or Android — then follow the simple steps to download Malwarebytes, scan your system, and remove any threats it finds. The scan usually takes 5 to 20 minutes.
Run a Malware Scan with Malwarebytes for Windows
Malwarebytes is one of the most popular and trusted anti-malware tools for Windows — and it’s completely free for removing infections. It catches threats that many antivirus programs miss, including adware, browser hijackers, and trojans. Follow the steps below to scan and clean your PC in just a few minutes.
Download Malwarebytes
Click the button below to download the latest version of Malwarebytes for Windows from the official source. The free version is all you need — it will scan your computer and remove adware, browser hijackers, and other malicious software at no cost.
Download MalwarebytesOfficial installer for Windows 11 and 10. Your download starts right away.Want real-time protection? See Malwarebytes Premium Malwarebytes Free for WindowsScans and removes malware at no cost
-
Install Malwarebytes
When the download finishes, open your Downloads folder and double-click the MBSetup file. If Windows shows a User Account Control pop-up, click “Yes” to allow the installation.

Follow the On-Screen Prompts to Install Malwarebytes
The setup wizard will walk you through a few quick screens:
-
Choose where you’re installing the program — “Personal Computer” or “Work Computer” — then click Next.

-
Malwarebytes will now install on your device. This usually takes under a minute.

-
When installation is complete, the “Welcome to Malwarebytes” screen will open automatically.

-
On the final screen, click Open Malwarebytes to launch the program.

-
Enable “Scan for Rootkits”
Before scanning, turn on rootkit detection so Malwarebytes can find even the most hidden threats. Click the Settings gear icon on the left side of the screen.

In the settings menu, find “Scan for rootkits” and click the toggle so it turns blue.

Done? Click “Dashboard” in the left pane to return to the main screen.
Start the Scan
Click the blue Scan button. Malwarebytes will automatically update its virus database and start checking your computer for malware.

-
Wait for the Scan to Finish
The scan checks your entire system for browser hijackers and other malicious programs, so it can take 5 to 20 minutes depending on your computer. Feel free to do something else — just check back occasionally to see the progress.

-
Quarantine the Detected Threats
When the scan is done, you’ll see a list of everything Malwarebytes found — malware, adware, and potentially unwanted programs. Click the “Quarantine” button to remove all of them at once.

Malwarebytes will now remove the malicious files and registry entries and move them safely into quarantine.

-
Restart Your Computer
Some threats can only be fully removed after a reboot. If Malwarebytes asks you to restart, click Yes. Once you’re logged back in, Malwarebytes has finished removing the threats it found.

That’s it — your Windows PC is now clean of trojans, adware, and other malware, and should be back to running smoothly.
If you are still having problems with your computer after completing these instructions, then please follow one of the steps:
- Run a computer scan with ESET Online Scanner
- Ask for help in our Windows Malware Removal Help & Support forum.
Run a Malware Scan with Malwarebytes for Mac
Malwarebytes for Mac is a free on-demand scanner that removes the malware other security software tends to miss — adware, browser hijackers, and unwanted programs included. Cleaning an infected Mac with Malwarebytes has always been completely free, and it’s our go-to recommendation. Follow the steps below to scan and clean your Mac in just a few minutes.
-
Download Malwarebytes for Mac
Click the button below to download the latest version of Malwarebytes for Mac.
Download MalwarebytesOfficial installer for macOS. Your download starts right away.Want real-time protection? See Malwarebytes PremiumMalwarebytes Free for MacScans and removes malware at no cost -
Open the Malwarebytes setup file
When the download finishes, open your Downloads folder and double-click the setup file to begin the installation.

-
Follow the On-Screen Prompts to Install Malwarebytes
The Malwarebytes for Mac Installer will guide you through a few quick screens. Click “Continue” and keep following the prompts until the installation completes.



When the installation is complete, Malwarebytes opens to the Welcome to Malwarebytes screen. Click “Get started“.
-
Select “Personal Computer” or “Work Computer”
Malwarebytes will ask what type of computer you’re installing it on. Click either Personal Computer or Work Computer, whichever applies.

-
Start the Scan
Click the “Scan” button. Malwarebytes will automatically update its detection database and begin checking your Mac for malware.

-
Wait for the Scan to Finish
Malwarebytes will scan your Mac for adware, browser hijackers, and other malicious programs. This can take a few minutes, so feel free to do something else — just check back occasionally to see the progress.

-
Quarantine the Detected Threats
When the scan is done, you’ll see a list of everything Malwarebytes found. Click the “Quarantine” button to remove all the threats at once.

-
Restart Your Mac
Malwarebytes will now remove all the malicious files it found. Some threats can only be fully removed after a reboot — if Malwarebytes asks you to restart, allow it. Once you’re logged back in, your Mac is clean.

That’s it — your Mac is now free of adware, rogue browser extensions, and other potentially harmful software.
If you are still experiencing problems while trying to remove a malicious program from your computer, please ask for help in our Mac Malware Removal Help & Support forum.
Run a Malware Scan with Malwarebytes for Android
Malwarebytes for Android automatically detects and removes dangerous threats like malware and ransomware so you don’t have to worry about your most-used device being compromised. Aggressive detection of adware and potentially unwanted programs keeps your Android phone or tablet running smooth.
-
Download Malwarebytes for Android.
You can download Malwarebytes for Android by clicking the link below.
Get Malwarebytes for AndroidOpens Google Play in a new tab.Want real-time protection? See Malwarebytes Premium for AndroidMalwarebytes for AndroidScans your phone and removes malware at no cost -
Install Malwarebytes for Android on your phone.
In the Google Play Store, tap “Install” to install Malwarebytes for Android on your device.

When the installation process has finished, tap “Open” to begin using Malwarebytes for Android. You can also open Malwarebytes by tapping on its icon in your phone menu or home screen.

-
Follow the on-screen prompts to complete the setup process
When Malwarebytes will open, you will see the Malwarebytes Setup Wizard which will guide you through a series of permissions and other setup options.
This is the first of two screens that explain the difference between the Premium and Free versions. Swipe this screen to continue.
Tap on “Got it” to proceed to the next step.
Malwarebytes for Android will now ask for a set of permissions that are required to scan your device and protect it from malware. Tap on “Give permission” to continue.
Tap on “Allow” to permit Malwarebytes to access the files on your phone.
-
Update database and run a scan with Malwarebytes for Android
You will now be prompted to update the Malwarebytes database and run a full system scan.

Click on “Update database” to update the Malwarebytes for Android definitions to the latest version, then click on “Run full scan” to perform a system scan.

-
Wait for the Malwarebytes scan to complete.
Malwarebytes will now start scanning your phone for adware and other malicious apps. This process can take a few minutes, so we suggest you do something else and periodically check on the status of the scan to see when it is finished.

-
Click on “Remove Selected”.
When the scan has been completed, you will be presented with a screen showing the malware infections that Malwarebytes for Android has detected. To remove the malicious apps that Malwarebytes has found, tap on the “Remove Selected” button.

-
Restart your phone.
Malwarebytes for Android will now remove all the malicious apps that it has found. To complete the malware removal process, Malwarebytes may ask you to restart your device.
That’s it — your Android phone is now clean — no more malicious apps, adware, or browser redirects.
If you are still having problems with your phone after completing these instructions, then please follow one of the steps:
- Restore your phone to factory settings by going to Settings > General management > Reset > Factory data reset.
- Ask for help in our Mobile Malware Removal Help & Support forum.
Stay Protected: Block Ads and Malicious Sites
Now that your device is clean, keep it that way. Most infections start with a malicious ad or a fake download button — so blocking them at the source is your best defense.
We recommend AdGuard, which blocks malicious ads, phishing pages, and dangerous redirects before they can reach you.
👉 Download AdGuard and browse safely
Resetting the Browser Without Losing Important Data
A browser reset can remove altered startup values, injected search providers, and unwanted permissions. It should follow extension and application removal, not replace those steps.
Export essential bookmarks first. Avoid exporting questionable extensions or complete synchronized settings, because they can carry the unwanted configuration into a fresh profile.
Passwords should be stored in a reputable password manager rather than a browser profile under active investigation. Confirm recovery access before changing the profile.
After resetting, install only extensions you recognize from their official listings. Check the developer name, permission request, update history, and recent user feedback.
Reconnect synchronization last. If Homeinlook.com reappears immediately afterward, synced data or an extension on another device may be restoring it.
Remove the problematic item from every synchronized device before enabling sync again. Otherwise, cleanup can become a frustrating loop.
How to Prevent Another Search Hijacker
Download programs from their official developers or trusted stores. Repacked installers are more likely to include unrelated offers whose purpose is poorly explained.
Choose custom installation when available. Read each screen and decline additional search tools, homepage changes, notification helpers, or optional extensions.
Ignore web pages that claim an extension is required to view a video, prove you are human, update a browser, or continue a download.
Browser updates come through the browser’s own update system. A random website should never choose the installer for a core browser component.
Keep extension inventories small. Every add-on adds code and permissions to the browser, while abandoned extensions can later change owners or behavior.
Review settings periodically, especially after installing free utilities. Early detection prevents a subtle redirect from becoming the browser’s unnoticed normal state.
Use AdGuard or another reputable content blocker to reduce exposure to deceptive advertising. Pair it with updated security software and cautious installation habits.
Back up irreplaceable files and maintain reliable account recovery methods. Browser hijackers are usually removable, but the pages they promote can create larger problems.
Frequently Asked Questions
Is Homeinlook.com a real search engine?
It presents a search interface, but observed queries are redirected through Searchinlook.com and then delivered to another provider rather than answered independently.
That unnecessary chain, combined with forced browser settings, makes it unsuitable as a trusted default search service.
Why does Homeinlook.com return after I change my homepage?
An extension, installed application, managed policy, startup item, or synchronized profile may still control the browser. Changing the visible homepage addresses only one symptom.
Remove the controlling component first, then restore the settings and verify them again after restarting the computer.
Does seeing Bing results mean the redirect is harmless?
No. A legitimate final provider does not validate the services that handled the query earlier. The unwanted intermediary can still collect information or alter routing.
Choose Bing directly if you want its results. There is no benefit in allowing an unexplained site to stand between the browser and the provider.
Can Homeinlook.com steal my passwords?
The redirect alone does not prove password theft. However, broad extension permissions and exposure to deceptive pages create a meaningful privacy and credential risk.
Change passwords if you entered them on a suspicious redirected page. Use a clean device and review account sessions afterward.
Will reinstalling my browser remove the hijacker?
Not always. A separate program, browser policy, or synchronized extension can restore the same settings after reinstallation.
A better cleanup removes associated software and policies, scans the system, resets the profile, and reconnects synchronization only after verification.
Is a security scan enough to finish the cleanup?
A full scan is important, but manual checks still matter. Confirm the extension list, search provider, startup pages, notifications, policies, and synchronized devices.
Run a second scan after restarting. The browser should remain clean through several new tabs, searches, and restarts before the incident is considered resolved.
The Bottom Line
Homeinlook.com is not merely a different-looking homepage. Its forced settings and multi-stage search route are consistent with browser-hijacking behavior and unnecessary data exposure.
Remove the controlling extension or application, restore trusted settings, scan the system, and verify that the redirect stays gone after synchronization and restart.








