We have written a Malware Removal Guide for Windows which is able to remove more than 99% of today’s infections, however sometimes a PC is so severe compromised that you won’t be able to boot into Windows or install any removal tools to disinfect your system.
If that’s the case then we can use a Kaspersky Rescue Disk to remove even the most stubborn malware infections.
Removal Instructions for stubborn malware
What you’ll need to perform this removal guide :
- A computer with Internet access.
- 1 blank DVD or CD
- 1 DVD/CD Burner
- Software which can create a bootable CD – http://www.imgburn.com/index.php?act=download
- A copy of the latest Kaspersky Rescue Disc from here – http://rescuedisk.kaspersky-labs.com/rescuedisk/updatable/
- About 1 -2 hours depending on how much data you have on C:
STEP 1: Download and create a bootable Kaspersky Rescue Disk CD
- Download the Kaspersky Rescue Disk ISOimage from below.

- Download ImgBurn, a software that will help us create this bootable disk.

- You can now insert your blank DVD/CD in your burner.
- Install ImgBurn by following the prompts and then start this program.
- Click on the Write image file to disc button.

- Under ‘Source’ click on the Browse for file button, then browse to the location where you previously saved the Kaspersky Rescue Disk ISO file.(kav_rescue_10.iso)

- Click on the big Write button.

- The disc creation process will now start and it will take around 5-10 minutes to complete.
STEP 2:Configure the computer to boot from CD-ROM
- Use the Delete or F2 keys, to load the BIOS menu.Information how to enter the BIOS menu is displayed on the screen at the start of the OS boot:
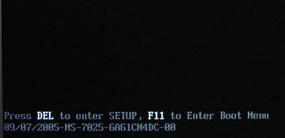
- In your PC BIOS settings select the Boot menu and set CD/DVD-ROM as a primary boot device.
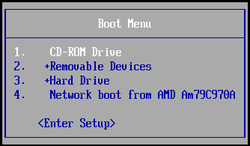
- Insert your Kaspersky Rescue Disk and restart your computer.
STEP 3:Boot your computer from Kaspersky Rescue Disk
- Your computer will now boot from the Kaspersky Rescue Disk,and you’ll be asked to press any key to proceed with this process
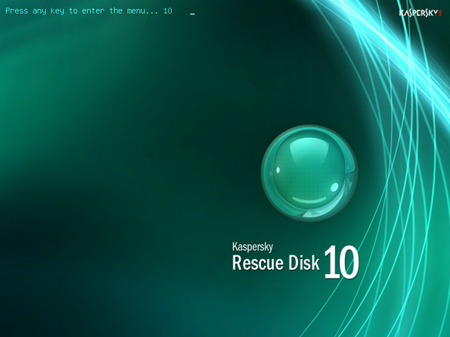
- In the start up wizard window that will open, select your language using the cursor moving keys. Press the ENTER key on the keyboard.
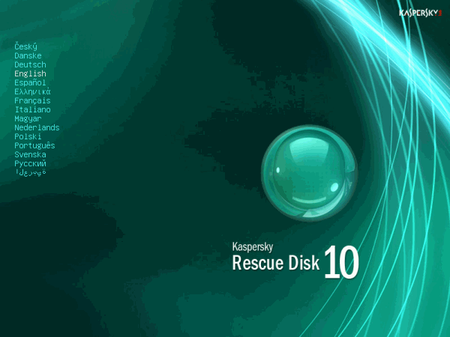
- On the next screen, select Kaspersky Rescue Disk. Graphic Mode then press ENTER.
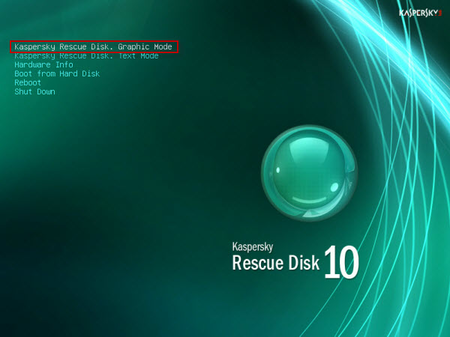
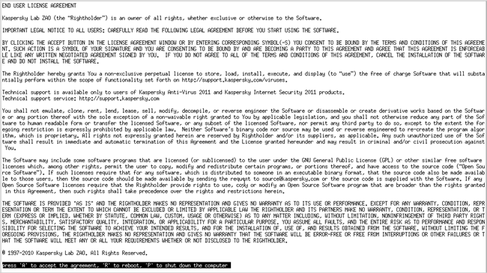
- The End User License Agreement of Kaspersky Rescue Disk will be displayed on the screen. Read carefully the agreement then press the C button on your keyboard.
- Once the actions described above have been performed, the Kasprsky operating system will start.
STEP 5:Scan your system with Kaspersky Rescue Disk
- Click on the Start buttonlocated in the left bottom corner of the screen and select the Kaspersky Rescue Disk then click on My Update Center and press Start update.
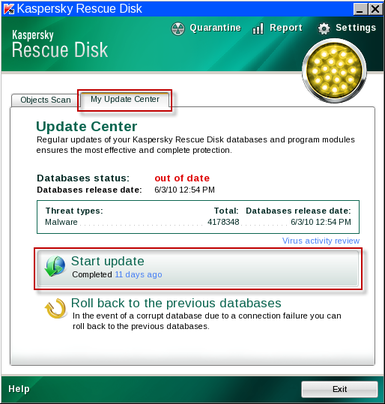
- When the update process has completed, the light at the top of the window will turn green, and the databases release date will be updated.
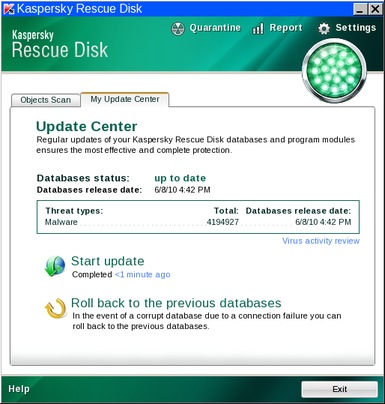
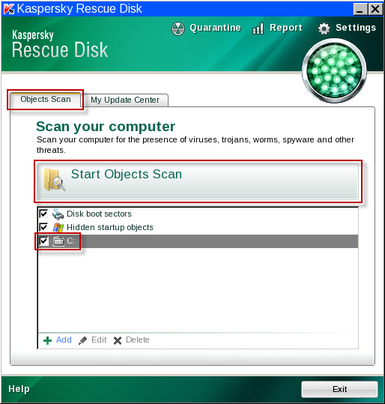
- Click on the Objects Scan tab, then click Start Objects Scanto begin the scan.
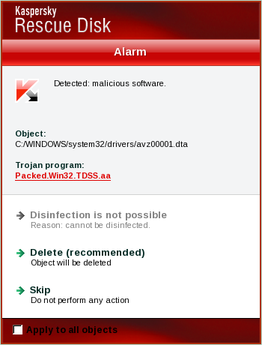
- If any malicious items are found, the default settings are to prompt you for action with a red popup window on the bottom right. Quarantine is the recommended action in most cases but we strongly recommend that you try first to Cure the files as forms of malware may infect some critical system files.
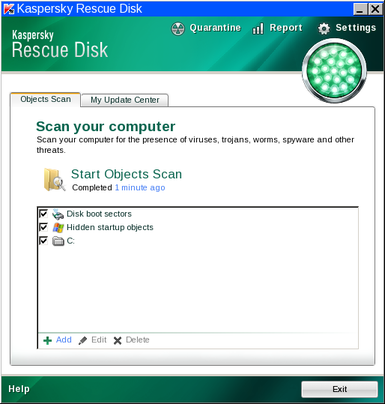
- When all detected items have been processed and removed, the light in the window will turn green and the scan will show as completed.
- When done you can close the Kaspersky Rescue Disk window and use the Start Menu to Restart the computer.
If you completed the above steps, then you should now be able to follow our Malware Removal Guide for Windows.


