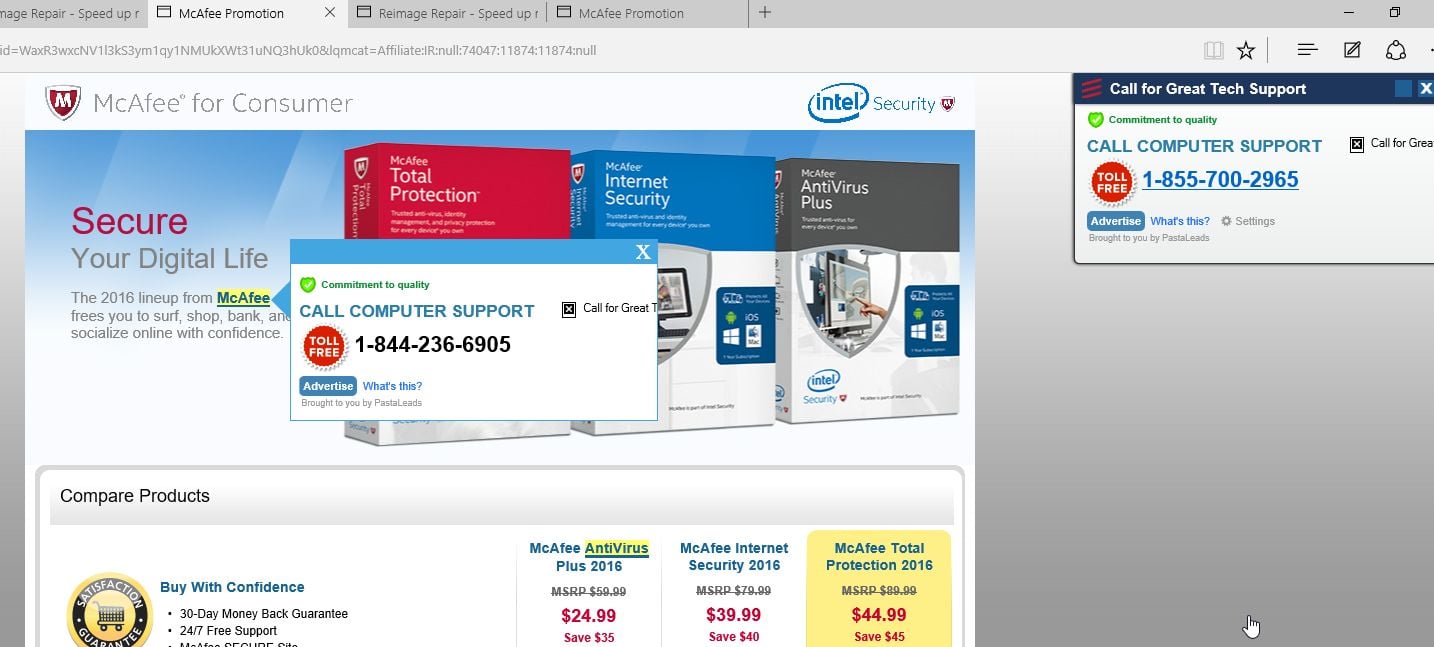
InstantSupport is a trojan horse (Trojan.Tech-Support-Scam) that displays errors from your Windows event log to scare you into calling a remote tech support phone number.
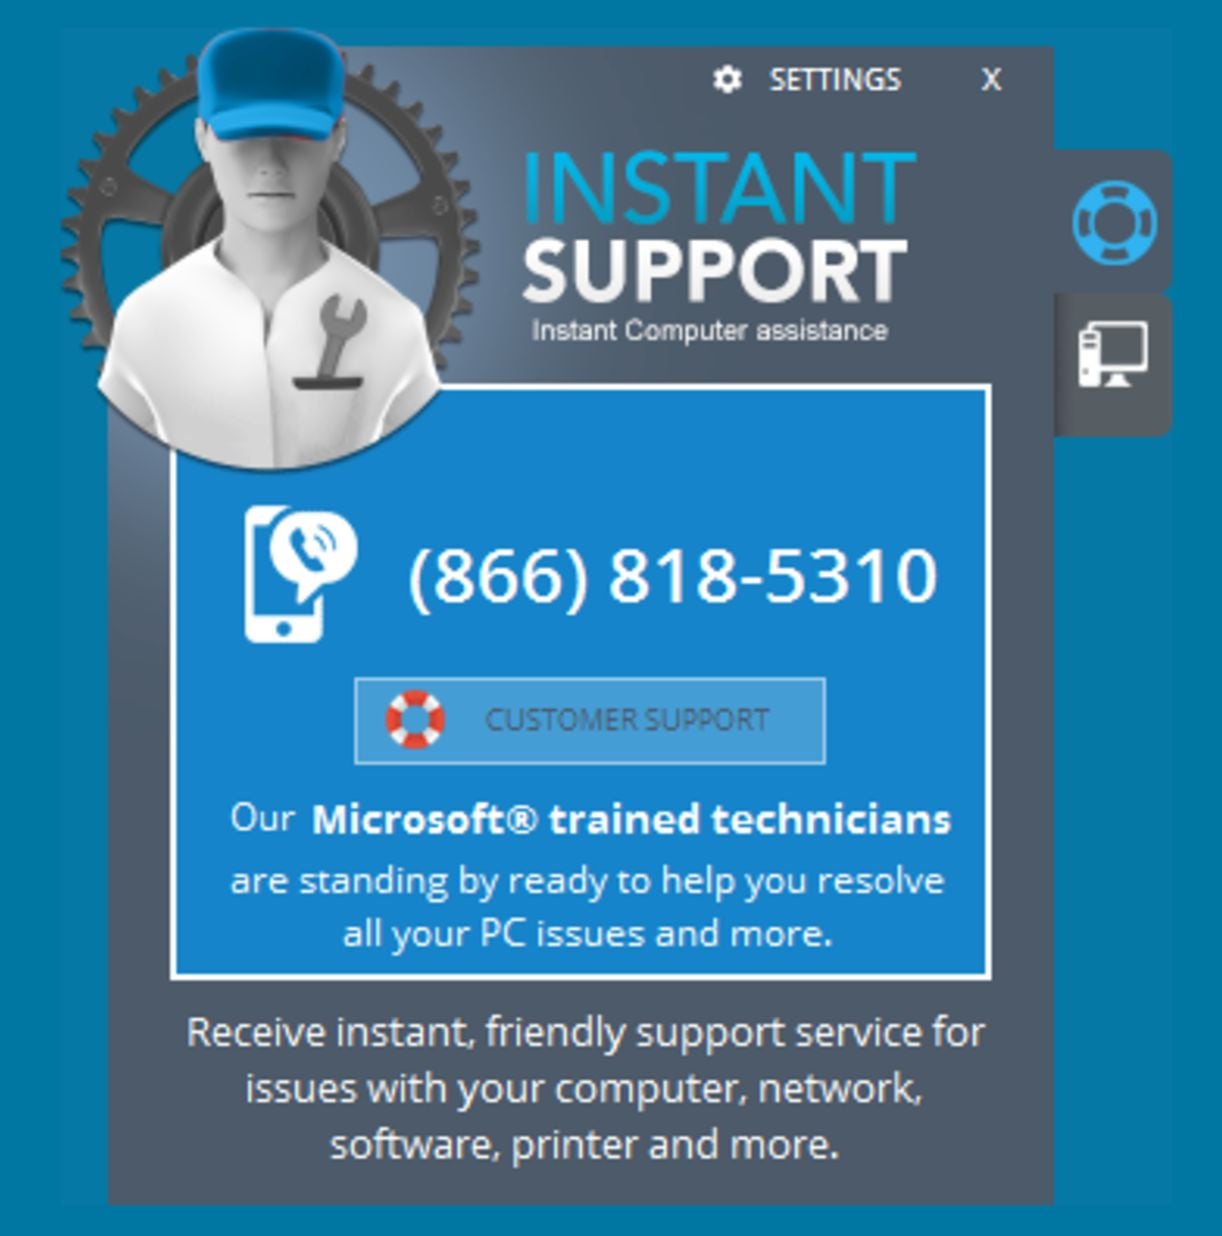
The bogus “InstantSupport” alert is shown in such a way as to trick the user into thinking their computer has crashed or that a virus has been detected on the computer. It does this to try and scare the infected user into calling one of the listed numbers in order to receive support. In reality, though, they will only be greeted with people who are trying to sell them unneeded support contracts and services.
The “InstantSupport” pop-up will have this message:
INSTANTSUPPORT
Instant Computer Assistance 866-818-5310
Our Microsoft trained technicians are standing by ready to help you resolve all your PC issues and more.
The scammer will typically attempt to get the victim to allow remote access to their computer. After remote access is gained, the scammer relies on confidence tricks typically involving utilities built into Windows and other software in order to gain the victim’s trust to pay for the supposed “support” services, when the scammer actually steals the victim’s credit card account information.
How to remove InstantSupport adware (Virus Removal Guide)
Please perform all the steps in the correct order. If you have any questions or doubt at any point, STOP and ask for our assistance.
- STEP 1: Uninstall InstantSupport from Windows
- STEP 2: Use Adwcleaner to remove InstantSupport adware
- STEP 3: Scan and clean your computer with Malwarebytes
- STEP 4: Double-check for malicious programs with HitmanPro
- (OPTIONAL) STEP 5: Reset your browser to default settings
STEP 1 : Uninstall VInstantSupport from Windows
In this first step, we will try to identify and remove any malicious program that might be installed on your computer.
- Go to the uninstall menu.
Windows 10 or Windows 8
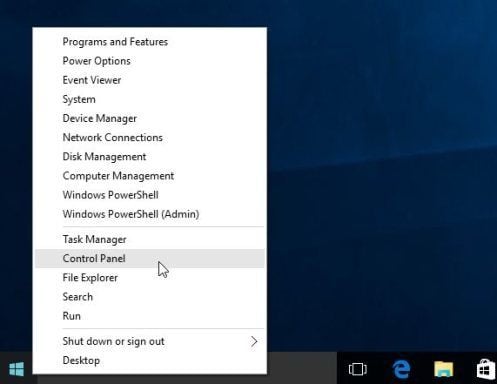
- To uninstall a program on Windows 10 or Windows 8, right-click on the Windows Start button and choose “Control Panel” from the pop-up menu.
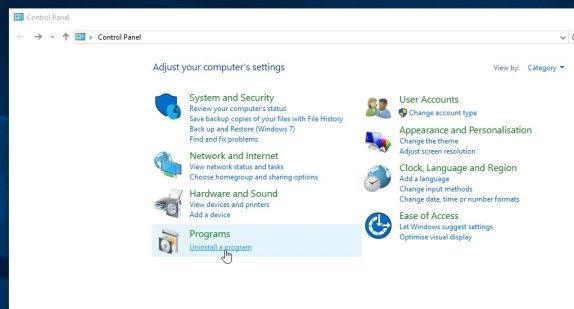
- When the “Control Panel” window opens click on the “Uninstall a program” option under “Programs” category.
Windows 7 or Windows Vista
- If you are using Windows XP, Windows Vista or Windows 7, click the “Start” button, then click on the “Control Panel” menu option.
![Control Panel in Windows Start Menu [Image: Control Panel in Windows Start Menu]](https://malwaretips.com/blogs/wp-content/uploads/2014/08/windows-start-menu-control-panel.jpg)
- When the “Control Panel” window opens click on the “Uninstall a program” option under “Programs” category.
![Click on Uninstall a program [Image: Uninstall a program]](https://malwaretips.com/blogs/wp-content/uploads/2013/03/uninstall-a-program-windows.jpg)
- To uninstall a program on Windows 10 or Windows 8, right-click on the Windows Start button and choose “Control Panel” from the pop-up menu.
- When the “Programs and Features” screen is displayed, scroll through the list of currently installed programs and uninstall “PCAcceleratePro” and “InstantSupport” by DST/RBL Tech.The malicious program may have a different name on your computer. To view the most recently installed programs, you can click on the “Installed On” column to sort your program by the installation date. Scroll through the list, and uninstall any unwanted or unknown programs.
If you cannot find any unwanted programs on your computer, you can proceed with the next step.
If you are having issues while trying to uninstall a program, you can use Revo Uninstaller to completely remove this unwanted program from your machine.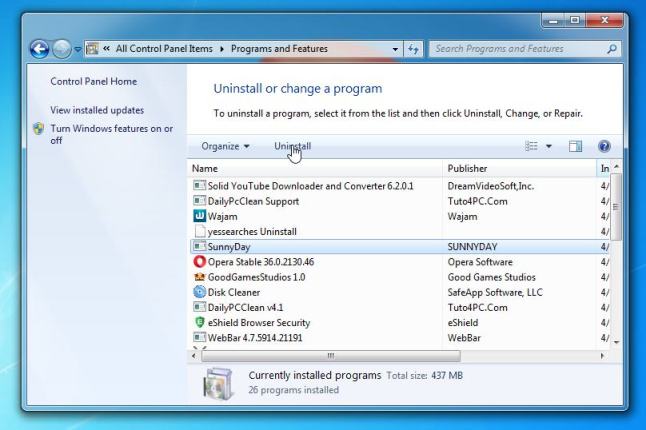
STEP 2: Use AdwCleaner to remove InstantSupport adware
Malwarebytes AdwCleaner is a free utility that will scan your computer for adware programs that may have been installed without your knowledge.
- You can download Malwarebytes AdwCleaner from the below link.
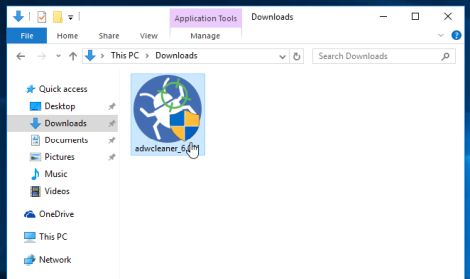
MALWAREBYTES ADWCLEANER DOWNLOAD LINK (This link will start the download of “Malwarebytes AdwCleaner” on your computer) - When Malwarebytes AdwCleaner has finished downloading, please double-click on the AdwCleaner icon to perform a system scan with this program.
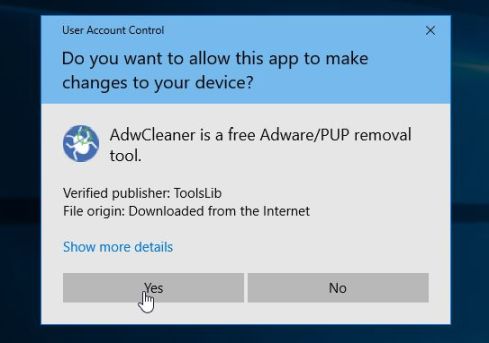
If Windows prompts you as to whether or not you wish to run Malwarebytes AdwCleaner, please allow it to run.
- When the Malwarebytes AdwCleaner program will open, click on the “Scan” button as shown below.
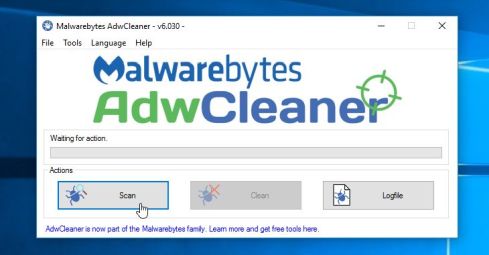
Malwarebytes AdwCleaner will now start to search for the InstantSupport adware and other malicious programs. - To remove the malicious files that were detected in the previous step, please click on the “Clean” button.
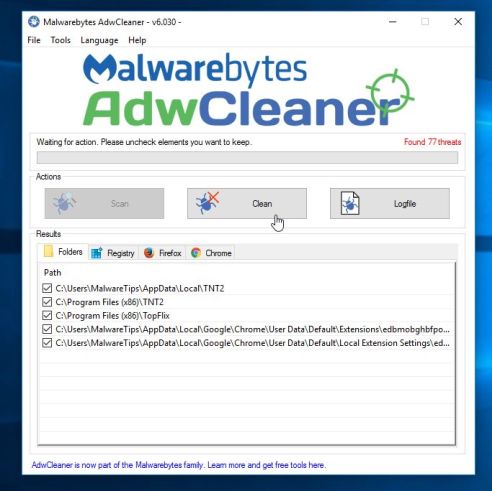
- Malwarebytes AdwCleaner will prompt you to save any open files or documents, as the program will need to reboot the computer to complete the cleaning process. Please do so, and then click on the “OK” button.
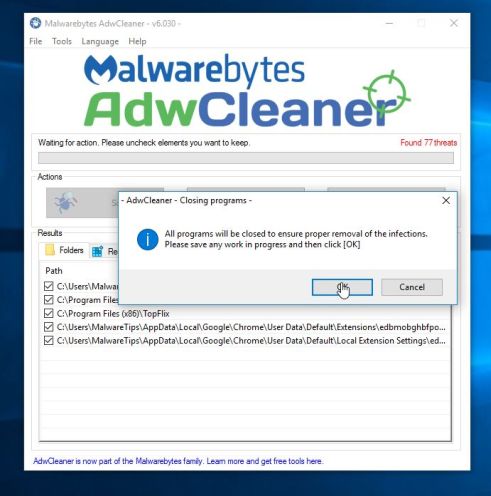
When your computer reboots and you are logged in, Malwarebytes AdwCleaner will automatically open a log file that contains the files, registry keys, and programs that were removed from your computer. Please review this log file and then close the notepad window.
You can now continue with the rest of the instructions.
STEP 3: Scan and clean your computer with Malwarebytes
Malwarebytes is a powerful on-demand scanner which should remove the InstantSupport adware from your computer. It is important to note that Malwarebytes will run alongside antivirus software without conflicts.
- You can download download Malwarebytes from the below link.
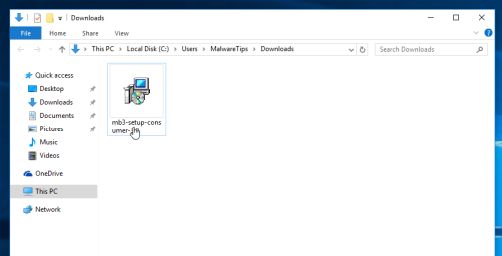
MALWAREBYTES DOWNLOAD LINK (This link open a new page from where you can download “Malwarebytes”) - When Malwarebytes has finished downloading, double-click on the “mb3-setup-consumer” file to install Malwarebytes on your computer.
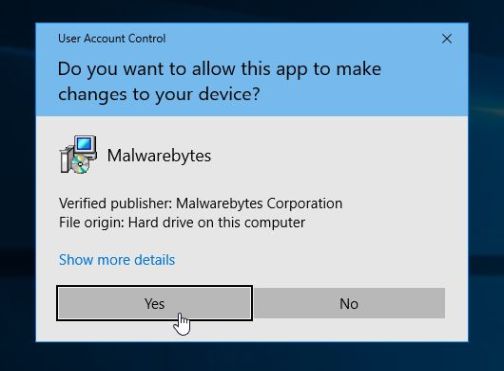
You may be presented with an User Account Control pop-up asking if you want to allow Malwarebytes to make changes to your device. If this happens, you should click “Yes” to continue with the installation.
- When the Malwarebytes installation begins, you will see the Malwarebytes Setup Wizard which will guide you through the installation process.
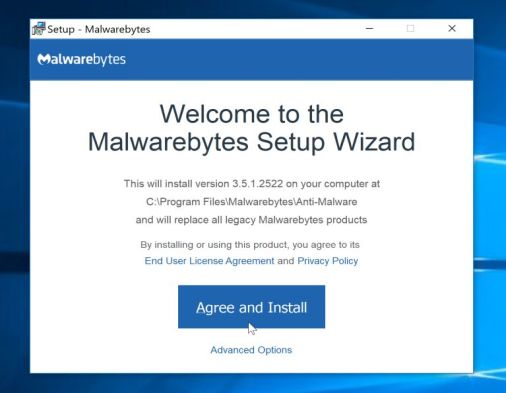
To install Malwarebytes on your machine, keep following the prompts by clicking the “Next” button.
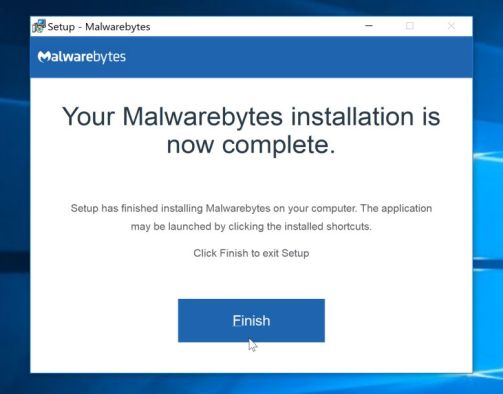
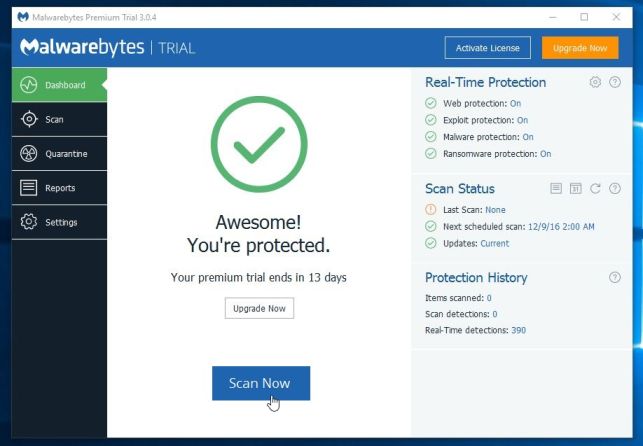
- Once installed, Malwarebytes will automatically start and update the antivirus database. To start a system scan you can click on the “Scan Now” button.
- Malwarebytes will now start scanning your computer for InstantSupport adware.
This process can take a few minutes, so we suggest you do something else and periodically check on the status of the scan to see when it is finished.
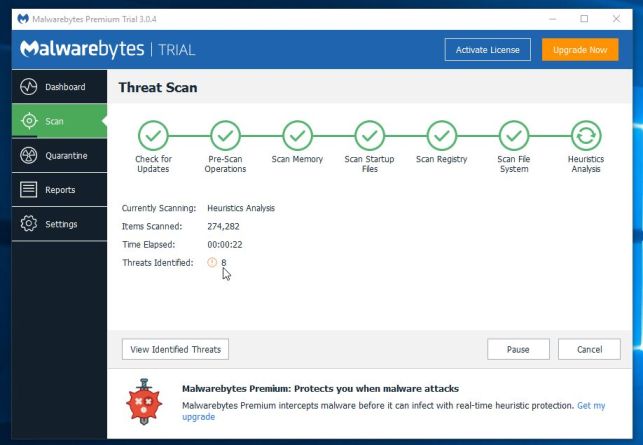
- When the scan has completed, you will be presented with a screen showing the malware infections that Malwarebytes has detected.
To remove the malicious programs that Malwarebytes has found, click on the “Quarantine Selected” button.
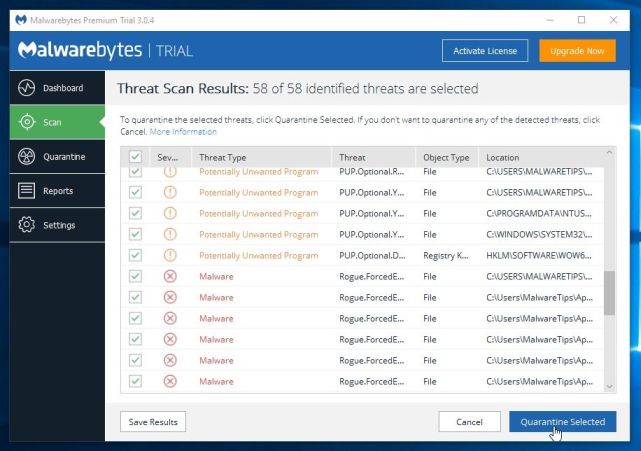
- Malwarebytes will now quarantine all the malicious files and registry keys that it has found.
To complete the malware removal process, Malwarebytes may ask you to restart your computer.
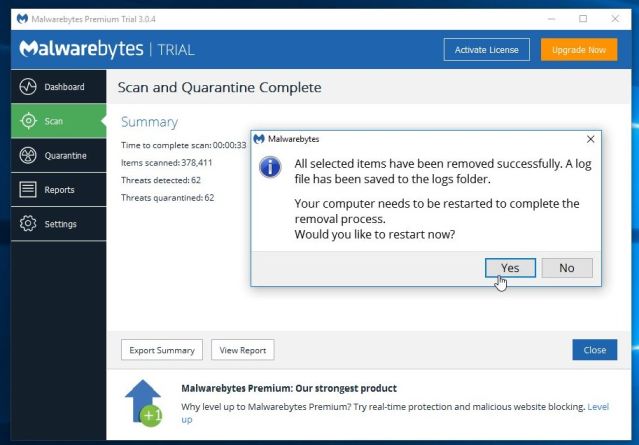
When the malware removal process is complete, you can close Malwarebytes and continue with the rest of the instructions.
STEP 4: Double-check for malicious programs with HitmanPro
HitmanPro can find and remove malware, adware, bots, and other threats that even the best antivirus suite can oftentimes miss. HitmanPro is designed to run alongside your antivirus suite, firewall, and other security tools.
- You can download HitmanPro from the below link:
HITMANPRO DOWNLOAD LINK (This link will open a new web page from where you can download “HitmanPro”) - When HitmanPro has finished downloading, double-click on the “hitmanpro” file to install this program on your computer.
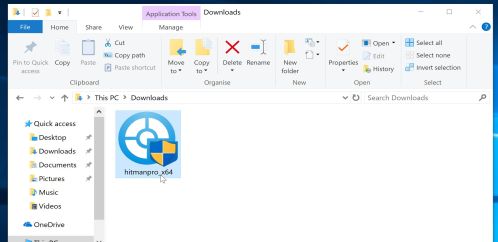
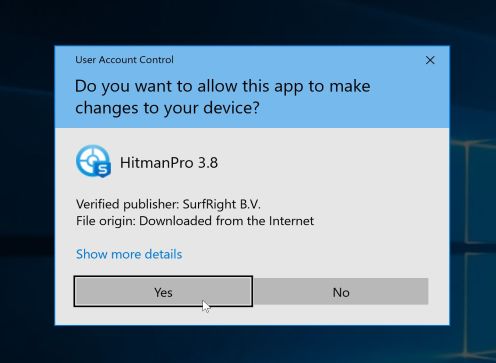
You may be presented with an User Account Control pop-up asking if you want to allow HitmanPro to make changes to your device. If this happens, you should click “Yes” to continue with the installation.
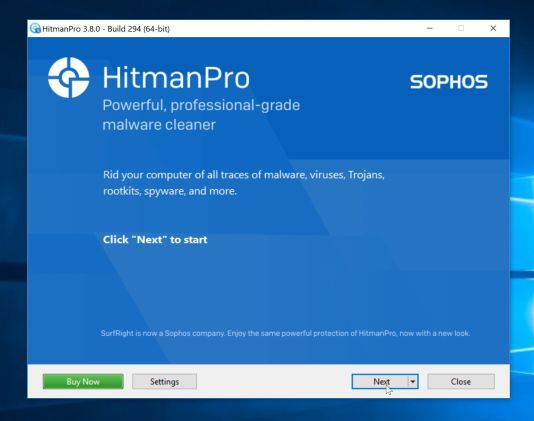
- When the program starts you will be presented with the start screen as shown below. Now click on the Next button to continue with the scan process.
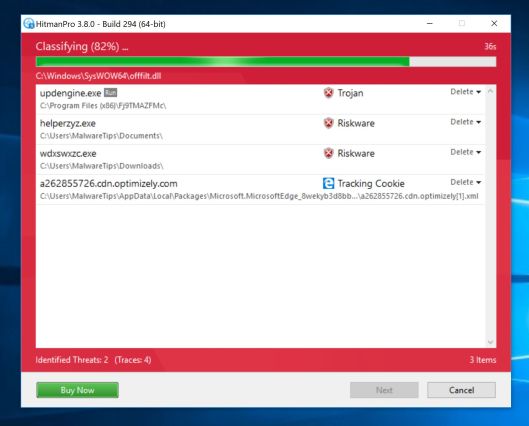
- HitmanPro will now begin to scan your computer for the InstantSupport adware.
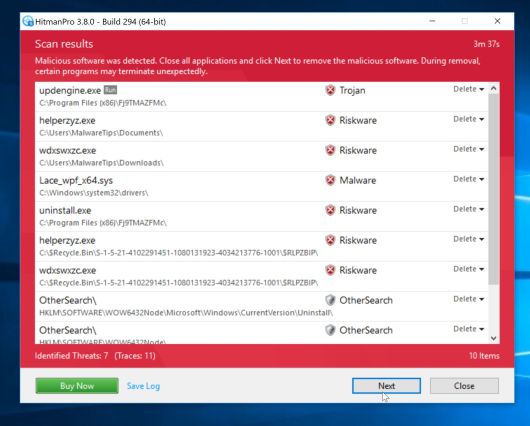
- When it has finished it will display a list of all the malware that the program found as shown in the image below. Click on the “Next” button, to remove malware.
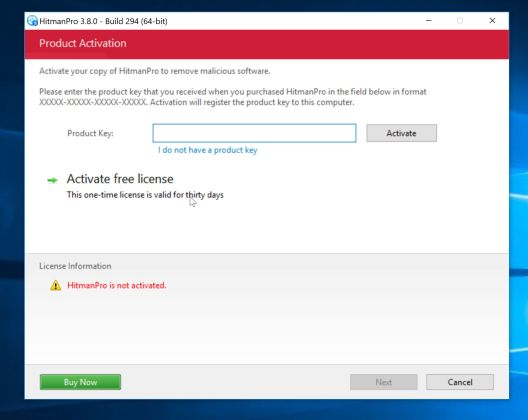
- Click on the “Activate free license” button to begin the free 30 days trial, and remove all the malicious files from your computer.
When the process is complete, you can close HitmanPro and continue with the rest of the instructions.
(OPTIONAL) STEP 5: Reset your browser to default settings
This step should be performed only if your issues have not been solved by the previous steps.
Google Chrome
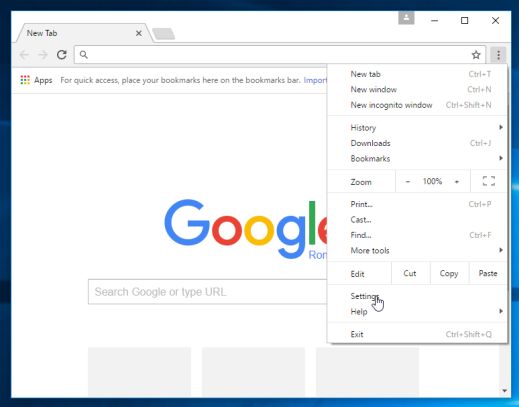
- Click on Chrome’s main menu button, represented by three horizontal lines. When the drop-down menu appears, select the option labeled Settings.
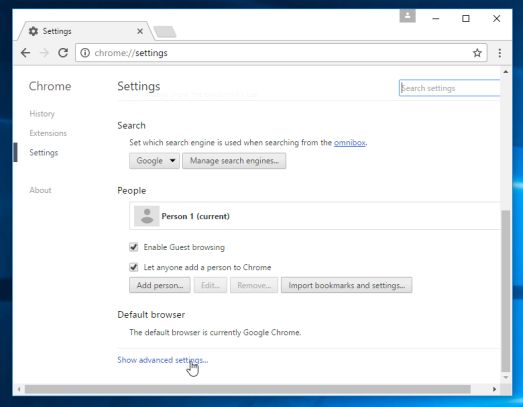
- Chrome’s Settings should now be displayed in a new tab or window, depending on your configuration. Next, scroll to the bottom of the page and click on the Show advanced settings link (as seen in the below example).
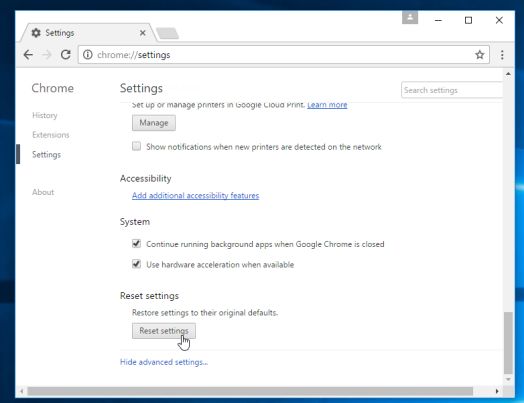
- Chrome’s advanced Settings should now be displayed. Scroll down until the Reset browser settings section is visible, as shown in the example below. Next, click on the Reset browser settings button.
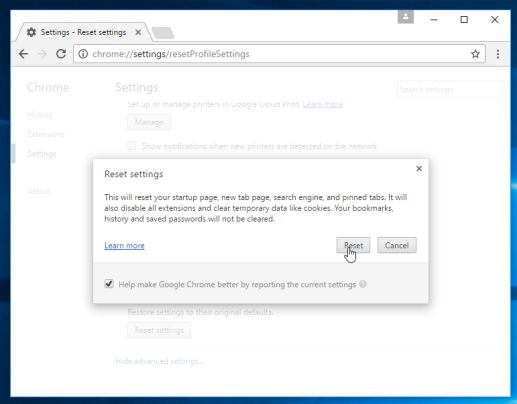
- A confirmation dialog should now be displayed, detailing the components that will be restored to their default state should you continue on with the reset process. To complete the restoration process, click on the Reset button.
Internet Explorer
- Open Internet Explorer, click on the “gear icon” in the upper right part of your browser, then click again on Internet Options.
![Click on the Gear Icon then on Internet Options [Image: Internet Options in Internet Explorer]](https://malwaretips.com/blogs/wp-content/uploads/2014/03/Internet-Options-Internet-Explorer.jpg)
- In the “Internet Options” dialog box, click on the “Advanced” tab, then click on the “Reset” button.
![In the Advanced tab click on the Reset button [Image: Reset Internet Explorer]](https://malwaretips.com/blogs/wp-content/uploads/2014/03/Reset-Internet-Explorer.jpg)
- In the “Reset Internet Explorer settings” section, select the “Delete personal settings” check box, then click on “Reset” button.
![Click on the Reset button to revert IE to its default settings [Image: Reset Internet Explorer to its default settings]](https://malwaretips.com/blogs/wp-content/uploads/2014/03/reset-button-Internet-Explorer.jpg)
- When Internet Explorer has completed its task, click on the “Close” button in the confirmation dialogue box. You will now need to close your browser, and then you can open Internet Explorer again.
![Click on the Close button [Image Reset Internet Explorer settings]](https://malwaretips.com/blogs/wp-content/uploads/2014/03/Close-button-Reset.jpg)
Mozilla Firefox
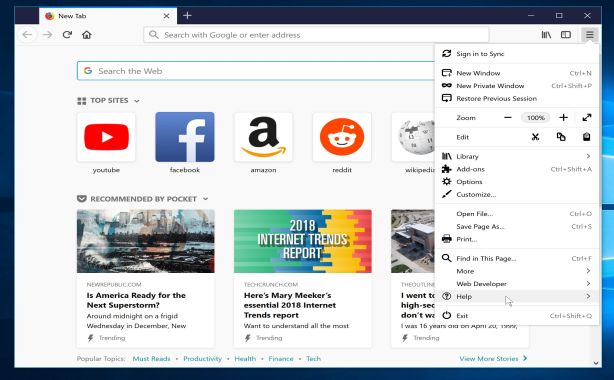
- In the upper-right corner of the Firefox window, click the Firefox menu button, then click on the “Help”
![Firefox Help button [Image: Firefox Help button]](https://malwaretips.com/blogs/wp-content/uploads/2014/04/Firefox-Help.png) button.
button.
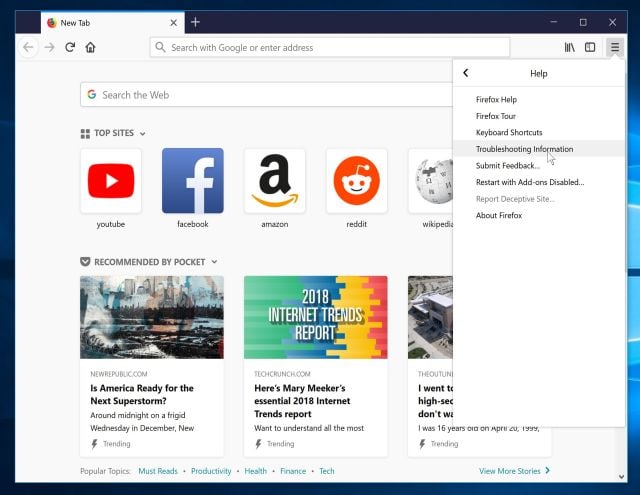
- From the Help menu, choose Troubleshooting Information.
If you’re unable to access the Help menu, type about:support in your address bar to bring up the Troubleshooting information page.
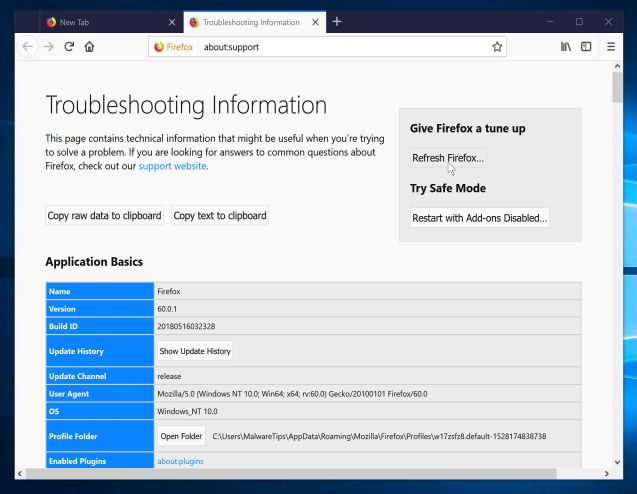
- Click the “Refresh Firefox” button in the upper-right corner of the “Troubleshooting Information” page.
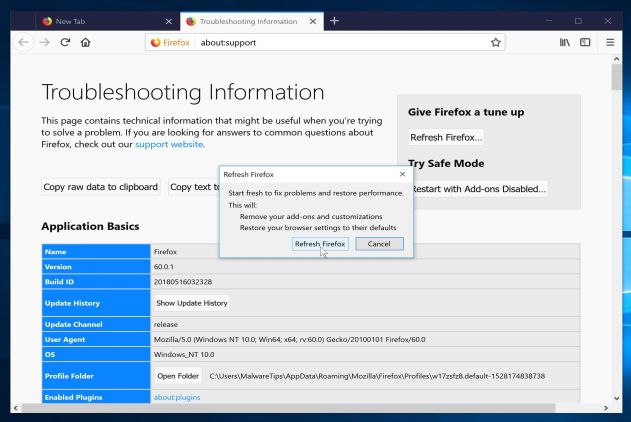
- To continue, click on the “Refresh Firefox” button in the new confirmation window that opens.
- Firefox will close itself and will revert to its default settings. When it’s done, a window will list the information that was imported. Click on the “Finish“.
Your computer should now be free of the InstantSupport adware. If you are still experiencing problems while trying to remove InstantSupport adware from your computer, please do one of the following:
- Run a system scan with Zemana AntiMalware
- Ask for help in our Malware Removal Assistance forum.

