


If your computer has been locked and you are seeing a notification from the police, asking you to pay a fine via Ukash, MoneyPak or PaySafeCard, then you are reading this article to understand if it’s real and how to get rid of it.
The newest form of attack used by cyber criminals, is a piece of malware called Trojan Reveton, which will display a bogus notification that pretends to be from your local police department, and states that your computer has been blocked due to it being involved with the distribution of pornographic material, SPAM and copyrighted content.
This new form of malware will lock you out of your computer and applications, so whenever you’ll try to log on into your Windows operating system or Safe Mode with Networking, it will display instead a lock screen asking you to pay a non-existing fine in the form of a Ukash or PaySafeCard code.
Furthermore, to make its alert seem more authentic, this virus also has the ability to access your installed webcam so that the bogus Ukash notification shows what is happening in the room.
If your computer is infected with Ukash virus,then you’ll see a notification from your local police department, below you can see just a few examples on how this alerts might look:
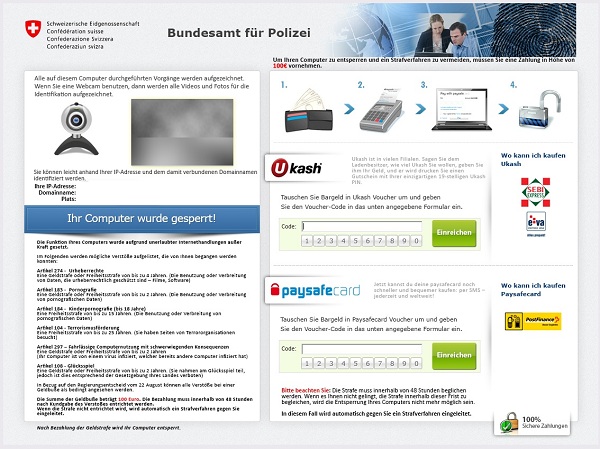

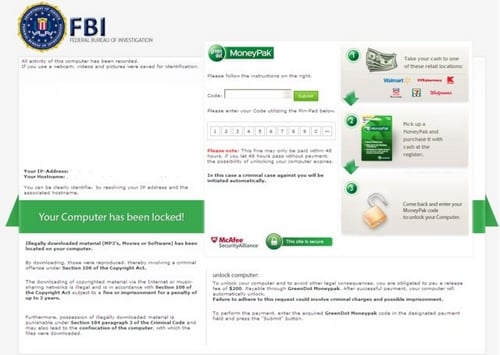
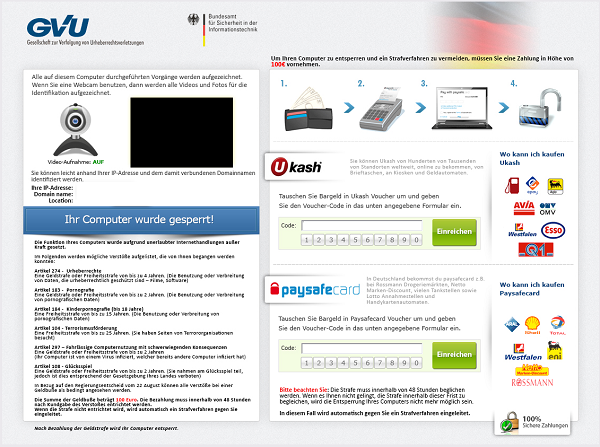
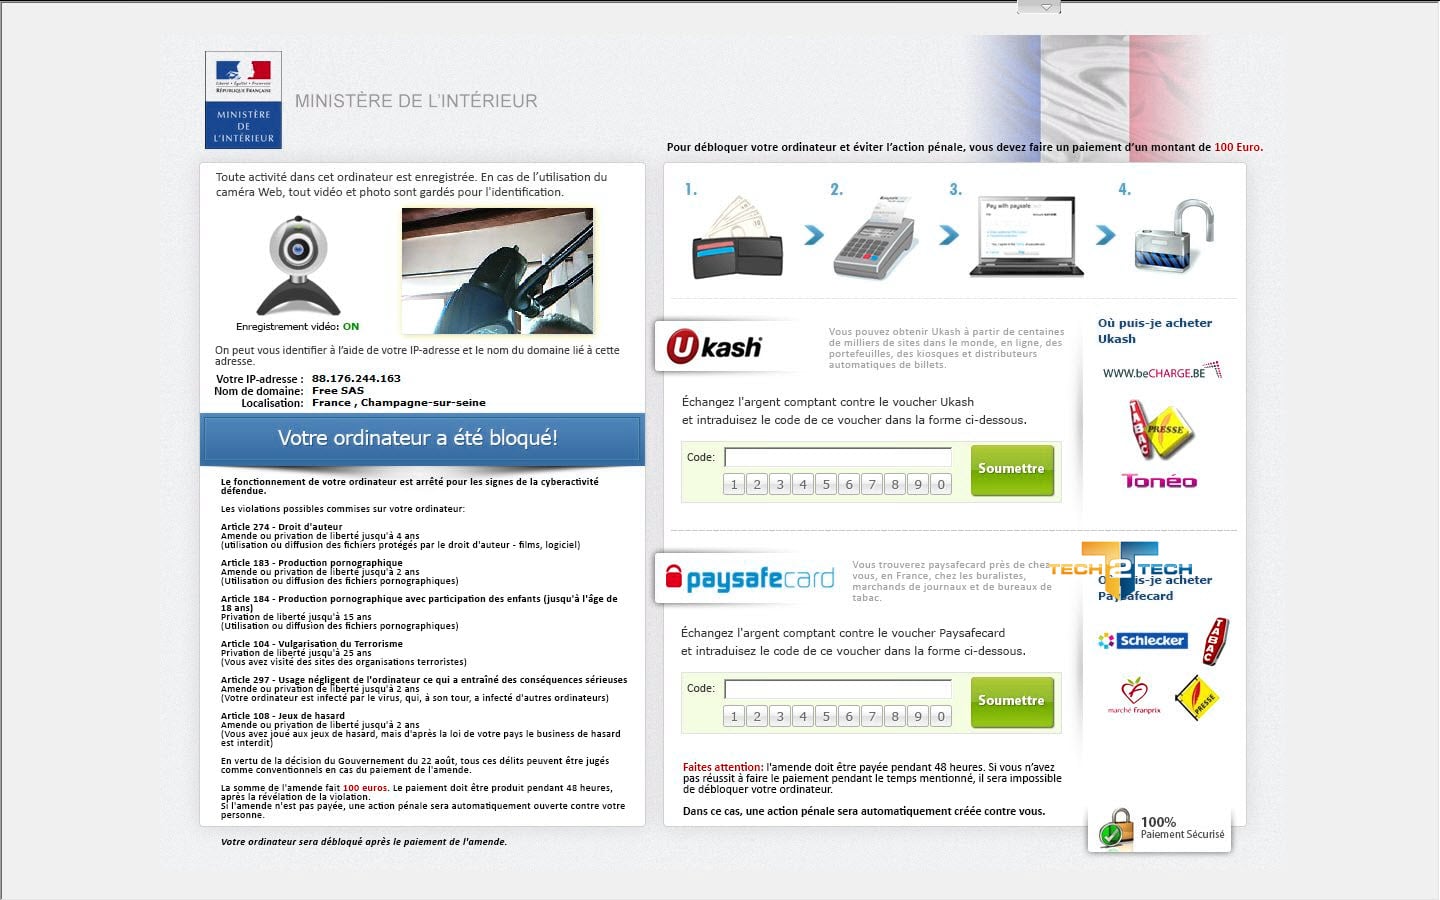

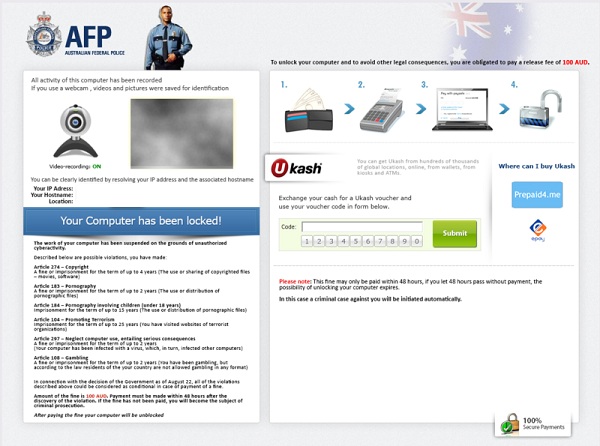

The Ukash Ransom is a scam and you should ignore any alert that this malicious software might generate and remove this trojan ransomware from your computer.
Under no circumstance should you send any money to this cyber criminals,as this could lead to identity theft,and if you have, you should request a refund from Ukash stating that you are the victim of a scam and computer virus.
Ukash Police Ransom – Virus Removal Guide
This page is a comprehensive guide, which will remove the Ukash infection from your your computer. Please perform all the steps in the correct order. If you have any questions or doubt at any point STOP and ask for our assistance.
The Ukash will start automatically when you login to your computer and display its screenlocker so that you are unable to access your computer, therefore we will need to remove this infection by using any of the below methods:
OPTION 1: Remove Ukash lock screen virus with System Restore
OPTION 2: Remove Ukash virus with with HitmanPro Kickstart
OPTION 3: Remove Ukash virus with Kaspersky Rescue Disk
OPTION 1: Remove Ukash lock screen virus with System Restore
System Restore helps you restore your computer’s system files to an earlier point in time. It’s a way to undo system changes to your computer without affecting your personal files, such as e‑mail, documents, or photos.
Because the Ukash virus will not allow you to start the computer in Windows regular mode, we will need to start System Restore from the Safe Mode with Command Prompt mode.
STEP 1: Restore Windows to a previous state using System Restore
- Reboot your computer into Safe Mode with Command Prompt. To do this, turn your computer off and then back on and immediately when you see anything on the screen, start tapping the F8 key on your keyboard.
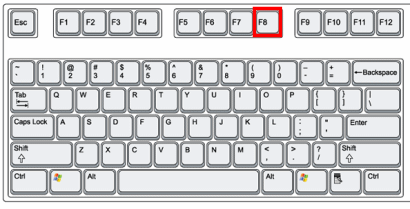
If you are using Windows 8, the trick is to hold the Shift button and gently tap the F8 key repeatedly, this will sometimes boot you into the new advanced “recovery mode”, where you can choose to see advanced repair options. On the next screen, you will need to click on the Troubleshoot option, then select Advanced Options and select Windows Startup Settings. Click on the Restart button, and you should now be able to see the Advanced Boot Options screen. - Using the arrow keys on your keyboard, select Safe Mode with Command Prompt and press Enter on your keyboard.
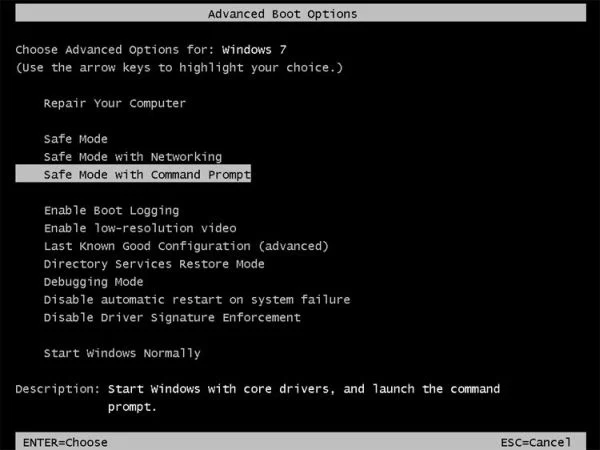
- At the command prompt, type rstrui.exe, and then press ENTER.
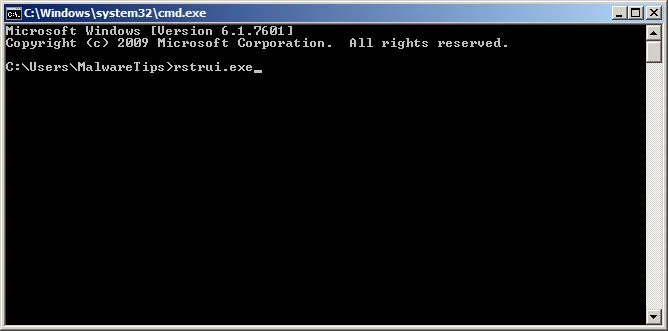
Alternatively, if you are using Windows Vista, 7 and 8, you can type: C:\windows\system32\rstrui.exe , and press Enter. And if you are a Windows XP user, type C:\windows\system32\restore\rstrui.exe, then press Enter. - System Restore should start, and you will display also a list of restore points. Try using a restore point created just before the date and time the Ukash lock screen virus has infected your computer.
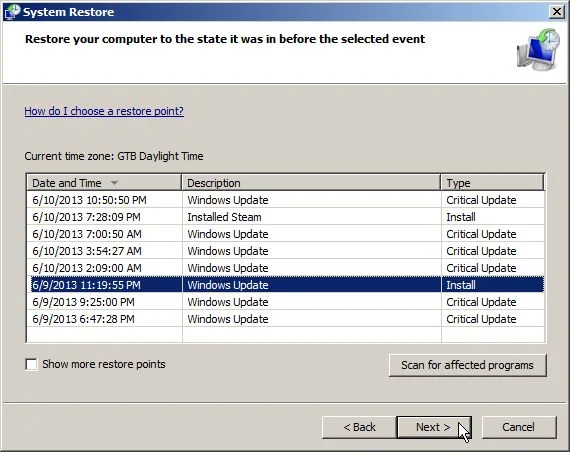
- When System Restore has completed its task, start your computer in Windows regular mode, and perform a scan with Malwarebytes Anti-Malware and HitmanPro, as seen in the next step.
STEP 2: Remove Ukash malicious files with Malwarebytes Anti-Malware Free
Even after using System Restore,
- You can download Malwarebytes Anti-Malware Free from the below link, then double-click on the icon named mbam-setup.exe to install this program.
Download MalwarebytesFree official installer. Your download starts right away. - When the installation begins, keep following the prompts in order to continue with the setup process, then at the last screen click on the Finish button.
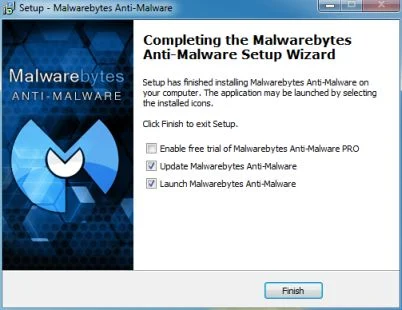
- On the Scanner tab, select Perform quick scan, and then click on the Scan button to start searching for the Ukash malicious files.
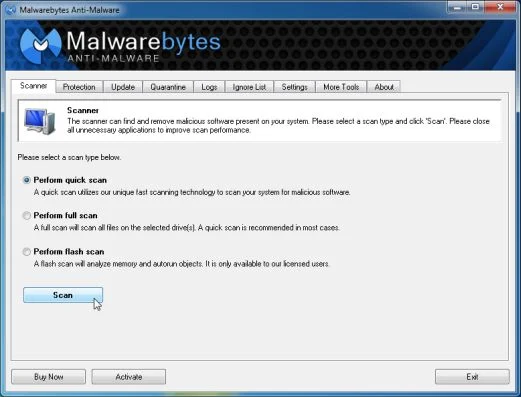
- Malwarebytes’ Anti-Malware will now start scanning your computer for Ukash virus as shown below.
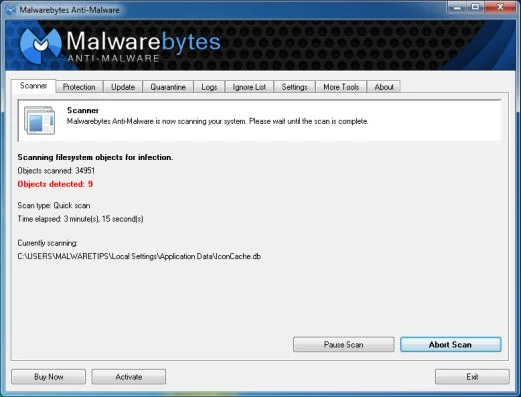
- When the Malwarebytes Anti-Malware scan has finished, click on the Show Results button.
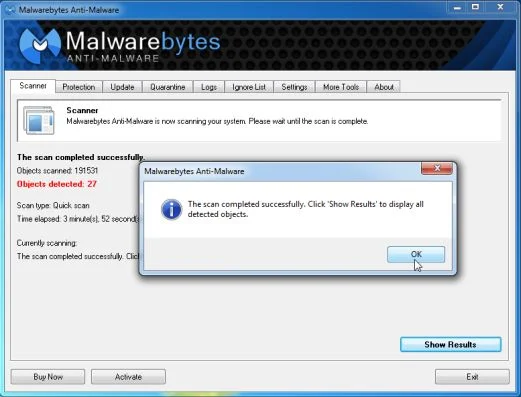
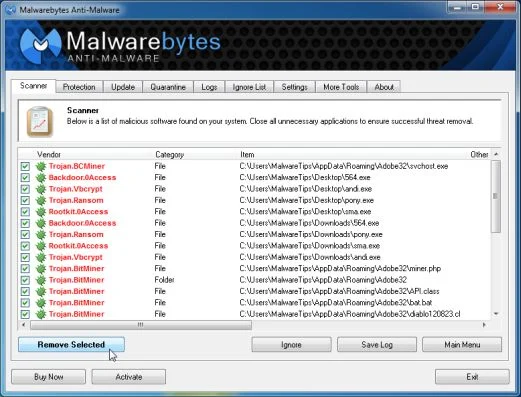
- You will now be presented with a screen showing you the computer infections that Malwarebytes Anti-Malware has detected. Make sure that everything is Checked (ticked), then click on the Remove Selected button.
STEP 3: Double-check for the Ukash virus with HitmanPro
- You can download HitmanPro from the below link:
Download HitmanProOfficial Sophos download. Free scan, free 30-day trial to remove threats. - Double-click on the file named HitmanPro.exe (for 32-bit versions of Windows) or HitmanPro_x64.exe (for 64-bit versions of Windows). When the program starts you will be presented with the start screen as shown below.
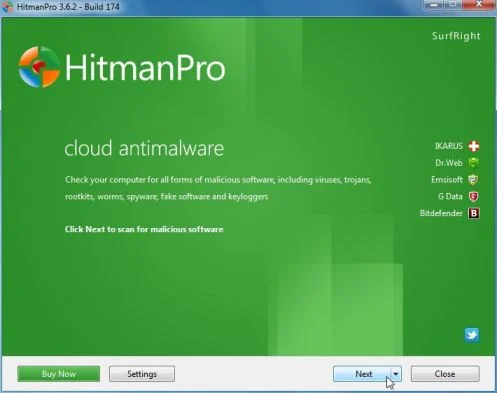
Click on the Next button, to install HitmanPro on your computer.
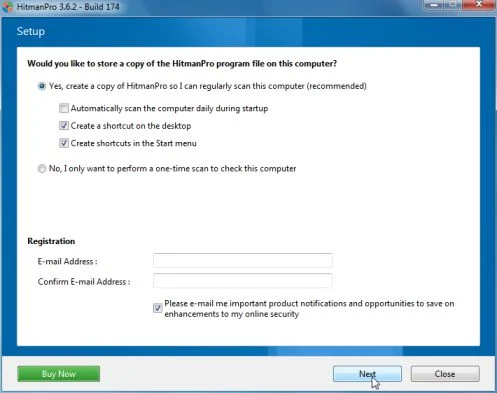
- HitmanPro will now begin to scan your computer for Ukash malicious files.
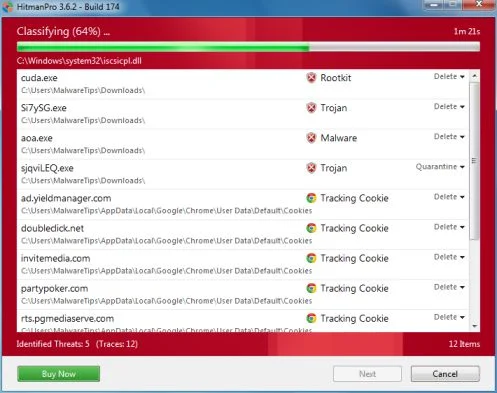
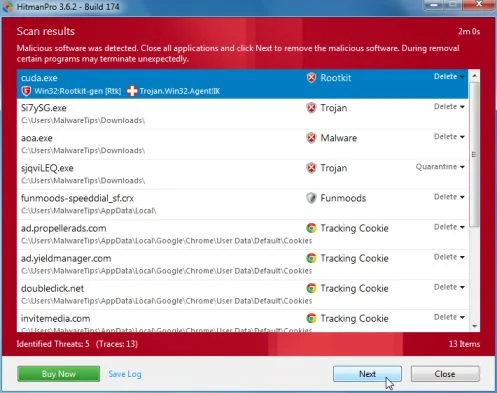
- When it has finished it will display a list of all the malware that the program found as shown in the image below. Click on the Next button, to remove Ukash virus.
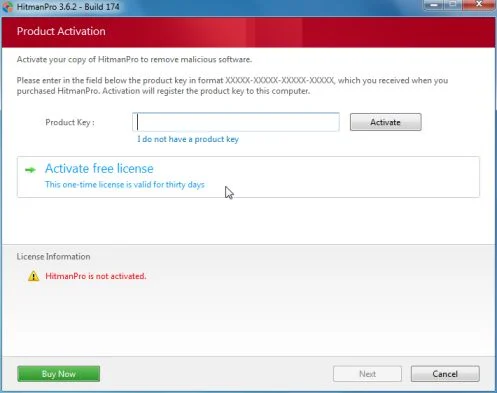
- Click on the Activate free license button to begin the free 30 days trial, and remove all the malicious files from your computer.
OPTION 2: Remove Ukash virus with with HitmanPro Kickstart
If you cannot start your computer into Safe Mode with Command Prompt mode, we can use the HitmanPro Kickstart program to bypass Ukash lock screen.
As the Ukash ransomware infection locks you out of your computer, you will need to create a bootable USB drive that contains the HitmanPro Kickstart program.
We will then boot your computer using this bootable USB drive and use it to clean the infection so that you are able to access Windows normally again.
You will also need a USB drive, which will have all of its data erased and will then be formatted. Therefore, only use a USB drive that does not contain any important data.
- Using a “clean” (non-infected) computer, please download HitmanPro Kickstart from the below link.
Download HitmanProOfficial Sophos download. Free scan, free 30-day trial to remove threats. - Once HitmanPro has been downloaded, please insert the USB flash drive that you would like to erase and use for the installation of HitmanPro Kickstart. Then double-click on the file named HitmanPro.exe (for 32-bit versions of Windows) or HitmanPro_x64.exe (for 64-bit versions of Windows).
To create a bootable HitmanPro USB drive, please follow the instructions from this video:
- Now, remove the HitmanPro Kickstart USB drive and insert it into the Ukash infected computer.
- Once you have inserted the HitmanPro Kickstart USB drive, turn off the infected computer and then turn it on. As soon as you power it on, look for text on the screen that tells you how to access the boot menu.

The keys that are commonly associated with enabling the boot menu are F10, F11 or F12. - Once you determine the proper key (usually the F11 key) that you need to press to access the Boot Menu, restart your computer again and start immediately tapping that key. Next, please perform a scan with HitmanPro Kickstart as shown in the video below.
- HitmanPro will now reboot your computer and Windows should start normally. Then please Malwarebytes Anti-Malware and HitmanPro, and scan your computer for any left over infections.

OPTION 3: Remove Ukash virus with Kaspersky Rescue Disk
If any of the above methods did not clean your infected computer, we can use a Kaspersky Rescue Disk Bootable to clean the Windows registry and to perform a system scan to remove the Ukash virus.
To create a bootable Kaspersky Rescue Disk, we will need the following items:
- A clean (non-infected) computer with Internet access
- A blank DVD or CD
- A computer with a DVD or CD burner
STEP 1: Download and create a bootable Kaspersky Rescue Disk CD
- You can download Kaspersky Rescue Disk utility from link below:
Download Kaspersky Rescue DiskOpens the download page in a new tab. - To create the bootable rescue disk, we will need to use the ImgBurn program. You can download ImgBurn from the below link, then install this program.
Download ImgBurnOpens the download page in a new tab. - Insert your blank DVD or CD in your burner, then start ImgBurn and click on the Write image file to disc button.
- Under Source click on the Browse for file button, then navigate to the location where you previously saved the Kaspersky Rescue Disk utility (kav_rescue_10.iso), then click on the Write button.
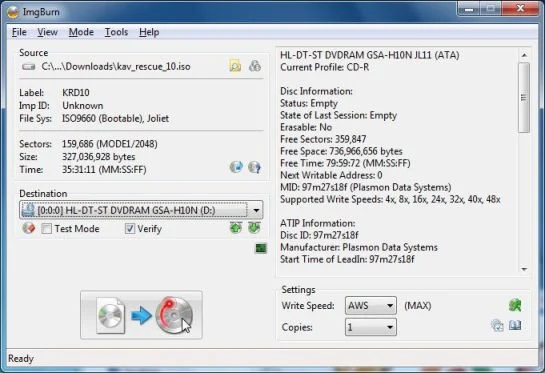
That’s it, ImgBurn will now begin writing your bootable Kaspersky Rescue Disk.
STEP 2: Start your computer using the Kaspersky Rescue Disk
- Once you’ve got the Kasperky Rescue Disk in hand, insert it into the infected computer, and turn off and then turn it on again.
- As soon as you power it on, you will see a screen that tells you to press any key to enter the menu, so please tap any key to boot your machine from the Kaspersky Rescue Disk.

- In the next screen, you will need to chose a language, then you click on Kaspersky Rescue Disk. Graphic Mode and press ENTER, to start the Kaspersky Rescue Disk.
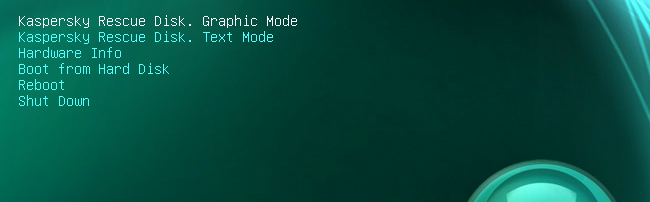
STEP 3: Scan your system with Kaspersky Rescue Disk
- Within a few short seconds you should see the full working environment, with the Kaspersky Rescue Disk screen front and center as shown below.
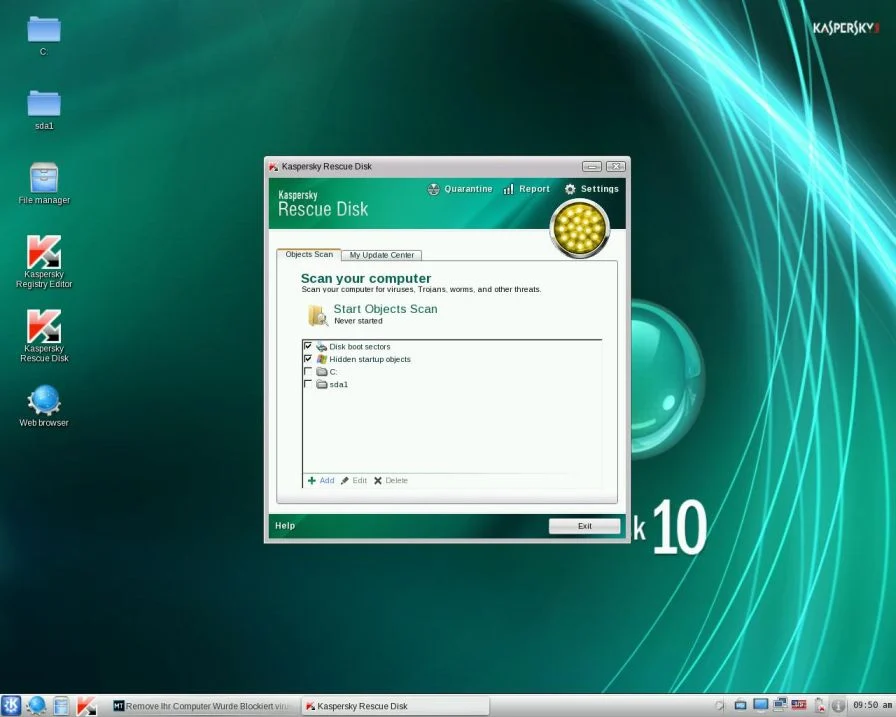
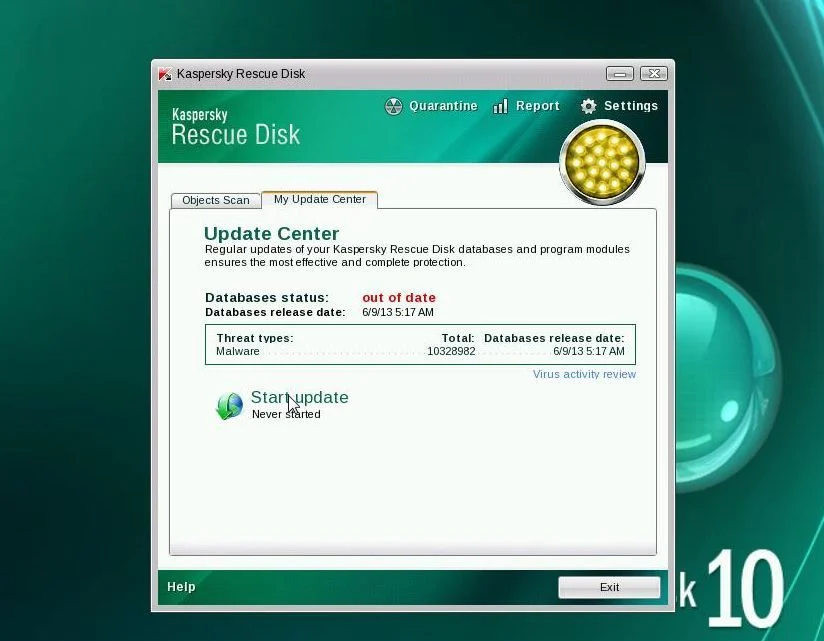
- Switch tabs over to the My Update Center, and then click the Start update button to load the latest anti-virus definitions. Please be patience while this process its completed.
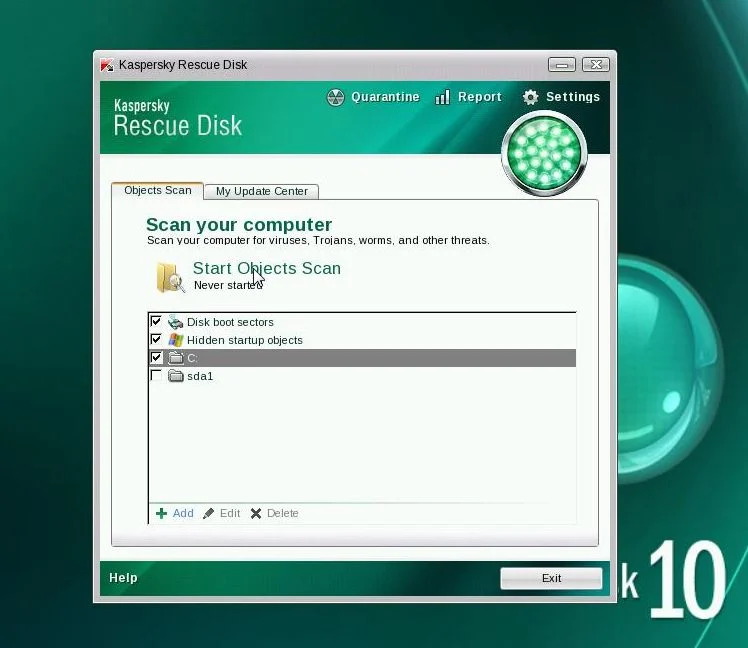
- Switch back over to the Objects Scan tab, select the drives you want to scan, and then click the Start Objects Scan button.
- When Kaspersky Antivirus will detect the Ukash virus, you’ll be prompted to select an action. When this happens, please select Quarantine or Delete to remove this infection from your computer.

- When the antivirus scan has completed, you can restart back into Windows regular mode, by clicking on the Kaspersky Start button
 (lower left corner), and selecting Restart.
Once your computer will start in Windows regular more, download Malwarebytes Anti-Malware and HitmanPro, and scan your computer for any left over infections.

Your computer should now be free of the Ukash infection. If your current anti-virus solution let this infection through, you may want to consider purchasing the PRO version of Malwarebytes Anti-Malware to protect against these types of threats in the future.
If you are still experiencing problems while trying to remove Ukash virus from your machine, please start a new thread in our Malware Removal Assistance forum.

Join the discussion
140 commentsShare your experience or ask a question about this article.
Your progress
Did these steps help?
Let us know how the guide worked for you.
Describe what you see and the step you reached. Keep passwords and other private information out.
Discussion
I can’t thank this website and the Hitman Pro product enough. All day it has taken to find a solution but here it is. Hope it coninues to help many others I am thrilled thank you!
I tried Options 1 and 3 but they did not work, so i tried something different.
I had the problem on an accer laptop running Vista. I pressed the power button and as the computer went to shut down, it closed the Malware screen as part of the shutdown. In the couple of seconds available, I opened a few programs which brought up the “Programs running – do you want to continue shutdown or Cancel” screen. I cancelled and was then able to run my Malwarrebytes!
Might not work for all, but may be worth a try!
Thanks for the Help!
thank you, your explications are helpful
my computer is now clean.
I really want to thank you the person who created this blog!! I caught this dumbass Virus on my work computer. If it werent for your help id be stuck explaining everyone I wasnt watching child porn.. EWWW lol . The methods work great! thanks once again and god bless u!!
Many thanks for the tips found here. Given that the virus has been around for a while I wonder why my up to date version of Norton didn’t trap it when I contracted it from an infected website.
Hi,
Your tips are really helpful.You are the best person.God bless you
Just want to share that I used a similar strategy today.
Download malwarebytes on a USB or SD card from a safe computer
Insert USB or SD card to the infected computer and then turn it on.
Start pressing F8
Select Safe Mode with Command Prompt
At the command prompt, if you are using Windows Vista, 7 or 8 type C:\windows\system32\explorer.exe and then press ENTER.
Go to your SD or USB drive folder and select the mbam-setup
Once malwarebytes get installed,start scanning
After virus detection,remove the infected files and then restart the system.
Your computer will get unlocked and then you can run a full scan to remove the virus completely.
I hope this method will help others too.
Thank you thank you thank you :D
I was completely stuck with this and you have saved me having to take it to an expert :)
I ended up using method 3
thank you
Hey,
Unfortunately none of these methods are working for me at the moment. When I try to use HitmanPro Kickstart it says its waiting for an Internet connect even though my pc is connected to the net wirelessly and via an Ethernet cable. How do I fix this?
In reply to Gianni
Hello Gianni,
If there is no internet connection, you can try scanning in EWS mode (goto Settings -> Advanced -> Early Warning Scoring and check “I am an Expert”).
If it still doesn’t work,you’ll need to create a Kaspersky Rescue CD as seen HERE: http://malwaretips.com/blogs/anonymous-virus/ , on Method 2.
If everything fails, then you’ll need to create an account on our forums and a member of the staff will help you (with more advanced tools) to remove this nasty virus: http://malwaretips.com/Forum-Malware-Removal-Assistance
Good Luck!
Good onya Stelian you’re an absolute legend. I used ‘Method 4’ to fix my laptop. Thanks millions mate. Cheers, Rik.
Hi there brother , i got th same problem with ma comp.. lust wana know how many times to do this C:\windows\system32\restore\rstrui.exe, and then press ENTER
on method 2 please..
cos i enter yhat code n keep repeating .. thank you..
In reply to Sa
Hello Sa,
What operating system are you using?
Wow – thank you so very much. The only thing that can cure the sting of being taken advantage of is the relief of being helped by a kind person(s). Amazing feeling.
Hi,
You are a saviour to anyone who has gone thru this….I do not know how or why this happened but I was just panicking and not sure what made me search, I came across ur suggestions and was able to get this fixed…..thank you so so much and god bless you…you are surely a saviour if there was one….
thanks again
I am having trouble my malwarebytes is a little different and i dont know if that effects it but its taken 9 minutes 10 seconds and its not doing anyrhing
In reply to Shawn
Hello Shawn,
Can you please run a scan with the following tools:
STEP 1: Run a scan with Malwarebytes Anti-Malware in Chameleon Mode:
STEP 2: Run a scan with RogueKiller
RogueKiller Download Link (This link will automatically download RogueKiller on your computer)
STEP 3 Please perform a scan with HitmanPro as seen on the guide.
If you are having problems starting this program please use the ForceBreach mode as described in the guide.
STEP 4: Run a scan with ESET Online Scanner:
ESET Online Scanner Download Link (This link will automatically download ESET Online Scanner on your computer.)
Waiting for your reply to tell me how everything is running!
Good luck…
Thanx a lot for all the detailed information.Sick minds dealing wlth these threats should be bang up.Whish u success
Thank you very much second method worked for me ,you are a star
Thanks so much!
Can not thank you enough! You have been the light at the end of a tunnel!
Thank you so much for this! Really!
Thank you for clear concise removal instructions..your a legend!
hello Stelian,
I just wanted to say THANK YOU VERY MUCH for providing a step by step process in removing the ukash virus. I would have never been able to do it without your help. i followed all the instructions and managed to get my pc back THANKS TO U.