- Apr 21, 2016
- 4,979
Today, we’re releasing an experimental preview of Collections for Microsoft Edge. We initially demoed this feature during the Microsoft Build 2019 conference keynote. Microsoft Edge Insiders can now try out an early version of Collections by enabling the experimental flag on Microsoft Edge preview builds starting in today’s Canary channel build.
We designed Collections based on what you do on the web. It’s a general-purpose tool that adapts to the many roles that you all fill. If you’re a shopper, it will help you collect and compare items. If you’re an event or trip organizer, Collections will help pull together all your trip or event information as well as ideas to make your event or trip a success. If you’re a teacher or student, it will help you organize your web research and create your lesson plans or reports. Whatever your role, Collections can help.
The current version of Collections is an early preview and will change as we continue to hear from you. For that reason, it’s currently behind an experimental flag and is turned off by default. There may be some bugs, but we want to get this early preview into your hands to hear what you think.
Try out Collections
To try out Collections, you’ll need to be on the Canary Channel which you can download from the Microsoft Edge Insider website.
Once you’re on the right build, you’ll need to manually enable the experiment. In the address bar, enter edge://flags#edge-collections to open the experimental settings page. Click the dropdown and choose Enabled, then select the Restart button from the bottom banner to close all Microsoft Edge windows and relaunch Microsoft Edge.

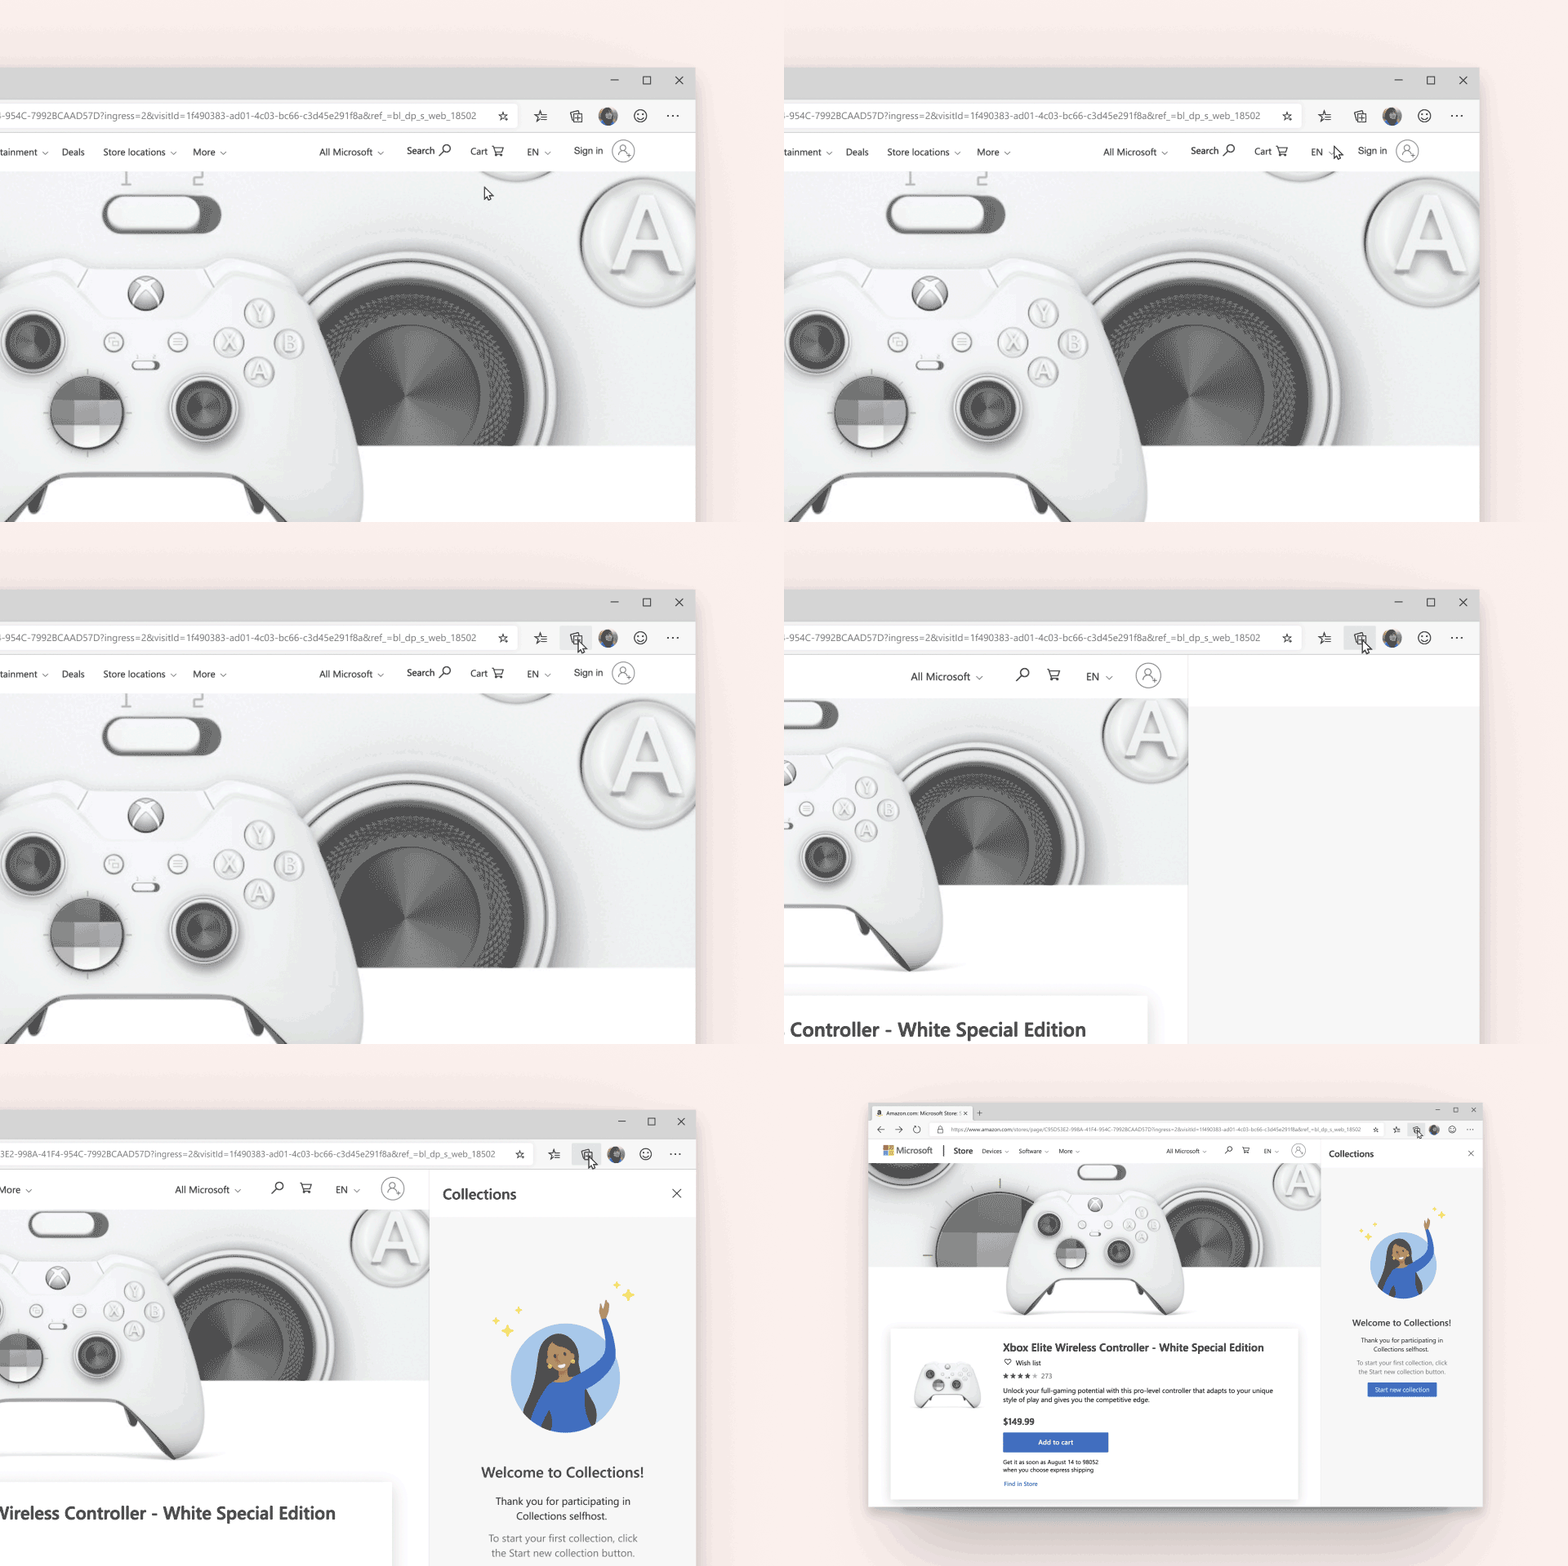
Once the Collections experiment is enabled, you can get started by opening the Collections pane from the button next to the address bar.
Start a collection
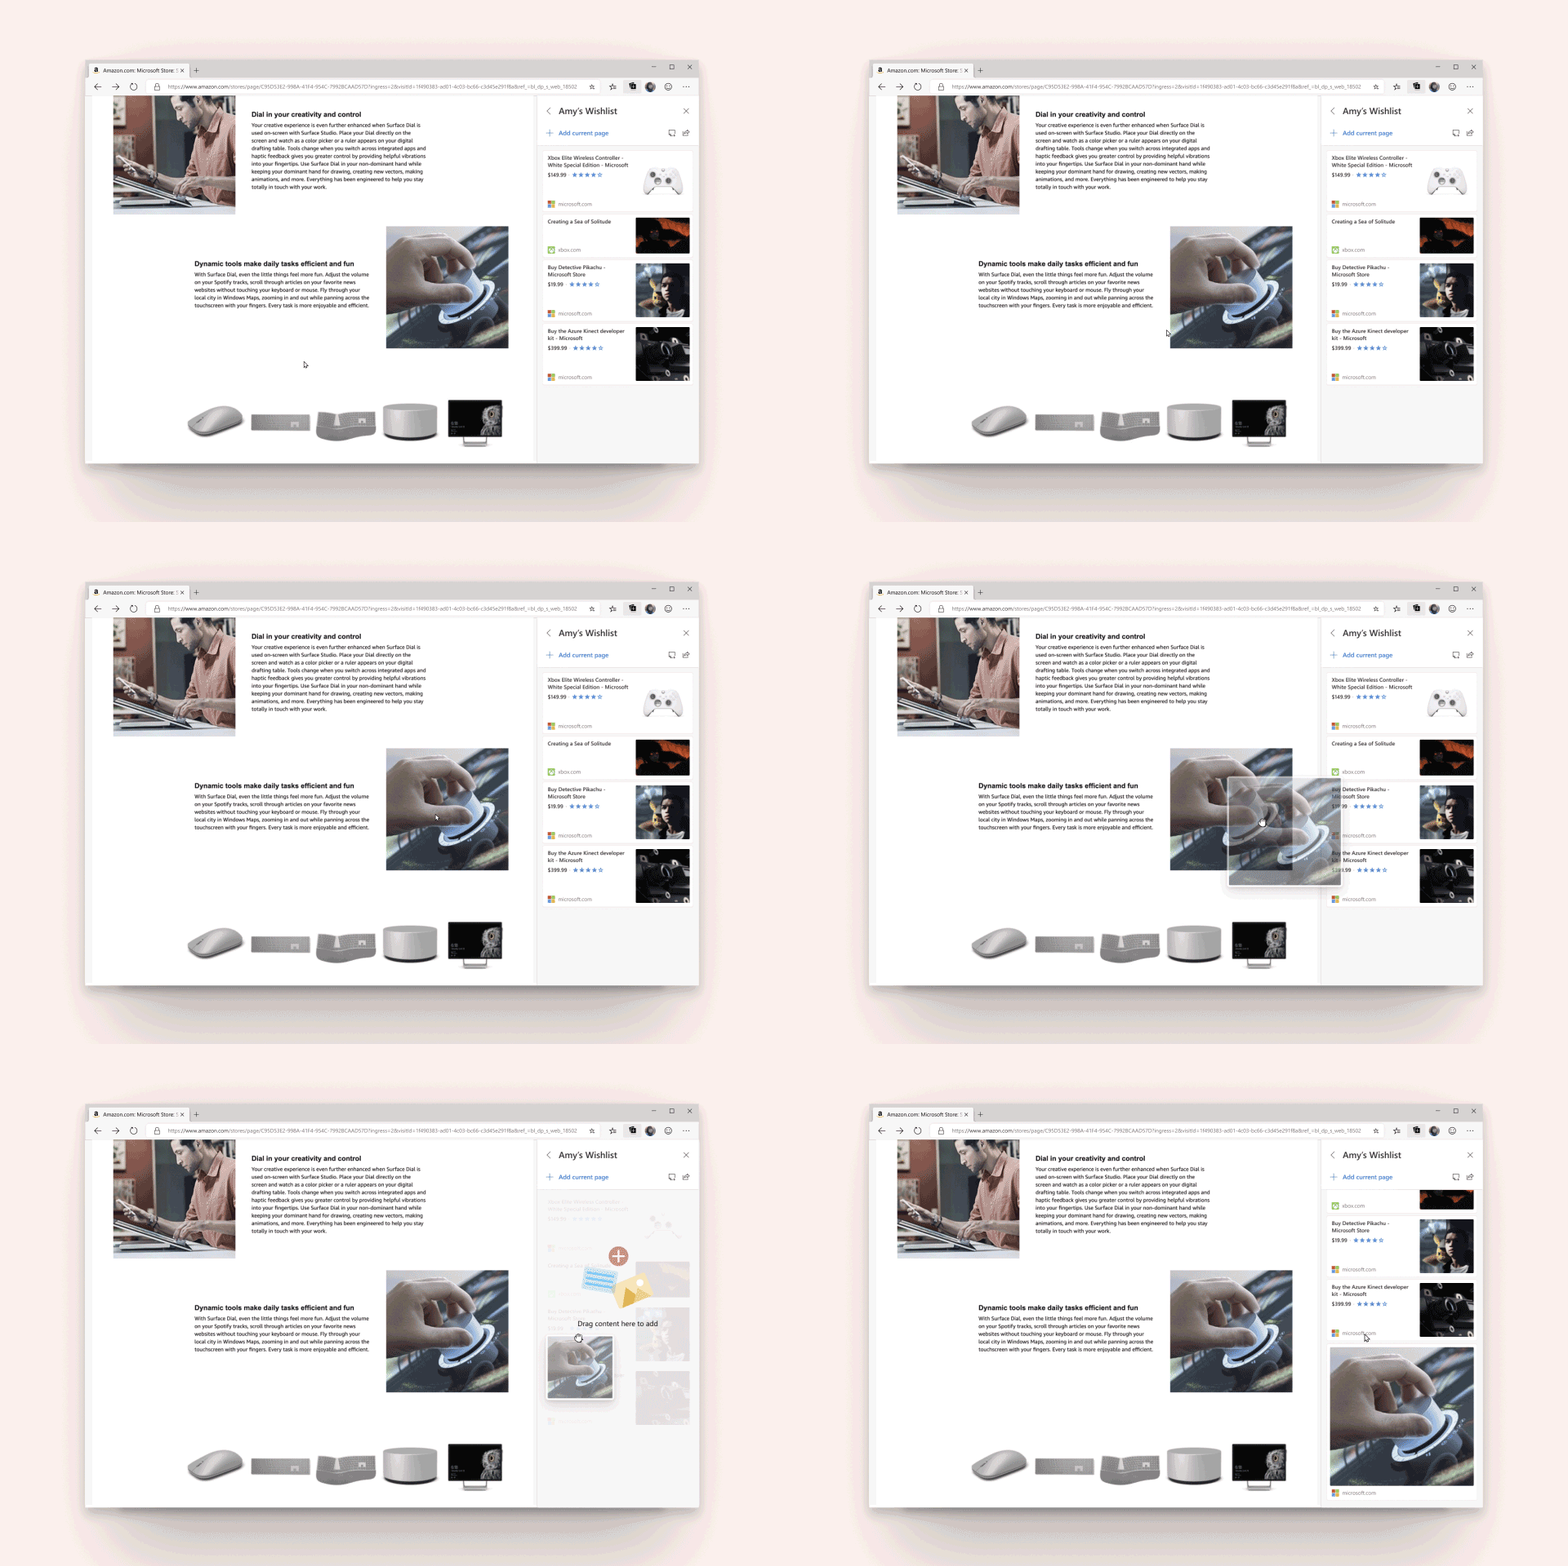
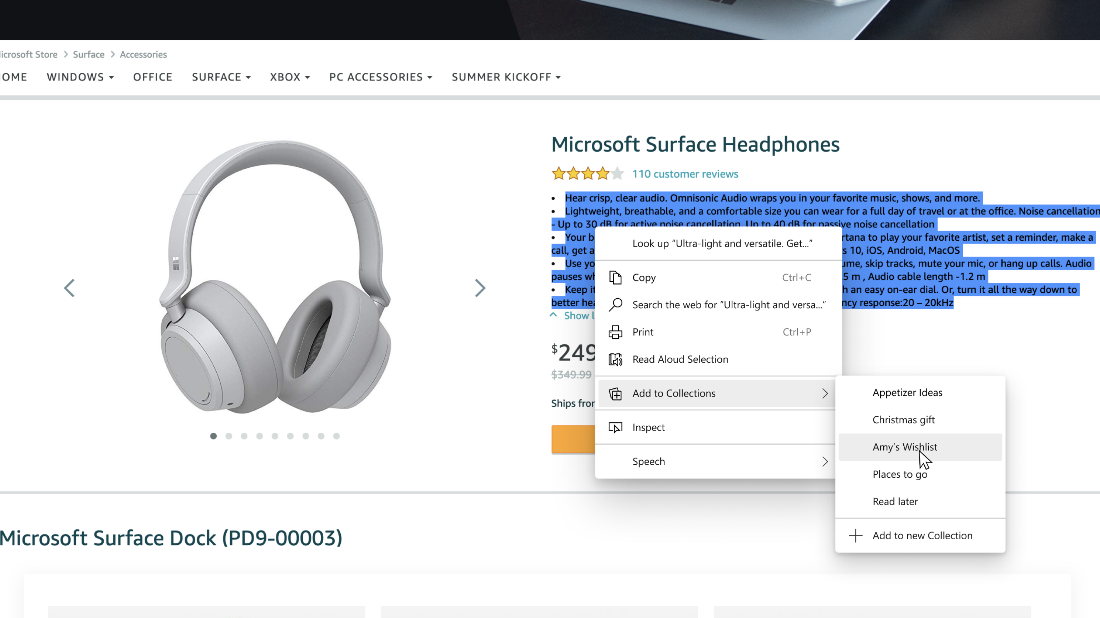
When you open the Collections pane, select Start new collection and give it a name. As you browse, you can start to add content related to your collection in three different ways:
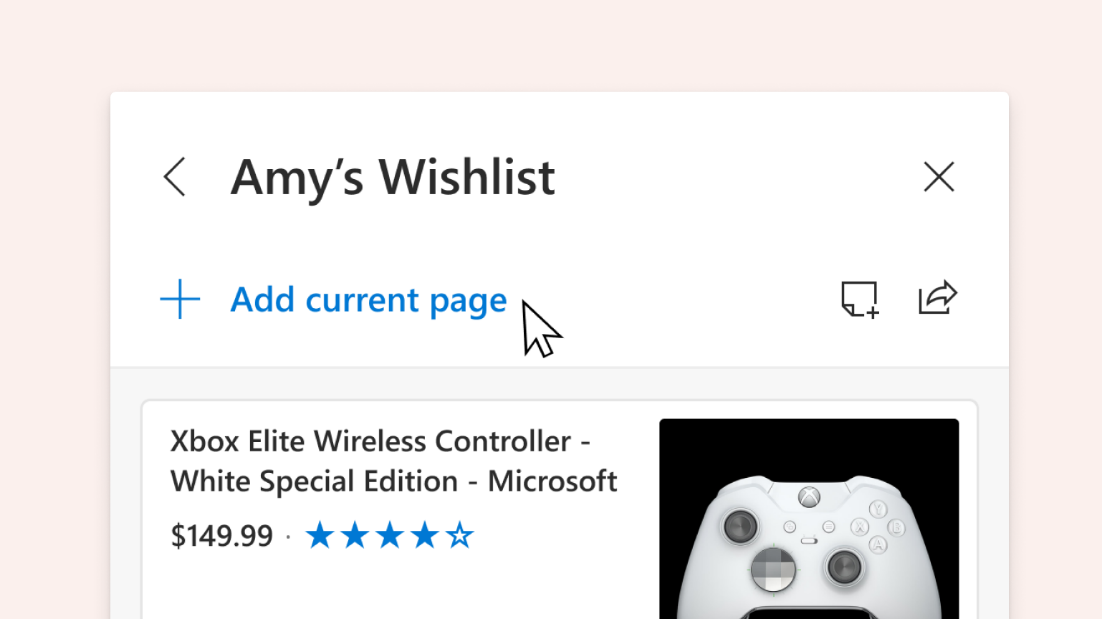
When you add content to Collections, Microsoft Edge creates a visual card to make it easier to recognize and remember the content. For example, a web page added to a collection will include a representative image from that page, the page title, and the website name. You can easily revisit your content by clicking on the visual card in the Collections pane.
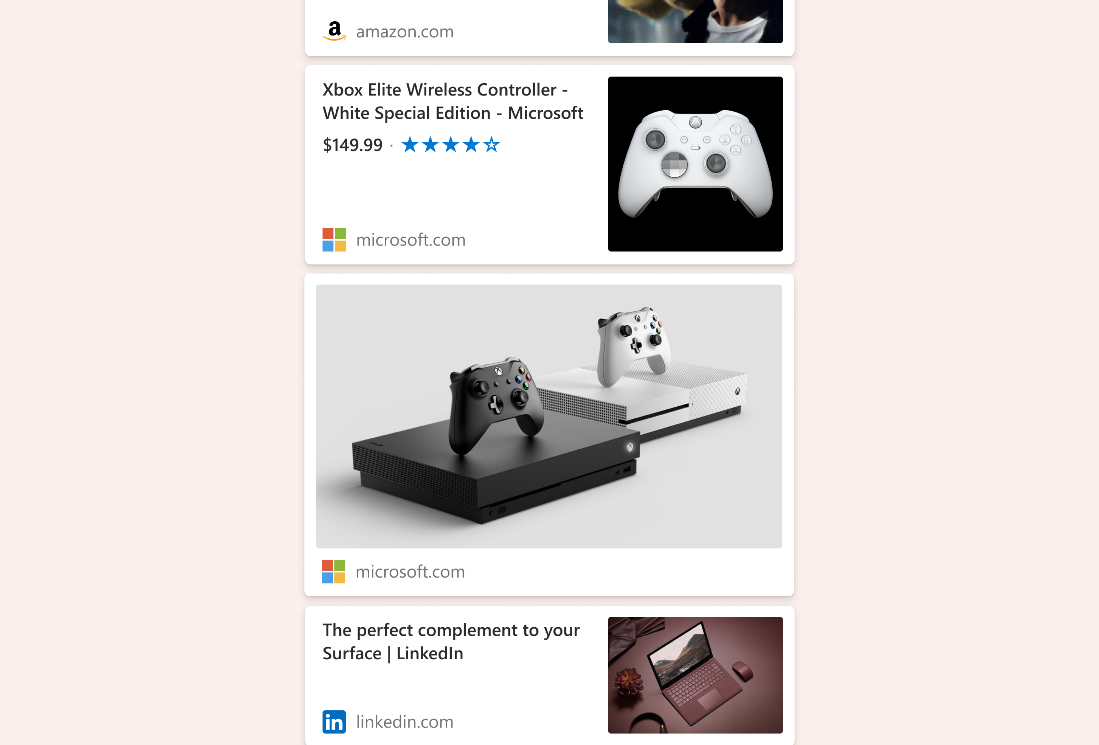
You’ll see different cards for the different types of content you add to Collections. Images added to a collection will be larger and more visual, while full websites added to a collection will show the most relevant content from the page itself. We’re still developing this, starting with a few shopping websites. Content saved to a collection from those sites will provide more detailed information like the product’s price and customer rating.
Edit your collection
Once you’ve created a collection, you can easily use that content by exporting it. You can choose to export the whole collection or select a subset of content.
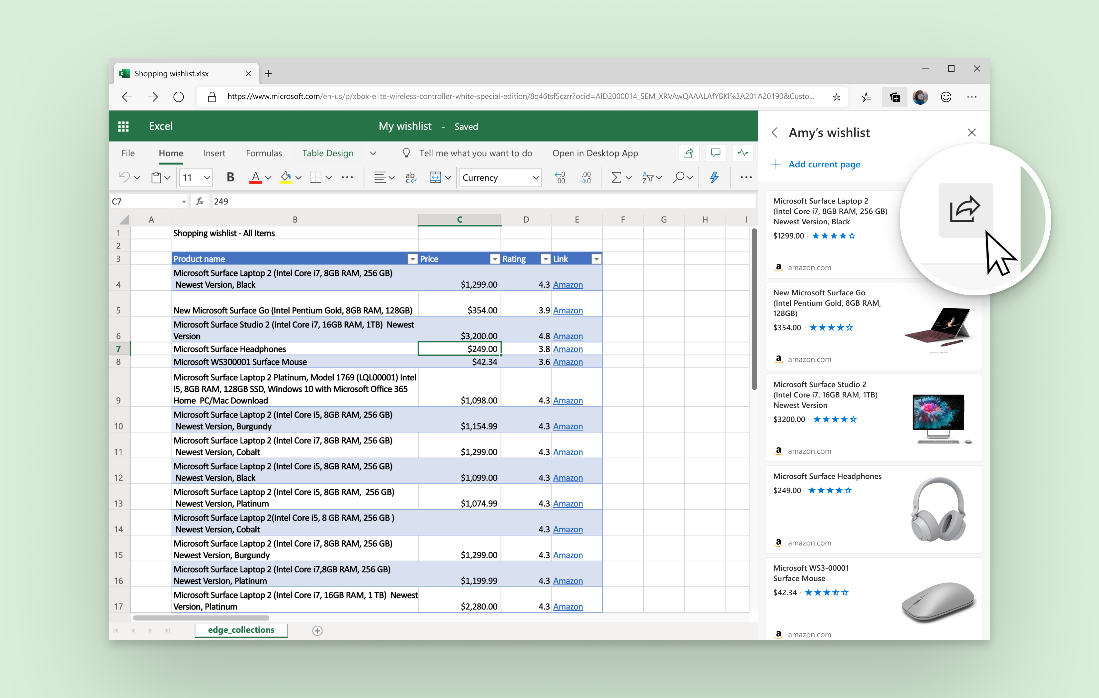
Sending content to Excel is available for Mac and Windows devices running Windows 10 and above. We’ll add support for Windows devices running Windows 7 and 8 soon. Additional functionality, like the ability to send to Word, will also come soon.
Send us feedback
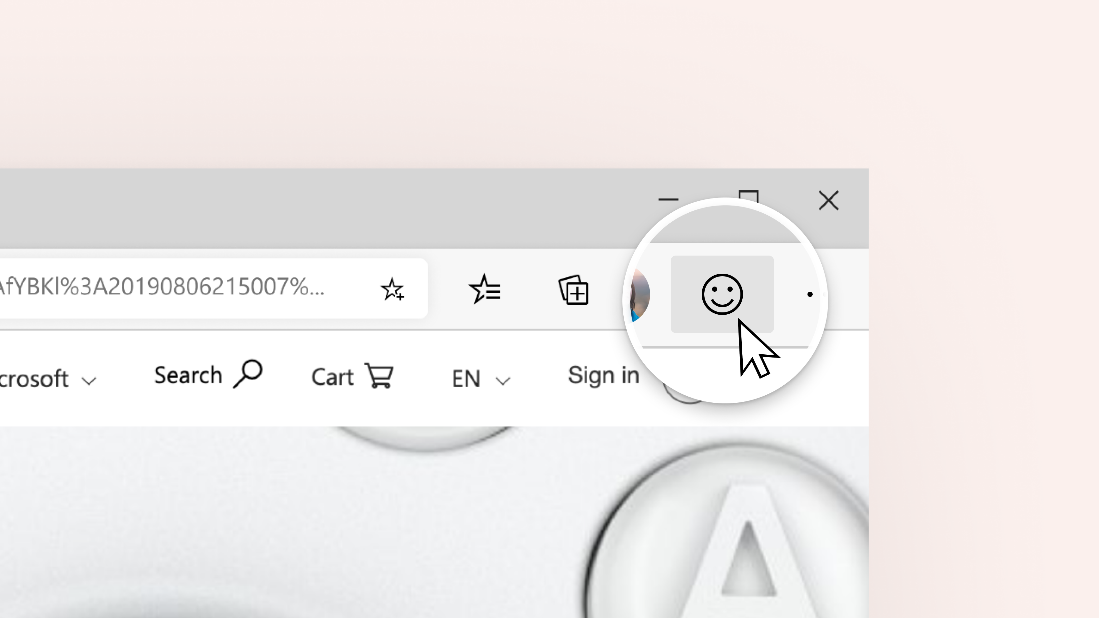
This is the just the first step in our Collections journey and we want to hear from you. If you think something’s not working right, or if there’s some capability you’d like to see added, please send us feedback using the smiley face icon in the top right corner of the browser.
Thanks for being a part of this early preview! We look forward to hearing your feedback.
– The Microsoft Edge Team
The post Collections is now available to test in the Canary channel appeared first on Microsoft Edge Blog.
We designed Collections based on what you do on the web. It’s a general-purpose tool that adapts to the many roles that you all fill. If you’re a shopper, it will help you collect and compare items. If you’re an event or trip organizer, Collections will help pull together all your trip or event information as well as ideas to make your event or trip a success. If you’re a teacher or student, it will help you organize your web research and create your lesson plans or reports. Whatever your role, Collections can help.
The current version of Collections is an early preview and will change as we continue to hear from you. For that reason, it’s currently behind an experimental flag and is turned off by default. There may be some bugs, but we want to get this early preview into your hands to hear what you think.
Try out Collections
To try out Collections, you’ll need to be on the Canary Channel which you can download from the Microsoft Edge Insider website.
Once you’re on the right build, you’ll need to manually enable the experiment. In the address bar, enter edge://flags#edge-collections to open the experimental settings page. Click the dropdown and choose Enabled, then select the Restart button from the bottom banner to close all Microsoft Edge windows and relaunch Microsoft Edge.

Once the Collections experiment is enabled, you can get started by opening the Collections pane from the button next to the address bar.

Start a collection
When you open the Collections pane, select Start new collection and give it a name. As you browse, you can start to add content related to your collection in three different ways:
- Add current page: If you have the Collections pane open, you can easily add a webpage to your collection by selecting Add current page at the top of the pane.

- Drag/drop: When you have the Collections pane open, you can add specific content from a webpage with drag and drop. Just select the image, text, or hyperlink and drag it into the collection.

- Context menu: You can also add content from a webpage from the context menu. Just select the image, text, or hyperlink, right-click it, and select Add to Collections. You can choose an existing collection to add to or start a new one.

When you add content to Collections, Microsoft Edge creates a visual card to make it easier to recognize and remember the content. For example, a web page added to a collection will include a representative image from that page, the page title, and the website name. You can easily revisit your content by clicking on the visual card in the Collections pane.

You’ll see different cards for the different types of content you add to Collections. Images added to a collection will be larger and more visual, while full websites added to a collection will show the most relevant content from the page itself. We’re still developing this, starting with a few shopping websites. Content saved to a collection from those sites will provide more detailed information like the product’s price and customer rating.
Edit your collection
- Add notes: You can add your own notes directly to a collection. Select the add note icon
from the top of the Collections pane. Within the note, you can create a list and add basic formatting options like bold, italics, or underline.

- Rearrange: Move your content around in the Collections pane. Just click an item and drag and drop it in the position you prefer.
- Remove content: To remove content from your collection, hover over the item, select the box that appears in the upper-right corner, and then select the delete icon
from the top of the Collections pane.

Once you’ve created a collection, you can easily use that content by exporting it. You can choose to export the whole collection or select a subset of content.
- Send to Excel: Hit the share icon from the top of the Collections pane and then select Send to Excel. Your content will appear on a new tab with pre-populated table(s) that allow you to easily search, sort, and filter the data extracted from the sites you added to your Collection. This is particularly useful for activities like shopping, when you want to compare items.

- Copy/paste: Select items by clicking the box in the upper right. A gray bar will appear at the top of the Collections pane. Select the copy icon
to add those items to your clipboard. Then, paste it into an HTML handler like Outlook by using the context menu or Ctrl+V on your keyboard.

Sending content to Excel is available for Mac and Windows devices running Windows 10 and above. We’ll add support for Windows devices running Windows 7 and 8 soon. Additional functionality, like the ability to send to Word, will also come soon.
Send us feedback
This is the just the first step in our Collections journey and we want to hear from you. If you think something’s not working right, or if there’s some capability you’d like to see added, please send us feedback using the smiley face icon in the top right corner of the browser.

Thanks for being a part of this early preview! We look forward to hearing your feedback.
– The Microsoft Edge Team
The post Collections is now available to test in the Canary channel appeared first on Microsoft Edge Blog.
