- Aug 23, 2011
- 2,291
AskVG.com said:We all know that installing a software in Windows is not a very hard task, its quite easy. You just need to follow a few simple steps given in the setup wizard to complete the software installation. Most of the times you just have to click on the "Next" button 2-3 times to finish the setup process.
I have seen many people saying, "Just click on Next, Next, Next and done." while teaching someone how to install a software. And guess what? If you are going to follow such kind of advices, get ready to install some adware, spyware or unnecessary and undesired software as extra bonus. Actually many times when we get a 3rd party software from Internet, CD or from a friend's PC, chances are the software is bundled with unwanted toolbars or adware. Software developers get paid from the companies to include their toolbars or other undesired stuffs in setups.
There are many other drawbacks of not taking precautions while installing software. Today in this article, we are going to share a few very important points which you should always keep in your mind while installing a software.
The important points are:
Always create System Restore Point
Always select Custom (Advanced) type of installation
Always uncheck installation of 3rd party toolbars, etc
Don't forget to select "Restart later" option at the end
POINT 1: Always Create System Restore Point
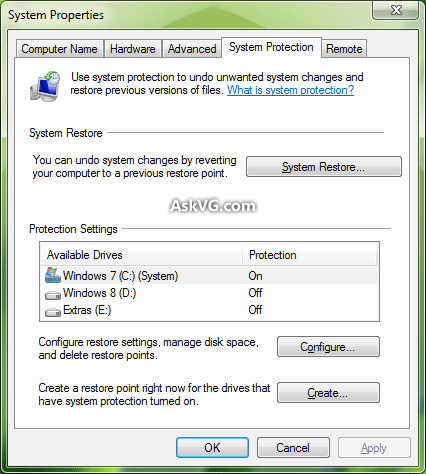
Its always advised to create a System Restore point before installing a software. We are not saying that you should always create a System Restore point even if you are going to install a simple browser like Firefox, Chrome or a media player.
But creating a System Restore point before installing a transformation pack (aka customization pack or skin pack), a patcher or a tweaking utility is MUST.
Many times when we install a transformation pack in Windows, it modifies lots of system files and installs lots of eye candy software to change look-n-feel of Windows. If the transformation pack was not created carefully, it might mess up with your system and might crash your Windows. Here comes System Restore to the rescue. If you created System Restore point, you can restore your system back. If might also come handy when you don't like the new look of Windows and want to get the old look back.
Same case applies to patchers and tweaking utilities. Many times we install patching utilities like UXTheme patcher. These patchers also modify Windows system files and if an incompatible patcher is used in Windows, it might also crash your Windows.
And what should I say about tweaking utilities? Everyone knows that almost all tweaking utilities modify Windows registry to enable or disable lots of hidden features. Sometimes enabling an unknown hidden feature using a tweaking utility might create problems. So its always a wise idea to create a System Restore point before installing a tweaking utility. Most of the times tweaking utilities allow you to create a System Restore point.
Now question is how to create a System Restore point? Not a big problem! You can access System Restore program using "Start -> All Programs -> Accessories -> System Tools" menu.
You can also launch it using System Properties. Right-click on My Computer icon on Desktop and select Properties. Or you can directly launch it by typing sysdm.cpl command in RUN or startmenu search box.

You can also directly launch it by typing create restore in startmenu search box in Windows Vista and 7.
POINT 2: Always Select Custom (Advanced) Type of Installation
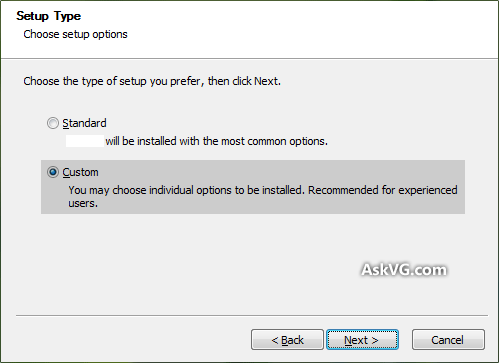
Once you have created System Restore point, lets move further. Almost all setup provide 2 types of installation:
Standard (or Easy or Express)
Custom (or Advanced)
Always select "Custom (Advanced)" installation type because this type of installation provides full control over the installation. If you don't select custom installation type, you'll not be able to customize various parts of installation and it'll install the software with built-in configuration.

We talked about bundling toolbars, adware with software setups. You can disable installations of all such unwanted stuffs only when you select "Custom (Advanced)" installation type.
POINT 3: Always Uncheck Installation of 3rd Party Toolbars, etc
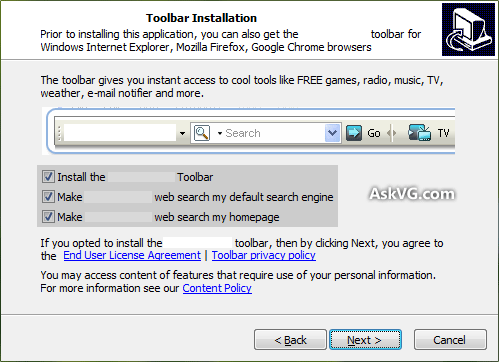
Now when you select the "Custom (Advanced)" installation type, make sure the software is not bundled with 3rd party toolbars or adware. Most of the times when a software setup comes with such unwanted stuff, it shows a screen similar to following one:

So always make sure to uncheck the checkboxes which ask you to install the toolbar, set their website as your browser homepage or install their search engine.
POINT 4: Don't Forget to Select "Restart Later" Option at the End
Once the setup completes the installation and shows the final screen where you need to click on "Finish" button, don't click on the button immediately. Just relax and double-check the checkboxes or radio buttons given in the final screen.
Many times the software asks you to restart the system and it usually selects "Restart Now" button by default and if you click on Finish button without noticing it, Windows will restart the system and you'll lose your important documents which were not saved or website links which were opened by you in your web browser.
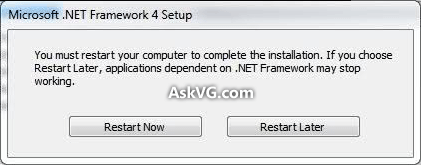
So make sure you enable "Restart Later" option before clicking on Finish button. Many times the software doesn't show checkboxes or radio buttons, instead it shows a dialog box having 2 buttons "Restart Now" and "Restart Later". Make sure you click on the 2nd button "Restart Later".

Apart from restart option, a software might also show checkbox to install another 3rd party software in final screen and most of the times the checkbox is enabled by default. So if you click on Finish button in hurry, the setup will also install that unwanted software. So make sure you uncheck any of such option before clicking on Finish button.
Source : AskVG.com