D
Deleted member 21043
Thread author
Hi everyone,
Today, I am going to be going over how someone may use AdwCleaner to fix a adware infection on their system. For the purpose of this guide, I will be using a Virtual Machine.
AdwCleaner is an easy-to-use tool which will scan your system for known adware/unwanted programs (including Hijackers - e.g. web browser hijacker). It will scan: Services, Folders, Files, Shortcuts, Scheduled tasks, Registry, Internet Explorer, Firefox and Chrome. It also scans for Toolbars.
Downloading AdwCleaner
Before we can go in and explore AdwCleaner by Xplode, we first need to download the tool. The tool can be downloaded from the following URL: http://www.bleepingcomputer.com/download/adwcleaner/
Once downloaded, you could move it to a area for it to be easily accessed. I tend to create a Folder called "MalwareRemoval". In this folder, I store AdwCleaner inside. (NOTE: I recommend you just save it to the Desktop).
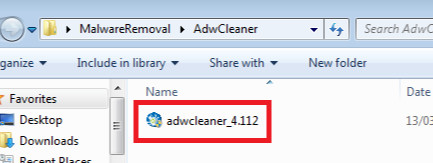
Using AdwCleaner
To start off, open up AdwCleaner. Once opened, it should look like in the below screenshot (hidden in the spoiler):
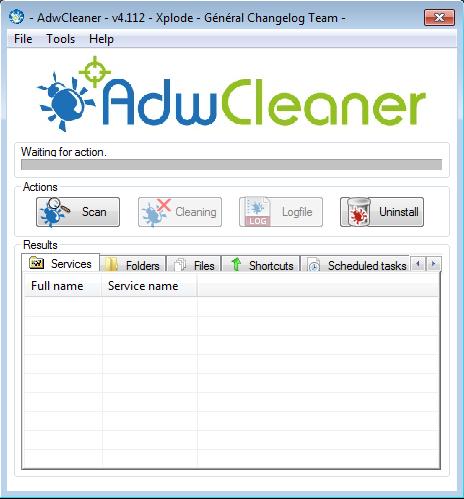
As we could see from the above spoiler, the User Interface is quite simple. We have text displayed on the interface to display the status/action being carried out by the tool, a button to start the Scan, a button to start Cleaning, a button for creating a Logfile, a button to Uninstall and underneath that a area called "Results" in which beneath it we have some tabs containing a area for information to be listed.
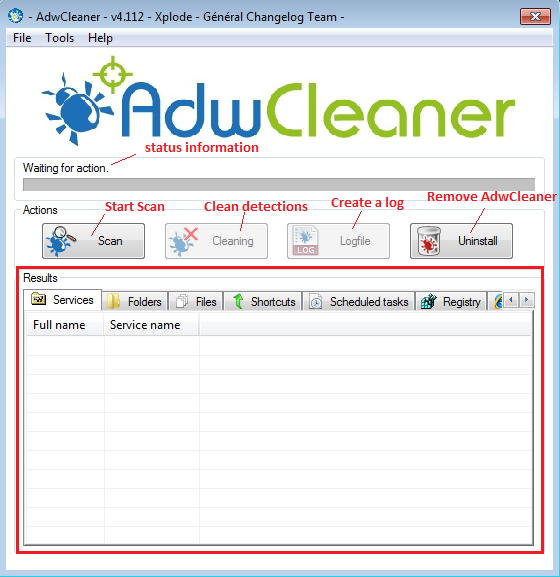
**The logfile button does not create the log, however it opens the log made by AdwCleaner most recent to that session**
Starting a scan
To start a scan, all you have to do is click the Scan button. Upon being clicked, the scanning process will start. AdwCleaner will start by loading it's database, and then it will start scanning your system to see what it can find.
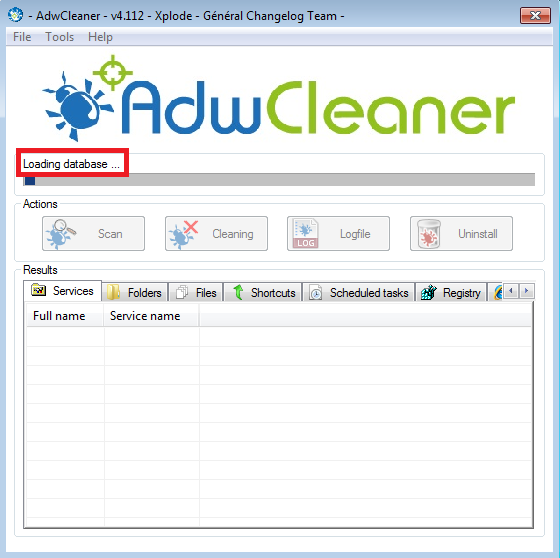
The scan time usually takes around 3 - 10 minutes. Of course its always possible it can go over this time limit.
Once your scan has completed, your results will be displayed in the results area and the status will be changed too, "Waiting for action. Please uncheck elements you want to keep.".
You should now go through each tab and check the detections in case of a false positive detection.
As we can see from the above results (check the above spoiler), AdwCleaner found many items. These items were relating to 2 pieces of software: Reimage Repair and PrivDog.
Cleaning
When you are happy with the checked detections (uncheck items you do not want removed), to clean them all you have to do is click the button with the caption Cleaning:

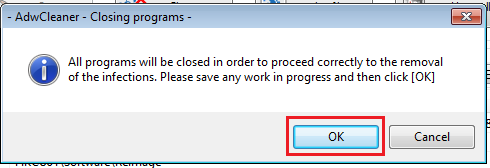
AdwCleaner will alert you that for the cleaning process to start, it must close down your programs. To continue and have it start the cleaning process, you must accept this and select OK.
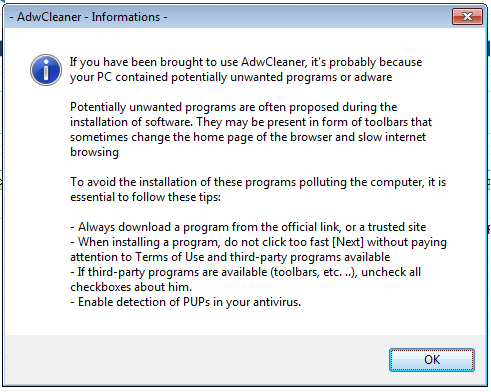
The cleaning process will now start. Once the cleaning process has ended, you will be presented by the alert shown in the below screenshot. It also contains some tips at the end of it.
After clicking OK, you will receive another popup prompting you to restart your system.
On reboot, AdwCleaner will have the rest of the cleaning process complete. **Check the Uninstall section below**
Logs
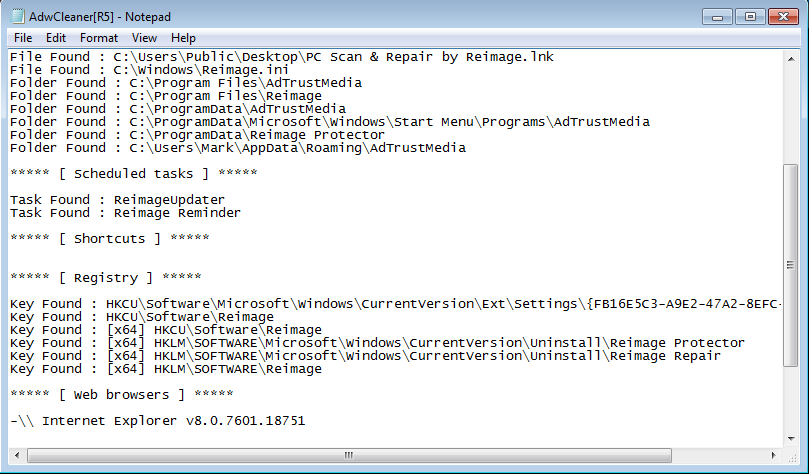
After the cleaning process reboot, you will be prompted by a log opened in a text editor (usually notepad if this is your default text editor) about the cleaning process.
To find all the logs from the scans/clean up process of AdwCleaner, go to: System Drive\AdwCleaner\ (e.g. for me this is: C:\AdwCleaner\)
The logs will be found here:

If you open up the text files you will see the AdwCleaner information:
Uninstall
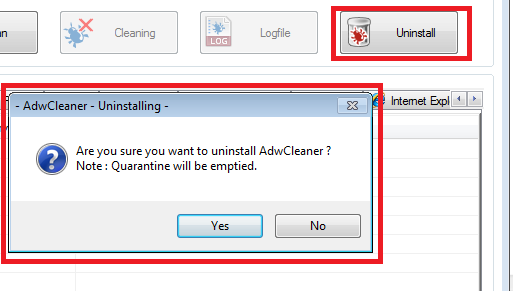
When you are finished with AdwCleaner, you can use the Uninstall option.
Upon clicking, you will be prompted with another window mentioning a Quarantine folder. Well, if you look back at the Logs area above, you may notice a folder called "Quarantine". Inside this folder contains the files detected by AdwCleaner. When you use the uninstall option, AdwCleaner will remove this Quarantine folder (as well as itself), really deleting it instead of just having the detections moved to the Quarantine folder.
Quick info:
While some of you may be thinking, "I'll just leave my main Antivirus product to sort out what this tool can do", this tool has been proven to be effective and is very handy during the cleaning of a infected system (adware related). Of course, the system became infected in the first place during the use of their main Antivirus.
Logs are useful when someone else is assisting you (and for you too). It allows them to see what was successfully moved to Quarantine, etc, and what was detected. This is good for when a Malware Removal Expert is helping you clean your system, too.
AdwCleaner is a handy tool to have on your system. You may or may not ever need to use it, but it's always a good assist in case of any adware troubles you may one day experience.
Cheers.
Today, I am going to be going over how someone may use AdwCleaner to fix a adware infection on their system. For the purpose of this guide, I will be using a Virtual Machine.
AdwCleaner is an easy-to-use tool which will scan your system for known adware/unwanted programs (including Hijackers - e.g. web browser hijacker). It will scan: Services, Folders, Files, Shortcuts, Scheduled tasks, Registry, Internet Explorer, Firefox and Chrome. It also scans for Toolbars.
Downloading AdwCleaner
Before we can go in and explore AdwCleaner by Xplode, we first need to download the tool. The tool can be downloaded from the following URL: http://www.bleepingcomputer.com/download/adwcleaner/
Once downloaded, you could move it to a area for it to be easily accessed. I tend to create a Folder called "MalwareRemoval". In this folder, I store AdwCleaner inside. (NOTE: I recommend you just save it to the Desktop).

Using AdwCleaner
Before opening this tool, it may be a good idea to close down your programs e.g. Skype, Web Browser (IE, Chrome,...), Visual Studio, Windows Media Player, Photoshop,...
To start off, open up AdwCleaner. Once opened, it should look like in the below screenshot (hidden in the spoiler):

As we could see from the above spoiler, the User Interface is quite simple. We have text displayed on the interface to display the status/action being carried out by the tool, a button to start the Scan, a button to start Cleaning, a button for creating a Logfile, a button to Uninstall and underneath that a area called "Results" in which beneath it we have some tabs containing a area for information to be listed.

**The logfile button does not create the log, however it opens the log made by AdwCleaner most recent to that session**
Starting a scan
To start a scan, all you have to do is click the Scan button. Upon being clicked, the scanning process will start. AdwCleaner will start by loading it's database, and then it will start scanning your system to see what it can find.

The scan time usually takes around 3 - 10 minutes. Of course its always possible it can go over this time limit.
Once your scan has completed, your results will be displayed in the results area and the status will be changed too, "Waiting for action. Please uncheck elements you want to keep.".
You should now go through each tab and check the detections in case of a false positive detection.
NOTE: A false positive may occur with any product. You must make sure you check the detections before carelessly deciding to clean everything.
You can see my results:
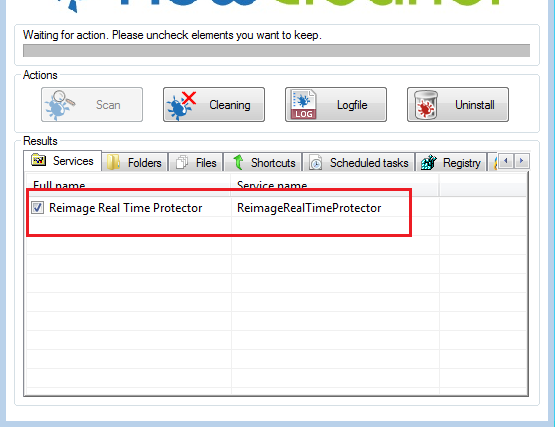
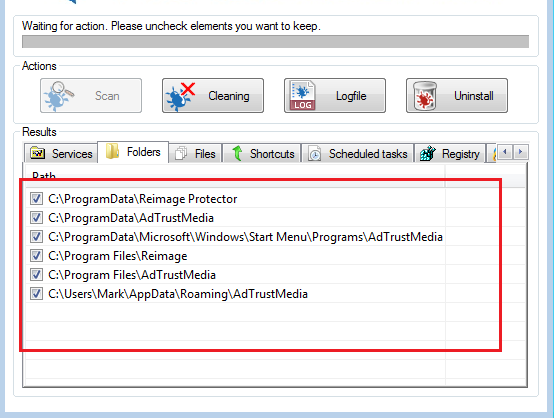
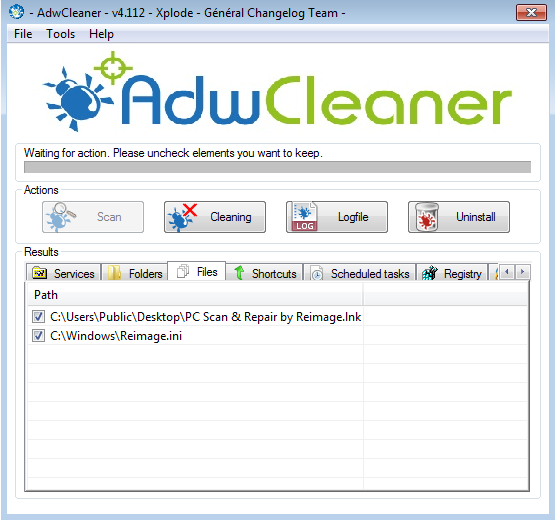
**Shortcuts tab is empty - no detections found for this, therefore I shall not post a screenshot of it**
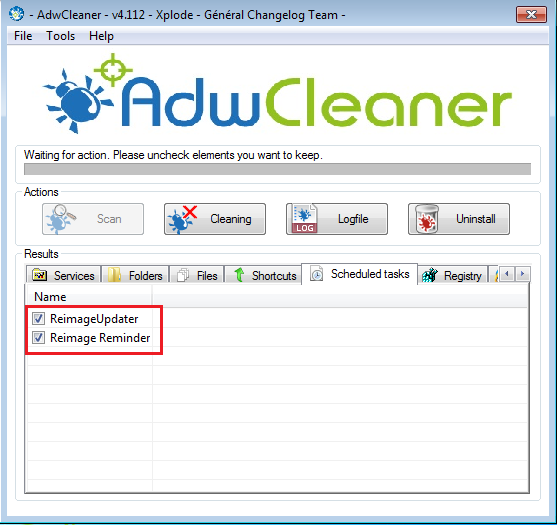
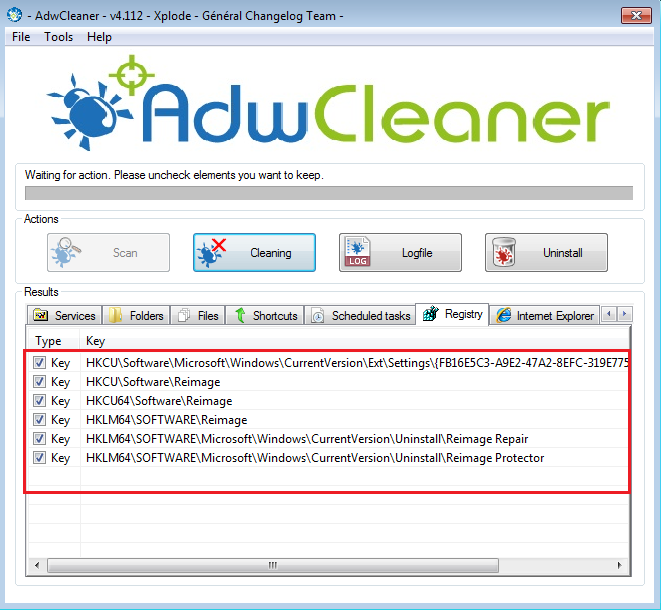
**The Internet Explorer, Firefox and Chrome tabs are empty therefore I didn't feel the need to add a screenshot for them**
You can see my results:


**Shortcuts tab is empty - no detections found for this, therefore I shall not post a screenshot of it**


**The Internet Explorer, Firefox and Chrome tabs are empty therefore I didn't feel the need to add a screenshot for them**
As we can see from the above results (check the above spoiler), AdwCleaner found many items. These items were relating to 2 pieces of software: Reimage Repair and PrivDog.
Cleaning
When you are happy with the checked detections (uncheck items you do not want removed), to clean them all you have to do is click the button with the caption Cleaning:

AdwCleaner will alert you that for the cleaning process to start, it must close down your programs. To continue and have it start the cleaning process, you must accept this and select OK.

The cleaning process will now start. Once the cleaning process has ended, you will be presented by the alert shown in the below screenshot. It also contains some tips at the end of it.

After clicking OK, you will receive another popup prompting you to restart your system.
On reboot, AdwCleaner will have the rest of the cleaning process complete. **Check the Uninstall section below**
Logs
After the cleaning process reboot, you will be prompted by a log opened in a text editor (usually notepad if this is your default text editor) about the cleaning process.
To find all the logs from the scans/clean up process of AdwCleaner, go to: System Drive\AdwCleaner\ (e.g. for me this is: C:\AdwCleaner\)
The logs will be found here:

If you open up the text files you will see the AdwCleaner information:

Uninstall
When you are finished with AdwCleaner, you can use the Uninstall option.
Upon clicking, you will be prompted with another window mentioning a Quarantine folder. Well, if you look back at the Logs area above, you may notice a folder called "Quarantine". Inside this folder contains the files detected by AdwCleaner. When you use the uninstall option, AdwCleaner will remove this Quarantine folder (as well as itself), really deleting it instead of just having the detections moved to the Quarantine folder.

Quick info:
While some of you may be thinking, "I'll just leave my main Antivirus product to sort out what this tool can do", this tool has been proven to be effective and is very handy during the cleaning of a infected system (adware related). Of course, the system became infected in the first place during the use of their main Antivirus.
Logs are useful when someone else is assisting you (and for you too). It allows them to see what was successfully moved to Quarantine, etc, and what was detected. This is good for when a Malware Removal Expert is helping you clean your system, too.
AdwCleaner is a handy tool to have on your system. You may or may not ever need to use it, but it's always a good assist in case of any adware troubles you may one day experience.
Cheers.
Last edited by a moderator: