Bryan's Guide To Securing Your Website and/or server
Prerequisites
Before you get started there are some things you'll require -
- A Domain Name W/ Web Hosting & Cpanel (Most hosting plans include this) for ease of installation
- An Email
Part 1: Securing your website
So, for the most part...You've come here because you care for the safety of your site because you've put a lot of time into it. For the first part of this tutorial I'll be teaching you how to secure your site using an SSL Certificate which will add a green site verification bar in the users browser. Please note, Part 1 does work on Virtual Private Servers assuming your host included Cpanel, otherwise you can do a command line installation which I will cover in a further tutorial assuming enough support and the want for it is strong enough.
That is assuming all content delivered from the host to client is from your site and transmitted securely over HTTPS
3. Pick your verification method and proceed with instructions provided, after completion download your SSL Certificate files to your local PC, you'll need these later.

4. Log into Cpanel (Web Hosting) of your domain

5. Locate and click on SSL/TLS in the Security section

6. Click on Generate, view, upload, or delete SSL certificates

7. Click Choose File to browse your local computer for the certificate file and click on Upload Certificate, you should then upload your certificate you downloaded earlier.

8. Click on Install and Manage SSL for your site(HTTPS)

9. From the Domain drop-down, select the domain you're installing your SSL certificate on, and then click Autofill by Domain

You're now done with the SSL installation and when you visit your website it should have SSL
Part 2: DDOS Protection for your website or server
For part 2, you can do this on any VPS running a distro of linux or your website, although there are two methods
Linux Distro's - IP Tables
Iptables is basically a firewall for Linux but it comes with it and works to mitigate DDOS. Most installations come with it enabled but for those who don't, use the following commands in Terminal or SSH to enable it.
How to update / Install
sudo apt-get install iptables
Activating/starting IP Tables
service iptables restart
Websites - Cloudflare
Cloudflare is by far one of the largest CDN's and DDOS Mitigation services, you'll be setting this up to mask your websites IP address and open ports behind Cloudflare's service. This will mitigate DDOS up to 50GB/s which is more than enough.


To do this:
ALL DONE
Please leave a comment and tell me how you found this tutorial and if you would like anything else :^)
Prerequisites
Before you get started there are some things you'll require -
- A Domain Name W/ Web Hosting & Cpanel (Most hosting plans include this) for ease of installation
- An Email
Part 1: Securing your website
So, for the most part...You've come here because you care for the safety of your site because you've put a lot of time into it. For the first part of this tutorial I'll be teaching you how to secure your site using an SSL Certificate which will add a green site verification bar in the users browser. Please note, Part 1 does work on Virtual Private Servers assuming your host included Cpanel, otherwise you can do a command line installation which I will cover in a further tutorial assuming enough support and the want for it is strong enough.
That is assuming all content delivered from the host to client is from your site and transmitted securely over HTTPS
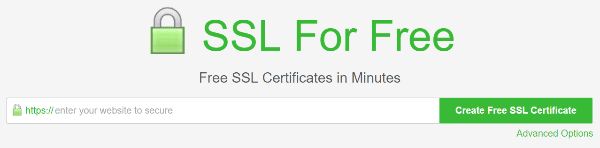
- Visit SSLforFree (https://www.sslforfree.com)
- Enter your domain name
3. Pick your verification method and proceed with instructions provided, after completion download your SSL Certificate files to your local PC, you'll need these later.
4. Log into Cpanel (Web Hosting) of your domain
5. Locate and click on SSL/TLS in the Security section
6. Click on Generate, view, upload, or delete SSL certificates
7. Click Choose File to browse your local computer for the certificate file and click on Upload Certificate, you should then upload your certificate you downloaded earlier.
8. Click on Install and Manage SSL for your site(HTTPS)
9. From the Domain drop-down, select the domain you're installing your SSL certificate on, and then click Autofill by Domain
You're now done with the SSL installation and when you visit your website it should have SSL
Part 2: DDOS Protection for your website or server
For part 2, you can do this on any VPS running a distro of linux or your website, although there are two methods
Linux Distro's - IP Tables
Iptables is basically a firewall for Linux but it comes with it and works to mitigate DDOS. Most installations come with it enabled but for those who don't, use the following commands in Terminal or SSH to enable it.
How to update / Install
sudo apt-get install iptables
Activating/starting IP Tables
service iptables restart
Websites - Cloudflare
Cloudflare is by far one of the largest CDN's and DDOS Mitigation services, you'll be setting this up to mask your websites IP address and open ports behind Cloudflare's service. This will mitigate DDOS up to 50GB/s which is more than enough.
- Go to www.cloudflare.com and click the Sign up link at the top of the page.
- Create a Cloudflare account by typing your email address and password. Click Create account now to proceed.
- Enter the domain for your website and then click Begin Scan. It's not necessary to add "www" to the domain. For example, if your website is www.example.com, type example.com.
- Cloudflare will now scan your domain's DNS records.
- This will take approximately 60 seconds to complete.
- Once the DNS scan has finished, click Continue.
- A list of all the DNS records found is displayed, including your subdomains. In this step, you can decide which subdomains you want to enable Cloudflare (
 ) or bypass Cloudflare (). Some records, like MX, never go through Cloudflare (no cloud)
- If there are any additional records you'd like to add, you can add them here. After you've reviewed your DNS records, click Process and continue.
- Select the free plan unless you want to pay
- On the final step, you are given the Cloudflare nameservers for your domain. The Cloudflare nameservers are assigned to your domain and listed on this page. Please write down the Cloudflare nameservers. You can also find your Cloudflare nameservers in your Cloudflare dashboard under Overview.
- Optionally, choose the appropriate Performance and Security settings. By default, your Performance settings are set to CDN Only and your Security profile is set to Medium for your domain. You can change your settings at a later time.Click Process and continue.
To do this:
- Login to your Domain Provider
- Proceed to go to the management section of your website
- There should be a section relevant to Name Servers
- Modify the Name Servers from your hosting provider to Cloudflare servers
ALL DONE
Please leave a comment and tell me how you found this tutorial and if you would like anything else :^)