Hi,
In this tutorial, I will show you how to manipulate brushes in photoshop. I will show you how to create your own brushes, to export them for sharing and finally, to import them to use them.
First of all, I will show you how to create your own brushes.
Open photoshop and create a 100px * 100px document.
Then, Draw the form of the brush you want to create

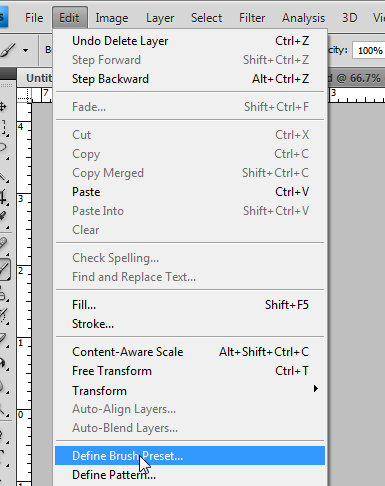
To save your form as a brush you need to click on Edit -> Define Brush Preset.
A window will open, it contains a thumbnail of your brush, it size and a text field for it name.
So choose a name for your brush and click on Ok.

You just created your own brush. You can use it by choosing the Brush Tool (B).
Then, in the options menu, click on the small arrow pointing down just next to the selected brush.
You will see a list of all brushes you have. Your's is normally at the end.
You change the size of your brushes and use it.
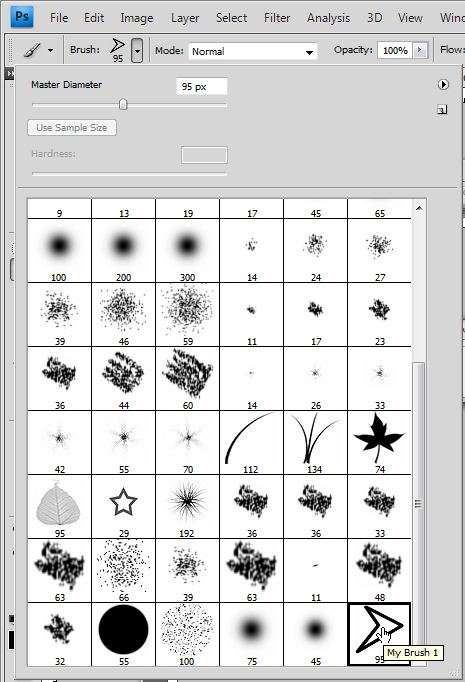
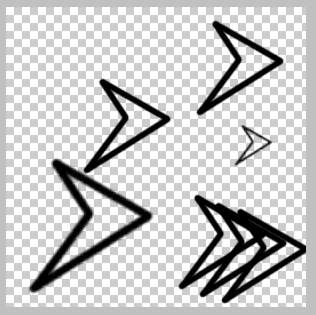
Here is an example of what you can easily do with your brush
Now we are going to export the brush to share it.
Click again on the arrow to open the list of your brushes.
There is another arrow pointing on the right. Click on it and in the menu choose Preset Manager:
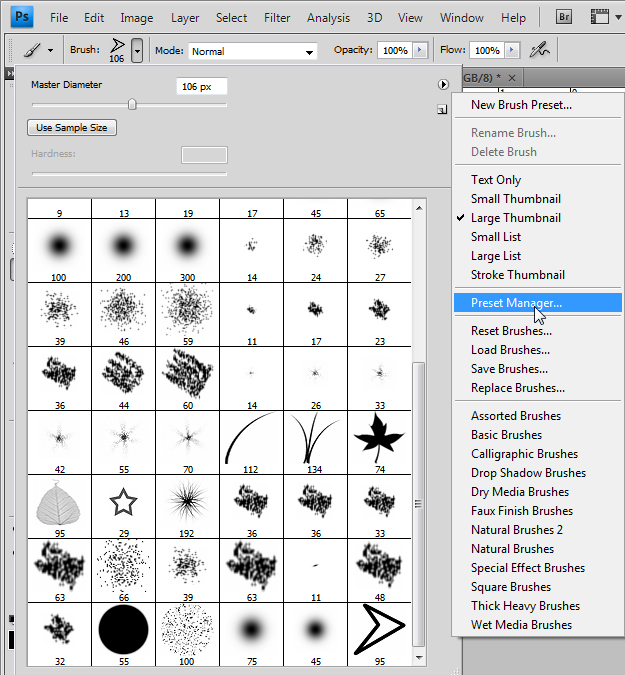
A window will open, it will let you manage your brushes.
Click on the brush you want to export(You can select multiple brushes by maintaining the Ctrl key down).
Finally, click on Save Set:
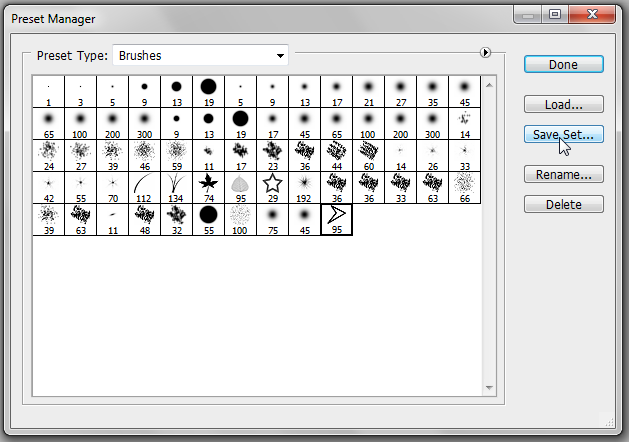
Now you can save the brush on your computer as a file and share it.
To import a brush you only need to click on the file
and Photoshop will automatically import it.
Thank you and I hope this tutorial will be useful.
<a href="http://www.webestools.com/scripts_tutorials-code-source-25-tutorial-create-export-and-import-brushes-on-photoshop.html">Source Here</a>
In this tutorial, I will show you how to manipulate brushes in photoshop. I will show you how to create your own brushes, to export them for sharing and finally, to import them to use them.
First of all, I will show you how to create your own brushes.
Open photoshop and create a 100px * 100px document.
Then, Draw the form of the brush you want to create

To save your form as a brush you need to click on Edit -> Define Brush Preset.

A window will open, it contains a thumbnail of your brush, it size and a text field for it name.
So choose a name for your brush and click on Ok.

You just created your own brush. You can use it by choosing the Brush Tool (B).
Then, in the options menu, click on the small arrow pointing down just next to the selected brush.
You will see a list of all brushes you have. Your's is normally at the end.
You change the size of your brushes and use it.

Here is an example of what you can easily do with your brush

Now we are going to export the brush to share it.
Click again on the arrow to open the list of your brushes.
There is another arrow pointing on the right. Click on it and in the menu choose Preset Manager:

A window will open, it will let you manage your brushes.
Click on the brush you want to export(You can select multiple brushes by maintaining the Ctrl key down).
Finally, click on Save Set:

Now you can save the brush on your computer as a file and share it.
To import a brush you only need to click on the file
and Photoshop will automatically import it.
Thank you and I hope this tutorial will be useful.
<a href="http://www.webestools.com/scripts_tutorials-code-source-25-tutorial-create-export-and-import-brushes-on-photoshop.html">Source Here</a>