A sealed graphics-card box should contain the expensive hardware printed on its label. One buyer opened an RTX 5070 package and found discarded electronics instead.
The order reportedly came through Amazon and carried convincing weight, packaging, and product markings. The unpleasant surprise appeared only after the box was opened.
Overview
The reported $700 order contained electronic junk
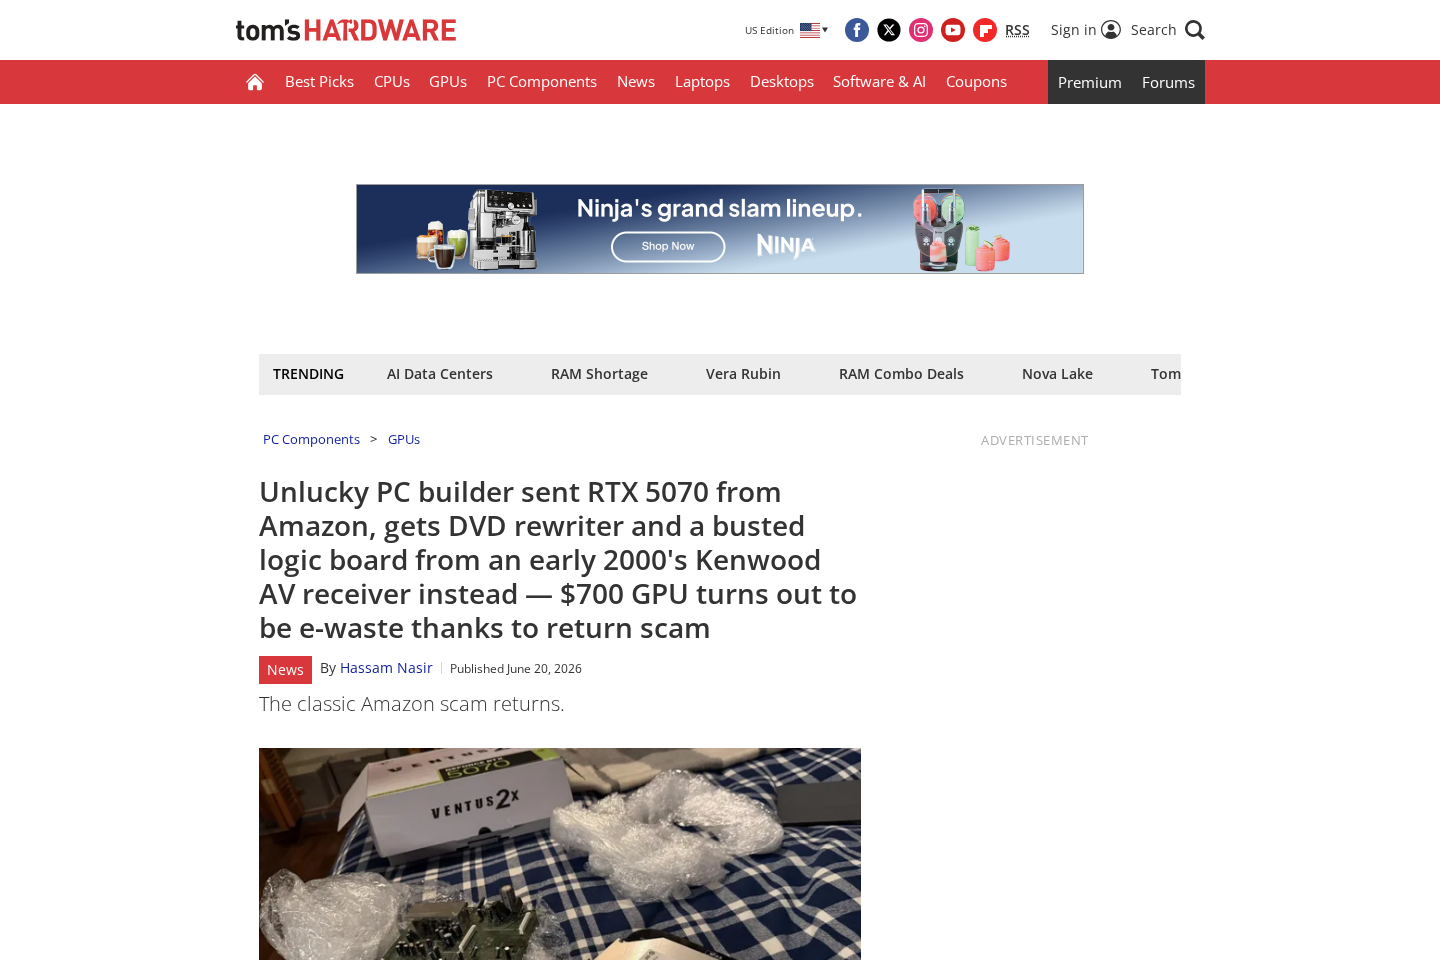
Tom’s Hardware documented a buyer who expected an MSI Ventus 2X RTX 5070 purchased for roughly $700.
Inside the package, the recipient reportedly found a DVD rewriter, a mousepad, and a damaged circuit board from an older Kenwood receiver.
The substitute pieces helped imitate the weight of a graphics card. From outside, the parcel could therefore pass a basic handling check.
The buyer provided the publication with proof of purchase. The report said the item was sold and shipped by Amazon, not an unknown marketplace storefront.
This is a return-swap scam, not evidence Amazon created the fraud
The likely bad actor is a previous buyer who removed the genuine GPU, replaced it with low-value material, and returned the box for a refund.
If the returned package reentered sellable inventory without an adequate inspection, a later customer could receive the tampered box.
Amazon did not advertise e-waste as an RTX 5070. The retailer and the final buyer can both become victims of return abuse.
That distinction matters. The scam exploits a legitimate marketplace’s returns process rather than operating through a counterfeit Amazon website.
High-value components are attractive swap targets
Graphics cards are compact, expensive, easy to resell, and packaged inside boxes that can be refilled with similarly weighted objects.
Processors, solid-state drives, cameras, phones, and gaming hardware share the same risk.
A factory seal helps, but seals can be cut, lifted, replaced, or copied. Returned inventory can also acquire new warehouse labels.
The strongest warning points are practical:
A high-value item arrives in a box with unusual sealing.
Outer and inner serial numbers do not match.
The package weight feels plausible, but internal movement sounds wrong.
Protective films, accessories, or manuals are missing.
The anti-static bag has been resealed or substituted.
The hardware model differs from the label.
Old parts or weighted objects occupy the product cavity.
The retailer initially treats the case as an ordinary return.
Why an Expensive GPU Can Pass Through a Returns System
Retail returns move at enormous scale. Staff must decide whether an item is unopened, damaged, incomplete, fraudulent, refurbishable, liquidated, or safe to resell.
Many checks begin with the outside. Packaging condition, barcode, stated reason, weight, and tamper evidence can determine the next path.
A careful fraudster prepares for those checks. The genuine component leaves while scrap material restores approximate weight and shape.
The box may be resealed with replacement stickers or clear circles resembling retail packaging.
Warehouse staff cannot power-test every returned GPU without opening packaging and spending specialized labor.
If the customer claimed the product was unwanted rather than defective, the parcel may appear lower-risk than a reported hardware failure.
This explanation remains an inference unless the original swapper is identified and the item’s chain of custody is reconstructed.
Other possibilities include theft or substitution during fulfillment, transit, seller handling, or an earlier stage of distribution.
The published facts establish that the final recipient got wrong contents. They do not publicly prove exactly where replacement occurred.
That is why evidence from the moment of delivery matters. Every photograph narrows the dispute and helps the retailer investigate upstream.
The Serial Numbers Tell an Important Story
High-value electronics often carry serial numbers on the retail box, anti-static packaging, hardware body, receipt, and manufacturer registration system.
A mismatch can reveal that packaging and product traveled through different histories.
Before breaking inner seals, photograph the outer shipping label, retail-box barcode, serial stickers, security tape, and every visible side.
If the box shows a model number different from the order, stop and contact the retailer before installation.
After opening, compare the device label with the carton. Manufacturers may let buyers check warranty status using that serial number.
A serial already registered, outside warranty, or assigned to another region can indicate previously handled inventory.
Do not publish the complete serial number online. Share it privately with the retailer, payment provider, carrier, manufacturer, or law enforcement.
Public exposure can allow another person to attempt fraudulent warranty service or create convincing counterfeit records.
Preserve every label even when it seems redundant. Warehouse stickers and routing codes may reveal when the parcel reentered inventory.
Keep the scrap pieces exactly as received. Cleaning, testing, or discarding them can weaken the evidence.
How the Amazon RTX 5070 Return-Swap Scam Works
Step 1: A fraudster orders a valuable graphics card
The buyer chooses a GPU with strong resale demand and a generous return window.
They receive a genuine unit, creating a legitimate order number, delivery record, and return path.
The original purchase can appear completely normal until the product enters the returns system.
Step 2: The real hardware is removed for resale or personal use
The scammer opens the retail package and keeps the GPU.
They may also remove adapters, support brackets, cables, manuals, promotional codes, or warranty documentation.
The stolen component can be installed, sold locally, or listed through another online account.
Step 3: Scrap material recreates weight and appearance
Random electronics, metal, books, tiles, or another cheap component replaces the graphics card.
In the documented case, a DVD rewriter and old circuit board made the package feel substantial.
A mousepad and packing material may reduce movement and fill empty space.
Step 4: The altered box is resealed and returned
The fraudster selects a reason that may not trigger technical testing, then sends the parcel through the normal return route.
Replacement stickers can make the packaging look unopened. A weight scan may fall within an expected range.
If the refund succeeds, the attacker has both the valuable GPU and returned money.
Step 5: The package reenters inventory
A rushed or incomplete inspection can classify the box as suitable for resale.
The item may be stored, moved between facilities, or offered as new, used, open-box, or warehouse inventory.
The exact classification in the reported case was not publicly established.
Step 6: An innocent customer receives the swapped contents
The next buyer sees a normal order page and receives a parcel with the expected label and approximate weight.
Only unboxing exposes the substitution. Without photographs or video, the buyer must explain that they did not perform the swap.
Fast reporting gives the retailer a better chance to freeze records, compare weights, inspect related returns, and protect other inventory.
How to Document a High-Value Unboxing
Start recording before cutting the shipping carton. Show every side, the carrier label, visible damage, tape patterns, and the unopened retail box.
Keep the scene continuous. Pauses or off-camera movement can weaken the value of video when a retailer investigates who handled the contents.
Read serial numbers clearly and photograph them separately. Compare the retail box, component label, receipt, and manufacturer warranty lookup.
Weigh the complete parcel when practical. A household scale is imperfect, but a timestamped reading can support other evidence.
Do not power unknown scrap electronics. Damaged boards, swollen batteries, exposed conductors, or contaminated parts may create electrical and handling hazards.
Preserve every piece exactly where possible. Repacking too early can erase placement details that explain how the weight was distributed.
Contact the retailer through the order page, not a number found in a sponsored search result. Fake refund agents actively target distressed shoppers.
Write down each case number and representative name. Confirm promises inside the retailer’s message center whenever that option exists.
A calm evidence package usually works better than a long accusation. State what was ordered, what arrived, and which identifiers do not match.
Keep the payment dispute deadline in mind while the retailer investigates. Waiting for repeated promises should not erase an independent chargeback right.
Recording every inexpensive delivery is unrealistic. For a costly GPU or processor, a simple continuous video can be worthwhile.
Begin before the shipping carton opens. Show all sides, the label, damaged areas, unusual tape, and the sealed retail package.
Keep the frame wide enough to show that the box does not leave view. Avoid cuts while opening the outer and inner packaging.
Read serial numbers close enough for private documentation, then store the video securely rather than posting those identifiers publicly.
Show every layer of protective material and every object removed. If junk appears, do not stop recording immediately.
Film the empty cavities, seals, stickers, manuals, anti-static bag, and final contents together.
Take separate still photographs afterward. Videos are persuasive, but photographs make individual labels easier to review.
Weigh the complete parcel and each major component if a reliable scale is available. Preserve the measurement display in a photograph.
Save the order page, seller name, “ships from” entry, listing condition, delivery photograph, and tracking history.
Do not contact a telephone number found through a sponsored search result. Use Your Orders and the official Amazon application or typed website.
What Amazon’s Published Policy Says
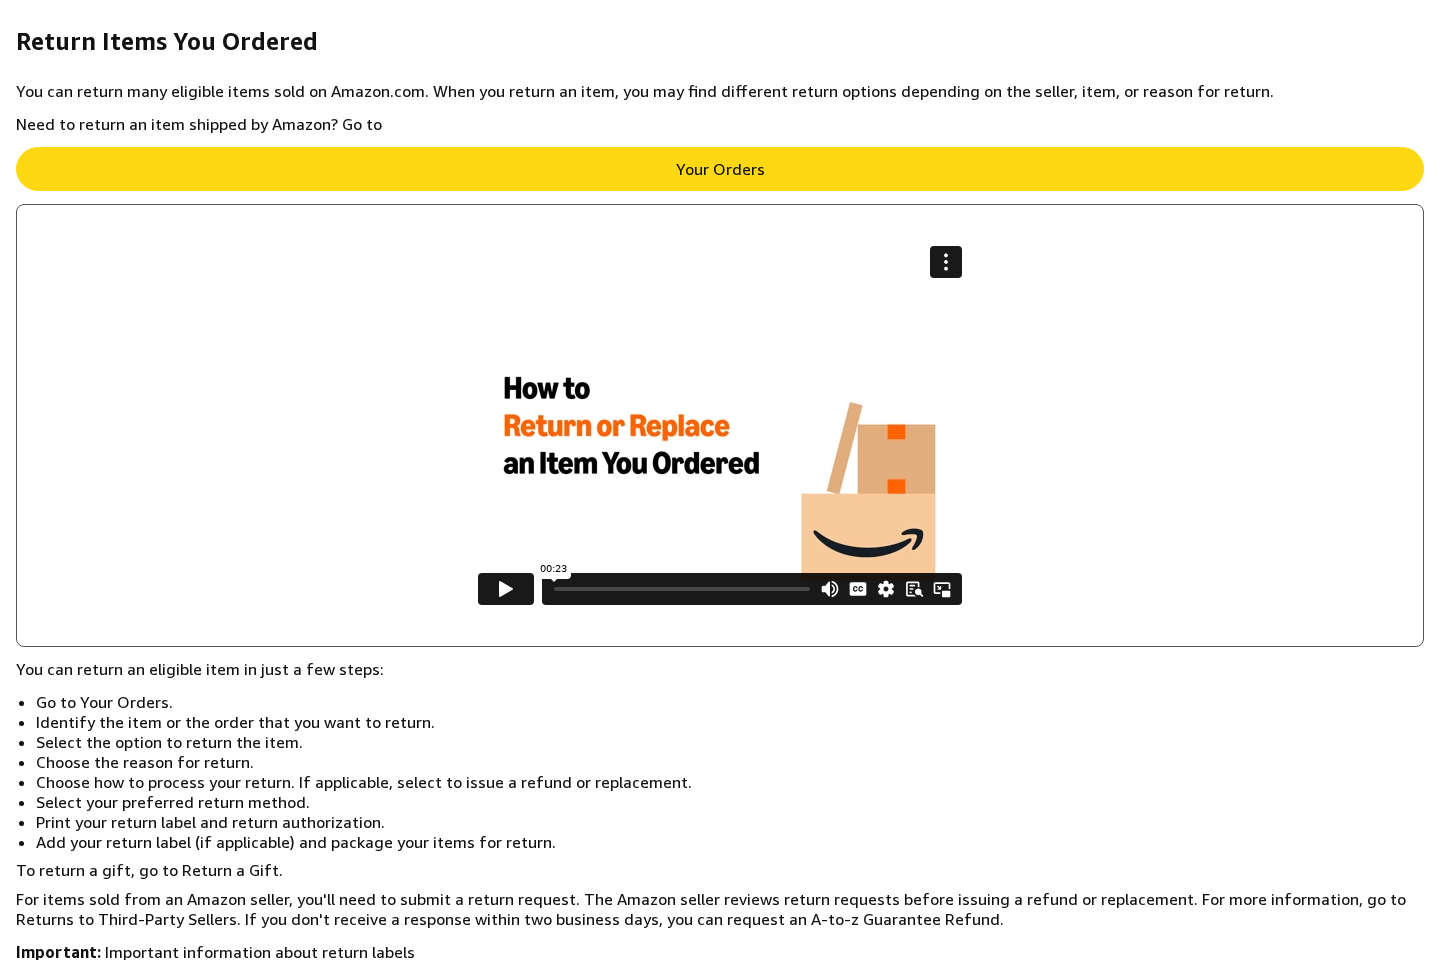
Amazon’s return information directs customers to Your Orders, where eligible items can be returned or replaced.
The available option depends on the seller, item, reason, and return eligibility.
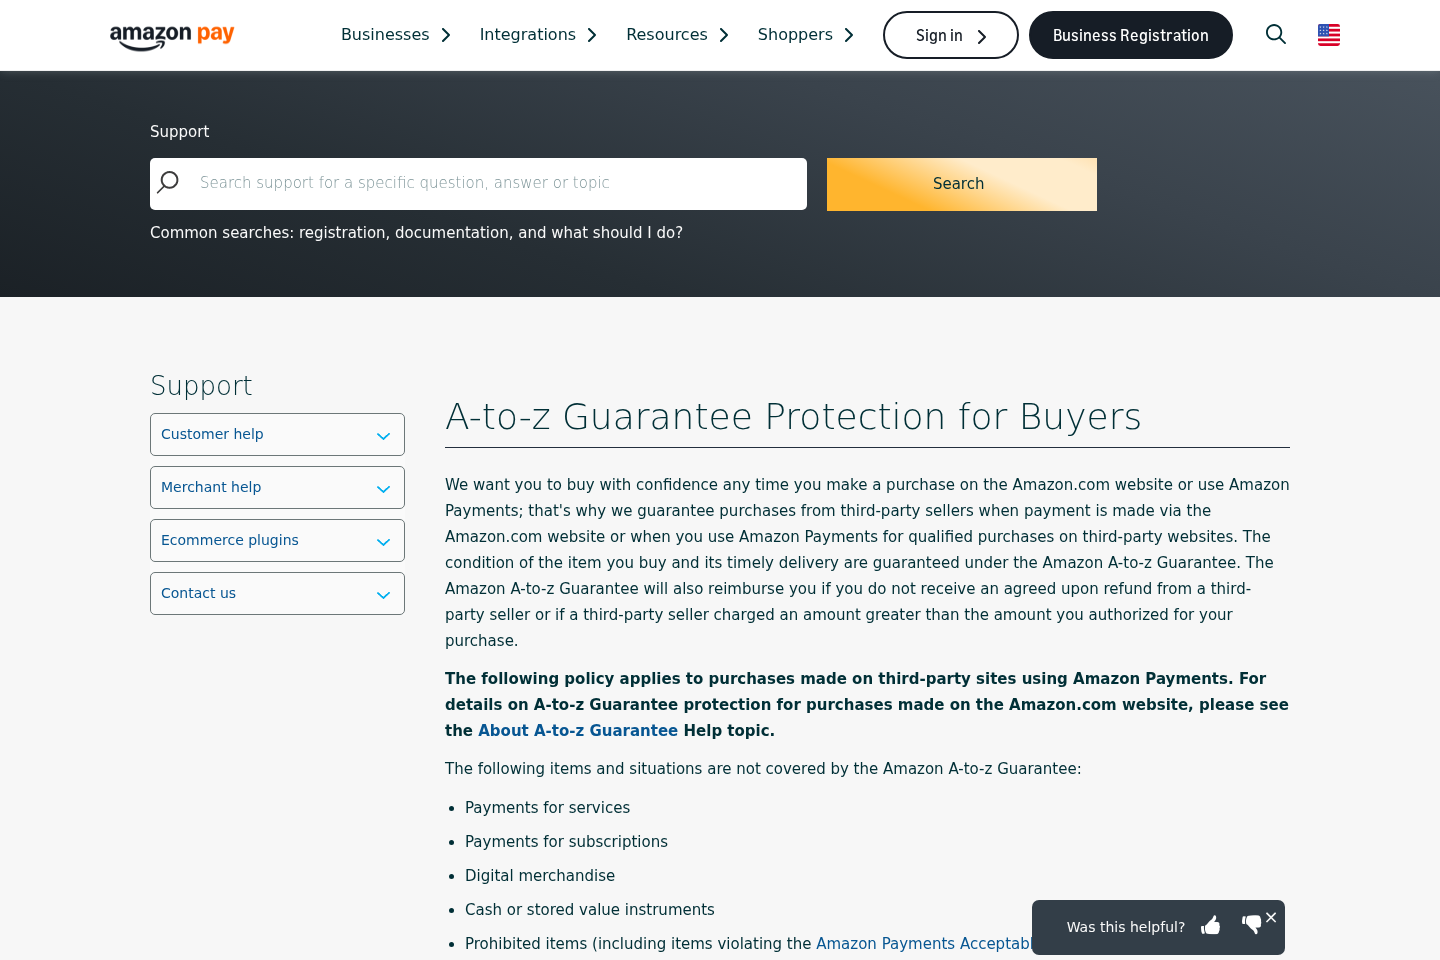
For third-party orders, Amazon says the seller reviews the request. A buyer may seek A-to-z protection when qualifying problems remain unresolved.
The A-to-z material describes wrong, damaged, defective, missing, or materially different items as possible claim situations.
Amazon may request documentation during a return investigation. That makes prompt, complete evidence more useful than a vague statement weeks later.
Policies can change and vary by country. Use the instructions attached to the exact order rather than an old forum screenshot.
If the item was a gift, coordinate with the purchaser. Their payment record and order access may be required for replacement or refund.
Do not send the junk back until support creates the correct case and return method.
Photograph the return parcel, serial labels, internal packaging, and sealed final box. Keep the drop-off receipt and tracking number.
A refund notice is not the end. Monitor the original payment method until the credit posts and the case remains closed.
Company, Address, and Fulfillment Checks
“Sold by” and “ships from” are different roles
A listing may involve Amazon retail, a marketplace seller, Amazon fulfillment, a distributor, and the manufacturer.
Record both seller and shipper exactly. A familiar fulfillment label does not automatically identify who owned the inventory.
The documented RTX case reportedly involved an item sold and shipped by Amazon, making an unknown storefront less likely.
The return address may be a processing facility
A warehouse address is not necessarily the seller’s headquarters or the manufacturer’s office.
Follow the label generated inside the official order. Sending a valuable parcel to an address provided by an unsolicited caller can create another loss.
Keep proof that the facility accepted the package, including carrier scans and delivery confirmation.
The manufacturer can help authenticate the component
MSI or another board partner may confirm whether a serial format, model label, seal, and warranty record appear consistent.
The manufacturer usually cannot refund a retailer’s missing-item order, but its authentication can strengthen the evidence.
Contact the brand through its typed official domain, not a card placed inside suspicious packaging.
Fulfillment records can expose the swap
Retailers may hold inbound weights, photographs, return reasons, employee scans, inventory movements, and prior order identifiers.
Customers cannot access all those records, but a clear report gives investigators the precise SKU, serial, facility, and delivery time to examine.
Ask support to preserve the chain of custody and flag related inventory rather than treating the incident as simple buyer’s remorse.
How Buyers and Sellers Can Reduce the Risk
Buy expensive hardware from listings with clear seller identity, condition, warranty, and return protection.
Avoid payment outside the marketplace. Off-platform transfers can remove the protections that make a return investigation possible.
Inspect delivery damage before accepting where practical. Photograph a crushed, punctured, wet, or retaped carton immediately.
Open high-value components soon after arrival. Waiting until the return window closes makes both proof and recovery harder.
Retailers should treat weight as one signal rather than proof. Serial matching and tamper inspection matter for compact expensive products.
Returned GPUs deserve higher scrutiny than low-value household items because the incentive and resale market are unusually strong.
Marketplace sellers should record outbound serials and package weights. That information can distinguish a customer claim from the seller’s original shipment.
Manufacturers can improve seals and serialize internal components, packaging, and accessories consistently.
No safeguard eliminates fraud. Layered records reduce the chance that one believable box transfers the loss to an innocent buyer.
What to Do if You Have Fallen Victim to This Scam
Stop handling the contents. Keep every part, bag, seal, label, insert, and piece of packaging exactly as received.
Document everything. Photograph the shipping carton, retail box, serial labels, seals, wrong contents, weight, and complete order page.
Open the case through Your Orders. Report a wrong or materially different item and request the available replacement or refund route.
Ask for escalation. Explain that suspected return fraud contaminated inventory and request preservation of weights, scans, serials, and prior return records.
Follow the official return instructions. Use the generated label, photograph the packed parcel, and retain drop-off and delivery tracking.
Contact the card issuer if unresolved. Provide the listing, receipt, evidence, communications, and proof that the received item was materially different.
Reject fake support contacts. Amazon will not require gift cards, cryptocurrency, remote access, or a transfer to process this merchandise problem.
Scan after suspicious contact. Run Malwarebytes if a supposed support agent directed you to software, downloads, browser extensions, or unusual websites.
Block dangerous advertisements. AdGuard can reduce malicious sponsored links, but it does not replace Amazon’s official return and claim process.
Report repeat fraud indicators. Share serial mismatches and seller evidence with Amazon, the manufacturer, the FTC, and local law enforcement when appropriate.
Is Your Device Infected? Run a Free Malware Scan
Slow performance, constant pop-ups, or strange behavior? These are classic signs of a malware infection. The fastest way to find out is to scan your device with Malwarebytes Anti-Malware Free — one of the most trusted malware removal tools available.
The free version detects and removes the most common threats, including:
Adware — the cause of those annoying pop-ups
Browser hijackers — unwanted redirects and changed homepages
Trojans and spyware — hidden programs stealing your data
Potentially unwanted programs (PUPs) — software you never asked for
👉 Select your device below — Windows, Mac, or Android — then follow the simple steps to download Malwarebytes, scan your system, and remove any threats it finds. The whole process takes about 5 minutes.
Malwarebytes for WindowsMalwarebytes for MacMalwarebytes for Android
Run a Malware Scan with Malwarebytes for Windows
Malwarebytes is one of the most popular and trusted anti-malware tools for Windows — and it’s completely free for removing infections. It catches threats that many antivirus programs miss, including adware, browser hijackers, and trojans. Follow the steps below to scan and clean your PC in just a few minutes.
Download Malwarebytes
Click the button below to download the latest version of Malwarebytes for Windows from the official source. The free version is all you need — it will scan your computer and remove adware, browser hijackers, and other malicious software at no cost.
(The link opens in a new page where your download will start)
Install Malwarebytes
When the download finishes, open your Downloads folder and double-click the MBSetup file. If Windows shows a User Account Control pop-up, click “Yes” to allow the installation.
Follow the On-Screen Prompts to Install Malwarebytes
The setup wizard will walk you through a few quick screens:
Choose where you’re installing the program — “Personal Computer” or “Work Computer” — then click Next.
Malwarebytes will now install on your device. This usually takes under a minute.
When installation is complete, the “Welcome to Malwarebytes” screen will open automatically.
On the final screen, click Open Malwarebytes to launch the program.
Enable “Scan for Rootkits”
Before scanning, turn on rootkit detection so Malwarebytes can find even the most hidden threats. Click the Settings gear icon on the left side of the screen.
In the settings menu, find “Scan for rootkits” and click the toggle so it turns blue.
Done? Click “Dashboard” in the left pane to return to the main screen.
Start the Scan
Click the blue Scan button. Malwarebytes will automatically update its virus database and start checking your computer for malware.
Wait for the Scan to Finish
The scan checks your entire system for browser hijackers and other malicious programs, so it can take several minutes. Feel free to do something else — just check back occasionally to see the progress.
Quarantine the Detected Threats
When the scan is done, you’ll see a list of everything Malwarebytes found — malware, adware, and potentially unwanted programs. Click the “Quarantine” button to remove all of them at once.
Malwarebytes will now remove the malicious files and registry entries and move them safely into quarantine.
Restart Your Computer
Some threats can only be fully removed after a reboot. If Malwarebytes asks you to restart, click Yes. Once you’re logged back in, your PC is clean and you can continue with the next steps in this guide.
When the scan finishes, click Quarantine to remove everything Malwarebytes found. That’s it — your Windows PC is now clean of trojans, adware, and other malware, and should be back to running smoothly.
If your current antivirus allowed this malicious program on your computer, you may want to consider purchasing Malwarebytes Premium to protect against these types of threats in the future. If you are still having problems with your computer after completing these instructions, then please follow one of the steps:
Malwarebytes for Mac is a free on-demand scanner that removes the malware other security software tends to miss — adware, browser hijackers, and unwanted programs included. Cleaning an infected Mac with Malwarebytes has always been completely free, and it’s our go-to recommendation. Follow the steps below to scan and clean your Mac in just a few minutes.
Download Malwarebytes for Mac
Click the button below to download the latest version of Malwarebytes for Mac.
When the download finishes, open your Downloads folder and double-click the setup file to begin the installation.
Follow the On-Screen Prompts to Install Malwarebytes
The Malwarebytes for Mac Installer will guide you through a few quick screens. Click “Continue” and keep following the prompts until the installation completes.
When the installation is complete, Malwarebytes opens to the Welcome to Malwarebytes screen. Click “Get started“.
Select “Personal Computer” or “Work Computer”
Malwarebytes will ask what type of computer you’re installing it on. Click either Personal Computer or Work Computer, whichever applies.
Start the Scan
Click the “Scan” button. Malwarebytes will automatically update its detection database and begin checking your Mac for malware.
Wait for the Scan to Finish
Malwarebytes will scan your Mac for adware, browser hijackers, and other malicious programs. This can take a few minutes, so feel free to do something else — just check back occasionally to see the progress.
Quarantine the Detected Threats
When the scan is done, you’ll see a list of everything Malwarebytes found. Click the “Quarantine” button to remove all the threats at once.
Restart Your Mac
Malwarebytes will now remove all the malicious files it found. Some threats can only be fully removed after a reboot — if Malwarebytes asks you to restart, allow it. Once you’re logged back in, your Mac is clean.
Once the scan is done, remove every threat it detected. Your Mac is now free of adware, rogue browser extensions, and other potentially harmful software.
If your current antivirus allowed a malicious program on your computer, you might want to consider purchasing the full-featured version of Malwarebytes Anti-Malware to protect against these types of threats in the future. If you are still experiencing problems while trying to remove a malicious program from your computer, please ask for help in our Mac Malware Removal Help & Support forum.
Run a Malware Scan with Malwarebytes for Android
Malwarebytes for Android automatically detects and removes dangerous threats like malware and ransomware so you don’t have to worry about your most-used device being compromised. Aggressive detection of adware and potentially unwanted programs keeps your Android phone or tablet running smooth.
Download Malwarebytes for Android.
You can download Malwarebytes for Android by clicking the link below.
In the Google Play Store, tap “Install” to install Malwarebytes for Android on your device.
When the installation process has finished, tap “Open” to begin using Malwarebytes for Android. You can also open Malwarebytes by tapping on its icon in your phone menu or home screen.
Follow the on-screen prompts to complete the setup process
When Malwarebytes will open, you will see the Malwarebytes Setup Wizard which will guide you through a series of permissions and other setup options. This is the first of two screens that explain the difference between the Premium and Free versions. Swipe this screen to continue. Tap on “Got it” to proceed to the next step. Malwarebytes for Android will now ask for a set of permissions that are required to scan your device and protect it from malware. Tap on “Give permission” to continue. Tap on “Allow” to permit Malwarebytes to access the files on your phone.
Update database and run a scan with Malwarebytes for Android
You will now be prompted to update the Malwarebytes database and run a full system scan.
Click on “Update database” to update the Malwarebytes for Android definitions to the latest version, then click on “Run full scan” to perform a system scan.
Wait for the Malwarebytes scan to complete.
Malwarebytes will now start scanning your phone for adware and other malicious apps. This process can take a few minutes, so we suggest you do something else and periodically check on the status of the scan to see when it is finished.
Click on “Remove Selected”.
When the scan has been completed, you will be presented with a screen showing the malware infections that Malwarebytes for Android has detected. To remove the malicious apps that Malwarebytes has found, tap on the “Remove Selected” button.
Restart your phone.
Malwarebytes for Android will now remove all the malicious apps that it has found. To complete the malware removal process, Malwarebytes may ask you to restart your device.
After the scan, tap Remove Selected to delete all detected threats. Your Android phone is now clean — no more malicious apps, adware, or browser redirects.
If your current antivirus allowed a malicious app on your phone, you may want to consider purchasing the full-featured version of Malwarebytes to protect against these types of threats in the future. If you are still having problems with your phone after completing these instructions, then please follow one of the steps:
Restore your phone to factory settings by going to Settings > General management > Reset > Factory data reset.
Now that your device is clean, keep it that way. Most infections start with a malicious ad or a fake download button — so blocking them at the source is your best defense.
We recommend AdGuard, which blocks malicious ads, phishing pages, and dangerous redirects before they can reach you.
Did Amazon intentionally send e-waste instead of an RTX 5070?
No evidence shows Amazon intentionally created the substitution. The documented facts fit return-swap abuse that likely passed through an inspection failure.
Was the reported RTX 5070 sold by a marketplace seller?
The buyer told Tom’s Hardware it was sold and shipped by Amazon and provided proof of purchase to the publication.
Why would junk weigh the same as a graphics card?
A fraudster can combine old electronics, metal, and packing material to imitate the expected parcel weight and reduce movement inside the box.
Should I record every Amazon unboxing?
That is unnecessary for ordinary purchases, but continuous video can provide valuable evidence when opening compact, costly, easily resold electronics.
Can Amazon’s A-to-z Guarantee help?
It may apply to qualifying third-party seller disputes involving wrong or materially different goods. Use the protection instructions attached to your order.
Should I return the junk immediately?
First open an official case and obtain the correct instructions. Document the contents and return parcel thoroughly before handing it to the carrier.
The Bottom Line
The RTX 5070 incident illustrates a real return-swap method: valuable hardware disappears, believable weight replaces it, and a tampered box reaches another buyer.
Amazon remains a legitimate retailer, but legitimate marketplaces can be abused. Document costly deliveries, report substitutions immediately, and keep every record until the refund settles.
10 Rules to Avoid Online Scams
Here are 10 practical safety rules to help you avoid malware, online shopping scams, crypto scams, and other online fraud. Each tip includes a quick “if you already got hit” action.
Stop and verify before you click, log in, download, or pay.
Most scams win by creating urgency. Verify using a trusted method: type the website address yourself, use the official app, or call a known number (not the one in the message).
If you already clicked: close the page, do not enter passwords, and run a malware scan.
Keep your operating system, browser, and apps updated.
Updates patch security holes used by malware and malicious ads. Turn on automatic updates where possible.
If you saw a scary “update now” pop-up: close it and update only through your device settings or the official app store.
Use layered protection: antivirus plus an ad blocker.
Antivirus helps block malware. An ad blocker reduces scam redirects, phishing pages, and malvertising.
If your browser is acting weird: remove unknown extensions, reset the browser, then run a full scan.
Install apps, software, and extensions only from official sources.
Avoid cracked software, “keygens,” and random downloads. During installs, choose Custom/Advanced and decline bundled offers you do not recognize.
If you already installed something suspicious: uninstall it, restart, and scan again.
Treat links and attachments as untrusted by default.
Phishing often impersonates delivery services, banks, and popular brands. If it is unexpected, do not open attachments or log in through the message.
If you entered credentials: change the password immediately and enable 2FA.
Shop safely: research the store, then pay with protection.
Be cautious with brand-new stores, “closing sale” stories, and prices that make no sense. Prefer credit cards or PayPal for dispute options. Avoid wire transfers, gift cards, and crypto payments.
If you already paid: contact your card issuer or PayPal quickly to dispute the transaction.
Crypto rule: never pay a “fee” to withdraw or recover money.
Common patterns include fake profits, then “tax,” “gas,” or “verification” fees. Another is a “recovery agent” who demands upfront crypto.
If you already sent crypto: stop paying, save evidence (wallet addresses, TXIDs, chats), and report the scam to the platform used.
Secure your accounts with unique passwords and 2FA (start with email).
Use a password manager and unique passwords for every account. Enable 2FA using an authenticator app when possible.
If you suspect an account takeover: change passwords, sign out of all devices, and review recent logins and recovery settings.
Back up important files and keep one backup offline.
Backups protect you from ransomware and device failure. Keep at least one backup on an external drive that is not always connected.
If you suspect infection: do not connect backup drives until the system is clean.
If you think you are a victim: stop losses, document evidence, and escalate fast.
Move quickly. Speed matters for disputes, account recovery, and limiting damage.
Stop payments and contact: do not send more money or respond to the scammer.
Call your bank or card issuer: block transactions, replace the card if needed, and start a dispute or chargeback.
Secure your email first: change the email password, enable 2FA, and remove unfamiliar recovery options.
Secure other accounts: change passwords, enable 2FA, and log out of all sessions.
Scan your device: remove suspicious apps or extensions, then run a full malware scan.
Save evidence: screenshots, emails, order pages, tracking pages, wallet addresses, TXIDs, and chat logs.
Report it: to the payment provider, marketplace, social platform, exchange, or wallet service involved.
These rules are intentionally simple. Most online losses happen when decisions are rushed. Slow down, verify independently, and use payment methods and account controls that give you recourse.
Hello! I'm Lapain Epuran, your go-to source for detailed and honest product reviews. From tech gadgets to miracle cures, I provide insights to help you make informed choices. Join me as we discover what's truly worth your time and money.