Night Driving Glasses Exposed: Do Yellow Lenses Really Make Roads Safer?
Written by: Lapain Epuran
Published on:
Yellow-tinted night driving glasses promise a calmer view of modern headlights, sharper road contrast, and safer driving after dark.
Many buyers genuinely find bright lights uncomfortable. The important question is whether comfort, visibility, and safety actually improve together.
Overview
The product is real, but broad safety promises are questionable
Yellow driving glasses are physical products, not imaginary merchandise. They tint incoming light and can make a scene appear warmer.
That visible effect does not prove they help drivers detect pedestrians, read road markings, or react faster.
Evidence reviewed for this investigation does not support claiming that ordinary yellow lenses make night driving safer.
What controlled research found
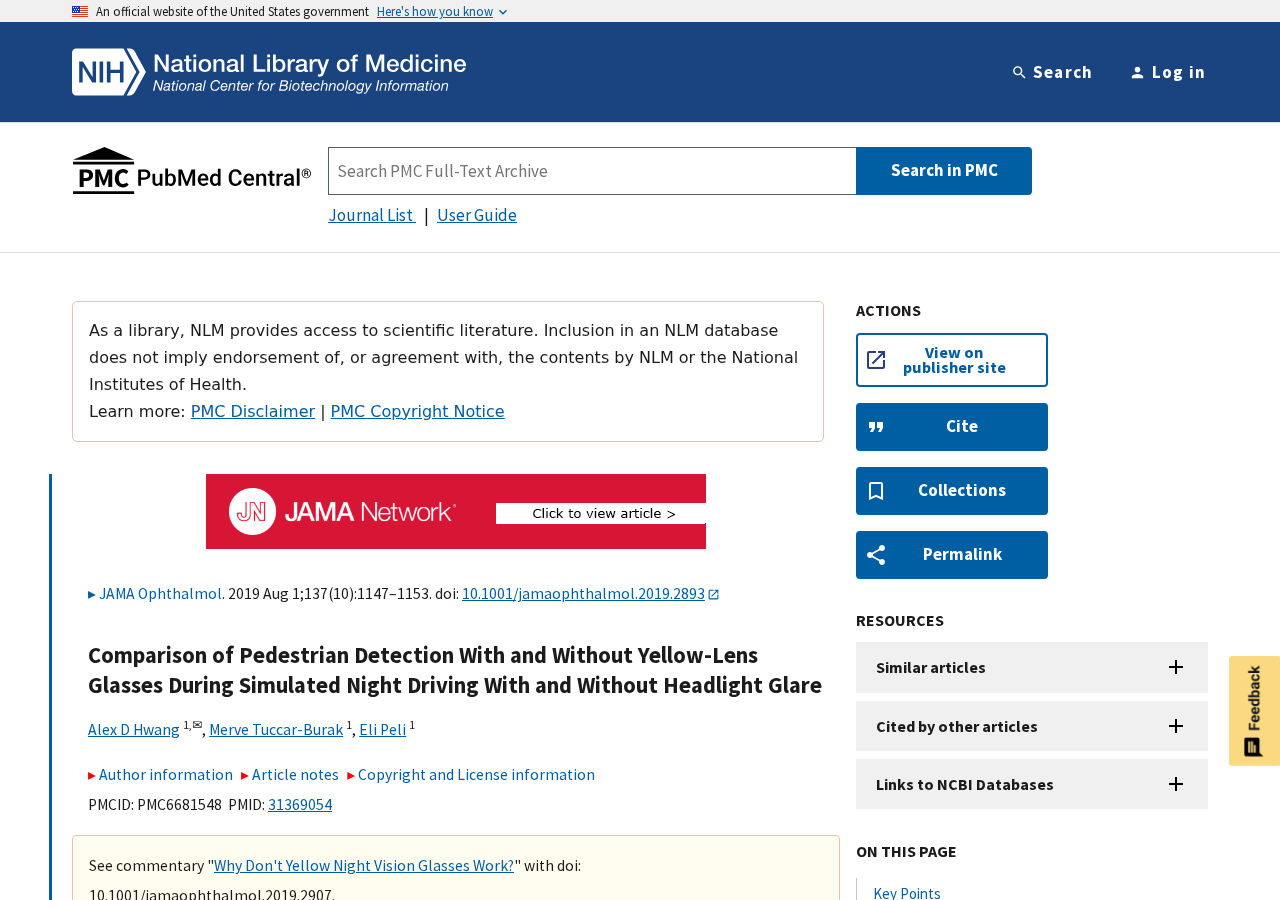
A 2019 study compared three commercially available yellow-lens products with clear glasses in a night-driving simulator.
Participants faced conditions with and without simulated headlight glare while researchers measured pedestrian detection.
The yellow lenses did not improve detection or reduce the negative effect of glare.
How shoppers should interpret the result
Some people may still describe the tint as comfortable, soothing, or visually pleasant.
Comfort is subjective. A safety claim requires stronger evidence because a driver must still see dark hazards quickly.
Keep these distinctions clear:
Dimming a headlight is not the same as improving vision.
Warmer colors do not automatically create useful contrast.
A personal preference is not proof of shorter reaction time.
“Polarized” does not guarantee suitability for night use.
UV protection is mainly relevant to daytime ultraviolet exposure.
Recurring night glare can signal an eye or prescription problem.
No generic online seller can diagnose the cause of glare.
Why Yellow Lenses Can Feel Helpful Without Improving Detection
Headlights can look harsh because the visual system must adapt between dark surroundings and bright points of light.
A tinted lens reduces part of the light entering the eye. That can make the bright source feel less intense.
The same filter also reduces light coming from pedestrians, animals, lane markings, signs, and debris.
At night, those darker details are already difficult to see.
The driver therefore experiences a tradeoff: less apparent brightness, but potentially less information across the entire scene.
A warmer color cast may create the impression of contrast even when measurable hazard detection does not improve.
This explains why honest personal testimonials can conflict with controlled testing.
A buyer may accurately report that glare feels softer while remaining unaware that a dark-clothed pedestrian became harder to detect.
Road safety depends on the second outcome, not only the first sensation.
How the Night Driving Glasses Marketing Funnel Works
Step 1: The advertisement begins with a real frustration
Bright LED headlights, wet pavement, aging eyes, dirty windshields, and uncorrected vision can all make night driving unpleasant.
Marketing shows starbursts and glare around approaching vehicles, then presents yellow lenses as the simple answer.
The problem is recognizable, so the promised solution feels immediately plausible.
Before-and-after graphics often exaggerate the difference by changing exposure, sharpness, or contrast along with lens color.
Step 2: A color change is presented as proof
Demonstrations place a yellow filter over nighttime footage and show the scene becoming warmer.
Because the visual change is obvious, viewers may assume performance must have improved.
The demonstration does not measure pedestrian detection, reading distance, braking response, or contrast sensitivity.
It proves only that the filter changes transmitted light and color.
Step 3: Technical terms make ordinary tint sound specialized
Listings use phrases such as blue-light blocking, HD vision, anti-glare, UV400, polarized night vision, and contrast enhancement.
Each term can describe a different property, and some are more useful in daylight than darkness.
A seller may combine them without publishing transmission curves, independent testing, lens standards, or driving-performance evidence.
Technical vocabulary should lead to test documents, not replace them.
Step 4: Testimonials replace controlled evidence
Buyers often say headlights look softer, the yellow tint feels relaxing, or rainy roads appear easier to view.
Those experiences may be sincere, but they cannot separate expectation, comfort, color preference, and actual hazard detection.
Advertising may select only favorable comments while omitting buyers who found the lenses too dark.
A credible safety claim needs reproducible testing under representative conditions.
Step 5: A low price makes experimentation feel harmless
Many pairs cost between roughly $10 and $100, so trying them can seem less consequential than scheduling an eye examination.
The financial risk may be small, but misplaced confidence behind the wheel is not.
A driver who believes the glasses solve glare may continue driving in conditions that require medical evaluation or behavioral changes.
Safety equipment should not create reassurance that exceeds its demonstrated benefit.
Step 6: Dropship listings make accountability difficult
The same frame and lens design can appear under several brand names across social ads and temporary stores.
Product photos, descriptions, and claimed certifications may be copied between sellers.
When the item disappoints, the buyer may face overseas returns, restocking deductions, or support that stops responding.
This commercial risk is separate from the scientific question and should be checked before payment.
What the 2019 Night-Driving Study Actually Tested
The research appeared in JAMA Ophthalmology and is available through the National Library of Medicine.
It involved 22 participants, including younger and older adults, using a night-driving simulator.
Researchers compared clear lenses with three yellow-lens products sold for night driving.
Participants encountered pedestrians wearing dark navy or brighter orange clothing while simulated oncoming headlights created glare.
The experiment measured whether people detected the pedestrians and how quickly they responded.
Yellow lenses did not improve the critical task of pedestrian detection.
The authors said performance appeared slightly worse with the yellow lenses, although that difference was not statistically significant.
They concluded the findings did not support eye-care professionals advising patients to use yellow night-driving glasses.
The study has limitations. It was small and conducted in a simulator rather than on public roads.
Those limitations do not turn a negative result into proof of benefit.
A seller claiming safer driving still needs competent evidence supporting the specific product and claim.
The FTC Has Challenged Similar Claims Before
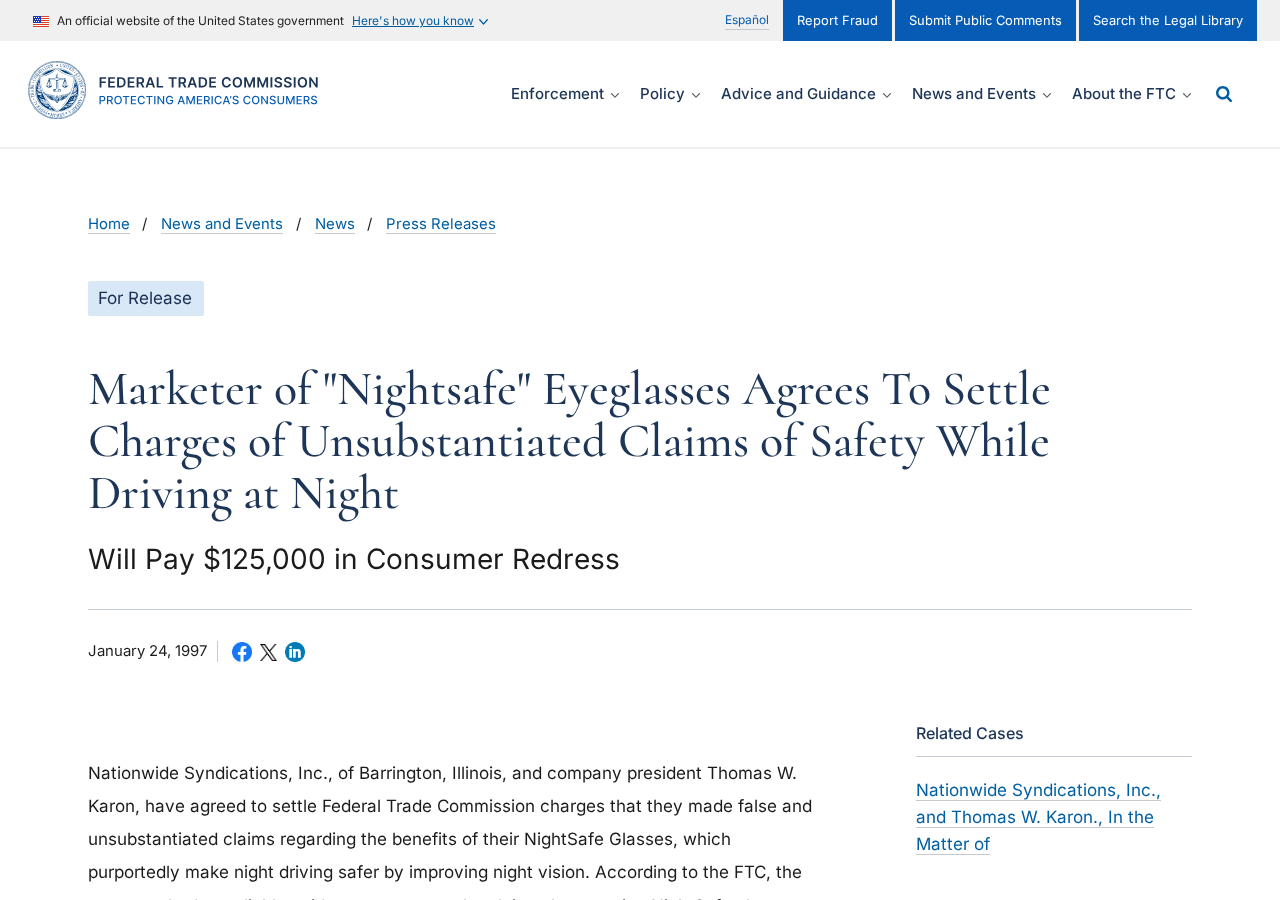
The controversy is not new. In 1997, the FTC announced a settlement involving NightSafe glasses.
The marketer had claimed the glasses improved night vision and made driving safer in rain, snow, sleet, and fog.
The FTC alleged those claims were false or unsupported by reliable evidence.
The proposed settlement prohibited representations that the glasses made night driving safer without competent scientific support.
It also required $125,000 in consumer redress.
That action concerned a specific company and older product. It does not automatically prove every modern seller is fraudulent.
It does show why safety language needs more than marketing photographs and testimonials.
The FTC’s general advertising rule remains straightforward: objective product claims must be truthful, non-deceptive, and supported by evidence.
What Eye Doctors Recommend Instead
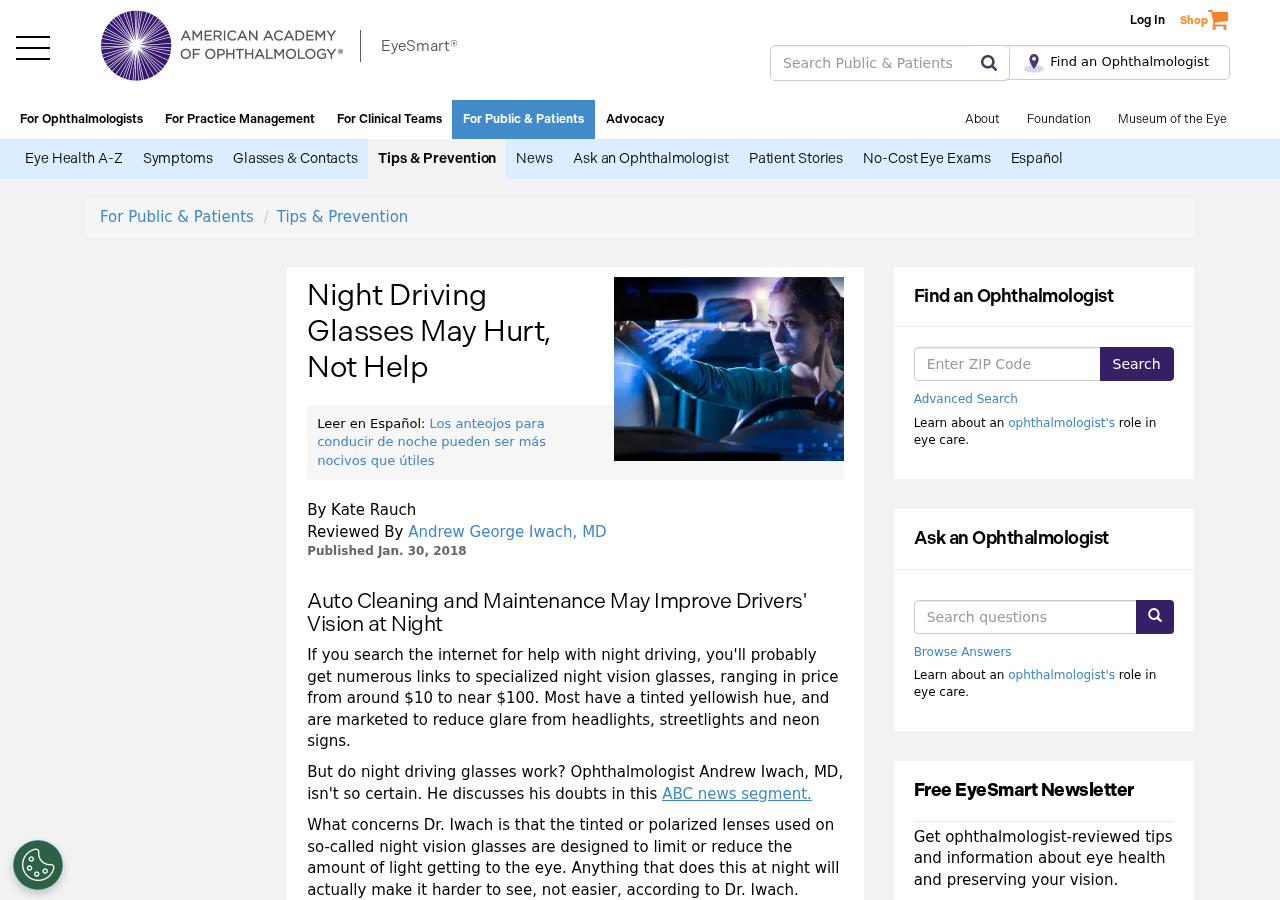
The American Academy of Ophthalmology warns that tinted or polarized lenses reduce light reaching the eye.
At night, reducing available light can make seeing harder rather than easier.
Its practical guidance begins with basics that preserve useful light and reduce avoidable scatter.
Keep the windshield clean inside and outside, clean eyeglasses, and replace worn wiper blades.
Use the night setting on the rearview mirror and avoid staring directly into approaching headlights.
Reduce unnecessary dashboard brightness so the eyes remain adapted to the darker road.
Most importantly, keep the eyeglass prescription current and arrange an eye examination when glare is persistent or worsening.
Cataracts, dry eye, astigmatism, corneal problems, and other conditions can influence night vision.
A product advertisement cannot determine which factor affects an individual driver.
How to Evaluate a Specific Pair Before Buying
Start with the exact claim. “May feel more comfortable” is different from “improves safety” or “helps you see hazards sooner.”
Ask whether the seller identifies the lens transmission level and provides testing from an independent optical laboratory.
Look for the applicable impact-resistance and optical-quality standards for your country.
A UV400 claim does not answer how much visible light reaches the eye at night.
Check whether the product can be returned after opening and trying it.
Some sellers classify eyewear as personal-use merchandise and restrict returns once packaging is opened.
Do not test unfamiliar tinted lenses for the first time during demanding traffic, rain, or high-speed driving.
If you notice reduced detail, darker pedestrians, distorted color, headaches, or delayed adaptation, stop using them while driving.
What Tint Does to the Light Reaching Your Eyes
Yellow lenses filter portions of visible light. That filtering changes color balance and can make a scene appear more contrasted.
The subjective change may feel cleaner or calmer, especially when bright headlights are uncomfortable.
Yet every tinted lens also removes some light that would otherwise reach the retina.
At night, the visual system is already working with limited illumination. Darker objects and pedestrians may provide only faint signals.
Removing light can therefore trade perceived comfort for less information, even when the road appears warmer or sharper.
This explains why a user can honestly report reduced discomfort while a controlled detection test shows no improved driving performance.
Comfort, contrast preference, glare sensation, hazard recognition, and reaction time are related but distinct outcomes.
Advertisements often blur those distinctions, turning a personal visual preference into an unsupported safety guarantee.
Night Glare Can Point to a Correctable Problem
Severe glare is not always something a shopper should solve with an online accessory.
An outdated prescription, scratched lenses, dry eyes, cataracts, uncorrected astigmatism, or other eye conditions can worsen nighttime vision.
A comprehensive examination can identify whether refractive correction, medical treatment, or a change in driving habits is appropriate.
Clean the windshield inside and outside, because haze scatters incoming headlight beams across the driver’s field of view.
Replace worn wiper blades and keep headlamps clean, correctly aimed, and used at an appropriate brightness.
Clean prescription lenses with suitable materials. Fine scratches and greasy residue can create halos around lights.
Reduce unnecessary cabin illumination and avoid staring directly at oncoming headlights.
These measures do not promise perfect night vision, but they address known sources of glare without deliberately reducing incoming light.
How to Read the Fine Print on a Night-Driving Offer
Check whether the seller promises comfort or makes the stronger claim that the glasses prevent accidents.
A safety statement should identify the supporting test, participants, comparison lens, lighting conditions, and measured outcome.
Terms such as “HD vision,” “military grade,” and “polarized night technology” have little meaning without verifiable specifications.
Photographs showing a bright yellow “after” scene can be edited simulations rather than views through the actual lens.
Search the product photographs across marketplaces. Identical frames under many names often indicate private labeling or dropshipping.
That business model is not automatically fraudulent, but it can make warranties and product accountability harder to trace.
Read the return policy before opening the package, then preserve the advertisement if it contains measurable safety promises.
Keep the packaging and receipt until you have confirmed that the lenses match the advertised specifications.
Company, Address, and Fulfillment Checks
Identify the actual seller, not only the brand
Generic yellow glasses often appear under several invented brand names with identical photographs.
Find the legal entity taking payment and compare it with the receipt, terms, return policy, and card statement.
A storefront name alone may disappear while the payment processor and warehouse remain.
Check whether the address is a warehouse
Search the return address before ordering. It may be a fulfillment center serving unrelated stores.
A warehouse can receive merchandise without designing, testing, or guaranteeing optical performance.
Do not treat “ships from the USA” as proof that the lenses were manufactured or tested there.
Look for usable customer support
Call or email before buying and ask whether opened eyewear can be returned.
Request the return deadline, restocking fee, shipping destination, and responsibility for international postage.
If support avoids those questions, the low purchase price can turn into a no-refund sale.
Demand evidence matching the safety claim
A responsible seller should distinguish glare comfort from improved night-driving performance.
Ask for the study involving that exact lens, not a general article about blue light or daytime sunglasses.
Certification badges without traceable standards, laboratory names, and reports offer little assurance.
What to Do if You Bought Night Driving Glasses Based on Safety Claims
Do not assume the glasses improve safety. Treat them as an unproven tint unless the seller provides credible product-specific evidence.
Stop using them if visibility worsens. Reduced detail, darker road users, distortion, or headaches are reasons to remove them safely.
Arrange an eye examination. Persistent glare, halos, or declining night vision can have causes that deserve professional assessment.
Save the advertisement. Keep screenshots of safety promises, product specifications, order confirmation, and return terms.
Request a refund promptly. Explain the claim that influenced the purchase and follow the seller’s written return procedure.
Dispute a materially misrepresented purchase when appropriate. Give the card issuer the advertisement, seller response, and evidence of your return attempt.
Report unsupported safety advertising. Complaints can be submitted to the FTC and the relevant consumer-protection authority.
Improve the driving environment. Clean glass surfaces, adjust mirrors and dashboard lighting, and avoid driving when glare makes conditions unsafe.
Check the device after suspicious downloads. Run Malwarebytes if the store installed anything, and use AdGuard to limit aggressive advertising and tracking.
Is Your Device Infected? Run a Free Malware Scan
Slow performance, constant pop-ups, or strange behavior? These are classic signs of a malware infection. The fastest way to find out is to scan your device with Malwarebytes Anti-Malware Free — one of the most trusted malware removal tools available.
The free version detects and removes the most common threats, including:
Adware — the cause of those annoying pop-ups
Browser hijackers — unwanted redirects and changed homepages
Trojans and spyware — hidden programs stealing your data
Potentially unwanted programs (PUPs) — software you never asked for
👉 Select your device below — Windows, Mac, or Android — then follow the simple steps to download Malwarebytes, scan your system, and remove any threats it finds. The whole process takes about 5 minutes.
Malwarebytes for WindowsMalwarebytes for MacMalwarebytes for Android
Run a Malware Scan with Malwarebytes for Windows
Malwarebytes is one of the most popular and trusted anti-malware tools for Windows — and it’s completely free for removing infections. It catches threats that many antivirus programs miss, including adware, browser hijackers, and trojans. Follow the steps below to scan and clean your PC in just a few minutes.
Download Malwarebytes
Click the button below to download the latest version of Malwarebytes for Windows from the official source. The free version is all you need — it will scan your computer and remove adware, browser hijackers, and other malicious software at no cost.
(The link opens in a new page where your download will start)
Install Malwarebytes
When the download finishes, open your Downloads folder and double-click the MBSetup file. If Windows shows a User Account Control pop-up, click “Yes” to allow the installation.
Follow the On-Screen Prompts to Install Malwarebytes
The setup wizard will walk you through a few quick screens:
Choose where you’re installing the program — “Personal Computer” or “Work Computer” — then click Next.
Malwarebytes will now install on your device. This usually takes under a minute.
When installation is complete, the “Welcome to Malwarebytes” screen will open automatically.
On the final screen, click Open Malwarebytes to launch the program.
Enable “Scan for Rootkits”
Before scanning, turn on rootkit detection so Malwarebytes can find even the most hidden threats. Click the Settings gear icon on the left side of the screen.
In the settings menu, find “Scan for rootkits” and click the toggle so it turns blue.
Done? Click “Dashboard” in the left pane to return to the main screen.
Start the Scan
Click the blue Scan button. Malwarebytes will automatically update its virus database and start checking your computer for malware.
Wait for the Scan to Finish
The scan checks your entire system for browser hijackers and other malicious programs, so it can take several minutes. Feel free to do something else — just check back occasionally to see the progress.
Quarantine the Detected Threats
When the scan is done, you’ll see a list of everything Malwarebytes found — malware, adware, and potentially unwanted programs. Click the “Quarantine” button to remove all of them at once.
Malwarebytes will now remove the malicious files and registry entries and move them safely into quarantine.
Restart Your Computer
Some threats can only be fully removed after a reboot. If Malwarebytes asks you to restart, click Yes. Once you’re logged back in, your PC is clean and you can continue with the next steps in this guide.
When the scan finishes, click Quarantine to remove everything Malwarebytes found. That’s it — your Windows PC is now clean of trojans, adware, and other malware, and should be back to running smoothly.
If your current antivirus allowed this malicious program on your computer, you may want to consider purchasing Malwarebytes Premium to protect against these types of threats in the future. If you are still having problems with your computer after completing these instructions, then please follow one of the steps:
Malwarebytes for Mac is a free on-demand scanner that removes the malware other security software tends to miss — adware, browser hijackers, and unwanted programs included. Cleaning an infected Mac with Malwarebytes has always been completely free, and it’s our go-to recommendation. Follow the steps below to scan and clean your Mac in just a few minutes.
Download Malwarebytes for Mac
Click the button below to download the latest version of Malwarebytes for Mac.
When the download finishes, open your Downloads folder and double-click the setup file to begin the installation.
Follow the On-Screen Prompts to Install Malwarebytes
The Malwarebytes for Mac Installer will guide you through a few quick screens. Click “Continue” and keep following the prompts until the installation completes.
When the installation is complete, Malwarebytes opens to the Welcome to Malwarebytes screen. Click “Get started“.
Select “Personal Computer” or “Work Computer”
Malwarebytes will ask what type of computer you’re installing it on. Click either Personal Computer or Work Computer, whichever applies.
Start the Scan
Click the “Scan” button. Malwarebytes will automatically update its detection database and begin checking your Mac for malware.
Wait for the Scan to Finish
Malwarebytes will scan your Mac for adware, browser hijackers, and other malicious programs. This can take a few minutes, so feel free to do something else — just check back occasionally to see the progress.
Quarantine the Detected Threats
When the scan is done, you’ll see a list of everything Malwarebytes found. Click the “Quarantine” button to remove all the threats at once.
Restart Your Mac
Malwarebytes will now remove all the malicious files it found. Some threats can only be fully removed after a reboot — if Malwarebytes asks you to restart, allow it. Once you’re logged back in, your Mac is clean.
Once the scan is done, remove every threat it detected. Your Mac is now free of adware, rogue browser extensions, and other potentially harmful software.
If your current antivirus allowed a malicious program on your computer, you might want to consider purchasing the full-featured version of Malwarebytes Anti-Malware to protect against these types of threats in the future. If you are still experiencing problems while trying to remove a malicious program from your computer, please ask for help in our Mac Malware Removal Help & Support forum.
Run a Malware Scan with Malwarebytes for Android
Malwarebytes for Android automatically detects and removes dangerous threats like malware and ransomware so you don’t have to worry about your most-used device being compromised. Aggressive detection of adware and potentially unwanted programs keeps your Android phone or tablet running smooth.
Download Malwarebytes for Android.
You can download Malwarebytes for Android by clicking the link below.
In the Google Play Store, tap “Install” to install Malwarebytes for Android on your device.
When the installation process has finished, tap “Open” to begin using Malwarebytes for Android. You can also open Malwarebytes by tapping on its icon in your phone menu or home screen.
Follow the on-screen prompts to complete the setup process
When Malwarebytes will open, you will see the Malwarebytes Setup Wizard which will guide you through a series of permissions and other setup options. This is the first of two screens that explain the difference between the Premium and Free versions. Swipe this screen to continue. Tap on “Got it” to proceed to the next step. Malwarebytes for Android will now ask for a set of permissions that are required to scan your device and protect it from malware. Tap on “Give permission” to continue. Tap on “Allow” to permit Malwarebytes to access the files on your phone.
Update database and run a scan with Malwarebytes for Android
You will now be prompted to update the Malwarebytes database and run a full system scan.
Click on “Update database” to update the Malwarebytes for Android definitions to the latest version, then click on “Run full scan” to perform a system scan.
Wait for the Malwarebytes scan to complete.
Malwarebytes will now start scanning your phone for adware and other malicious apps. This process can take a few minutes, so we suggest you do something else and periodically check on the status of the scan to see when it is finished.
Click on “Remove Selected”.
When the scan has been completed, you will be presented with a screen showing the malware infections that Malwarebytes for Android has detected. To remove the malicious apps that Malwarebytes has found, tap on the “Remove Selected” button.
Restart your phone.
Malwarebytes for Android will now remove all the malicious apps that it has found. To complete the malware removal process, Malwarebytes may ask you to restart your device.
After the scan, tap Remove Selected to delete all detected threats. Your Android phone is now clean — no more malicious apps, adware, or browser redirects.
If your current antivirus allowed a malicious app on your phone, you may want to consider purchasing the full-featured version of Malwarebytes to protect against these types of threats in the future. If you are still having problems with your phone after completing these instructions, then please follow one of the steps:
Restore your phone to factory settings by going to Settings > General management > Reset > Factory data reset.
Now that your device is clean, keep it that way. Most infections start with a malicious ad or a fake download button — so blocking them at the source is your best defense.
We recommend AdGuard, which blocks malicious ads, phishing pages, and dangerous redirects before they can reach you.
No. They are real tinted glasses. The problem arises when sellers claim proven safety or better hazard detection without adequate evidence.
Can yellow lenses reduce the feeling of glare?
They may make bright lights feel less intense for some users, but that subjective comfort does not prove better night vision.
Did the JAMA study find any safety benefit?
No. Yellow lenses did not improve pedestrian detection or reduce the negative effects of simulated headlight glare.
Are polarized lenses better for night driving?
Polarization can reduce reflected glare in daylight, but any night lens must preserve enough light. A polarized label alone proves no safety benefit.
What should I do about severe headlight glare?
Clean the windshield and glasses, confirm your prescription, adjust mirrors, and discuss persistent symptoms with an eye-care professional.
Can I wear yellow glasses for daytime driving?
Daytime use presents different lighting conditions. Follow applicable driving rules and professional advice for the specific tint and transmission level.
The Bottom Line
Yellow night driving glasses can change color and apparent brightness, but current evidence does not show that ordinary versions improve pedestrian detection or safety.
The product itself is not automatically a scam. The danger lies in exaggerated advertising, weak seller accountability, and confidence unsupported by performance data.
Treat worsening glare as a vision and driving-safety issue, not merely a shopping problem.
10 Rules to Avoid Online Scams
Here are 10 practical safety rules to help you avoid malware, online shopping scams, crypto scams, and other online fraud. Each tip includes a quick “if you already got hit” action.
Stop and verify before you click, log in, download, or pay.
Most scams win by creating urgency. Verify using a trusted method: type the website address yourself, use the official app, or call a known number (not the one in the message).
If you already clicked: close the page, do not enter passwords, and run a malware scan.
Keep your operating system, browser, and apps updated.
Updates patch security holes used by malware and malicious ads. Turn on automatic updates where possible.
If you saw a scary “update now” pop-up: close it and update only through your device settings or the official app store.
Use layered protection: antivirus plus an ad blocker.
Antivirus helps block malware. An ad blocker reduces scam redirects, phishing pages, and malvertising.
If your browser is acting weird: remove unknown extensions, reset the browser, then run a full scan.
Install apps, software, and extensions only from official sources.
Avoid cracked software, “keygens,” and random downloads. During installs, choose Custom/Advanced and decline bundled offers you do not recognize.
If you already installed something suspicious: uninstall it, restart, and scan again.
Treat links and attachments as untrusted by default.
Phishing often impersonates delivery services, banks, and popular brands. If it is unexpected, do not open attachments or log in through the message.
If you entered credentials: change the password immediately and enable 2FA.
Shop safely: research the store, then pay with protection.
Be cautious with brand-new stores, “closing sale” stories, and prices that make no sense. Prefer credit cards or PayPal for dispute options. Avoid wire transfers, gift cards, and crypto payments.
If you already paid: contact your card issuer or PayPal quickly to dispute the transaction.
Crypto rule: never pay a “fee” to withdraw or recover money.
Common patterns include fake profits, then “tax,” “gas,” or “verification” fees. Another is a “recovery agent” who demands upfront crypto.
If you already sent crypto: stop paying, save evidence (wallet addresses, TXIDs, chats), and report the scam to the platform used.
Secure your accounts with unique passwords and 2FA (start with email).
Use a password manager and unique passwords for every account. Enable 2FA using an authenticator app when possible.
If you suspect an account takeover: change passwords, sign out of all devices, and review recent logins and recovery settings.
Back up important files and keep one backup offline.
Backups protect you from ransomware and device failure. Keep at least one backup on an external drive that is not always connected.
If you suspect infection: do not connect backup drives until the system is clean.
If you think you are a victim: stop losses, document evidence, and escalate fast.
Move quickly. Speed matters for disputes, account recovery, and limiting damage.
Stop payments and contact: do not send more money or respond to the scammer.
Call your bank or card issuer: block transactions, replace the card if needed, and start a dispute or chargeback.
Secure your email first: change the email password, enable 2FA, and remove unfamiliar recovery options.
Secure other accounts: change passwords, enable 2FA, and log out of all sessions.
Scan your device: remove suspicious apps or extensions, then run a full malware scan.
Save evidence: screenshots, emails, order pages, tracking pages, wallet addresses, TXIDs, and chat logs.
Report it: to the payment provider, marketplace, social platform, exchange, or wallet service involved.
These rules are intentionally simple. Most online losses happen when decisions are rushed. Slow down, verify independently, and use payment methods and account controls that give you recourse.
Hello! I'm Lapain Epuran, your go-to source for detailed and honest product reviews. From tech gadgets to miracle cures, I provide insights to help you make informed choices. Join me as we discover what's truly worth your time and money.