

Your phone lights up with a notice about a card you use every day. The card is still in your wallet, but the notification feels wrong.
Before dismissing it or calling the number inside the message, take a moment. What the notice actually says matters more than how official it looks.
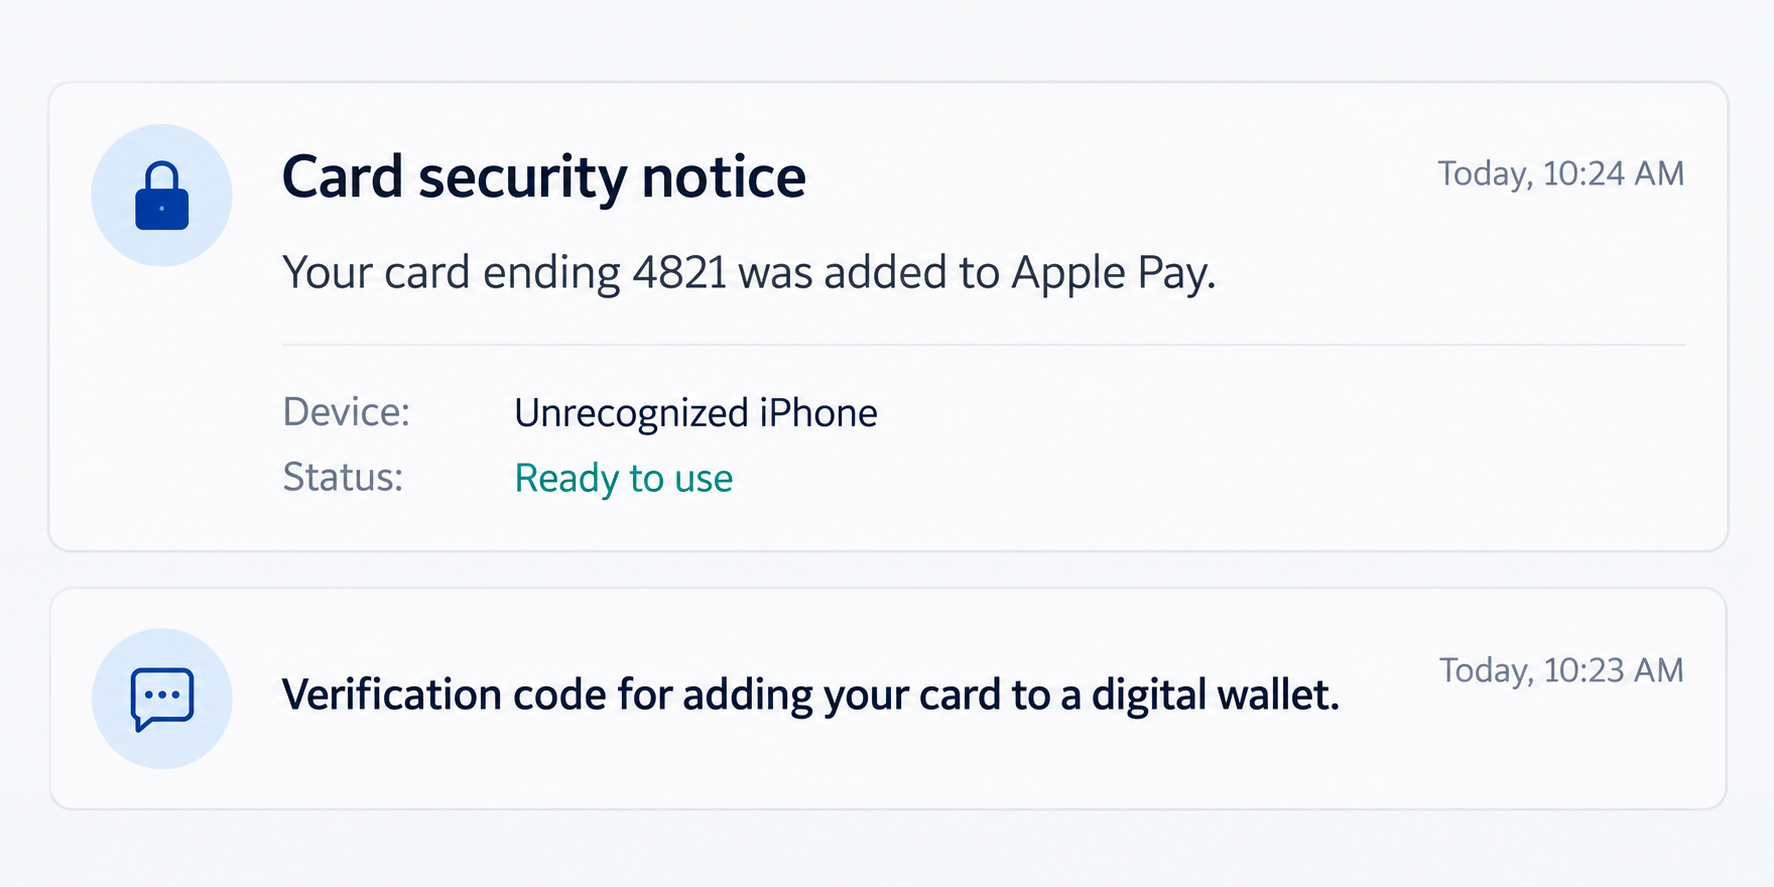
Overview
An unfamiliar wallet enrollment needs attention
If your card was added to Apple Pay without permission, contact its issuer through a trusted channel. Someone may have enrolled your card on another device.
This is different from losing a physical card. You can still have the original while an unauthorized digital payment credential exists somewhere else.
A notification alone does not establish what happened. It might concern your own recent setup, an attempted enrollment, or a fabricated alert designed to provoke a call.
The bank can check which situation applies. Do not use the disputed message itself as your route to the bank.
A genuine verification code can authorize the wrong action
Santander’s digital-wallet warning describes fake shopping pages that collect card information, then request a genuine one-time passcode.
The shopper thinks the code confirms a purchase. Instead, it authorizes adding the card to a criminal’s wallet. The advertised checkout conceals that change.
This does not mean Apple Pay is a scam. Criminals are abusing stolen information and misleading approvals, not proving that normal contactless payments are inherently unsafe.
The lead illustration uses fictional card details to show the distinction between an enrollment notice and an ordinary purchase confirmation.
Ask about the wallet, not just the plastic card
Tell the issuer specifically that an unfamiliar digital wallet may be involved. Ask it to identify and disable any unauthorized wallet credentials.
Useful details to have ready include:
- The time the enrollment notice arrived and its exact wording.
- The card’s last four digits, without posting the full number publicly.
- Any recent checkout where you entered a verification code.
- Unrecognized payments, including small pending transactions.
- Any unexpected changes to your banking contact details or account access.
Do not wait for a large loss to justify reporting it. An enrollment you did not authorize is worth checking even when your transaction list looks normal.
Why Your Physical Card Can Still Be in Your Hand
A digital wallet is another way to spend using the card account. Keeping the plastic does not rule out somebody else having enrolled it.
Apple’s provisioning documentation explains that the issuer decides whether to approve adding a card and creates a device-specific account number.
That payment token is different from the ordinary card number. An unfamiliar wallet enrollment therefore deserves a separate conversation with the issuer.
You do not need to diagnose the token system yourself. The practical question is whether somebody else has a usable payment credential tied to your account.
For example, an unexpected notification could arrive after a discount purchase on a site you thought belonged to a familiar retailer.
Perhaps you entered a code without opening its full message. You may remember the purchase amount clearly while missing that the bank mentioned a new wallet.
That hypothetical scenario explains why reporting only a disputed checkout can leave important context out. Describe the approval as well as the website.
Different issuers use different checks. Do not assume that every enrollment requires the same text message or that every successful fraud follows this exact route.
Equally, do not assume a notification means your Apple Account was breached. Card-detail theft and account takeover are separate possibilities requiring different checks.
How the Wallet Enrollment Scam Works
Step 1: A familiar purchase provides the cover story
The documented shopping version starts with an attractive offer appearing to come from a recognizable company. The expected activity is buying something, not configuring a wallet.
That expectation matters. Once you believe you are completing a checkout, another security prompt can feel like an ordinary final hurdle.
The offer’s small price does not limit what your card details can enable. A cheap item can lead to exposure involving your regular spending account.
Check the seller before entering financial information. A copied logo, familiar product photograph, or social-media advertisement does not authenticate the destination.
Step 2: The fake checkout captures payment details
You submit information needed for a card purchase. On the fraudulent page, those details go to an attacker rather than the retailer you expected.
You may still see a convincing order summary. A reference number generated by that page is not proof that the genuine business accepted an order.
The information can support card misuse beyond this specific scheme. That is why reporting exposed details matters even if you refused the later verification request.
Do not return to the page to experiment or see whether it accepts another card. Preserve the address and explain what you entered to your issuer.
Step 3: The attacker turns checkout verification into wallet approval
Using the card information, the criminal initiates wallet enrollment. If verification is required, the real issuer may send the cardholder an authentication request.
The fake page presents that request as purchase confirmation. This is the key deception: the explanation on the website does not match the bank’s actual operation.
Read the entire authentication message yourself. Words about adding a card, a wallet, or a new device are not interchangeable with approving a purchase.
If the request does not match what you initiated, stop. Do not let the page tell you that the difference is merely routine wording.
Step 4: The unauthorized device obtains a payment credential
Once enrollment is approved, the other device may have a wallet credential connected to your card. Your own wallet can continue looking unchanged.
Deleting the card from your phone only addresses your phone’s copy. It should not be treated as proof that an unrelated device has been disabled.
Ask the issuer to review wallet enrollments and tokens attached to the account. It can determine what must be suspended, revoked, or replaced.
A card replacement may be appropriate, but do not decide that it automatically settles every token question. Request explicit confirmation of the bank’s containment actions.
Step 5: Unexpected spending or an alert brings the problem to light
The first sign may be an enrollment message rather than a completed purchase. In other cases, an unfamiliar transaction starts the investigation.
Keep the two events together when reporting them. An enrollment time can help the bank distinguish ordinary account activity from the suspected unauthorized use.
Do not assume a small transaction is harmless because it fits inside your usual budget. The relevant issue is whether you authorized it.
Also avoid guessing that a merchant name identifies the criminal. A transaction descriptor may describe where spending occurred, not who enrolled the wallet.
Step 6: A second caller may try to exploit the alarm
A stranger claiming to resolve the issue may ask for another code, remote access, or a transfer to a supposedly safe account.
That is not a reason to cooperate. End the conversation and start a new one using the number printed on your card or your established banking app.
Do not share codes to cancel codes. Give the verified bank a description of the incident and follow its account-specific instructions.
A convincing caller can know details from the earlier page. Knowledge of your name, card ending, or purchase does not establish that the caller works for the bank.
Is the Alert Genuine, Fake, or About Your Own Device?
Check recent changes before drawing a conclusion
Did you recently replace a phone, configure a watch, restore a device, or help an authorized cardholder set up a wallet?
Those details can explain an enrollment. They are useful facts for the bank, not a reason to dismiss an unfamiliar notice without checking.
Write down what you recognize and what you do not. Saying you are uncertain is more useful than labeling the entire account hacked without evidence.
Verify outside the message
Open your usual banking app directly. Look for relevant card security information and contact support from the app or a previously trusted number.
If the issuer confirms that no enrollment or attempted enrollment occurred, the message itself may be the lure. Report it without following its callback instructions.
Do not search for an emergency support number inside sponsored search results. A familiar card or banking record provides a better starting point.
Describe the action accurately
A pending purchase, failed card enrollment, successful wallet enrollment, and Apple Account sign-in are different events. Read the wording before choosing a response.
For example, a message saying a card was added does not automatically mean a purchase already occurred. Conversely, no purchase yet does not make enrollment acceptable.
Ask the bank whether the alert concerns an attempt or an active credential. Keep its answer and the case reference for follow-up.
What to Do If Your Card Was Added Without Permission
You can handle this without understanding every technical detail. Start with the institution controlling the card, then address any information or account access you exposed.
- Contact the issuer immediately.
Use the card’s printed number or your normal banking app. Say that your card may have been added to an unauthorized digital wallet.
Do not begin by calling a number in the disputed alert. A fabricated support line can create a second loss while you are trying to stop the first.
- Ask about unknown wallet tokens and devices.
Request a review of digital wallets connected to the card. Ask which unauthorized credentials were disabled and whether any enrollment requests remain pending.
If the first representative discusses only card replacement, repeat the wallet concern. Let the issuer escalate the case to the appropriate security team.
- Restrict further use as the issuer advises.
If your banking app offers a card lock, use it while seeking help. Ask which transaction types that lock actually blocks.
Follow the bank’s replacement instructions. Do not assume a lock, replacement, or removal from your own phone covers every possible payment credential.
- Report unauthorized transactions separately.
List dates, amounts, merchant descriptions, and whether each item is pending or posted. Explain any genuine purchase you attempted immediately before the alert.
Ask how to submit a dispute and track its status. Available remedies depend on the payment type, jurisdiction, and circumstances; no outsider can guarantee reimbursement.
- Preserve a clear timeline.
Save the original notice, suspicious website address, order emails, and relevant authentication wording. Record what you entered or approved, without sharing codes publicly.
Keep the bank’s case number and follow-up instructions together. A concise timeline helps prevent repeated explanations and makes unresolved actions easier to spot.
- Secure accounts actually involved.
If you entered a banking or email password, change it through the genuine service. Review unfamiliar sessions, recovery details, and unexpected account changes.
If you only exposed card information, say so. Do not confuse that with confirmed email or Apple Account compromise, but investigate additional warning signs.
- Deal with downloads only if they occurred.
If someone persuaded you to install remote-access software, end that access and seek trusted device-cleanup help before returning to sensitive accounts.
MalwareTips’ Windows malware removal guide is relevant to that exposure. A security scan cannot revoke a bank token or reverse spending.
- Watch for follow-up attempts.
Ignore unsolicited recovery offers and requests to move money for protection. Confirm every later request through the same established bank channel.
Continue reviewing statements after the immediate incident. Ask the issuer when to follow up if a disputed charge or wallet credential remains unresolved.
A Safer Habit for Future Verification Requests
Before approving anything, finish this sentence: “The bank is asking me to authorize…” Use the actual message, not the seller’s explanation.
If the sentence ends differently from your intended task, stop. Buying a shirt and enrolling a card in a wallet are not the same task.
This habit also helps with login approvals and bank transfers. A genuine request can still concern an action you never intended to authorize.
You do not need to abandon digital wallets to apply it. Keep trusted payment tools while refusing unexplained approvals on unverified pages.
Frequently Asked Questions
Does an unauthorized enrollment mean Apple Pay was hacked?
No. Stolen card information and misleading verification can enable enrollment without establishing a breach of Apple Pay itself. The issuer must investigate the specific incident.
Can this happen while I still have my card?
Yes. A digital payment credential can be connected to the card account without the criminal possessing your physical card. Report the unknown enrollment promptly.
Should I remove the card from my own wallet?
Follow the issuer’s advice, but removing your copy is not confirmation that another device’s credential was revoked. Ask about unauthorized tokens specifically.
Is a real bank verification code safe to enter?
Only when its stated purpose matches an action you initiated through a trusted route. A real code can authorize an attacker-initiated operation.
Will a replacement card automatically fix everything?
Do not assume that. Ask the issuer what happens to associated wallet tokens and obtain confirmation that unauthorized access has been addressed.
What if I see no unfamiliar charges yet?
Still contact the issuer about an enrollment you did not authorize. Checking before spending occurs is better than waiting for a loss to confirm your concern.
The Bottom Line
Do not ignore an unknown wallet enrollment, and do not approve another code to make it disappear. Verify the alert directly with your card issuer.
Ask the bank to address unauthorized wallet credentials as well as the card itself. That specific request closes a gap a routine replacement conversation can miss.








