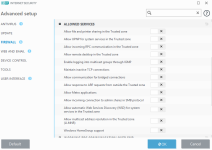
General Settings


HIPS RULE SETTINGS


HIPS Alerts

FIREWALL INTERACTIVE MODE


- Click “Advanced setup“
- Enable “integrate into system“
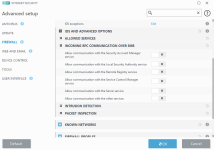
HIPS RULE SETTINGS
- HIPS rule can be created to protect user files stored in certain folders.
- Click “Edit” next to Rules
- Click “Add“
- Set “Rule name” as “PROTECTED FILES“
- Set “Action” as “Ask“
- Under “Operations affecting“, enable “Files“
- Click “Next“
- Select “All applications“
- Enable “Delete file“, “Write to File” and “Direct access to disk” as shown below
- Select “Specific files” as shown below
- Click “Add“
- Click “…” as shown below
- Select D:\ partition
- Click “OK“
- Click “OK“
- Similarly add other partitions in which files has been stored, as shown below
- Don’t add C: partition in which Windows OS is installed
- Click “Finish“
- Click “OK“
- Click “OK“
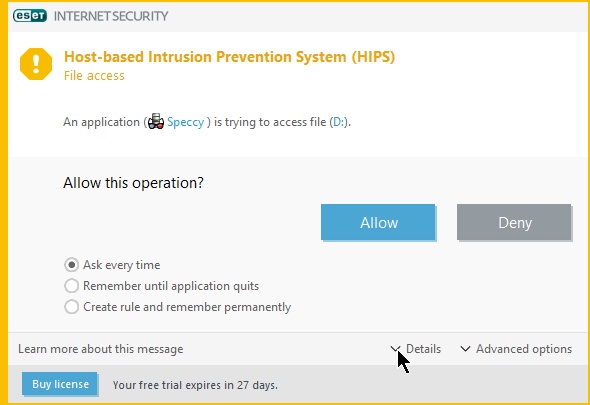
HIPS Alerts
- When an application tries to access files, ESET HIPS generates alerts as shown below.
- Allow only safe applications. Deny if you don’t want application to modify protected files.
- To permanently allow safe application access to files, select “Create rule and remember permanently“
- Tick “Only for operation” and select “All file operations“
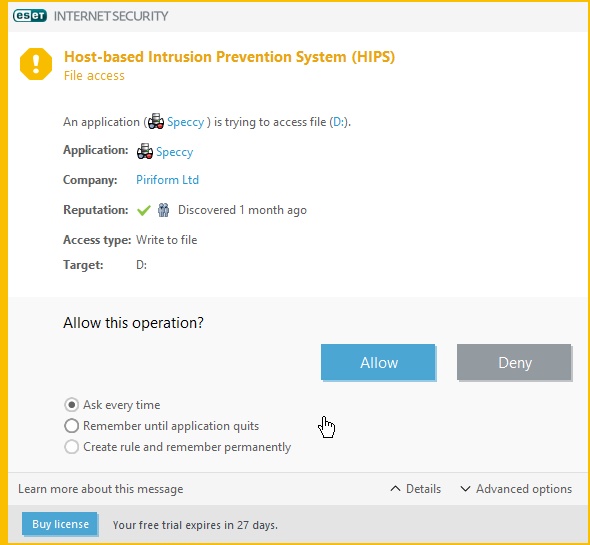
- To check the reputation of the application, click “Details“
- Next to “Reputation:” you can see the Eset rating of the application.
- Green color means the application is safe.
- Yellow color means application is unknown
- Red color means Application unsafe
FIREWALL INTERACTIVE MODE
- Set “Filtering mode” to “Interactive Mode“
- Click “OK“
- When an application tries to connect to Internet (network), Eset Firewall shows this alert.
- If application is safe then click “Allow“, otherwise “Deny“
- If you want to permanently allow a safe application to have access to internet, then select “create rule and remember permanently“
- Click “Allow“
- If you want to block access to the Internet for an application click “Deny” when Firewall alert is shown.
- To see Reputation of an application click “details“
- When installing an application, if application tries to connect to internet, then select “Remember until application quits“
- Click “allow” or “deny” as you wish


")