Upgrading your operating system,installing or removing drivers and some forms of malware can mess up your file extension association resulting in all your programs having a .lnk extension.

At this point,when you want to start any program from the Start menu or shortcuts nothing happens or in some cases Windows will ask you with what program would you like to use to open the .lnk file.
STEP 1: Restore .LNK file association settings in Windows registry
Your machine does not recognize the .exe extension because of an error in your Windows Registry,to fix this issue,we can run any of the below steps to fix it.
OPTION 1: Restore .lnk default behavior
Some forms of malware are known to change Windows file association settings,we strongly recommend that you scan your machine with the below software:
STEP 1: Run a system scan with Malwarebytes Anti-Malware FREE
At this point,when you want to start any program from the Start menu or shortcuts nothing happens or in some cases Windows will ask you with what program would you like to use to open the .lnk file.
STEP 1: Restore .LNK file association settings in Windows registry
Your machine does not recognize the .exe extension because of an error in your Windows Registry,to fix this issue,we can run any of the below steps to fix it.
OPTION 1: Restore .lnk default behavior
- Download and run the following registry fix to restore the default behavior for .lnk extension.
Restore default .LNK behavior for Windows XP users:
.LNK REGISTRY FIX FOR WINDOWS XP (This link will automatically download the registry fix for Windows XP users)
Restore default .LNK behavior for Windows Vista and 7 users:
.LNK REGISTRY FIX FOR WINDOWS 7 and VISTA (This link will automatically download the registry fix for Windows Vista and 7 users) - Double-click on the downloaded file and allow the prompt from the Registry Editor.
- Restart your machine .
- Click Start Menu, and then type regedit in the Start Search and press ENTER.
- Browse to the following registry branch:
HKEY_CURRENT_USER\Software\Microsoft\Windows\CurrentVersion\Explorer\FileExts\.lnk - Click on the arrow to expand it and delete the sub-key named UserChoice.
- Exit from Registry Editor and reboot your machine.
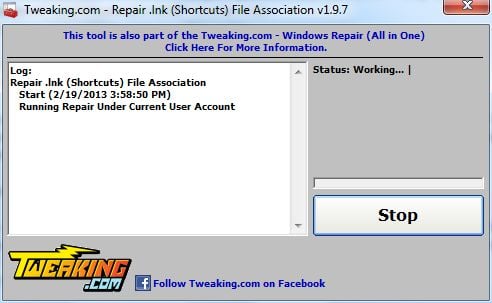
- Download Repair .lnk (Shortcuts) File Association utility from the below link
Repair .lnk (Shortcuts) File Association DOWNLOAD LINK (This link will open a new web page from where you can download Repair .lnk (Shortcuts) File Association) - Double click on the previously downloaded file, then click on the Start button.
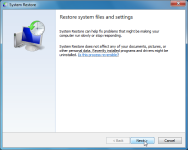
- Open System Restore by clicking the Start button .

- In the search box, type System Restore, and then, in the list of results, click System Restore.
- Follow the steps in the wizard to choose a restore point and restore your computer to an earlier state.
Some forms of malware are known to change Windows file association settings,we strongly recommend that you scan your machine with the below software:
STEP 1: Run a system scan with Malwarebytes Anti-Malware FREE
- Download the latest official version of Malwarebytes Anti-Malware FREE.
MALWAREBYTES ANTI-MALWARE DOWNLOAD LINK (This link will open a download page in a new window from where you can download Malwarebytes Anti-Malware Free) - Start the Malwarebytes’ Anti-Malware installation process by double clicking on mbam-setup file.

- When the installation begins, keep following the prompts in order to continue with the setup process. Do not make any changes to default settings and when the program has finished installing, make sure you leave both the Update Malwarebytes’ Anti-Malwareand Launch Malwarebytes’ Anti-Malware checked. Then click on the Finish button. If Malwarebytes’ prompts you to reboot, please do not do so.

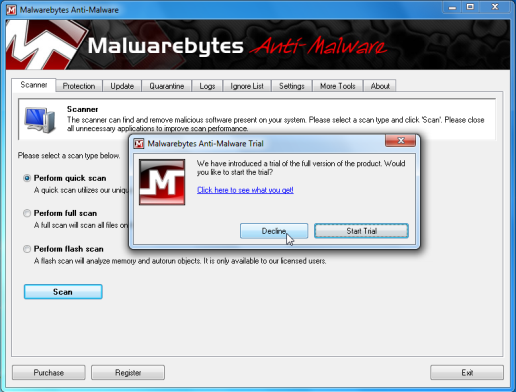
- Malwarebytes Anti-Malware will now start and you’ll be prompted to start a trial period , please select ‘Decline‘ as we just want to use the on-demand scanner.
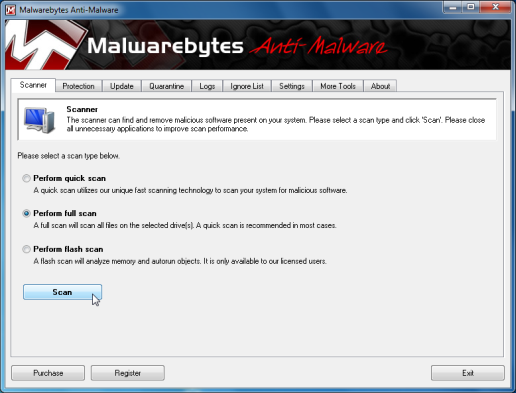
- On the Scanner tab,select Perform quick scan and then click on the Scan button to start scanning your computer.
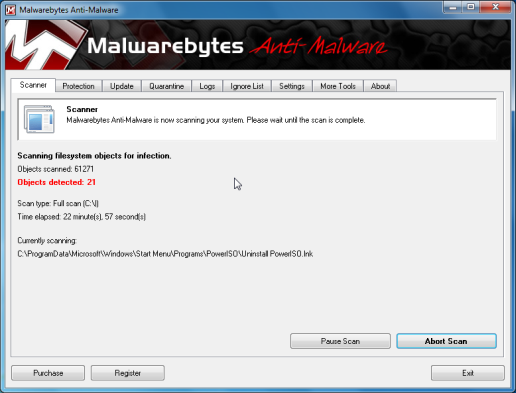
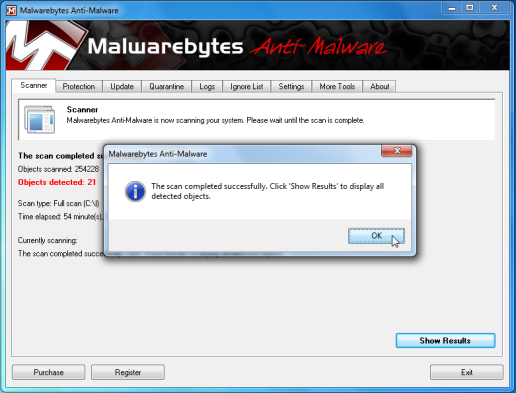
- Malwarebytes’ Anti-Malware will now start scanning your computer for malicious files as shown below.
- When the scan is finished a message box will appear, click OK to continue.
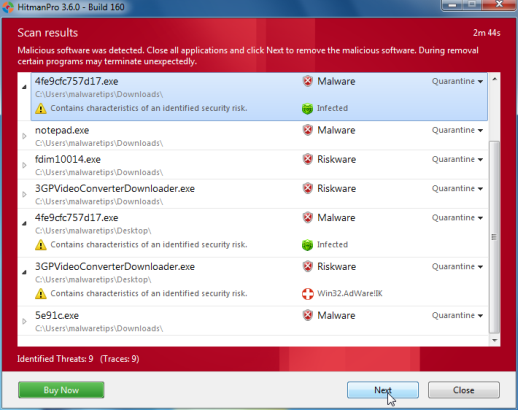
- You will now be presented with a screen showing you the malware infections that Malwarebytes’ Anti-Malware has detected.Please note that the infections found may be different from what is shown in the image.Make sure that everything is Checked (ticked) and click on the Remove Selected button.

- Malwarebytes’ Anti-Malware will now start removing the malicious files.After completing this task it will display a message stating that it needs to reboot,please allow this request and then let your machine boot in Normal mode.
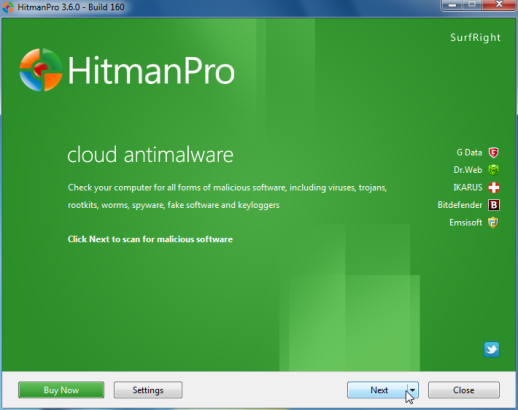
- This step can be performed in Normal Mode ,so please download the latest official version of HitmanPro.
HITMANPRO DOWNLOAD LINK (This link will open a download page in a new window from where you can download HitmanPro) - Double click on the previously downloaded fileto start the HitmanPro installation.

IF you are experiencing problems while trying to start HitmanPro, you can use the Force Breach mode.To start HitmanPro in Force Breach mode, hold down the left CTRL-key when you start HitmanPro and all non-essential processes are terminated, including the malware process. (How to start HitmanPro in Force Breach mode – Video) - Click on Next to install HitmanPro on your system.
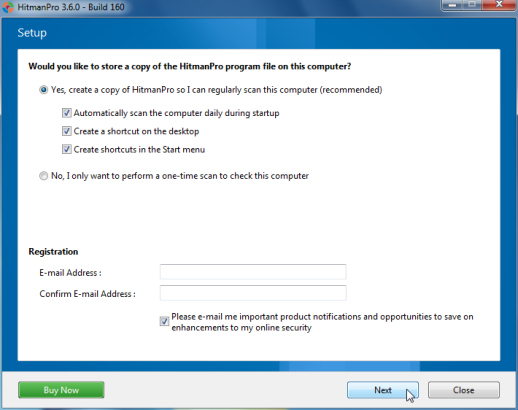
- The setup screen is displayed, from which you can decide whether you wish to install HitmanPro on your machine or just perform a one-time scan, select an option then click onNext to start a system scan.
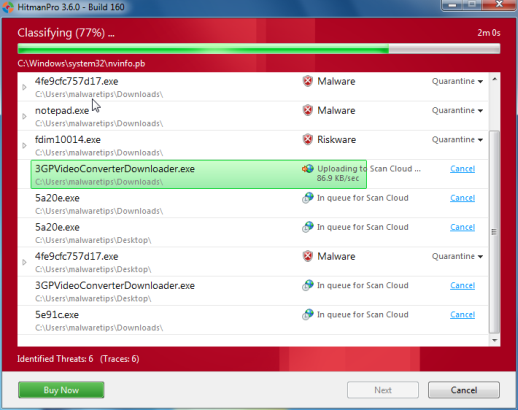
- HitmanPro will start scanning your system for malicious files as seen in the image below.
- Once the scan is complete,you’ll see a screen which will display all the malicious files that the program has found.Click on Next to remove this malicious files.
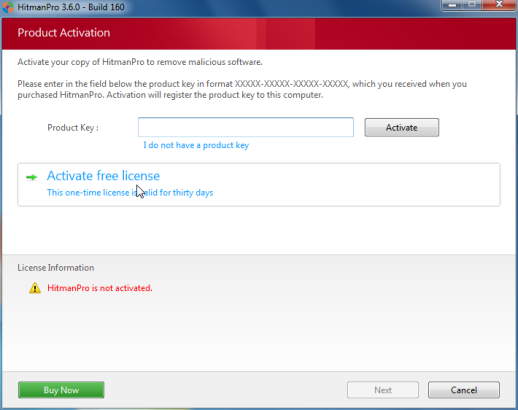
- Click Activate free license to start the free 30 days trial and remove the malicious files.
- HitmanPro will now start removing the infected objects.If this program will ask you to restart your computer,please allow this request.
Attachments

Last edited:
