Remove Vista Home Security 2012 (Uninstall Guide)
What is Vista Home Security 2012 ?
Vista Home Security 2012 is a fake system security software that is considered a rogue program.
Rogues are malicious programs that cyber criminals use to trick users by displaying false threats and problems that it claims to have detected. In reality, none of the issues are real and are only used to convince the user into buying their software and stealing their personal financial information.
As this program is a scam do not be scared into purchasing the program when you see its alerts. You are strongly advised to follow our removal instructions below.
Am I infected with Vista Home Security 2012 ?
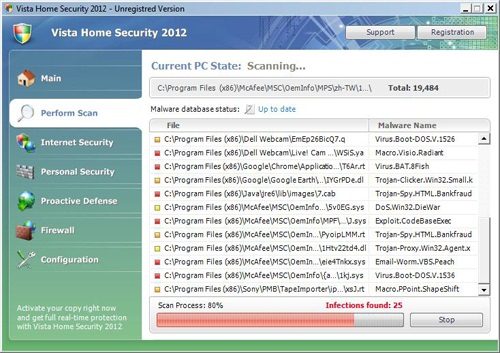
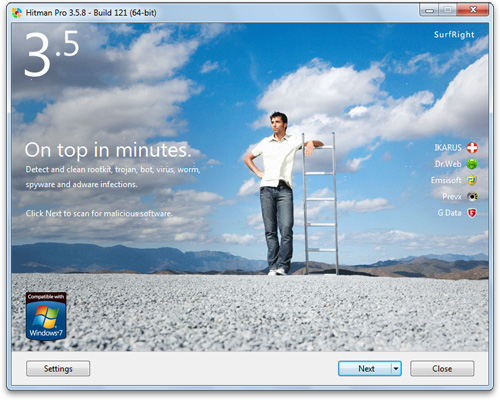
This is how the main screen of Vista Home Security 2012 looks:
Vista Home Security 2012 Removal Instructions
(If you experience any problems completing these instructions, please start a new thread here)
STEP 1 : Start your computer in Safe Mode with Networking
- Remove all floppy disks, CDs, and DVDs from your computer, and then restart your computer.
- Do one of the following:
- If your computer has a single operating system installed, press and hold the F8 key as your computer restarts. You need to press F8 before the Windows logo appears. If the Windows logo appears, you will need to try again by waiting until the Windows logon prompt appears, and then shutting down and restarting your computer.
- If your computer has more than one operating system, use the arrow keys to highlight the operating system you want to start in safe mode, and then press F8.
- On the Advanced Boot Options screen, use the arrow keys to highlight Safe Mode with Networking , and then press ENTER. For more information about options, see Advanced startup options (including safe mode).

- Log on to your computer with a user account that has administrator rights.
STEP 2: Fix the Windows Registry
This rogue has changed your Windows registry settings so that when you launch an executable (a file ending with .exe ) , it will instead launch the infection rather than the desired program.To fix this behavior you need to run the bellow registry fix.
- Download this registry file that will fix the malicious registry changes.
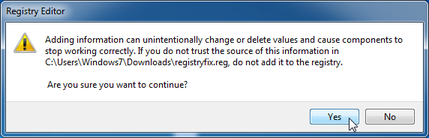
[attachment=969] - Double-click on registryfix.reg file to run it. Click "Yes" for Registry Editor prompt window. Then click OK.
STEP 3: Fix your internet connection
This infection may add a proxy server which prevents the user from accessing the internet,follow the below instructions to remove the proxy.
- Open Internet Explorer.
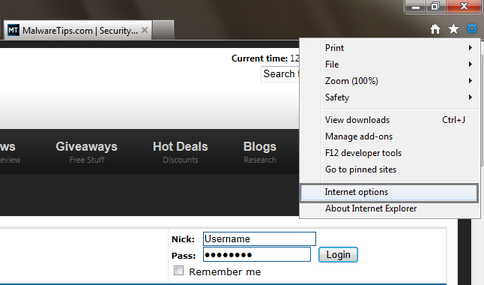
- For Internet Explorer 9 : Click on the gear icon at the top (far right) and click again on Internet Options.

- For Internet Explorer 8 : Click on Tools, select Internet Options.
- For Internet Explorer 9 : Click on the gear icon
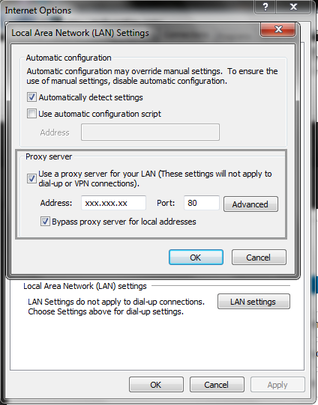
- Go to the tab Connections.At the bottom, click on LAN settings.
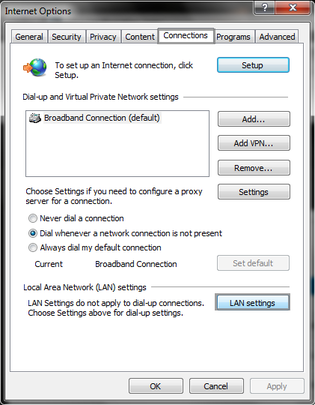
- Uncheck the option Use a proxy server for your LAN. This will remove the proxy server and allow you to use the internet again.
For Firefox users, go to Tools > Options > Advanced tab > Network > Settings > Select No Proxy
STEP 4: Download and scan with Kaspersky TDSSKiller
Kaspersky TDSSKiller is a utility that was created in order to provide you with a simple means of disinfecting any system that suffers a rootkit infection.A rootkit is a program or a set of programs designed to obscure the fact that a system has been compromised.
- Please download the latest official version of Kaspersky TDSSKiller.
<a href="http://support.kaspersky.com/downloads/utils/tdsskiller.exe" target="_blank"> <img src="http://malwaretips.com/images/removalguide/downloadnow.gif"> </a> - Before you can run Kaspersky TDSSKiller, you first need to rename it so that
you can get it to run. To do this, right-click on the TDSSKiller.exe icon that should now be on your Desktop and select Rename. You can now edit the name of the file and should name it to iexplore.exe
Code:iexplore.exe

- Once the file is renamed, double-click on it to launch it.
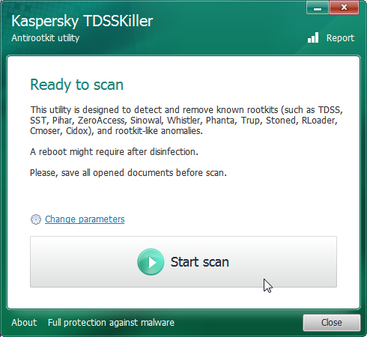
- Kaspersky TDSSKiller will now start and display the welcome screen as shown below.In order to start a system scan , press the 'Start Scan' button.
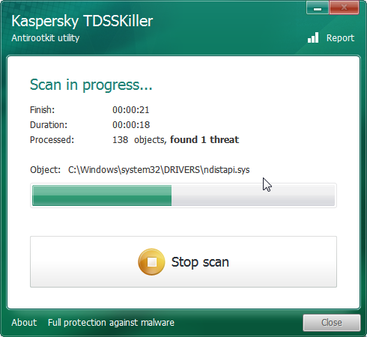
- Kaspersky TDSSKiller will now scan your computer for Vista Home Security 2012 related malicous files.
- When the scan has finished it will display a result screen stating whether or not the infection was found on your computer. If it was found it will display a screen similar to the one below.
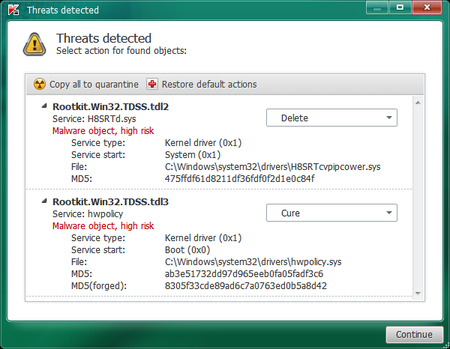
- To remove the infection simply click on the Continue button and TDSSKiller will attempt to clean the infection.
- A reboot might require to completely remove the malware from your system. In this scenario, always confirm the reboot action to be on the safe side.
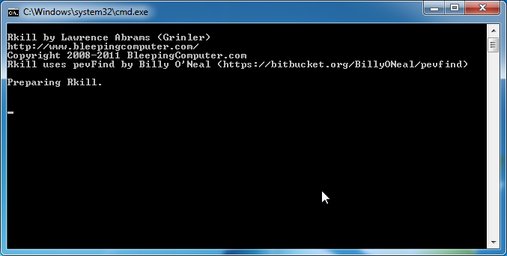
STEP 5 : Download and scan with RKill to terminate known malware processes.
RKill is a program that attempts to terminate known malware processes so that your normal security software can then run and clean your computer of infections. When RKill runs it will kill malware processes and then import a Registry file that removes incorrect file associations and fixes policies that stop us from using certain tools.
As RKill only terminates a program's running process, and does not delete any files, after running it you should not reboot your computer as any malware processes that are configured to start automatically will just be started again.
- Please download the latest official version of rKill.
<a href="http://download.bleepingcomputer.com/grinler/iExplore.exe" target="_blank"> <img src="http://malwaretips.com/images/removalguide/downloadnow.gif"> </a>
- Double-click on the RKill icon in order to automatically attempt to stop any processes associated with this rouge.

- Now RKill will start working in the background, please be patient while the program looks for various malware programs and tries to ends them.
- If you receive a message that RKill is an infection, that is a fake warning given by the rogue. As a possible solution we advise you to leave the warning on the screen and then try to run RKill again.Run RKill until the fake program is not visible but not more than ten times.
- If you continue having problems running RKill, you can download the other renamed versions of RKill from here.
- When Rkill has completed its task, it will generate a log. You can then proceed with the rest of the guide.
STEP 6 Download and scan with Malwarebytes Anti-Malware
- Please download the latest official version of Malwarebytes' Anti-Malware Free.
<a href="http://www.malwarebytes.org/products/malwarebytes_free" target="_blank"> <img src="http://malwaretips.com/images/removalguide/downloadnow.gif"> </a>
- Install Malwarebytes' Anti-Malware by double clicking on mbam-setup.
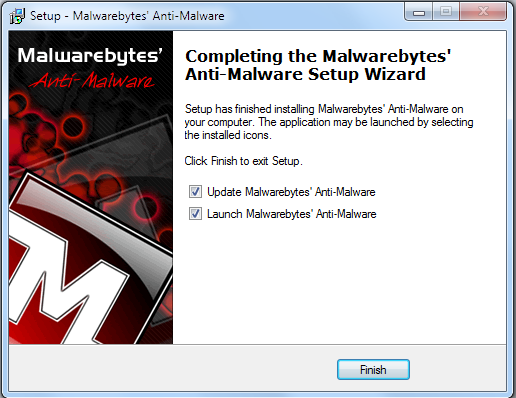
- When the installation begins, keep following the prompts in order to continue with the installation process. Do not make any changes to default settings and when the program has finished installing, make sure you leave both the Update Malwarebytes' Anti-Malware and Launch Malwarebytes' Anti-Malware checked. Then click on the Finish button. If Malwarebytes' prompts you to reboot, please do not do so.
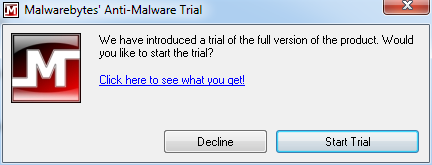
- Malwarebytes Anti-Malware will now start and you'll be prompted to start a trial period , please select 'Decline' as we just want to use the on-demand scanner.
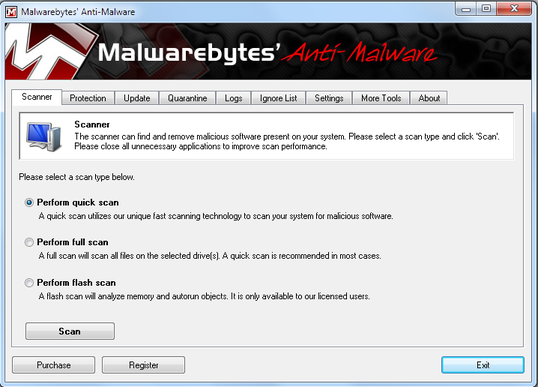
- On the Scanner tab,please select Perform full scan and then click on the Scan button to start scanning your computer for any possible infections.
- Malwarebytes' Anti-Malware will now start scanning your computer for Vista Home Security 2012 malicious files as shown below.

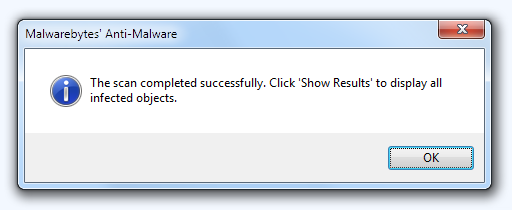
- When the scan is finished a message box will appear, click OK to continue.
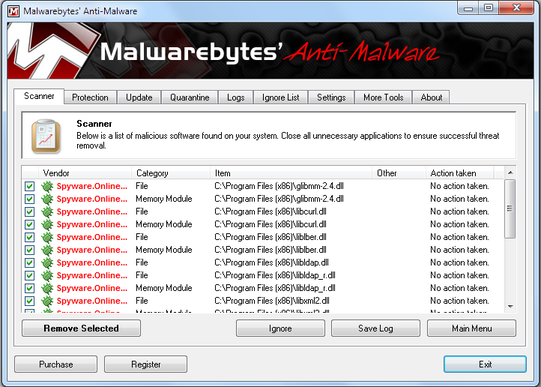
- You will now be presented with a screen showing you the malware infections that ]Malwarebytes' Anti-Malware has detected.Please note that the infections found may be different than what is shown in the image.
Make sure that everything is Checked (ticked) and click on Remove Selected button.
- Malwarebytes' Anti-Malware will now start removing the malicious files.
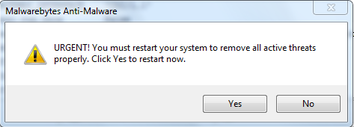
If during the removal process Malwarebytes will display a message stating that it needs to reboot, please allow this request.
STEP 7: Download and scan with Hitman Pro
- Please download the latest official version of Hitman Pro.
<a href="http://www.surfright.nl/en/downloads" target="_blank"> <img src="http://malwaretips.com/images/removalguide/downloadnow.gif"> </a> - Start Hitman Pro by clicking on the previously downloaded file.
NOTE : If you have problems starting Hitman Pro, use the “Force Breach” mode. Hold down the left CTRL-key when you start Hitman Pro and all non-essential processes are terminated, including the malware process. (How to start Hitman Pro in Force Breach mode - video)
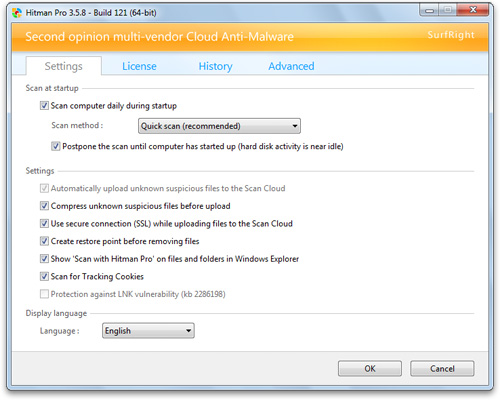
- Click Settings to proceed to the application scan options. Note that Hitman Pro 3 is free to use for the first 30 days, after which time it will prompt you to purchase a licence key.
In the Settings menu, ensure that the options "Create Restore Point Before Removing Files" is checked, and click OK. Click Next to continue to the scan.
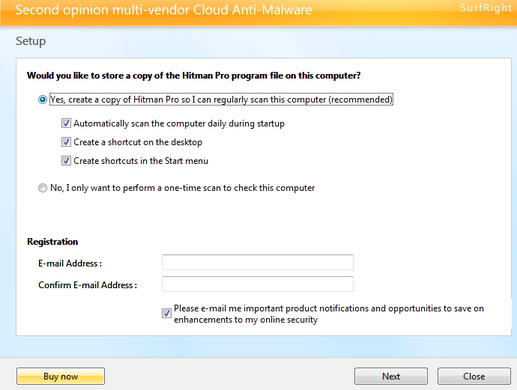
- The Setup screen is displayed. Here, you can decide whether or not you wish to install Hitman Pro 3 on your system. To proceed with installation, select Yes,create a copy of Hitman Pro so I can regularly scan this computer .Click Next to continue.
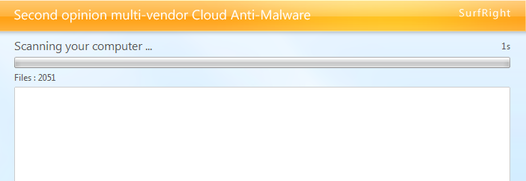
- Hitman Pro will start scanning your system for Vista Home Security 2012 malicious filles. Depending on the the size of your hard drive, and the performance of your computer, this step will take several minutes.
- Once the scan is complete, a summary of detected malicious files is displayed.

- Click Next to start removing the infected files.Hitman Pro 3 will now cleanse the infected files, and in some instances, may suggest a reboot in order to completely remove the malware from your system. In this scenario, always confirm the reboot action to be on the safe side.
As an addition step it's recommended that you download other free anti-malware software from the list below and run a full system scan :

If you are still experiencing problems on your machine, please start a new thread here.
Removing the residual damage from Security Monitor 2012
STEP 1 : Check yourDNS settings
Check Windows 7 DNS
- On your Start menu, open the Control Panel.
- Under the Network and Internet section, click View network status and tasks.
- In the View your active networks section, click the item to the right of Connections:

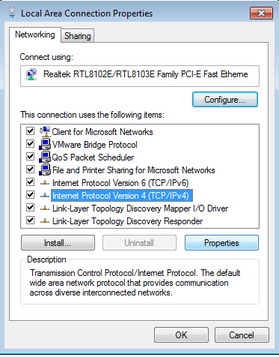
- On the General tab of the Connection Status window, click Properties.
- On the General tab of the Connection Properties window, scroll down and select Internet Protocol Version 4 (TCP/IPv4), then click Properties.
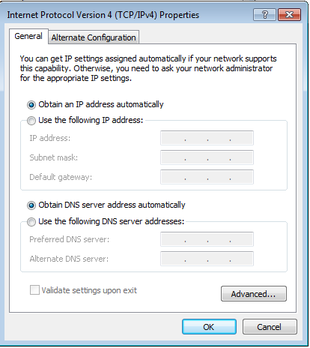
- On the General tab of the Internet Protocol Version 4 (TCP/IPv4) Properties window, in the lower section, select Obtain DNS server address automatically.
- Click OK and exit all the windows.
Check Windows Vista DNS
- On your Start menu, open the Control Panel.
- In the Control Panel window, click Network and Sharing Center.
- In the Network section, select View Status of each connection.
- On the General tab of the Connection Status window, click Properties.
- On the General tab of the Connection Properties, scroll down and select Internet Protocol Version 4 (TCP/IPv4), then click Properties.
- On the General tab of the Internet Protocol Version 4 (TCP/IPv4) Properties window, in the lower section, select Obtain DNS server address automatically.
- Click OK and exit all the windows.
Check Windows XP DNS
- On your Start menu, open the Control Panel.
- In the Control Panel window, click Network Connections and choose your current connection.
- On the General tab of the Connection Status window, click Properties.
- On the General tab of the Connection Properties window, scroll down and select Internet Protocol (TCP/IP), then click Properties.
- On the General tab of the Internet Protocol Version (TCP/IP) Properties window, in the lower section, select Obtain DNS server address automatically.
- Click OK and exit all the windows.
STEP 2 : Check your Windows HOSTS file
The hosts file is one of several system facilities to assist in addressing network nodes in a computer network. It is a common part in an operating system's Internet Protocol (IP) implementation, and serves the function of translating human-friendly hostnames into numeric protocol addresses, called IP addresses, that identify and locate a host in an IP network.
Because of its role in local name resolution, the hosts file represents an attack vector for malicious software. The file may be hijacked, for example, by adware, computer viruses, trojan horse software, and may be modified to redirect traffic from the intended destination to sites hosting content that may be offensive or intrusive to the user or the user’s computer system.
- Go to > C:\WINDOWS\system32\drivers\etc.
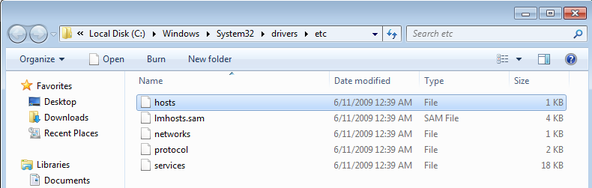
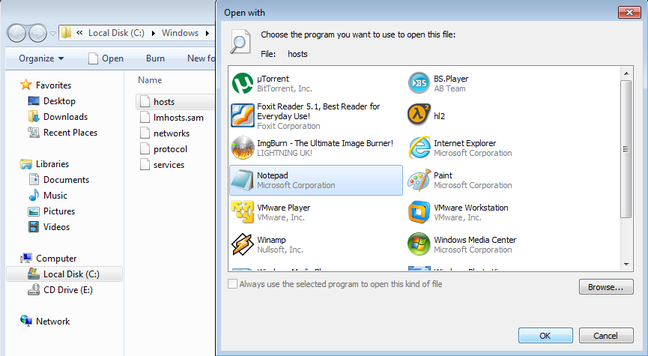
- Double-click “hosts” file to open it.You can open this file with Notepad.
- The “hosts” file should look the same as our below code boxes. There should be only one line: 127.0.0.1 localhost in Windows XP and 127.0.0.1 localhost ::1 in Windows Vista/7. If there are more, then remove them and save changes.
Default Host file for Windows XP
Default Host file Windows VistaCode:# Copyright (c) 1993-1999 Microsoft Corp. # # This is a sample HOSTS file used by Microsoft TCP/IP for Windows. # # This file contains the mappings of IP addresses to host names. Each # entry should be kept on an individual line. The IP address should # be placed in the first column followed by the corresponding host name. # The IP address and the host name should be separated by at least one # space. # # Additionally, comments (such as these) may be inserted on individual # lines or following the machine name denoted by a '#' symbol. # # For example: # # 102.54.94.97 rhino.acme.com # source server # 38.25.63.10 x.acme.com # x client host 127.0.0.1 localhost
Default Host file for Windows 7Code:# Copyright (c) 1993-2006 Microsoft Corp. # # This is a sample HOSTS file used by Microsoft TCP/IP for Windows. # # This file contains the mappings of IP addresses to host names. Each # entry should be kept on an individual line. The IP address should # be placed in the first column followed by the corresponding host name. # The IP address and the host name should be separated by at least one # space. # # Additionally, comments (such as these) may be inserted on individual # lines or following the machine name denoted by a '#' symbol. # # For example: # # 102.54.94.97 rhino.acme.com # source server # 38.25.63.10 x.acme.com # x client host 127.0.0.1 localhost ::1 localhost
Code:# Copyright (c) 1993-2006 Microsoft Corp. # # This is a sample HOSTS file used by Microsoft TCP/IP for Windows. # # This file contains the mappings of IP addresses to host names. Each # entry should be kept on an individual line. The IP address should # be placed in the first column followed by the corresponding host name. # The IP address and the host name should be separated by at least one # space. # # Additionally, comments (such as these) may be inserted on individual # lines or following the machine name denoted by a '#' symbol. # # For example: # # 102.54.94.97 rhino.acme.com # source server # 38.25.63.10 x.acme.com # x client host # localhost name resolution is handle within DNS itself. # 127.0.0.1 localhost # ::1 localhost
STEP 3 : Remove other forms of residual damage
If you still are experiencing residual damage after removing this infection, you can download and use the Windows Repair tool from tweaking.com to fix the problems.
Windows Repair is an all-in-one repair tool to help fix a large majority of known Windows problems including registry errors and file permissions as well as issues with Internet Explorer, Windows Update, Windows Firewall and more. Malware and installed programs can modify your default settings. With Tweaking.com - Windows Repair you can restore Windows original settings.
Use the bellow button to download Windows Repair (All In One) :
<a href="http://www.tweaking.com/content/page/windows_repair_all_in_one.html" target="_blank"> <img src="http://malwaretips.com/images/removalguide/downloadnow.gif"> </a>
You can watch the bellow video in order to see how to use Windows Repair :
If you are still experiencing problems on your machine, please start a new thread here.
How was I infected with Security Monitor 2012 ?
Rogue security software mainly relies on social engineering in order to defeat the security built into modern operating system and browser software and install itself onto victims' computers. A website may, for example, display a fictitious warning dialog stating that someone's machine is infected with a computer virus, and encourage them through social engineering to install or purchase scareware in the belief that they are purchasing genuine antivirus software.
Most have a Trojan horse component, which users are misled into installing. The Trojan may be disguised as:
- A browser plug-in or extension (typically toolbar)
- An image, screensaver or archive file attached to an e-mail message
- Multimedia codec required to play a certain video clip
- Software shared on peer-to-peer networks
- A free online malware scanning service
More recently, malware distributors have been utilizing SEO poisoning techniques by pushing infected URLs to the top of search engine results about recent news events. People looking for articles on such events on a search engine may encounter results that, upon being clicked, are instead redirected through a series of sites before arriving at a landing page that says that their machine is infected and pushes a download to a "trial" of the rogue program. A 2010 study by Google found 11,000 domains hosting fake anti-virus software, accounting for 50% of all malware delivered via internet advertising.
How can I prevent these infections?
A. Prevent malware with smart online behavior
The single biggest factor in preventing a malware infection on your PC is you. You don't need expert knowledge or special training. You just need vigilance to avoid downloading and installing anything you do not understand or trust, no matter how tempting, from the following sources:
From a website: The internet is a dangerous place so try to stay away from sites offering commercial software serial numbers, keygens or other hacked material.
Download programs only from reputable websites that have confirmed the software is malware free.If you are unsure, leave the site and research the software you are being asked to install. If it is OK, you can always come back to site and install it. If it is not OK, you will avoid a malware headache.
From e-mail: If you're not familiar with the sender, do not open, download, or execute any files or email attachments. Some viruses replicate themselves and spread via email. Stay on the safe side and confirm that the attachment was sent from a trusted source before you open it.
From physical media: Your friends, family, and associates may unknowingly give you a disc or flash drive with an infected file on it. Don't blindly accept these files; scan them with security software. If you are still unsure, do not accept the files.
From a pop-up window: Some pop-up windows or boxes will attempt to corner you into downloading software or accepting a free "system scan" of some type. Often these pop-ups will employ scare tactics to make you believe you need what they are offering in order to be safe. Close the pop-up without clicking anything inside it (including the X in the corner). Close the window via Windows Task Manager (press Ctrl-Alt-Delete).
From another piece of software: Often, a software installer includes optional installs, such as a toolbar or other programs. Be very careful what you agree to install. Always opt for the custom installation and deselect anything that is not familiar, especially optional software that you never wanted to download and install in the first place. It goes without saying that you should not install software that you don’t trust.
From illegal file-sharing services: You're on your own if you enter this realm. There is little quality control in the world of illegal software, and it is easy for an attacker to name a piece of malware after a popular movie, album, or program to tempt you into downloading it.
B. Prevent malware with the right software
1. Keep your Operating System, Software, and Drivers Up-To-Date
It is essential that you keep your operating system, software, and drivers updated with the latest hotfixes, patches, and security releases from the manufacturer on a regular basis.
Make sure that the Windows Updates are turned on and that you have the latest security releases and patches for your operating system.
Let Windows automatically check for security updates. Windows 7 is using this setting out of the box - just make sure it's really turned on.
Cybercriminals are increasingly targeting home users. Their entry points are vulnerabilities (certain code errors or bugs) in popular third party (non-Microsoft) programs, which are exploited and used as a gateway to compromise PCs and access confidential data such as passwords, online profiles, and bank details.The only way to prevent these types of attacks is to apply security updates, or “patches” which are offered free-of-charge by most software vendors.
2. Build up your malware defenses
The Internet is not a safe place if you go online without securing your computer, in order to avoid any malware infection is important that build up a solid malware defense system.
This is a list of components that should be part of your security configuration :
- Antivirus Engine
- Firewall
- Behavior Blocker
- Host Intrusion Prevention System
- Virtualization Software
- Site Advisor
- On-demand Scanners
3. Secure your browser
- Consider the use of an alternate Browser, such as Firefox, Google Chrome, or Opera, which are not susceptible to the same vulnerabilites of Internet Explorer 7 and 8 or update your Internet Explorer to the latest version.
- Disable unnecessary plug-ins in your web browser. This will help keep you safe from malicious scripts and activeX exploits
- Use available add-ons to improve it's general security.
- Take advantage of your browser's pop-up blocking, download screening, and automatic update features.
4. Back up all of your data
Because your information could be lost or compromised , make regular backups of your information so that you still have clean, complete copies .
Back up all your important documents, personal data files, photos to a CD or DVD drive, not a flash drive or external hard drive as they may become compromised in the process. The safest practice is not to backup any executable files (*.exe), screensavers (*.scr), autorun (.ini) or script files (.php, .asp, .htm, .html, .xml ) files because they may be infected by malware. Avoid backing up compressed files (.zip, .cab, .rar) that have executables inside them as some types of malware can penetrate compressed files and infect the .exe files within them.
Determining how often to back up your data is a personal decision. If you are constantly adding or changing data, you may find weekly backups to be the best alternative; if your content rarely changes, you may decide that your backups do not need to be as frequent. You don't need to back up software that you own on CD-ROM or DVD-ROM—you can reinstall the software from the original media if necessary.
5. Use a Limited/Standard User Account (LUA)
With Windows 7 working as a standard user has become more convenient than ever. There's no reason not to work with restricted permissions, what makes a giant leap in your computer's safety. The way Microsoft found to keep security, comfort and function in balance by integrating User Account Control (UAC) that seamlessly, is one of the benefits Windows 7 offers.When using a Limited/Standard User Account , your user profile might still getting compromised, but not Windows 7 basic operating system in the background. Even your profile got hit, all your pictures, MP3 files or documents can be restored easily by logging in to another account that is not yet compromised.
- To change your account type go to : Start -> Control Panel -> User Accounts and Family Safety -> User Accounts -> Change your account type
- To create a new Limited/Standard User Account : Start > Control Panel > User Accounts and Family Safety > User Accounts > Manage Accounts > Crate New Account
Tehnical details for Vista Home Security 2012 :
Code:
File System
  ===============
  Files:
C:\Documents and Settings\All Users\[SET OF RANDOM CHARACTERS]
C:\Documents and Settings\[UserName]\Application Data\[SET OF RANDOM CHARACTERS]
C:\Documents and Settings\[UserName]\Local Settings\Application Data\[3 RANDOM CHARACTERS].exe
C:\Documents and Settings\[UserName]\Templates\[SET OF RANDOM CHARACTERS]
C:\Documents And Settings\[UserName]\Local Settings\Temp\[SET OF RANDOM CHARACTERS]

Registry values
=================================================
HKEY_USERS\.DEFAULT\Software\Microsoft\Internet Explorer\BrowserEmulation "TLDUpdates" = '1'
HKEY_CURRENT_USER\Software\Classes\.exe\shell\open\command "(Default)" = '"C:\Documents and Settings\[UserName]\Local Settings\Application Data\[3 RANDOM CHARACTERS].exe" -a "%1" %*'
HKEY_CURRENT_USER\Software\Classes\exefile\shell\open\command "(Default)" = '"C:\Documents and Settings\[UserName]\Local Settings\Application Data\[3 RANDOM CHARACTERS].exee" -a "%1" %*'
HKEY_CLASSES_ROOT\.exe\shell\open\command "(Default)" = '"C:\Documents and Settings\[UserName]\Local Settings\Application Data\[3 RANDOM CHARACTERS].exe" -a "%1" %*'
HKEY_LOCAL_MACHINE\SOFTWARE\Clients\StartMenuInternet\FIREFOX.EXE\shell\open\command "(Default)" = '"%LocalAppData%\kdn.exe" -a "C:\Program Files\Mozilla Firefox\firefox.exe"'
HKEY_LOCAL_MACHINE\SOFTWARE\Clients\StartMenuInternet\FIREFOX.EXE\shell\safemode\command "(Default)" = '"%LocalAppData%\kdn.exe" -a "C:\Program Files\Mozilla Firefox\firefox.exe" -safe-mode'
HKEY_LOCAL_MACHINE\SOFTWARE\Clients\StartMenuInternet\IEXPLORE.EXE\shell\open\command "(Default)" = '"C:\Documents and Settings\[UserName]\Local Settings\Application Data\[3 RANDOM CHARACTERS].exe" -a "C:\Program Files\Internet Explorer\iexplore.exe"'
HKEY_LOCAL_MACHINE\SOFTWARE\Microsoft\Security Center "AntiVirusOverride" = '1'
HKEY_LOCAL_MACHINE\SOFTWARE\Microsoft\Security Center "FirewallOverride" = '1'
Extra details for Vista Home Security 2012 :
Activation codes for Vista Home Security 2012
In the worst case scenario,if can't reboot your computer in safe mode or install anti-malware software to remove Vista Home Security 2012, you can use one of the bellow serial keys to register this rogue program in order to stop the fake security alerts, then please follow our guide to remove this infection.
Code:
3425-814615-3990
1147-175591-6550
2233-298080-3424Was this malware removal guide helpful ?
- If yes, please consider donating to help us with the website costs. malwaretips.com is a free site and contributing is completely voluntary. All donated money will be used to pay for computer hardware, the Internet connection, server software, and other fees that apply directly to running the site.
<form action="https://www.paypal.com/cgi-bin/webscr" method="post">
<input type="hidden" name="cmd" value="_s-xclick">
<input type="hidden" name="hosted_button_id" value="LL2XR8C6DSX2S">
<input type="image" src="https://www.paypalobjects.com/en_US/i/btn/btn_donateCC_LG.gif" border="0" name="submit" alt="PayPal - The safer, easier way to pay online!">
<img alt="" border="0" src="https://www.paypalobjects.com/en_US/i/scr/pixel.gif" width="1" height="1">
</form> - If no, please start a thread in our Help, my PC is infected! forum, and we will help you remove this stubborn infection.
Attachments
Last edited: