


You made a second Google Account so work or club messages wouldn’t land in your personal inbox. Then your mobile number appeared in the new profile.
If you want to keep those accounts separate, start by checking both the phone and the account.
Overview
Why your number can show up in another account
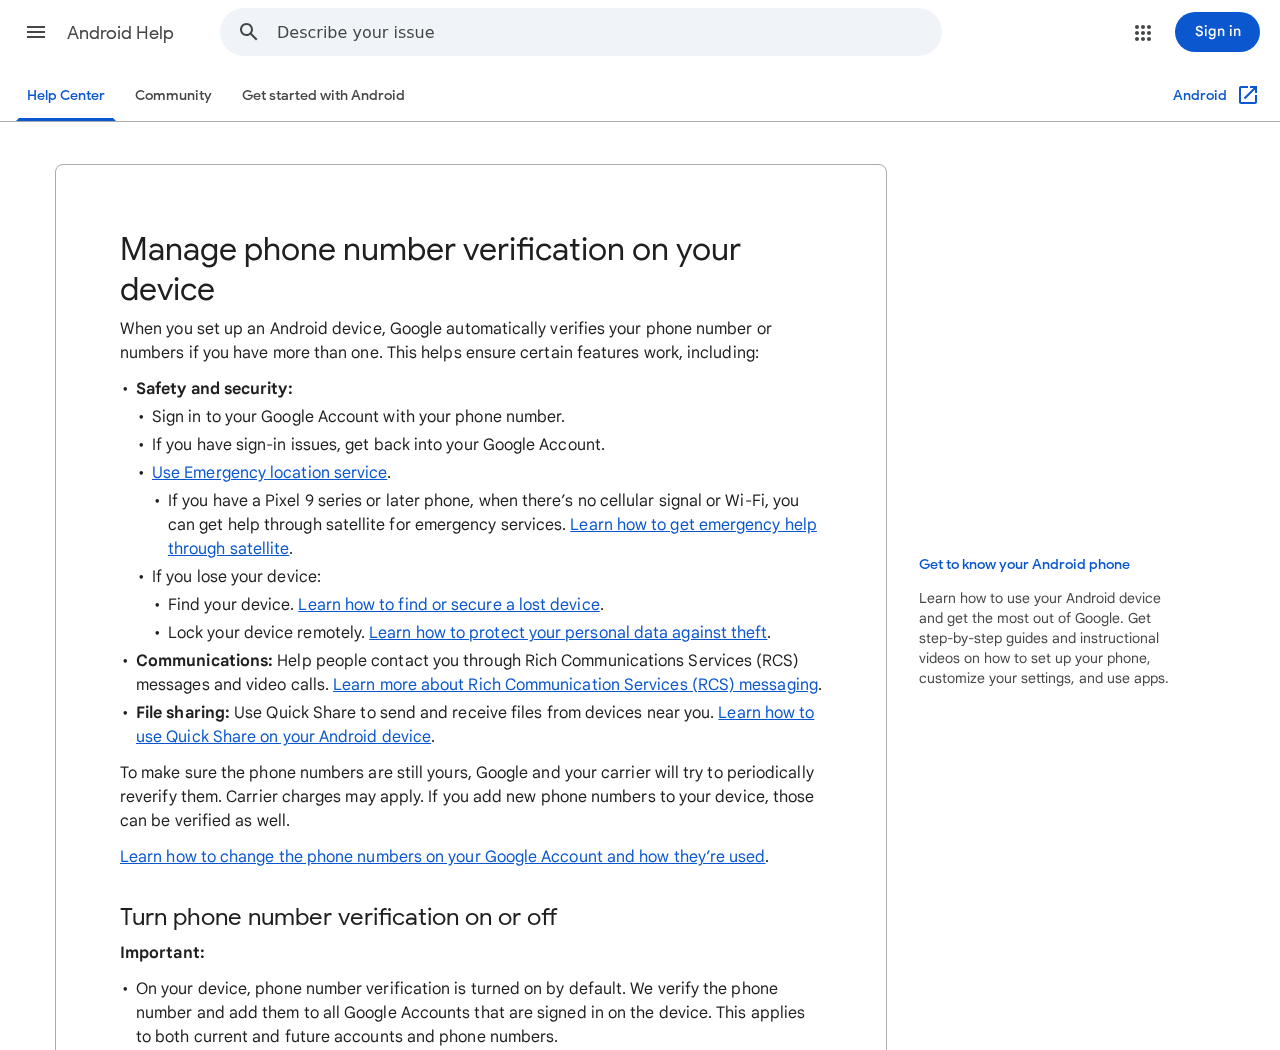
Google documents automatic phone number verification on Android. When it’s enabled, a verified number can be added to the Google Accounts signed in on the device.
That matters if you use the same phone for a personal address, a volunteer role and a side business. Separate inboxes aren’t necessarily separate contact details.
A device switch and an account setting do different jobs
The Android switch controls future verification on that device. The phone number page in your Google Account shows information that may already have been attached.
Turning off one switch won’t do all the housekeeping. Check each account and confirm why the number is there before removing it.
Decide what you want the phone number to do
You may want the same phone to receive texts but not have its number attached to a secondary identity. Start by identifying the setting involved:
- Verification: Whether Android and your carrier can verify a number on this phone.
- Account phone: Whether the selected Google Account lists that number.
- Recovery: Where Google can reach you if you lose access.
- Discoverability: What other people can find or use to contact you in supported Google services.
- Messaging: Whether a feature such as RCS uses that number independently of the account phone setting.
Don’t delete your only recovery option in a hurry. Adding a replacement you can access is a better first move if the account matters to you.
Where to Find Phone Number Verification on Android
Open the phone’s Settings app
Open Android Settings, then choose Google and All services. Under Privacy & security, look for Phone number verification.
The Android Help page describes this route. Your phone manufacturer may use slightly different menu names or place Google’s settings in a separate entry.
Search Settings for “phone number verification” if you can’t see it. Avoid similarly named options for a screen lock, SIM security or your Google login.
Check the device in your hand. Opening your Google Account in a laptop browser does not give you the device switch on the Android phone.
Turn off verification if you don’t want it on this device
Switch it off if you don’t want automatic verification to add numbers across accounts signed in there. Note which Android device you changed if you have several.
Google says its carrier-assisted verification can run periodically. It can include multiple numbers on a dual-SIM device and applies to current and future accounts under the documented default.
Switching off this behavior isn’t the same as canceling service from your mobile carrier. Your phone number and SIM still belong to the mobile plan.
A phone can have a personal SIM and a work eSIM. Look at both numbers when you review the accounts instead of assuming only the main number appears.
Consider what you rely on before changing it
Google lists benefits including account recovery, messaging features and ways to find or secure a lost phone. Check the features you actually use before making changes.
If your work manages the device, ask IT which settings you may change. A personal privacy preference doesn’t override an employer’s setup or recovery requirements.
A different Android phone can still be signed in to the same account. Review its setting too if you use it and want to prevent similar associations there.
How to Remove a Number That’s Already Attached
Pick the account before touching the number
Open your Google Account and look at the address shown under the profile icon. On shared devices, it’s easy to be in the wrong account.
Choose Personal info, then look under Contact info for Phone. Select the number you want to check and review the uses Google lists.
A second profile photo or an unfamiliar color is not enough to identify the account. Check the full email address before deleting or changing anything.
Repeat this inspection for each signed-in account you actually own or administer. If you find a coworker’s account on the device, let them handle their own settings.
Replace any recovery method you’re about to remove
Open the security settings and see whether the number is used for recovery or sign-in. Make sure you know how to regain access without that SIM.
Use a recovery email you can reach independently. If you rely on backup codes, store them somewhere other than the phone you’re trying to protect.
Two-step verification and recovery are related but not identical. A number can be removed from one service while remaining assigned to another, so check each relevant setting.
Keep one working, trusted session while making changes. Don’t sign out of your last device simply to see whether your recovery setup works.
Check the result account by account
Return to Personal info after the change. Confirm that the number you meant to remove is gone or that its listed use changed as intended.
Google’s account phone guidance warns that changing a number here affects only some services. Services that use it separately may need their own review.
If the number returns later, look for other Android phones where the account is signed in. Check whether somebody deliberately added it as a recovery method.
Before repeating the deletion, make sure you’re not just looking at a different account with the same photo. Compare the address and number each time.
What This Does and Doesn’t Reveal to Other People
Seeing your number in your own Google Account doesn’t mean it is printed beside your public name. Check the service and the visibility controls involved.
Google’s phone access guidance explains that the phone number can have different uses across services. Profile information and recovery information aren’t the same thing.
That distinction helps if you run a community group. You might intentionally publish its office number while keeping your personal mobile off the group’s profile.
If you and someone else share a device, review which accounts are signed in at the device level. Closing Gmail doesn’t remove an account from Android.
Changing a Google setting won’t remove a number you put in an email signature, online directory or shared document. Fix those places directly if they are the issue.
Avoid assuming these changes undo past disclosure. A contact who already saved your number won’t lose their copy because you edit the account.
What to Do If Your Number Appears on the Wrong Google Account
- Identify the affected account. Check the email address and determine whether the number appears as contact, recovery or a separate service setting.
- Check the Android phone that added it. Review device verification and other phones signed in with the same account before changing settings.
- Set up a replacement recovery route. Confirm you can reach the replacement before removing the old number from an important account.
- Remove or restrict the number where necessary. Inspect the account’s phone entry and any product that still needs its own setting.
- Recheck after a device change. Review the settings when you add another phone, move an eSIM or sign in with a new account.
If you see somebody else’s number in your recovery settings and can’t explain it, treat that as a separate security issue. Check recent activity and recognized devices.
Don’t text the unfamiliar number to find out who owns it. Work through Google’s official account security process and secure the recovery email too.
A popup offering to “disconnect all accounts” is not part of this procedure. Open Settings or your Google Account yourself instead of following a support message.
When Separation Matters More Than Convenience
Personal and work identities
If your employer provides a work profile or a separate device, ask IT which setup is supported. Moving account information between profiles can complicate later recovery.
If you are allowed to keep a work account on your own phone, check where your personal number is used. Don’t remove a company-required method without a replacement.
Temporary roles and borrowed phones
A neighborhood association or school club may rotate the person who handles its inbox. Don’t leave the next volunteer dependent on a code sent to your SIM.
Arrange an approved transfer of access before stepping down. Then remove the account from devices where you no longer need it, taking care not to delete the account itself.
If you borrowed a phone, review whether the account was added to Android rather than only opened in a browser. Ask the owner before changing device settings.
A phone number you’re giving up
Before canceling a line, make a list of important accounts using it for sign-in or recovery. Change those settings while you can still receive messages.
Check that the replacement works and that you can get into your main email without the old SIM. An old number can eventually be reassigned.
Do the same for backup phones that rarely leave the drawer. They may still have accounts signed in even if the old line doesn’t receive calls.
Make a Short Account and Device Inventory
Start with the phone you carry every day. Write down the Google addresses signed in there, then mark which account should be associated with each line.
Leave the numbers out of notes that other people can access. A label such as “work eSIM” is enough if you know which number it means.
For a family tablet, check whether it’s still signed in to the account of the person who originally set it up. Don’t assume the visible inbox tells you.
If the account is no longer needed on that device, make sure its owner can access it elsewhere. Then remove the account from the tablet with their permission.
That inventory is useful after an upgrade. If you copy the old phone’s setup to a new one, review the new phone’s device setting before adding extra accounts.
Check Better Sharing Without Changing Everything Else
Google says automatic verification also turns on Better sharing on Google. This can help people send photos, messages or other content through supported services using the number.
Open the number entry under Personal info and check whether Better sharing appears for it. If you don’t want that use, review the option for that number.
This matters if you give someone your number for one purpose. A customer may need to call you without needing another way to find your personal account.
Review your Google Messages profile sharing separately if you use it. Decide whose conversations should show your profile, then check the actual options the app offers.
A phone number set as a recovery option isn’t permission for people to send you messages everywhere. Keep the settings that help you sign in without enabling unwanted visibility.
If you change several options, note what you changed and try the features you depend on. You can restore a needed setting without undoing all of the others.
Frequently Asked Questions
Does Android automatically add my number to all signed-in Google Accounts?
Google says it can add verified phone numbers to all Google Accounts signed in on an Android device when the default verification is on.
Check the actual device setting and each account’s phone entry. A new account and a new SIM are both reasons to take another look.
Will turning off Android phone number verification remove my number?
No. Check the account separately for any number already added. Review related recovery or service settings before deciding what to remove.
Think of it as turning off a route into the account, not erasing what already came through it.
Does this make my phone number public?
Not by itself. The number can be stored for a service or recovery without being shown to everybody who can see your profile.
Check each relevant service’s audience settings. A personal number displayed in an account menu isn’t the same thing as a public directory entry.
Can I keep SMS verification for one account and remove the number from another?
You can review the settings for each account separately. Before removing anything, verify the sign-in and recovery methods available on the account you’re changing.
If the same number keeps being added to several accounts, also review automatic verification on the devices where they’re signed in.
Is this the same setting as RCS in Google Messages?
No. RCS is a messaging feature with its own settings. Google lists it among features that can benefit from verified numbers.
If messaging is what you’re trying to fix, inspect the Messages settings rather than relying on a change in your Google Account profile alone.
Do I need to remove my Google Account from the phone?
Not necessarily. Start with the device’s verification setting and the number attached to each account. Removing the account is a separate decision.
If you’re retiring or handing over a device, review what will be removed from that device and make sure you still have access elsewhere.
The Bottom Line
Turn off Android phone number verification if you don’t want that device linking your number across Google Accounts. Then review what was already added.
Keep a working recovery method before removing an old number. If you find a change you didn’t make, check account security instead of treating it as ordinary cleanup.

Join the discussion
0 commentsShare your experience or ask a question about this article.
Discussion
Start the conversation
Have a question or something useful to share? Add the first comment.