

You searched for ordinary software, ran a setup file, and later saw the name MODBEACON in a security alert. The installer may have looked completely routine.
Before trying another download or deleting Windows files, take a moment to understand what that alert means and how to regain confidence in the computer.
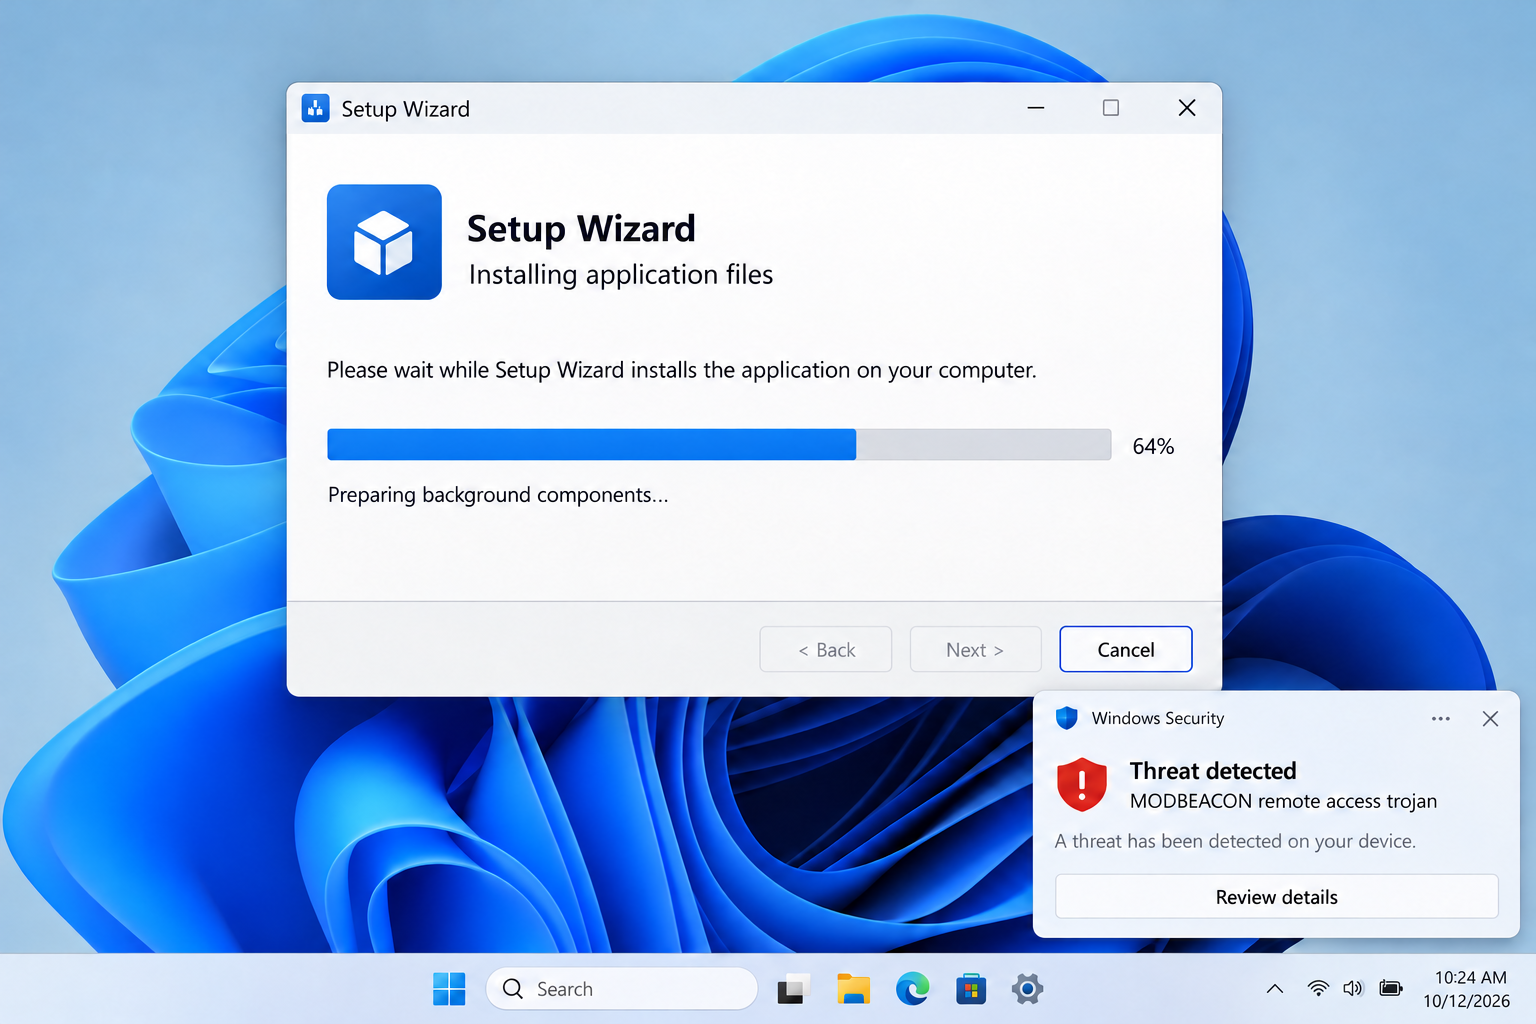
Overview
A remote access implant for Windows
MODBEACON is a remote access trojan associated with a distributor in the Silver Fox threat cluster. It gives an operator a way into an infected Windows system.
Qianxin Threat Intelligence Center analyzed a Windows x64 implant written in Rust. Its design separates the initial loader from a component that communicates with the operator.
The malware can receive commands and load additional plugins in memory. That means its purpose can extend beyond the behavior visible in the first installer.
A credible detection calls for containment and investigation. Running another installer or closing the application window is not enough to establish that the computer is safe.
The fake download route
The documented distributor uses counterfeit software pages surfaced through search manipulation. Someone looking for a legitimate program may download an impostor package instead.
The campaign includes targeted activity against organizations. Its reported victims and regional focus should not be turned into a claim that every suspicious download contains MODBEACON.
For an individual incident, the useful evidence is the actual setup file, download source, execution time, and security finding on the affected computer.
- A trusted software name can be copied onto a counterfeit download page.
- A normal-looking setup window says little about the code running behind it.
- A remote access implant can introduce capabilities after installation.
- A work device may expose more than its own local files.
What removal needs to accomplish
Removal must address the malicious program and any way it returns after a restart. Investigation also needs to consider accounts used while the device was exposed.
Qianxin describes persistence through mechanisms including scheduled tasks, services, and a Windows Management Instrumentation subscription. These are reasons to use qualified cleanup, not a random deletion checklist.
Disconnect the device when you have a credible MODBEACON finding. If the computer belongs to an organization, let its security staff coordinate the response.
The Installer Is Only the Beginning of the Incident
A setup program has an understandable job: install software you requested. That expectation gives a counterfeit installer an easy cover story.
The file might open a progress bar, appear to finish, or leave nothing obvious behind. None of those outcomes establishes what other components were started.
Do not judge the download solely by whether the promised application works. A genuine application and harmful code can coexist in one package.
Likewise, a website near the top of search results has not been vetted for your safety. Ranking and legitimacy are different questions.
Before installation, start at the developer’s known website and follow its download path. Verify the publisher shown by Windows when that information is available.
A signature can help identify a publisher, but it is not a complete safety guarantee. An unexplained publisher mismatch deserves a pause and a separate check.
After a detection, preserve the source details. The download address and filename can help identify other people who used the same impostor page.
How MODBEACON Gets Installed and Maintains Access
Step 1: A search or message leads to a counterfeit package
The reported campaign places convincing software lures in front of people seeking useful programs. The trusted name supplies the reason to download.
At this point, the victim may be thinking about a work task, not security. A page that looks like a download portal can meet that immediate need.
The warning sign is the source behind the button. A copied product logo does not identify who controls the page or prepared the installer.
If you have not run the file, leave it unopened. Check the genuine publisher’s site and ask your security tool or workplace IT to inspect the suspicious package.
Step 2: Execution creates an opportunity for the loader
The harmful package must get code running on the machine. Permission to install can give it a foothold beyond the browser that delivered the download.
Once a credible alert appears, do not accept instructions from the same website about fixing it. That source has already failed the trust check.
Record whether Windows asked for administrator approval and whether you granted it. That detail helps determine the scope a technician should examine.
A security product might block the file before execution, interrupt it later, or detect components during a subsequent scan. Keep its action status, not just the family name.
Step 3: The implant establishes its communication channel
Qianxin’s MODBEACON analysis describes encrypted gRPC communication over HTTP/2, with infrastructure using public content delivery networks.
In plain language, the malicious traffic can resemble traffic used by ordinary internet services. An encrypted connection does not make the program behind it trustworthy.
Do not block every Amazon or Cloudflare address on your computer. Those companies provide infrastructure for many unrelated services, and broad blocking can disrupt legitimate applications.
A security team instead needs to correlate the process, destination, timing, and other behavior. The identity of the program making the connection matters.
Step 4: Plugins and persistence extend the foothold
The operator can supply modules that expand what the implant does. Some activity can occur in memory, without a conventional application window explaining it.
Persistence mechanisms can also cause a malicious component to start again. Restarting Windows may interrupt a process while leaving the next launch in place.
This is why cleanup should include a follow-up check after the requested restart. A recurring alert deserves escalation rather than repeated dismissal.
For organization systems, the investigation may need to go beyond one endpoint. Connected accounts, file shares, and administrator access can change what must be reviewed.
What You Can Check Without Damaging Windows
Read the detection and action history
Open your security product through Windows or its installed application. Do not use a cleanup link shown inside an unfamiliar website notification.
Look for the affected file and whether the action says blocked, quarantined, allowed, or incomplete. These states describe different situations and should not be treated interchangeably.
If you previously selected an allow or restore option, tell the technician. That may explain why the file remains available after an alert.
Preserve the download trail
Write down the software you intended to install, the page visited, and the file you received. Browser download history can help fill gaps in memory.
A screenshot of a search result is useful context, but save the destination address too. Several pages can use identical titles and branding.
Do not upload business documents or private files to a public analysis service while collecting evidence. Let the organization’s security team decide how to share samples.
Leave deeper system changes to the right person
Scheduled tasks and services have legitimate uses. An unfamiliar entry alone is not enough reason to delete it.
Removing the wrong system component can break software and erase information an investigator needs. Use the scanner’s recommended actions or a technician’s case-specific instructions.
If a helper wants remote access, verify who they are through a known support channel. An unsolicited offer to remove MODBEACON can become another intrusion.
What to Do If MODBEACON Ran on the Device
The response should fit the device. A personal PC can follow the cleanup steps below; a managed endpoint should follow the organization’s incident procedure.
Contain the connection. Remove network access to the affected PC. Stop using remote desktops, corporate dashboards, banking, and sensitive file shares on it.
Tell your IT team if it is managed. They may use their endpoint tools to isolate it while preserving the information needed for investigation.
Keep a short incident record. Save the detection status, installer name, source address, execution time, and any administrator prompt you accepted.
Note whether the warning appeared before the file opened or afterward. Avoid rerunning the installer, including on another computer.
Run an updated security scan. Use your installed antivirus or another reputable product obtained through its genuine distribution channel.
Malwarebytes is an available second opinion for Windows cleanup. Review detections and apply quarantine rather than allowing a file because its name resembles ordinary software.
Use an offline check when appropriate. Microsoft Defender Offline can scan after restarting into a separate environment. Save open work before starting it.
Follow the Windows Security scan instructions. Repeated detections or blocked security controls are reasons to seek additional assistance.
Have persistence examined. If the threat returns, ask a qualified responder to inspect its startup mechanisms and related components.
Provide the reports you collected. Do not copy a registry or task-removal command from a forum unless it was written for your verified finding.
Review exposed access from a safe device. Change important credentials used during the incident and revoke unrecognized sessions where those services permit it.
For work accounts, administrators should assess access and activity. An employee’s password change alone may not cover organization applications or remote access grants.
Choose a rebuild when trust cannot be restored. A clean Windows reinstall may be appropriate after persistent or privileged compromise.
Agree on evidence collection first. Back up personal documents carefully, leave suspicious installers behind, and scan the backup before placing it on a rebuilt machine.
Check the computer before reconnecting normally. Confirm protection is active, updates are installed, and the threat no longer reappears after restarting.
Follow your IT team’s clearance process when applicable. Keep account monitoring in place while remaining questions about remote activity are resolved.
Is Your Device Infected? Run a Free Malware Scan
Slow performance, constant pop-ups, or strange behavior? These are classic signs of a malware infection. The fastest way to find out is to scan your device with Malwarebytes Free — one of the most trusted malware removal tools available.
The free version detects and removes the most common threats, including:
- Adware — the cause of those annoying pop-ups
- Browser hijackers — unwanted redirects and changed homepages
- Trojans and spyware — hidden programs stealing your data
- Potentially unwanted programs (PUPs) — software you never asked for
👉 Select your device below — Windows, Mac, or Android — then follow the simple steps to download Malwarebytes, scan your system, and remove any threats it finds. The scan usually takes 5 to 20 minutes.
Run a Malware Scan with Malwarebytes for Windows
Malwarebytes is one of the most popular and trusted anti-malware tools for Windows — and it’s completely free for removing infections. It catches threats that many antivirus programs miss, including adware, browser hijackers, and trojans. Follow the steps below to scan and clean your PC in just a few minutes.
Download Malwarebytes
Click the button below to download the latest version of Malwarebytes for Windows from the official source. The free version is all you need — it will scan your computer and remove adware, browser hijackers, and other malicious software at no cost.
Download MalwarebytesOfficial installer for Windows 11 and 10. Your download starts right away.Want real-time protection? See Malwarebytes Premium Malwarebytes Free for WindowsScans and removes malware at no cost
-
Install Malwarebytes
When the download finishes, open your Downloads folder and double-click the MBSetup file. If Windows shows a User Account Control pop-up, click “Yes” to allow the installation.

Follow the On-Screen Prompts to Install Malwarebytes
The setup wizard will walk you through a few quick screens:
-
Choose where you’re installing the program — “Personal Computer” or “Work Computer” — then click Next.

-
Malwarebytes will now install on your device. This usually takes under a minute.

-
When installation is complete, the “Welcome to Malwarebytes” screen will open automatically.

-
On the final screen, click Open Malwarebytes to launch the program.

-
Enable “Scan for Rootkits”
Before scanning, turn on rootkit detection so Malwarebytes can find even the most hidden threats. Click the Settings gear icon on the left side of the screen.

In the settings menu, find “Scan for rootkits” and click the toggle so it turns blue.

Done? Click “Dashboard” in the left pane to return to the main screen.
Start the Scan
Click the blue Scan button. Malwarebytes will automatically update its virus database and start checking your computer for malware.

-
Wait for the Scan to Finish
The scan checks your entire system for browser hijackers and other malicious programs, so it can take 5 to 20 minutes depending on your computer. Feel free to do something else — just check back occasionally to see the progress.

-
Quarantine the Detected Threats
When the scan is done, you’ll see a list of everything Malwarebytes found — malware, adware, and potentially unwanted programs. Click the “Quarantine” button to remove all of them at once.

Malwarebytes will now remove the malicious files and registry entries and move them safely into quarantine.

-
Restart Your Computer
Some threats can only be fully removed after a reboot. If Malwarebytes asks you to restart, click Yes. Once you’re logged back in, Malwarebytes has finished removing the threats it found.

That’s it — your Windows PC is now clean of trojans, adware, and other malware, and should be back to running smoothly.
If you are still having problems with your computer after completing these instructions, then please follow one of the steps:
- Run a computer scan with ESET Online Scanner
- Ask for help in our Windows Malware Removal Help & Support forum.
Run a Malware Scan with Malwarebytes for Mac
Malwarebytes for Mac is a free on-demand scanner that removes the malware other security software tends to miss — adware, browser hijackers, and unwanted programs included. Cleaning an infected Mac with Malwarebytes has always been completely free, and it’s our go-to recommendation. Follow the steps below to scan and clean your Mac in just a few minutes.
-
Download Malwarebytes for Mac
Click the button below to download the latest version of Malwarebytes for Mac.
Download MalwarebytesOfficial installer for macOS. Your download starts right away.Want real-time protection? See Malwarebytes PremiumMalwarebytes Free for MacScans and removes malware at no cost -
Open the Malwarebytes setup file
When the download finishes, open your Downloads folder and double-click the setup file to begin the installation.

-
Follow the On-Screen Prompts to Install Malwarebytes
The Malwarebytes for Mac Installer will guide you through a few quick screens. Click “Continue” and keep following the prompts until the installation completes.



When the installation is complete, Malwarebytes opens to the Welcome to Malwarebytes screen. Click “Get started“.
-
Select “Personal Computer” or “Work Computer”
Malwarebytes will ask what type of computer you’re installing it on. Click either Personal Computer or Work Computer, whichever applies.

-
Start the Scan
Click the “Scan” button. Malwarebytes will automatically update its detection database and begin checking your Mac for malware.

-
Wait for the Scan to Finish
Malwarebytes will scan your Mac for adware, browser hijackers, and other malicious programs. This can take a few minutes, so feel free to do something else — just check back occasionally to see the progress.

-
Quarantine the Detected Threats
When the scan is done, you’ll see a list of everything Malwarebytes found. Click the “Quarantine” button to remove all the threats at once.

-
Restart Your Mac
Malwarebytes will now remove all the malicious files it found. Some threats can only be fully removed after a reboot — if Malwarebytes asks you to restart, allow it. Once you’re logged back in, your Mac is clean.

That’s it — your Mac is now free of adware, rogue browser extensions, and other potentially harmful software.
If you are still experiencing problems while trying to remove a malicious program from your computer, please ask for help in our Mac Malware Removal Help & Support forum.
Run a Malware Scan with Malwarebytes for Android
Malwarebytes for Android automatically detects and removes dangerous threats like malware and ransomware so you don’t have to worry about your most-used device being compromised. Aggressive detection of adware and potentially unwanted programs keeps your Android phone or tablet running smooth.
-
Download Malwarebytes for Android.
You can download Malwarebytes for Android by clicking the link below.
Get Malwarebytes for AndroidOpens Google Play in a new tab.Want real-time protection? See Malwarebytes Premium for AndroidMalwarebytes for AndroidScans your phone and removes malware at no cost -
Install Malwarebytes for Android on your phone.
In the Google Play Store, tap “Install” to install Malwarebytes for Android on your device.

When the installation process has finished, tap “Open” to begin using Malwarebytes for Android. You can also open Malwarebytes by tapping on its icon in your phone menu or home screen.

-
Follow the on-screen prompts to complete the setup process
When Malwarebytes will open, you will see the Malwarebytes Setup Wizard which will guide you through a series of permissions and other setup options.
This is the first of two screens that explain the difference between the Premium and Free versions. Swipe this screen to continue.
Tap on “Got it” to proceed to the next step.
Malwarebytes for Android will now ask for a set of permissions that are required to scan your device and protect it from malware. Tap on “Give permission” to continue.
Tap on “Allow” to permit Malwarebytes to access the files on your phone.
-
Update database and run a scan with Malwarebytes for Android
You will now be prompted to update the Malwarebytes database and run a full system scan.

Click on “Update database” to update the Malwarebytes for Android definitions to the latest version, then click on “Run full scan” to perform a system scan.

-
Wait for the Malwarebytes scan to complete.
Malwarebytes will now start scanning your phone for adware and other malicious apps. This process can take a few minutes, so we suggest you do something else and periodically check on the status of the scan to see when it is finished.

-
Click on “Remove Selected”.
When the scan has been completed, you will be presented with a screen showing the malware infections that Malwarebytes for Android has detected. To remove the malicious apps that Malwarebytes has found, tap on the “Remove Selected” button.

-
Restart your phone.
Malwarebytes for Android will now remove all the malicious apps that it has found. To complete the malware removal process, Malwarebytes may ask you to restart your device.
That’s it — your Android phone is now clean — no more malicious apps, adware, or browser redirects.
If you are still having problems with your phone after completing these instructions, then please follow one of the steps:
- Restore your phone to factory settings by going to Settings > General management > Reset > Factory data reset.
- Ask for help in our Mobile Malware Removal Help & Support forum.
Stay Protected: Block Ads and Malicious Sites
Now that your device is clean, keep it that way. Most infections start with a malicious ad or a fake download button — so blocking them at the source is your best defense.
We recommend AdGuard, which blocks malicious ads, phishing pages, and dangerous redirects before they can reach you.
👉 Download AdGuard and browse safely
These scanning instructions support removal. AdGuard can help block malicious advertising paths, but it cannot investigate commands an intruder already ran on the machine.
When a Full Reinstall Makes More Sense Than Another Scan
A single detection that was blocked before execution is different from an operator having administrator access for an unknown period.
Ask what is actually known: did the program execute, did it communicate, did it return, and were sensitive accounts used afterward?
If answers remain unresolved on a high-value device, rebuilding may provide a clearer recovery path than repeatedly guessing which component remains.
A rebuild should start from trusted installation media and include current updates. Restoring the same unofficial software package recreates the original risk.
Backups deserve inspection too. Preserve the documents you need, but avoid carrying over downloads, scripts, or application folders whose origin is uncertain.
For a company incident, rebuilding one PC does not determine whether other systems were reached. Administrators should define the scope before closing the investigation.
Keep a record of the accounts and credentials changed during recovery. If a later alert appears, that record can reduce confusion about what is already complete.
A Better Download Routine After Recovery
Bookmark the official sites for frequently used applications. A known starting point reduces dependence on whatever search result happens to appear first.
Use an approved application catalog on a work computer. If a program is missing, ask IT to provide it rather than installing a lookalike package.
Slow down when a download arrives as an unexpected archive. Check that its name and publisher match the program you meant to obtain.
A request to turn off antivirus, ignore a detection, or bypass a Windows warning should interrupt the installation. Verify the request before going further.
Maintain a backup that the computer cannot continuously modify. It gives you options if investigation or rebuilding takes longer than expected.
After rebuilding, obtain application installers again from their publishers. Reusing the same unverified setup file can bring the original problem straight back to the clean machine.
Teach family members and coworkers to report unusual installation prompts early. A clear account of the first few minutes can make later cleanup much easier.
Frequently Asked Questions
What does MODBEACON RAT do?
It establishes remote access, communicates with its operator, and supports additional plugins. The exact activity on a particular PC depends on the operator and deployed components.
Can I identify it from a slow computer?
No. Slowness has many causes. A security detection, suspicious execution history, or verified malicious activity provides a more useful basis for action.
Does a cloud-hosted download mean Microsoft or Amazon approved it?
No. Hosting infrastructure can carry files supplied by unrelated customers. Verify the software publisher and its official download route rather than the hosting company’s name.
Will restarting remove malware running in memory?
A restart can stop a running process, but persistence can launch it again. Complete cleanup and check the result after the restart.
Should I delete every unfamiliar scheduled task?
No. Legitimate programs use scheduled tasks too. Have suspicious entries correlated with the detection and installer history before removing them.
Is antivirus removal enough for an infected work laptop?
It is one part of the response. IT may also need to investigate remote activity, account access, persistence, and related endpoints before returning the device to use.
The Bottom Line
A confirmed MODBEACON finding needs malware removal and a review of remote access. Isolate the device and use trusted cleanup tools or your organization’s security team.
Preserve the installer trail and recover exposed accounts from another device. If the implant returns or administrator access makes cleanup uncertain, arrange a properly planned rebuild.








