


Your meeting software installs and opens normally. Nothing seems unusual.
Then you question the download that brought you there.
Overview
The fake Zoom installer
Overlord is an open-source remote-access framework. Attackers used a fake Zoom installer to deliver configured Overlord agents.
Genuine Zoom installed alongside the agent.
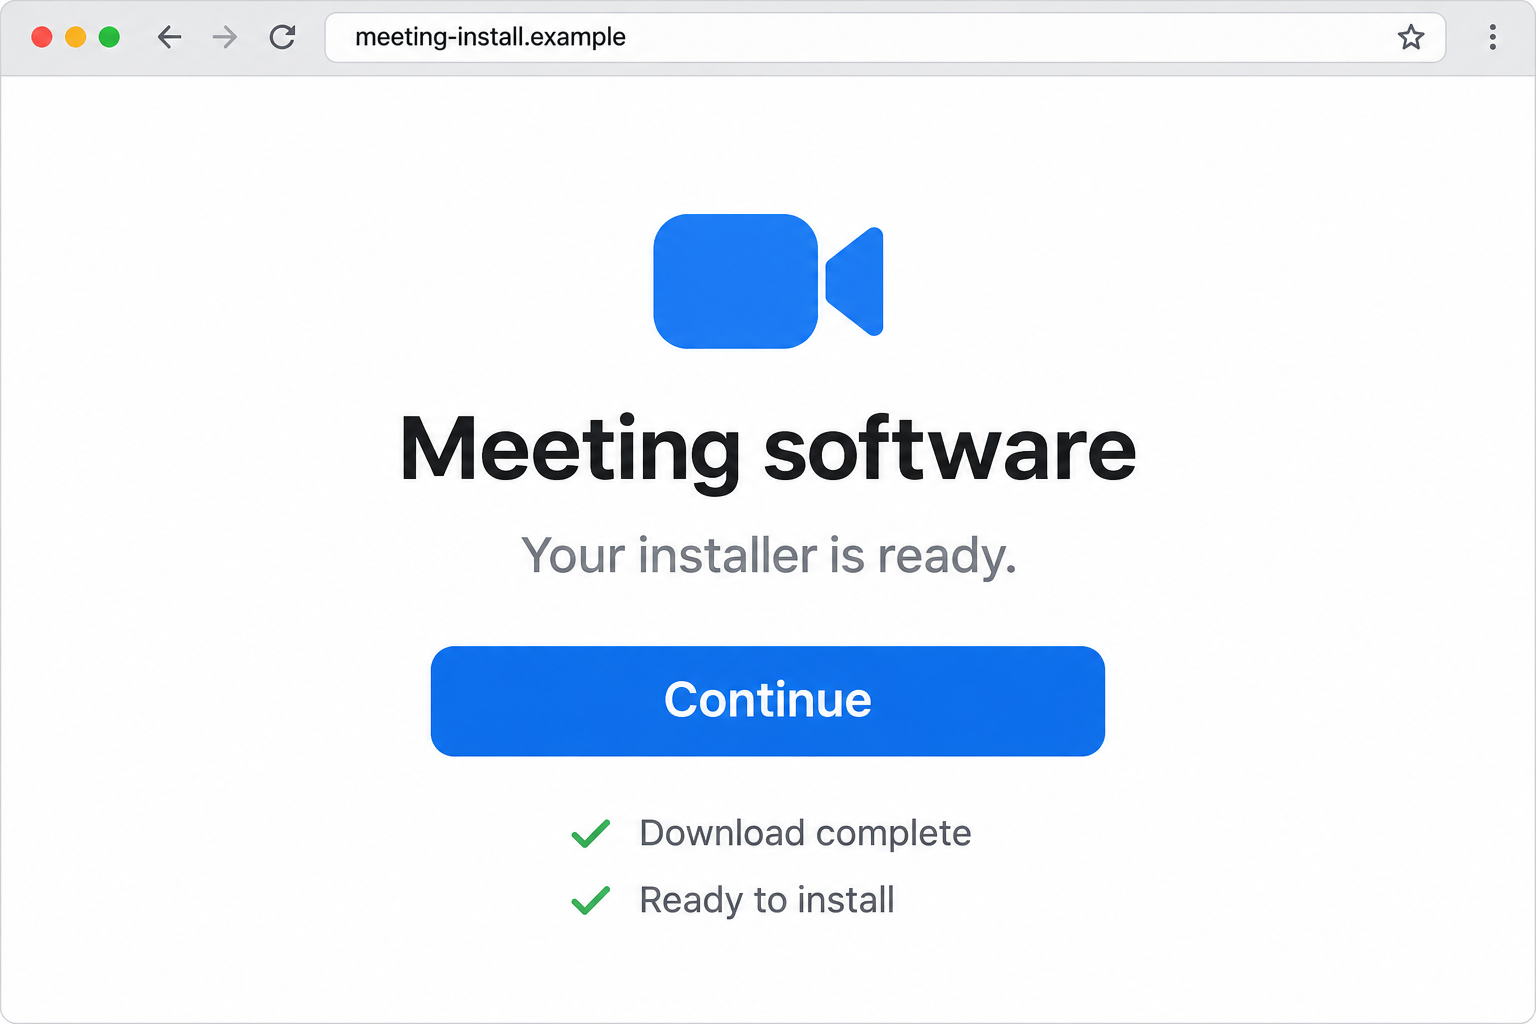
The lead illustration represents an installer lure, not an actual campaign page. The removal instructions below apply to a suspected malicious installation on a Mac.
What you ran determines the response
A downloaded file, an executed installer and an established remote-access infection are different situations. Keep those distinctions clear when asking for help.
- Only downloaded the file: do not open it, and preserve its source information.
- Ran an unofficial installer: disconnect the Mac and investigate the installation.
- Received a malware detection: retain the exact name, file path and remediation result.
- Used sensitive accounts afterward: secure them from a separate trusted device.
Device cleanup does not reverse remote access
Removing an agent cannot retrieve information already captured. Account recovery, workplace reporting and device remediation need their own follow-through.
Not every Overlord build behaves identically. A missing startup entry does not clear the Mac, and a Zoom-related filename alone does not prove infection.
How to Remove Malicious Overlord Software From Your Mac
These instructions combine targeted Mac cleanup with a free manual scan. They do not require a paid subscription or disabling Apple’s security protections.
If your employer or school manages this Mac, contact its security team first. Preserve evidence before changing processes, startup settings or files.
Step 1: Disconnect and preserve the useful details
Turn off Wi-Fi from Control Center and disconnect Ethernet or other network connections. Do not keep using the Mac for email, banking or password changes.
Secure accounts from a clean device now. Contact your bank or provider immediately for unauthorized payments or access; do not wait for scanning.
Disconnecting interrupts ordinary network communication. It cannot undo earlier access, and it is not the same as removing the software.
Use another trusted device to contact workplace support or your security provider. Explain that a meeting-software installer may have launched an additional program.
Record the download address, filename, approximate execution time and any warning or security detection. Avoid reopening the installer to see what happens.
Do not upload the suspected program to a public forum or send it to colleagues. Share the detection details rather than circulating executable files.
Keep relevant emails and browser-download information. If an investigator needs the original file or system logs, let them arrange safe collection before deletion.
For an active business incident, wait for instructions before restarting. A reboot can remove temporary evidence without resolving every persistence mechanism.
Step 2: Identify the unwanted program before removing it
Open Finder, then Applications and Utilities. Open Activity Monitor to review running processes without launching the suspicious installer.
A process called ZoomMeetings warrants investigation in this case, but its name is not a deletion rule. Correlate its path, timing and security findings.
Give your responder the full detection path. Investigators can distinguish the unwanted executable from a genuine Zoom installation.
If a malicious process is positively identified and evidence collection is complete, select it in Activity Monitor and click the stop control, then Quit.
Use Force Quit only if necessary. It stops a process immediately and can lose unsaved data or affect applications depending on that process.
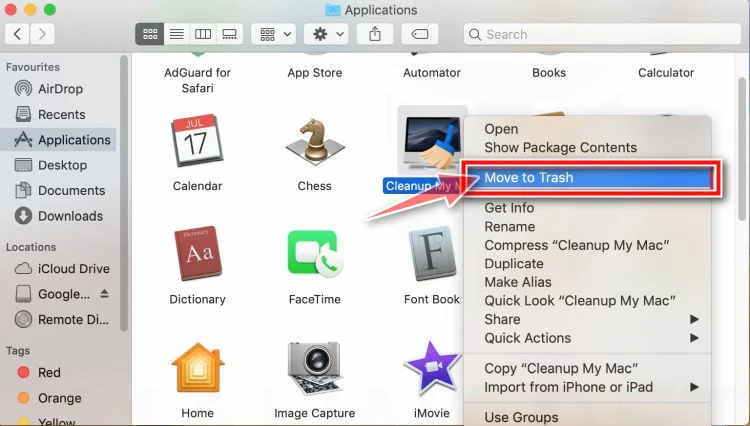
In Finder, locate the confirmed unwanted application. If it has no trusted uninstall procedure, select it and choose File, then Move to Trash.
The example shows Finder’s removal control using another application. It does not identify that pictured application as Overlord or justify removing legitimate Zoom.
Do not empty the entire Trash as a routine cleanup step. Preserve necessary evidence and keep unrelated deleted files recoverable while the incident is assessed.
A running agent may exist outside Applications. Removing a visible app or Dock icon therefore does not finish the investigation.
Step 3: Install Malwarebytes and choose the free option
If a malicious process remains active or you cannot identify it safely, obtain help before reconnecting. Do not restore network access merely to continue this checklist.
After containment, use a trusted connection for security updates and the genuine installer. Never use a cleanup download supplied by the suspicious meeting page.
Check the current Mac requirements first. The supported list starts with macOS Big Sur 11; unsupported systems need an appropriate upgrade or specialist advice.
You can also review the Malwarebytes for Mac product details before choosing optional protection.
If that route is unavailable to you, the official Malwarebytes Mac installer provides a separate genuine download option.
Open Downloads and double-click the Malwarebytes installation package. Read the introduction and Read Me information, selecting Continue after each.
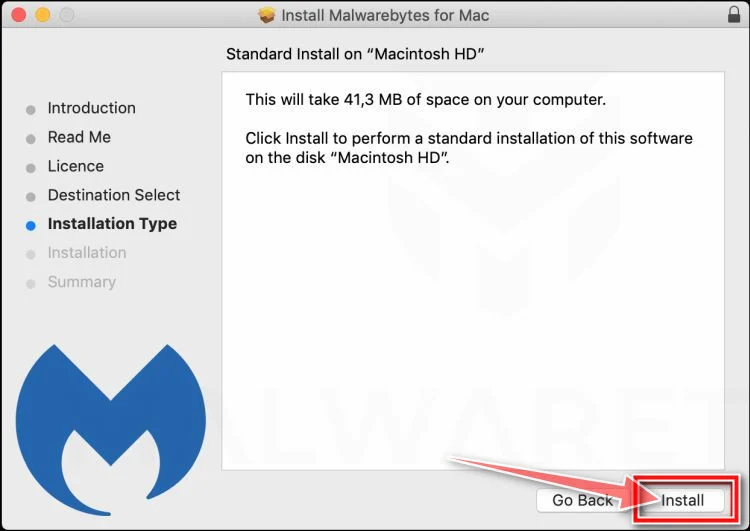
Review the license, click Continue, then Agree if you accept it. Check the installation destination and select Install.
Authenticate through macOS when requested and choose Install Software. The example’s older appearance and package size may differ from your current installer.
When installation finishes, click Close. The installer package can be kept or moved to Trash through the normal completion prompt.
In Malwarebytes, select Get started and the appropriate device type. For a personally owned computer, choose Personal Mac.
Choose Maybe later rather than Buy Now to use the free version. Choose Continue without email if you do not want the optional newsletter.
Existing subscribers can activate their plan separately. Do not purchase another subscription or start a trial solely to perform the free Custom scan described below.
Step 4: Grant the scanner access and check updates
Open the Apple menu, choose System Settings, then Privacy & Security. Open Full Disk Access and find the genuine Malwarebytes entry.
Turn its switch on and authenticate with your Mac password or Touch ID. Return to Malwarebytes afterward, following any request to reopen the app.
This permission lets the scanner examine protected locations. Grant it only to the verified security application, not the suspicious installer or an unsolicited support tool.
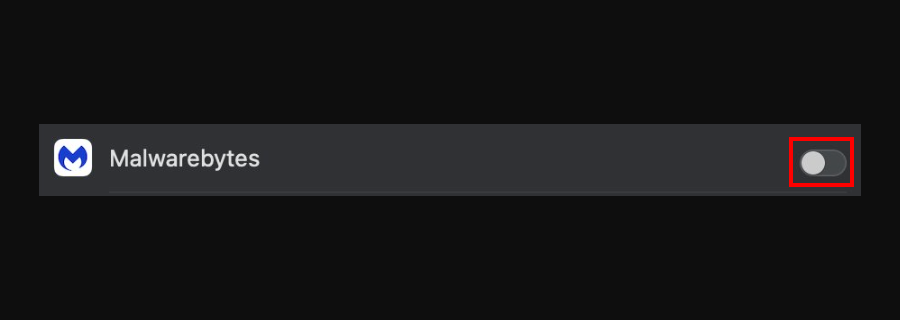
On Big Sur or Monterey, use System Preferences, then Security & Privacy and Full Disk Access. Unlock the controls and enable Malwarebytes Protection.
With Malwarebytes open, select Malwarebytes from the menu bar beside the Apple menu. Choose Check For Updates and let available updates finish.
In Settings, then General, keep Automatically check for protection updates enabled. Protection-database updates and application-version updates serve different purposes.
Allow protection updates to complete before scanning. If updating fails, retain the error and contact genuine support rather than assuming an outdated scan is sufficient.
Step 5: Start a free Custom scan from the Scanner tile
Open the Scanner tile on the dashboard. Click the tile itself, not its large Scan button, which starts the separate Threat Scan.
Mac Quick and Custom scans are free. Threat Scan, scheduled scans and ongoing protection are paid features; they are not prerequisites for this manual procedure.
The official interface detail shows why that distinction matters: the Scanner card contains both its navigation area and a separate Scan button.
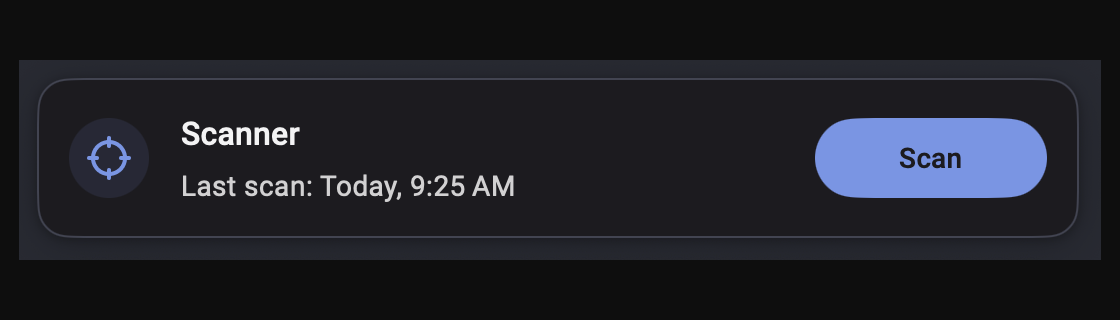
In the Scan tab, open Advanced scans and choose the Custom scan tile. A Finder selection window opens.
Select the folder or directory you want checked, then click Open. The scan starts automatically; allow access to selected documents if macOS requests it.
Include relevant locations rather than checking only an empty folder left after deletion. Your home folder, Applications and the original download location may need separate scans.
Tell your responder about any temporary-file or startup-path detection too. Custom scanning checks chosen locations, not an automatic guarantee that every part of macOS was examined.
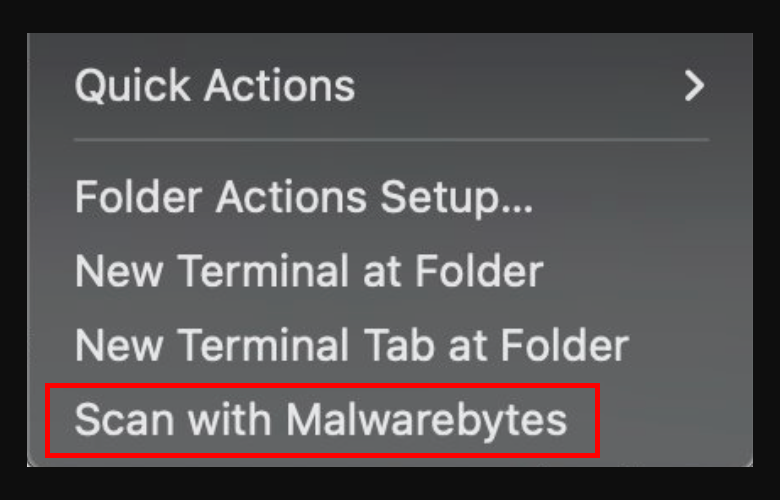
As an optional shortcut, Finder can scan a specific folder through its Scan with Malwarebytes context-menu command. This is still a limited folder check.
Let each scan reach completion and open its results. Do not interrupt it simply because the application looks responsive or the suspicious process has disappeared.
Keep any scan error or permission warning. An incomplete scan needs attention, not a clean-device interpretation.
Step 6: Quarantine detections and retain the report
Review detected items and their paths. Select confirmed threats and use Quarantine when the results offer that action.
Open View report or View Scan Report to review the recorded outcome. Keep detection names, affected locations and any action that failed.
You can review isolated items through Detection History, then Quarantined items. Do not choose Restore and allow merely because a suspicious filename resembles Zoom.
Deleting something from quarantine is permanent. Leave evidence-preservation decisions to your responder when the device forms part of a workplace or financial incident.
If Malwarebytes requests a restart, save legitimate open work and follow it after evidence collection is complete. Reopen the application and review unresolved findings afterward.
A scan reporting no detections means nothing was found within that scan’s scope. It does not establish that earlier remote access exposed no information.
Optional Malwarebytes Premium for Mac provides paid protection features. MalwareTips may earn a commission through product links; buying is not a condition of these cleanup steps.
Step 7: Check confirmed persistence and escalate remaining uncertainty
Open System Settings, then General and Login Items & Extensions. Remove an Open at Login entry only when it is tied to the unwanted software.
Review background activity with the same care. Turning off every background application can disable legitimate updates, backups, accessibility tools or workplace security.
A variant persisted through ~/Library/LaunchAgents/com.zoom.plist and ~/Library/Application Support/Overlord/com.zoom; the main build created no LaunchAgent during testing.
Use Finder’s Go, then Go to Folder to inspect an exact reported location. Do not delete every file containing zoom or every unfamiliar plist.
A qualified responder should correlate the launch entry with its executable, signature, hash and incident timing before removing residual files. Leave uncertain system components alone.
In Privacy & Security, review Input Monitoring, Accessibility, screen/audio recording, Camera, Microphone and Full Disk Access for the identified unwanted program.
Revoke only its unauthorized access. Genuine conferencing software may legitimately have camera, microphone or screen-sharing permission, so a permission entry is not itself evidence of malware.
Do not remove workplace management profiles or reset every browser. Those changes do not substitute for removing the agent and addressing exposed accounts.
After containment and approved restarts, install macOS updates through System Settings, General, then Software Update. Recheck affected startup entries and unresolved detections.
If files return, scans fail or trust remains uncertain, stop sensitive use. Ask your security provider or the Mac malware-removal forum for help.
A serious remote-access compromise may justify a planned erase and trusted rebuild. Preserve documents and recovery credentials first; erasure destroys local data.
Ordinary macOS reinstallation preserves applications and personal data. Do not confuse it with an assessed erase-and-rebuild process or promise either action proves complete safety.
Campaign findings
.NET downloader
Jamf Threat Labs identified a .NET downloader. Its arrival route remained unknown.
The chain doesn’t establish a Zoom vendor breach. Verify where your installer came from rather than judging only the application it eventually opened.
Build differences
The main build’s optional Solana resolver was disabled.
Capabilities are not a record of every victim’s exposure
The framework includes input, screen and media capture plus remote file and command operations. Actual access depends on the build, permissions and actions taken.
Jamf named no actor. Windows-only hidden-desktop or DLL-injection features should not be presented as established Mac behavior.
What to Do If You Ran a Suspected Overlord Installer
-
Change exposed and reused passwords from a clean device. Prioritize your email, Apple Account and password manager; keep the suspect Mac isolated.
Prioritize accounts used while the agent may have been active. For a managed device, coordinate the order with your security team.
-
Review active access, not just passwords. Sign out unknown sessions, inspect enrolled devices and revoke exposed application tokens through each service’s genuine security controls.
Check recovery addresses, forwarding rules and newly added authentication methods. Resetting a password may not end every session or remove an unauthorized recovery option.
-
Report financial activity through verified channels. If you see an unauthorized payment or account change, contact the bank or provider immediately.
Preserve transaction references and its case number. A security scan cannot reverse a transfer, and a stranger cannot guarantee recovery for an upfront fee.
-
Handle exposed work secrets with your administrator. API keys, signing credentials and business documents can need separate containment beyond a personal password change.
Do not post those records in a removal-help thread. Provide sensitive incident material only through the organization’s approved process.
-
Restore selectively after a rebuild. Recover trusted documents, reinstall applications from genuine sources and avoid restoring the same unofficial installer or unidentified startup items.
Keep monitoring account alerts and device findings. Repeated detections need another assessment rather than repeated blind deletion.
Frequently Asked Questions
Does installing genuine Zoom rule out Overlord?
No. The documented chain installed real Zoom alongside the malicious agent. A successful meeting does not verify everything the original installer launched.
Is every Overlord installation malicious?
No. Overlord is an open-source remote-access framework. This guide concerns attacker-configured agents delivered without informed authorization, not every legitimate use of remote administration.
Should I delete every com.zoom file?
No. Names alone cannot distinguish legitimate software from an impersonator. Correlate the exact path, file identity, security finding and incident history before removing anything.
Can I scan without paying for Malwarebytes?
Yes. Mac Quick and Custom scans are free. For Custom, enter through the Scanner tile and Advanced scans rather than the paid Threat Scan button.
Does restarting remove the infection?
Not reliably. Builds differ in persistence, and restarting cannot undo earlier access or secure exposed accounts. Follow the removal and account-response steps separately.
When should I consider rebuilding the Mac?
Consider a professionally planned rebuild for persistent detections, failed remediation or a high-risk compromise where trust cannot be restored. Preserve evidence and understand the data-loss consequences first.
The Bottom Line
Do not trust an unofficial meeting installer because Zoom works afterward. Isolate the Mac, identify the unwanted software and complete supported remediation rather than deleting files by name.
If Overlord may have run, secure affected accounts from a trusted device. Involve workplace responders when appropriate, and seek planned recovery when a clean scan leaves important uncertainty.

Join the discussion
0 commentsShare your experience or ask a question about this article.
Discussion
Start the conversation
Have a question or something useful to share? Add the first comment.