

If you cannot open your images, documents, or files and you see a Your files are encrypted ransom note, then your computer is infected with ransomware.
These ransomware infections encrypt the personal documents found on the victim’s computer, then displays a “Your files are encrypted” message which offers to decrypt the data if payment in Bitcoin is made. The instructions are placed on the victim’s desktop in a text or HTML file or pop-up window.
Here are a few ransomware infections that display the “Your files are encrypted” ransom note when infecting a computer:
What is the “Your files are encrypted” ransomware?
The “Your files are encrypted” malware is usually a file-encrypting ransomware infection that restricts access to data (files, images, videos) by encrypting files with an extension that contains the email adress and ID. It then attempts to extort money from victims by asking for “ransom”, in the form of Bitcoin cryptocurrency, in exchange for access to your files.
This ransomware targets all versions of Windows including Windows 11, Windows 10, and Windows 7. This executable will be launched and begin to scan all the drive letters on your computer for data files to encrypt.
The “Your files are encrypted” ransomware searches for files with certain file extensions to encrypt. The files it encrypts include important productivity documents, images, videos, and files such as .doc, .docx, .xls, .pdf, among others. When these files are detected, this infection will change the extension, so you are no longer able to open them.
Once your files are encrypted, you cannot open these files and this ransomware will create the “Your files are encrypted” ransom note in each folder that a file has been encrypted and on the Windows desktop.
When the infection has finished scanning your computer it will also delete all of the Shadow Volume Copies that are on the affected computer. It does this so that you cannot use the shadow volume copies to restore your encrypted files.
How did the “Your files are encrypted” ransomware get on my computer?
The “Your files are encrypted” ransomware is distributed via spam email containing infected attachments or by exploiting vulnerabilities in the operating system and installed programs.
Cyber-criminals spam out an email, with forged header information, tricking you into believing that it is from a shipping company like DHL or FedEx. The email tells you that they tried to deliver a package to you, but failed for some reason. Sometimes the emails claim to be notifications of a shipment you have made. Either way, you can’t resist being curious as to what the email is referring to – and open the attached file (or click on a link embedded inside the email). And with that, your computer is infected with the “Your files are encrypted” ransomware.
This ransomware was also observed attacking victims by exploiting operating system vulnerabilities. Commonly exploited software includes the operating system itself, browsers, Microsoft Office, and third-party applications.
Is my computer infected with “Your files are encrypted” Ransomware?
If your computer is infected with ransomware, your images, files, or documents will no longer open with your normal programs. When this ransomware has finished encrypting the victim’s files, it will also display a “Your files are encrypted” ransom note that includes instructions on how to contact these cybercriminals.
![Image: [writehere@onlinehelp.host].harma ransomware](https://malwaretips.com/blogs/wp-content/uploads/2020/01/writehere@onlinehelp.host-.harma_.jpg "Your Files Are Encrypted? Remove Ransomware and Check Recovery Options 2")
This is the message that the “Your files are encrypted” ransomware may display:
Your files are encrypted
Don’t worry,you can return all your files!
If you want to restore them, follow this link:
Use Tor Browser to access this address.
If you have not been answered via the link within 12 hours, write to us by crown_desh@aol.com
Attention!
Do not rename encrypted files.Do not try to decrypt your data using third party software, it may cause permanent data loss.
Decryption of your files with the help of third parties may cause increased price (they add their fee to our) or you can become a victim of a scam.
Remove the ransomware and recover the files
It’s important to understand that by starting the removal process you risk losing your files, as we cannot guarantee that you will be able to recover them. Your files may be permanently compromised when trying to remove this infection or trying to recover the encrypted documents.
We cannot be held responsible for losing your files or documents during this removal process.
It’s recommended to create a backup image of the encrypted drives or files before proceeding with the malware removal instructions so that you can restore them if the decryption keys are recovered from the cybercriminals’ servers. To create a backup for your encrypted files or drives, you can use EaseUS Todo Backup Free.
This malware removal guide may appear overwhelming due to the number of steps and numerous programs that are being used. We have only written it this way to provide clear, detailed, and easy-to-understand instructions that anyone can use to remove malware for free.
Please perform all the steps in the correct order. If you have any questions or doubts at any point, stop and ask for our assistance.
Before scanning: disconnect the PC from Wi-Fi or Ethernet and disconnect backup drives. Preserve the ransom note and copies of encrypted files. The steps remove the infection; file decryption and recovery are separate, and may not be possible.
- STEP 1: Use Rkill to terminate suspicious programs.
- STEP 2: Use Malwarebytes to remove Ransomware and Unwanted Programs
- STEP 3: Use HitmanPro to remove Trojans and other Malware
- STEP 4: Use AdwCleaner to remove Malicious Browser Extensions and Adware
- STEP 5: Perform a final check with ESET Online Scanner
- STEP 6: Restore the files encrypted by ransomware
STEP 1: Use Rkill to terminate suspicious programs.
In this first step, we will download and run Rkill to terminate suspicious programs that may be running on your computer.
RKill is a program that was developed at BleepingComputer.com that attempts to terminate known malware processes so that your normal security software can then run and clean your computer of infections. When RKill runs it will kill malware processes and then removes incorrect executable associations and fixes policies that stop us from using certain tools.
-
Download Rkill.
You can download RKill to your computer from the below link. When at the download page, click on the Download Now button labeled iExplore.exe. We are downloading a renamed version of Rkill (iExplore.exe) because some malware will not allow processes to run unless they have a certain filename.
Download RKillOpens the BleepingComputer download page in a new tab. RKillStops malware processes so other tools can run
 -
Run RKill.
After downloading, double-click the iExplore.exe icon to kill malicious processes. In most cases, downloaded files are saved to the Downloads folder.
The program may take some time to search for and end various malware programs.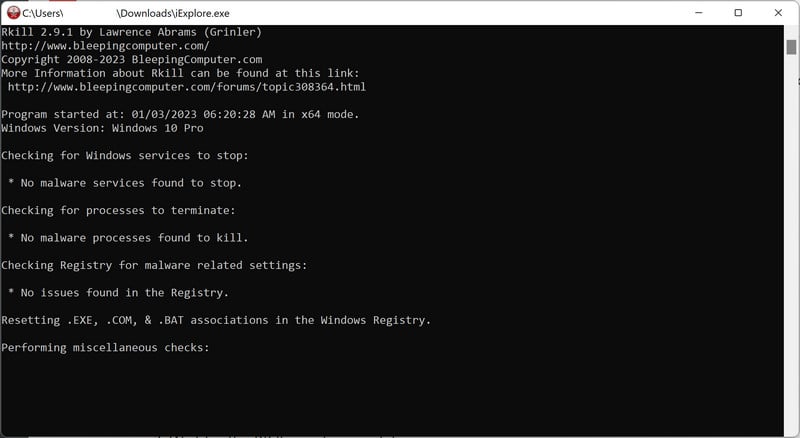
When it is finished, the black window will close automatically and a log file will open. Do not restart your computer. Proceed to the next step in this guide.
STEP 2: Use Malwarebytes to remove Ransomware and Unwanted Programs
In this second step, we will install Malwarebytes to scan and remove any infections, adware, or potentially unwanted programs that may be present on your computer.
Malwarebytes is one of the most popular and trusted anti-malware tools for Windows — and it’s completely free for removing infections. It catches threats that many antivirus programs miss, including adware, browser hijackers, and trojans. Follow the steps below to scan and clean your PC in just a few minutes.
Download Malwarebytes
Click the button below to download the latest version of Malwarebytes for Windows from the official source. The free version is all you need — it will scan your computer and remove adware, browser hijackers, and other malicious software at no cost.
Download MalwarebytesOfficial installer for Windows 11 and 10. Your download starts right away.Want real-time protection? See Malwarebytes Premium Malwarebytes Free for WindowsScans and removes malware at no cost
-
Install Malwarebytes
When the download finishes, open your Downloads folder and double-click the MBSetup file. If Windows shows a User Account Control pop-up, click “Yes” to allow the installation.

Follow the On-Screen Prompts to Install Malwarebytes
The setup wizard will walk you through a few quick screens:
Current installers may offer Browser Guard, a trial, or a paid plan. Read each screen; use Skip for optional offers you do not want. Manual Windows scans and quarantine remain available in the free version.
-
Choose where you’re installing the program — “Personal Computer” or “Work Computer” — then click Next.

-
Malwarebytes will now install on your device. This usually takes under a minute.

-
When installation is complete, the “Welcome to Malwarebytes” screen will open automatically.

-
On the final screen, click Open Malwarebytes to launch the program.

-
Choose the scan type and optional rootkit check
Start with the normal Threat Scan. For an additional rootkit check, click the three dots on the Scanner tile, choose Advanced Scan, then Custom Scan.
In the Custom Scan options, enable Scan for rootkits and select the entire C:\ system drive. Click Start Custom Scan when you have reviewed the remaining options. This option is unavailable on Windows ARM devices; do not change Windows security settings to make it appear.
Run the Custom Scan if you selected it. Otherwise, return to the Dashboard and follow the Threat Scan steps below. You do not need rootkit scanning enabled to run a normal scan.
Start the Scan
Click the blue Scan button. Malwarebytes will automatically update its virus database and start checking your computer for malware.

-
Wait for the Scan to Finish
A Threat Scan checks memory, startup items, the registry, and common malware locations; it does not inspect every file on every drive. Allow it to finish. Use a Custom Scan if you also need to check a particular drive or folder.

-
Quarantine the Detected Threats
When the scan finishes, review the detected items and leave the threats you want removed selected. Click Quarantine. If you are unsure about a detection, save the report and ask for help before excluding it.

Malwarebytes will now remove the malicious files and registry entries and move them safely into quarantine.

-
Restart Your Computer
Some threats can only be fully removed after a reboot. If Malwarebytes asks you to restart, click Yes. Once you’re logged back in, Malwarebytes has finished removing the threats it found.

STEP 3: Use HitmanPro to remove Rootkits and other Malware
In this third step, while the computer is in normal mode, we will download and run a scan with HitmanPro to remove Trojans, rootkits, and other malicious programs.
HitmanPro is a second-opinion scanner designed to check for threats your usual antivirus may have missed. It examines suspicious files and uses cloud analysis from several security labs, including SophosLabs. An internet connection is needed for that cloud check.
Scanning is free. Removing detected threats requires an eligible one-time 30-day trial or a paid license. If this computer already used its trial, do not expect another free activation; the purchase screen shows the current price.
-
Download HitmanPro
Click the button below to download HitmanPro. Remember — the scan is free, so you have nothing to lose by checking your PC.
Download HitmanProFree scan. Removal requires an eligible 30-day trial or a paid license. Opens the official HitmanPro page in a new tab. HitmanProSecond-opinion malware scanner from Sophos
 -
Install HitmanPro
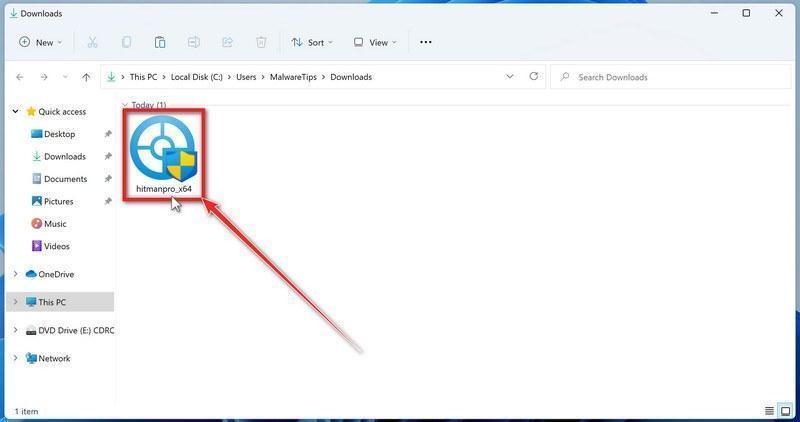
When the download finishes, open your Downloads folder and double-click the file: “hitmanpro.exe” on 32-bit Windows, or “hitmanpro_x64.exe” on 64-bit Windows.
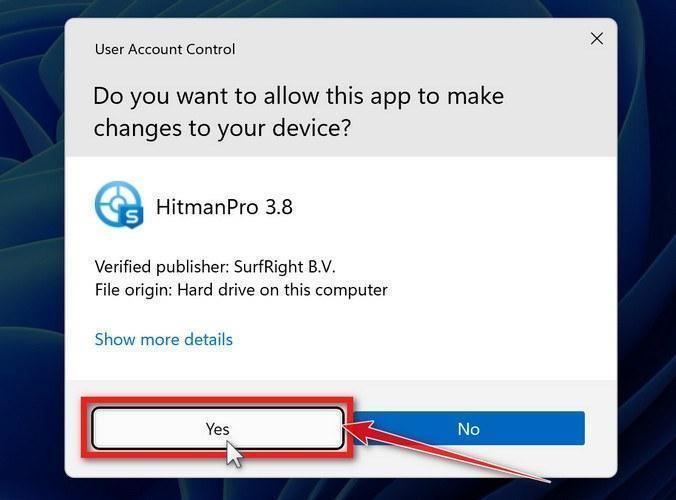
If a User Account Control pop-up asks whether HitmanPro can make changes to your device, click “Yes” to continue.
-
Follow the On-Screen Prompts
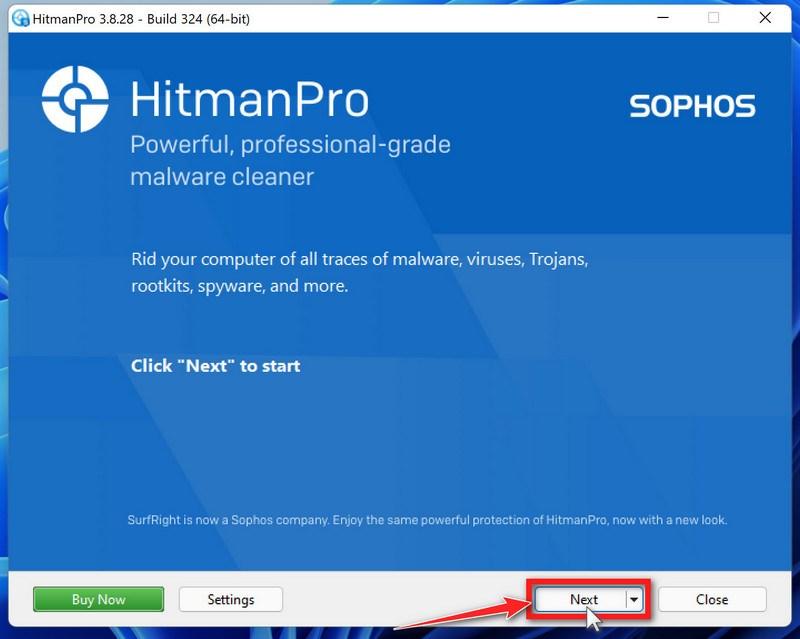
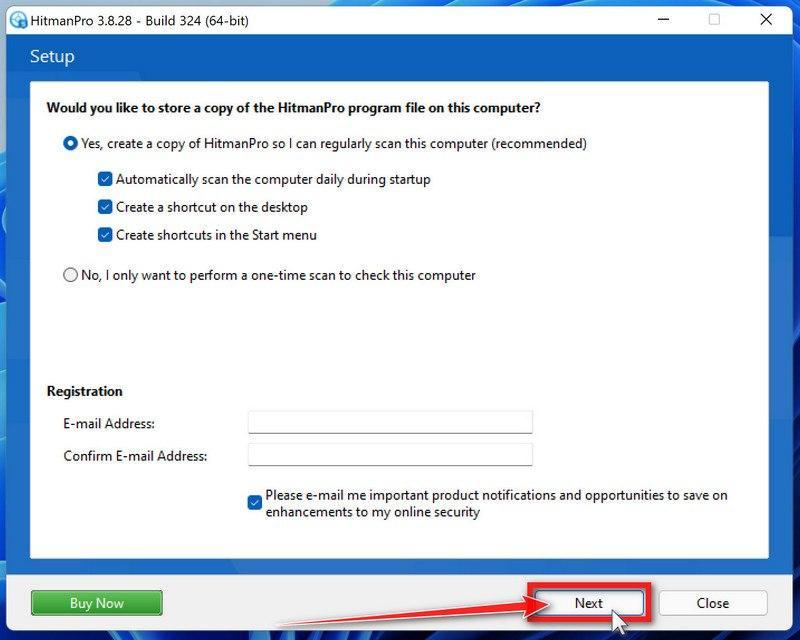
On the HitmanPro start screen, click “Next” to begin the system scan. No lengthy setup required — it goes straight to work.
-
Wait for the Scan to Finish
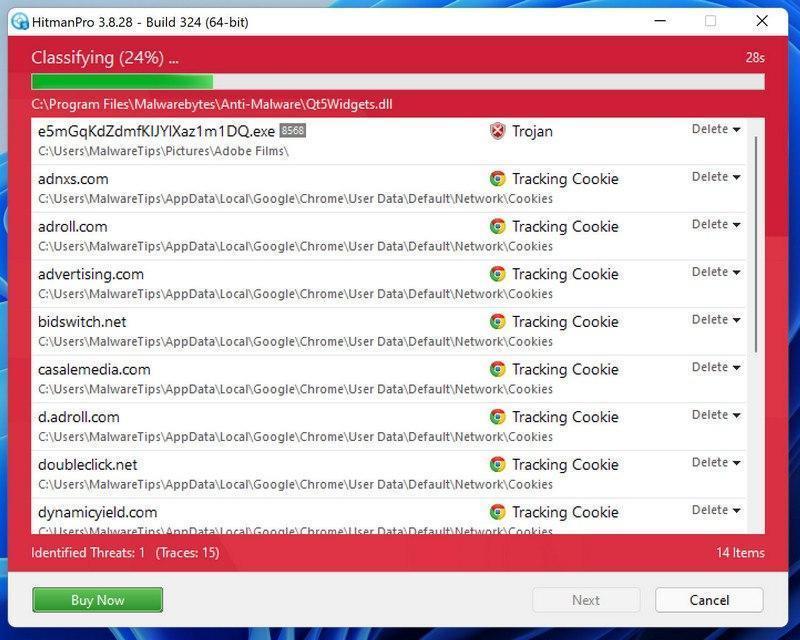
HitmanPro will now check your computer for malicious programs. This usually takes just a few minutes thanks to its cloud-based scanning.
-
Review the Results and Click “Next”
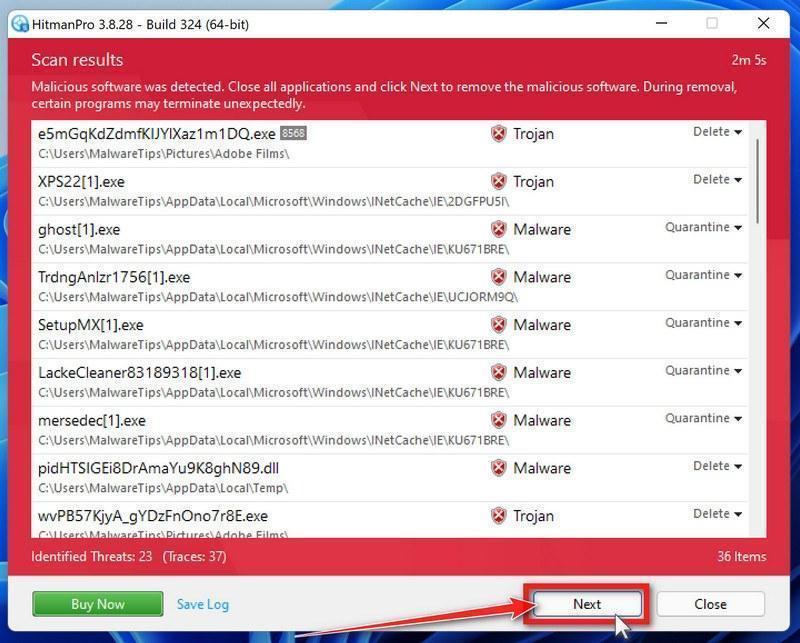
When the scan is done, HitmanPro will show you everything it found. Click “Next” to remove the detected threats.
-
Click “Activate Free License”
If the trial is available on this computer, click Activate free license and follow the activation prompts. If it is unavailable, use an existing paid license or keep the report for assistance; do not buy through an unexpected pop-up.
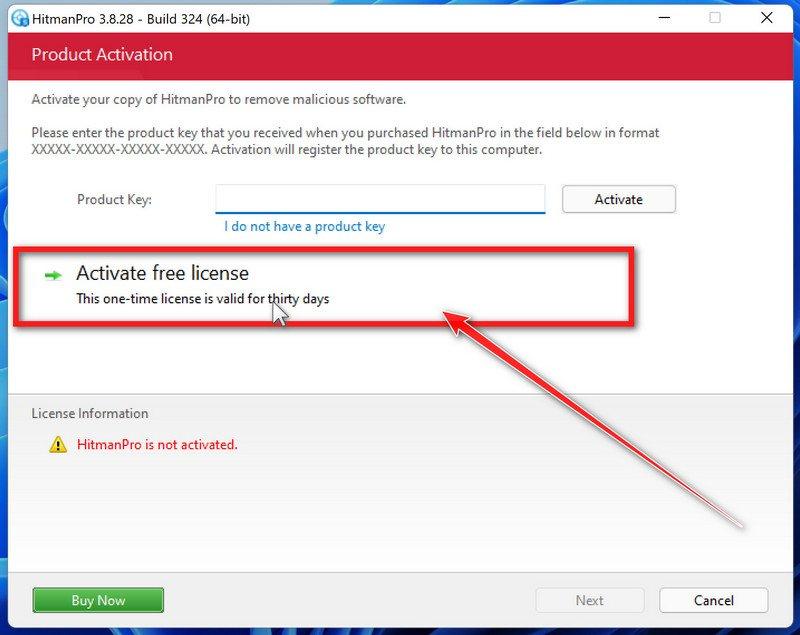
When the removal is complete, HitmanPro will show a summary of everything it cleaned. Click Next, then click Reboot if prompted. If there’s no reboot prompt, just click Close and check whether the original symptoms have stopped. A clean scan cannot rule out every threat.
STEP 4: Use AdwCleaner to remove Malicious Browser Extensions and Adware
In this next step, we will use AdwCleaner to remove malicious browser policies and unwanted browser extensions from your computer.
AdwCleaner is a free on-demand scanner that specializes in adware, browser hijackers, and unwanted toolbars — the exact threats that mainstream antivirus programs often miss. It also includes tools that repair the damage malware leaves behind, like hijacked browser settings and malicious policies. It’s a quick scan that’s well worth running.
-
Download AdwCleaner
Click the button below to download AdwCleaner — it’s free, portable, and requires no installation.
Download AdwCleanerOpens the official download page in a new tab. Malwarebytes AdwCleanerRemoves adware and unwanted programs at no cost
 -
Run AdwCleaner
Open your Downloads folder and double-click the file named “adwcleaner.exe“. There’s no installation — the program starts right away.
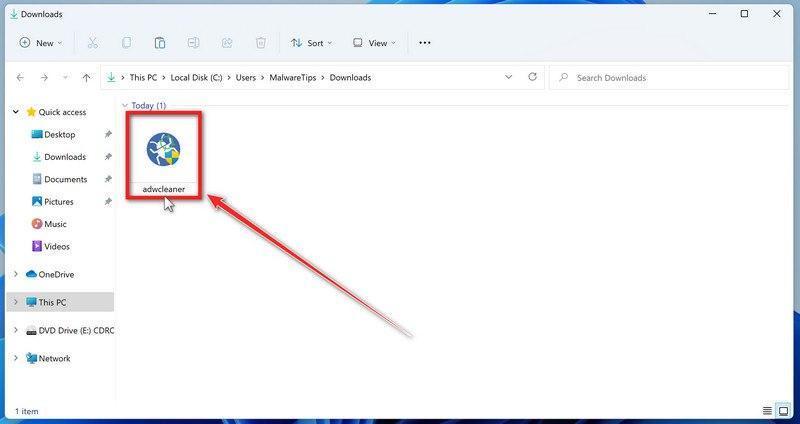
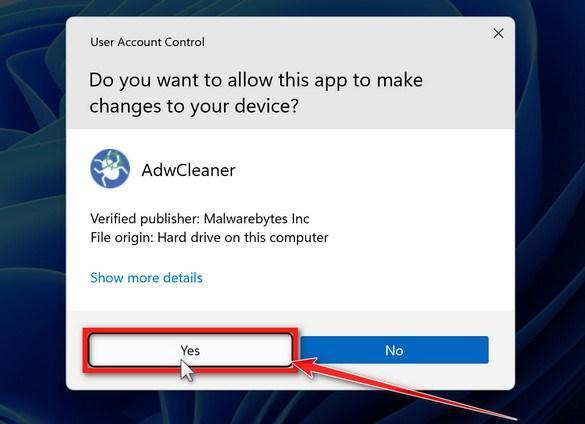
If Windows asks whether you want to allow AdwCleaner to run, click “Yes“. When the license agreement appears, click I agree to continue.
-
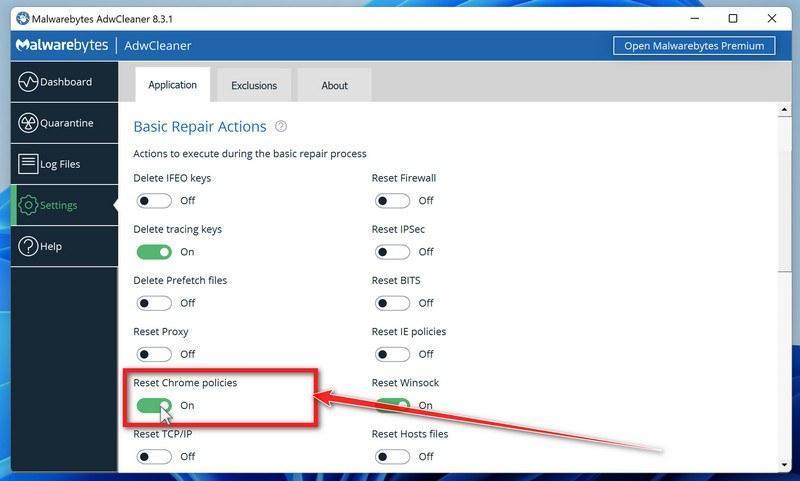
Check whether a Chrome policy reset is needed
Leave policy resets off for an ordinary scan. On a personal PC with confirmed unwanted Chrome policies, open Settings and enable Reset Chrome policies only if needed. On a work or school device, ask its administrator first.
-
Start the Scan
Return to Dashboard and click Scan Now.
-
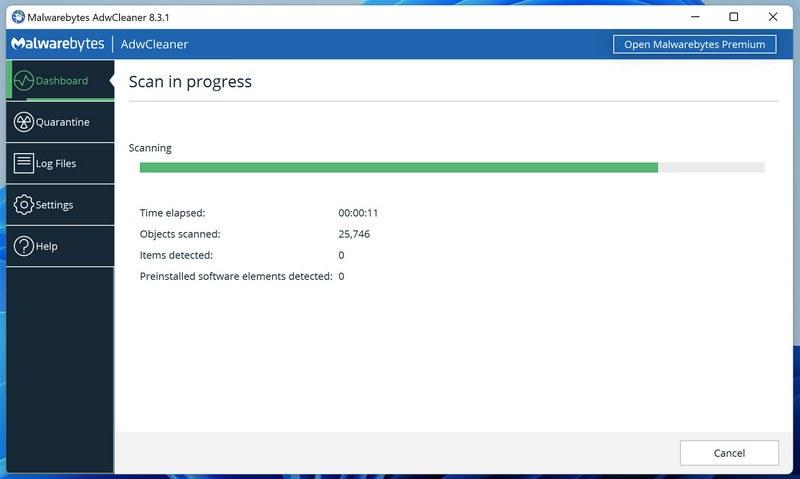
Wait for the Scan to Finish
AdwCleaner will now check your computer for adware and other malware. This usually takes only a few minutes — it’s one of the fastest scanners around.
-
Quarantine the Detected Threats
Review the detected adware and potentially unwanted programs, select the items to remove, and click Next. If a separate preinstalled-software list appears, review it too, then click Quarantine. Leave programs you intentionally use unselected.
-
Click “Continue” to Finish the Cleanup
Save any open work first — AdwCleaner needs to close your open programs before it can clean. When you’re ready, click the “Continue” button.
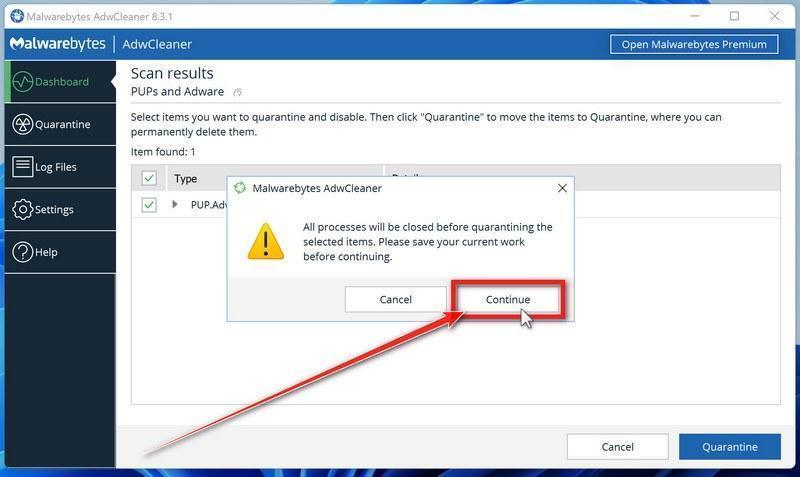
AdwCleaner quarantines the selected items. Restart when prompted, then review the cleanup log. Click Skip Basic Repair to finish; use Run Basic Repair only when a support agent has instructed you to do so.
STEP 5: Perform a final check with ESET Online Scanner
This final step involves installing and running a scan with ESET Online Scanner to check for any additional malicious programs that may be installed on the computer.
ESET Online Scanner is a free second-opinion scanner for Windows. It offers a thorough check for threats other scans may have missed. Let it update before scanning, and use the final report to see what it found and whether cleanup succeeded. A clean result is useful evidence, not a guarantee that no malware remains.
-
Download ESET Online Scanner
Click the button below to download ESET Online Scanner.
Download ESET Online ScannerOpens the official download page in a new tab. ESET Online ScannerFree one-time malware scan from ESET
 -
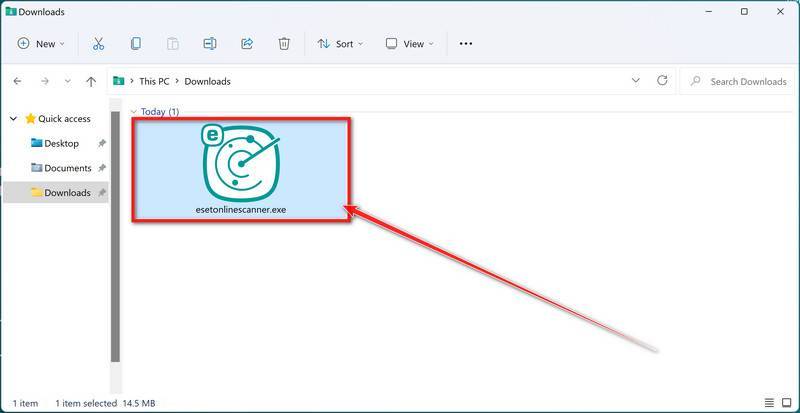
Run the Installer
When the download finishes, open your Downloads folder and double-click “esetonlinescanner.exe“.
-
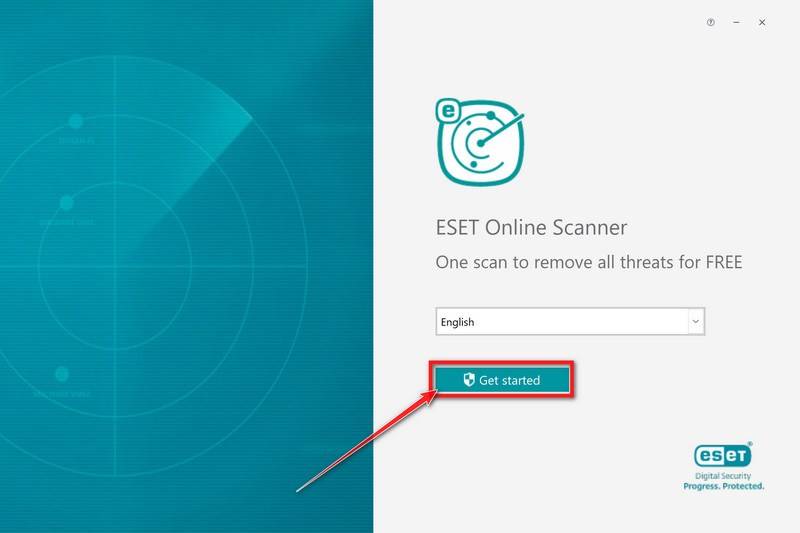
Install ESET Online Scanner
On the start screen, select your language from the drop-down menu and click Get started.
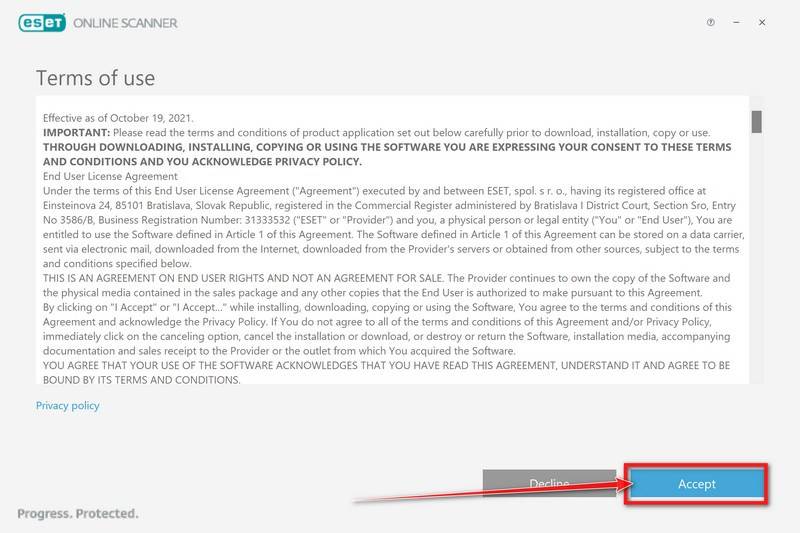
On the Terms of use screen, click Accept.
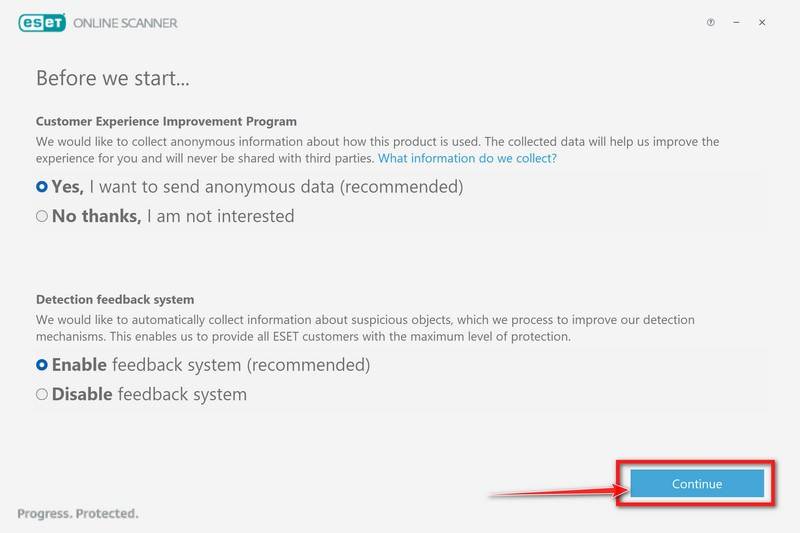
Choose your preferences for the Customer Experience Improvement Program and the Detection feedback system (either choice is fine), then click Continue.
-
Start a Full Scan
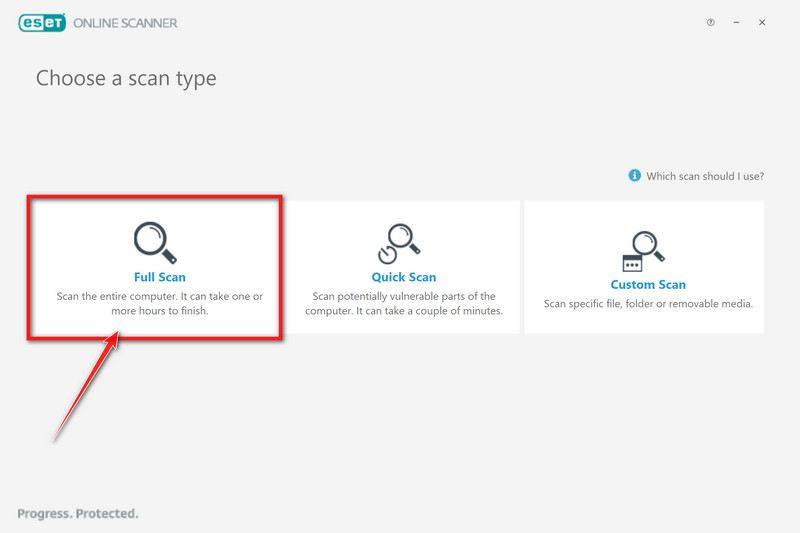
Click Full Scan — this checks your entire computer, not just the common hiding spots.
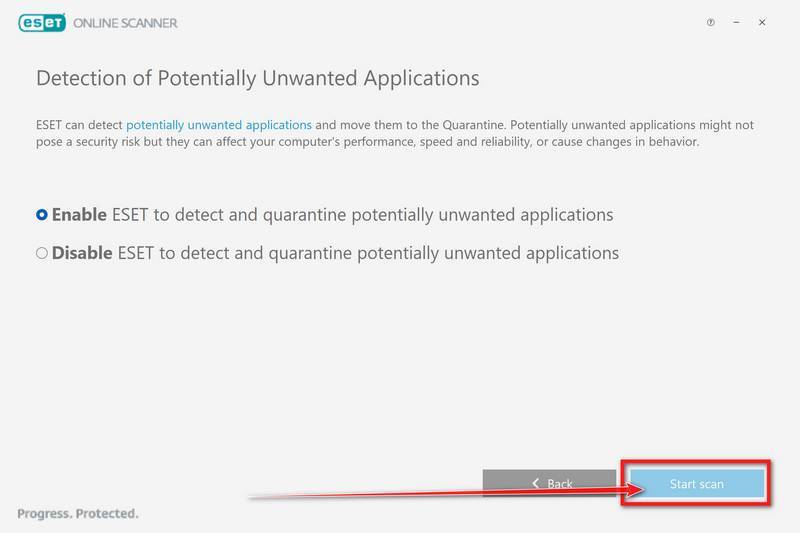
Select Enable for Detection of Potentially Unwanted Applications — this lets ESET catch adware and bundled junk programs, not just viruses. Then click Start scan.
-
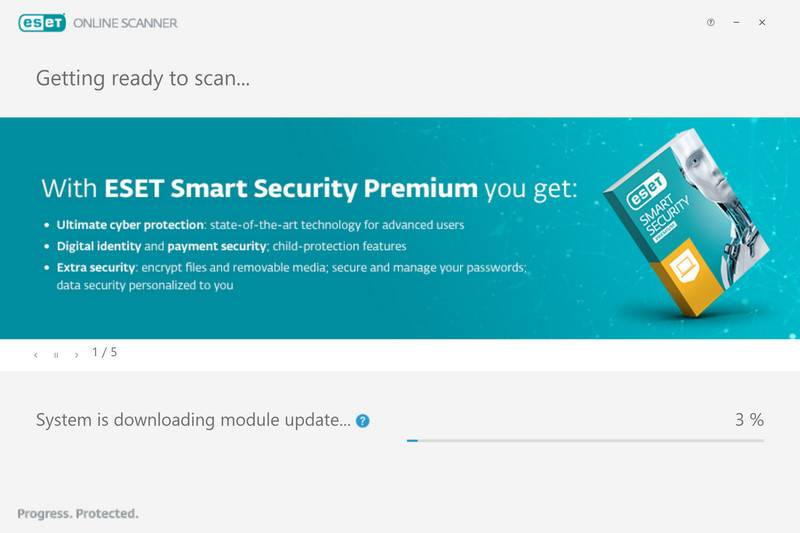
Wait for the Scan to Finish
ESET will now check every file on your computer. Because it’s a full scan, this can take a while — often an hour or more, depending on how much data you have. Leave it running in the background and check on it from time to time.
-
Review the Results
When the scan finishes, open View detailed results and check the action recorded for each detection. ESET attempts to clean detected threats, but unresolved items still need attention. Save the report if anything could not be cleaned.
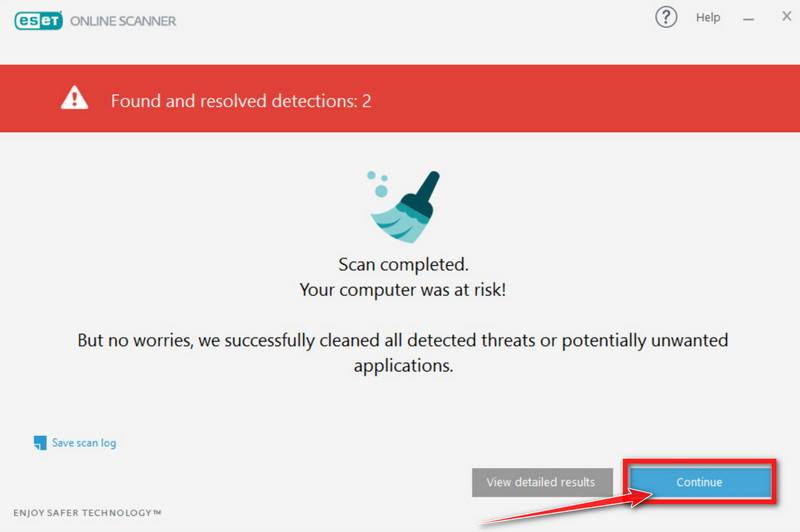
If ESET found nothing, restart and check whether the original problem is gone. If warnings, redirects, or other symptoms continue, keep the scan reports and ask for help in the MalwareTips removal forum.
STEP 6: Restore the files encrypted by ransomware
Disconnect the infected PC from the network and unplug backup drives. Use a clean device to check No More Ransom for a matching decryptor. Test recovery on copies and save restored files to a different, clean drive.
Whether encrypted files can be recovered depends on the ransomware family, available decryptors, and your backups. Removing the malware does not decrypt the files. Keep the ransom note and untouched copies of encrypted files before trying any recovery option below.
Option 1: Search a decryption tool for this ransomware
The cybersecurity community is constantly working to create ransomware decryption tools, so you can try to search these sites for updates:
- https://id-ransomware.malwarehunterteam.com/
- https://decrypter.emsisoft.com/
- https://noransom.kaspersky.com/
- https://www.avast.com/ransomware-decryption-tools
Option 2: Use EaseUS Data Recovery Wizard Free to look for recoverable original files
Check the current free recovery allowance before installing. EaseUS advertises up to 2 GB for its free Windows edition, with conditions shown in the app. Preview a file first to confirm it is readable before spending time recovering it.
This is a deleted-file recovery tool, not a ransomware decryptor. It may find original files that the ransomware deleted, but cannot turn properly encrypted data back into readable files. Avoid installing it on the affected drive, where new writes can overwrite recoverable data.
-
Download EaseUS Data Recovery Wizard Free.
You can download EaseUS Data Recovery Wizard Free by clicking the link below.
Download EaseUS Data Recovery WizardOpens the download page in a new tab. EaseUS Data Recovery WizardFile recovery tool with a free version
 -
Double-click on the EaseUS Data Recovery Wizard Free setup file.
When EaseUS Data Recovery Wizard Free has finished downloading, double-click on the setup file to install EaseUS Data Recovery Wizard on your computer. In most cases, downloaded files are saved to the Downloads folder.
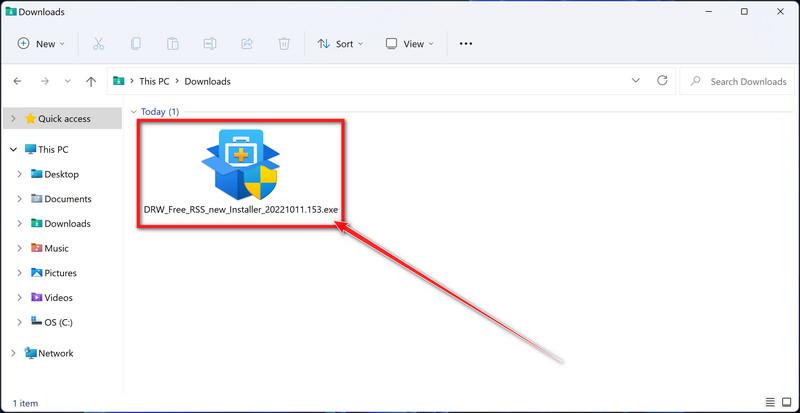
You may be presented with a User Account Control pop-up asking if you want to allow EaseUS to make changes to your device. If this happens, you should click “Yes” to continue with the EaseUS Data Recovery Wizard Free installation.
-
Follow the on-screen prompts to install EaseUS Data Recovery Wizard.
When the EaseUS Data Recovery Wizard installation begins, click on the “Install Now” as seen in the image below.
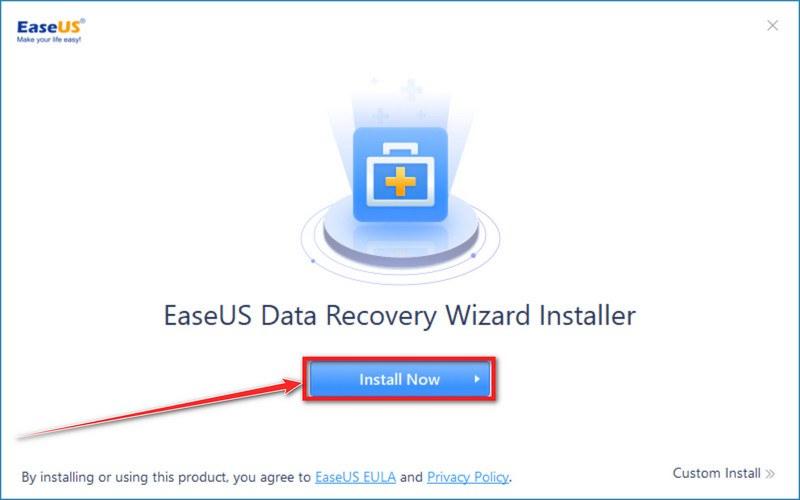
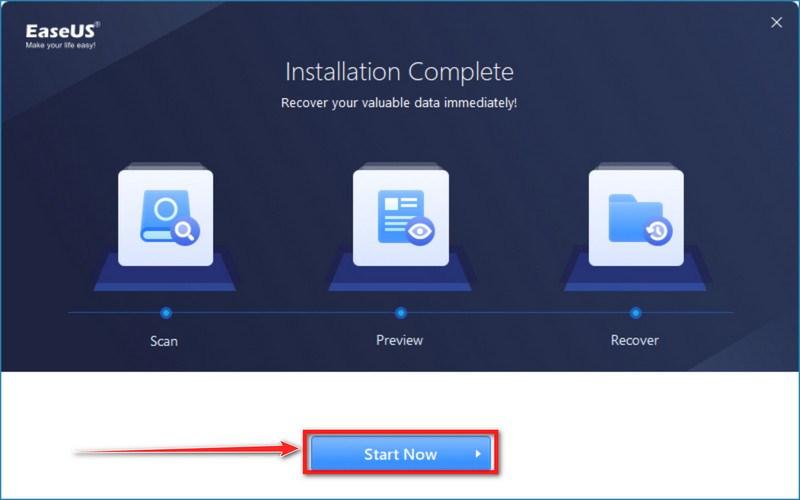
When your EaseUS Data Recovery Wizard installation completes, click the “Start Now” button to start the program.
-
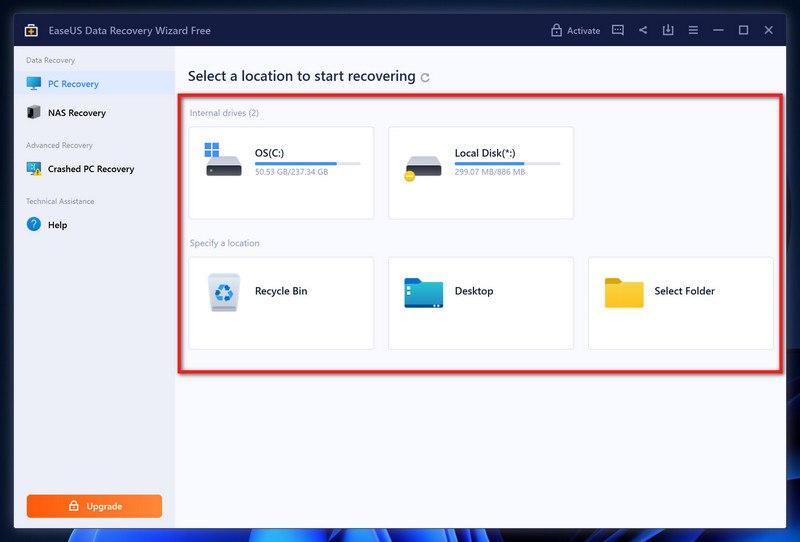
Select a location to start recovering the encrypted files.
Choose the drive or folder where you are the encrypted files that you want to recover and click “Scan“.
-
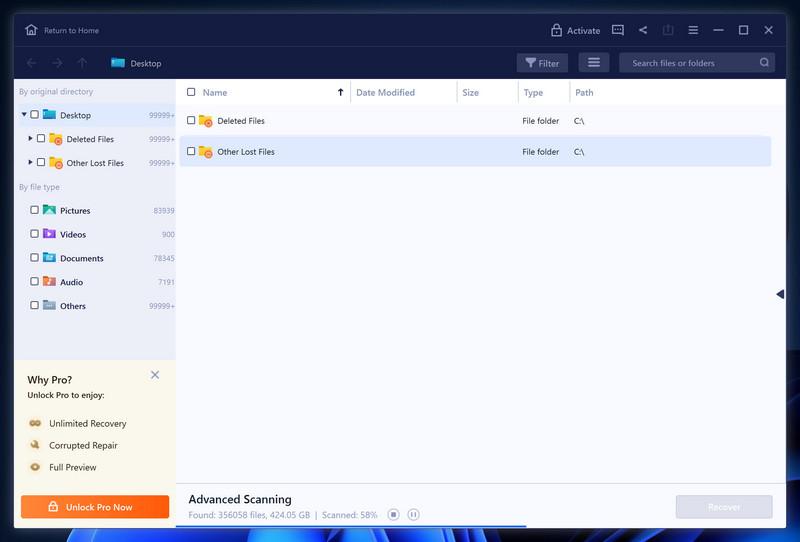
Wait for the EaseUS Data Recovery Wizard scan to complete.
EaseUS Data Recovery Wizard will now scan your computer files that can be restored. This process can take a few minutes, so we suggest you do something else and periodically check on the status of the scan to see when it is finished.
-
Find the files you want to recover.
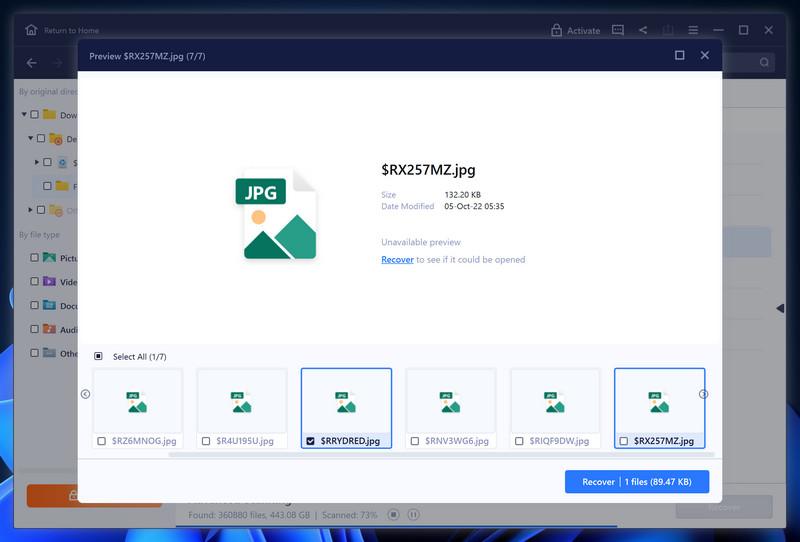
When the EaseUS Data Recovery Wizard scan is finished scanning it will show a screen that displays the files that can be recovered. This tool can recover a lot of data, use the “Filter” button to quickly filter specific file types and find the files that you want to recover.
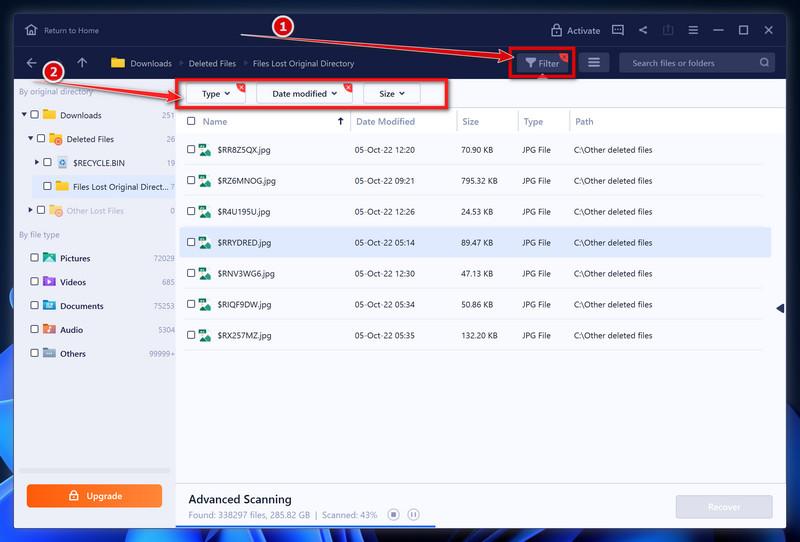
Click the “Preview” button or double-click on a file for a full preview.
-
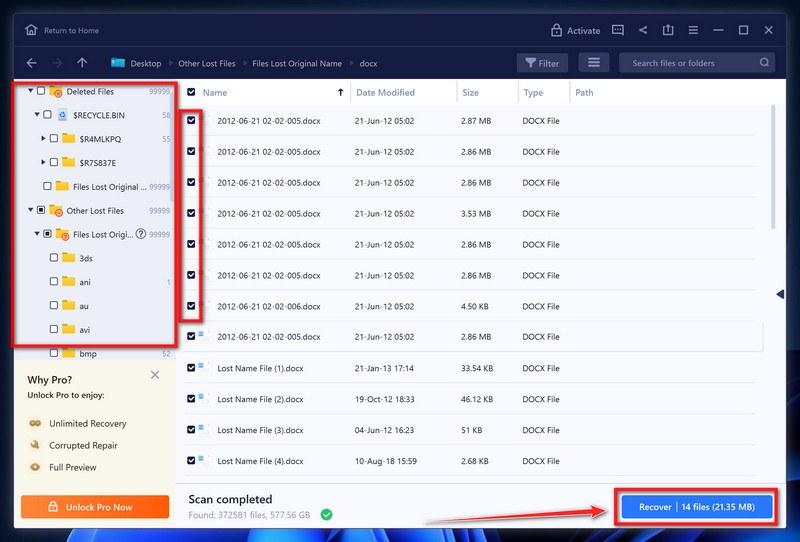
Select your files and click “Recover”.
Finally, select the the files you want to recover and click “Recover“.
Choose a safe location to save all the files.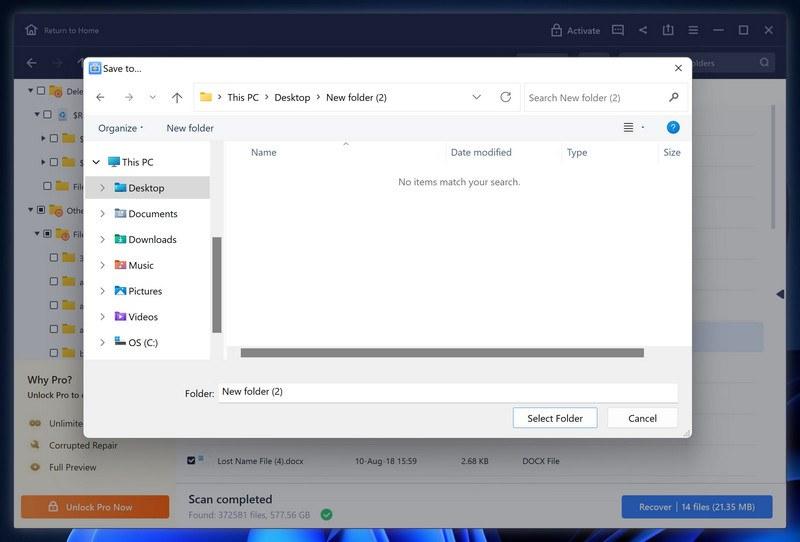
Save the recovered files to a different drive and open a few to check them. The free edition’s allowance is limited; do not assume that every listed file is intact or that purchasing a license will decrypt encrypted files.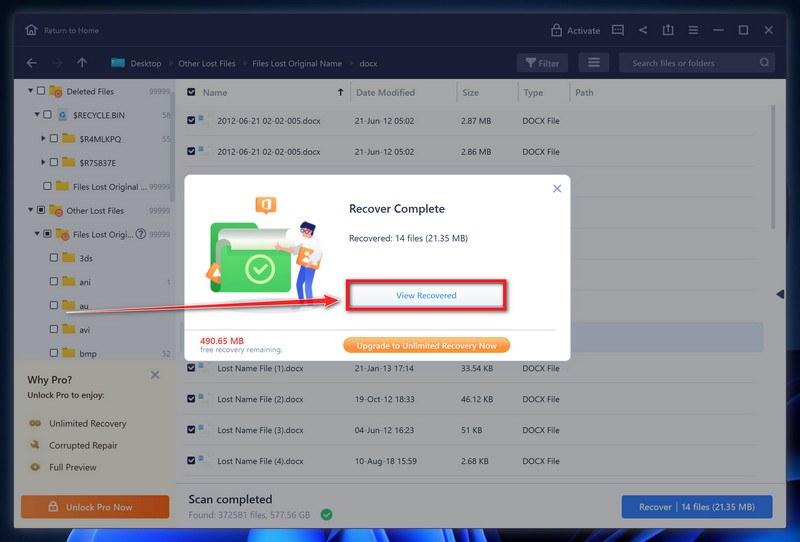
Option 3: Try to restore your files with ShadowExplorer
Many ransomware families try to delete Windows shadow copies. ShadowExplorer can help only if a usable snapshot from before the infection still exists. An empty date list means there is no available snapshot for that drive; the tool cannot recreate deleted shadow copies.
-
Download ShadowExplorer.
You can download ShadowExplorer from the below link.
Download ShadowExplorerOpens the official download page in a new tab.ShadowExplorerRestores files from Windows Shadow Volume Copies -
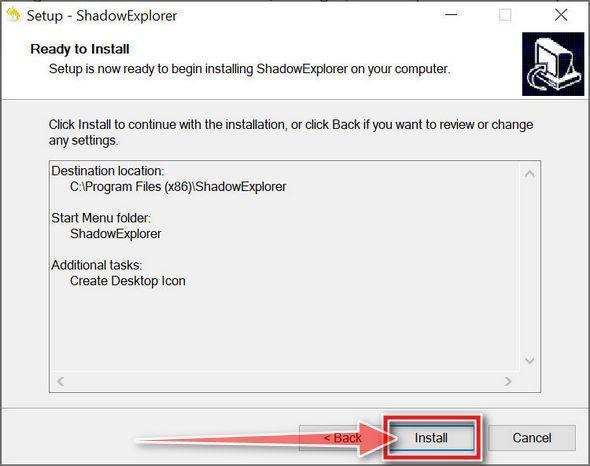
Install ShadowExplorer.
Double-click on the ShadowExplorer-x.x-setup file to start the installation process, then follow the on-screen promts to install this program.
-
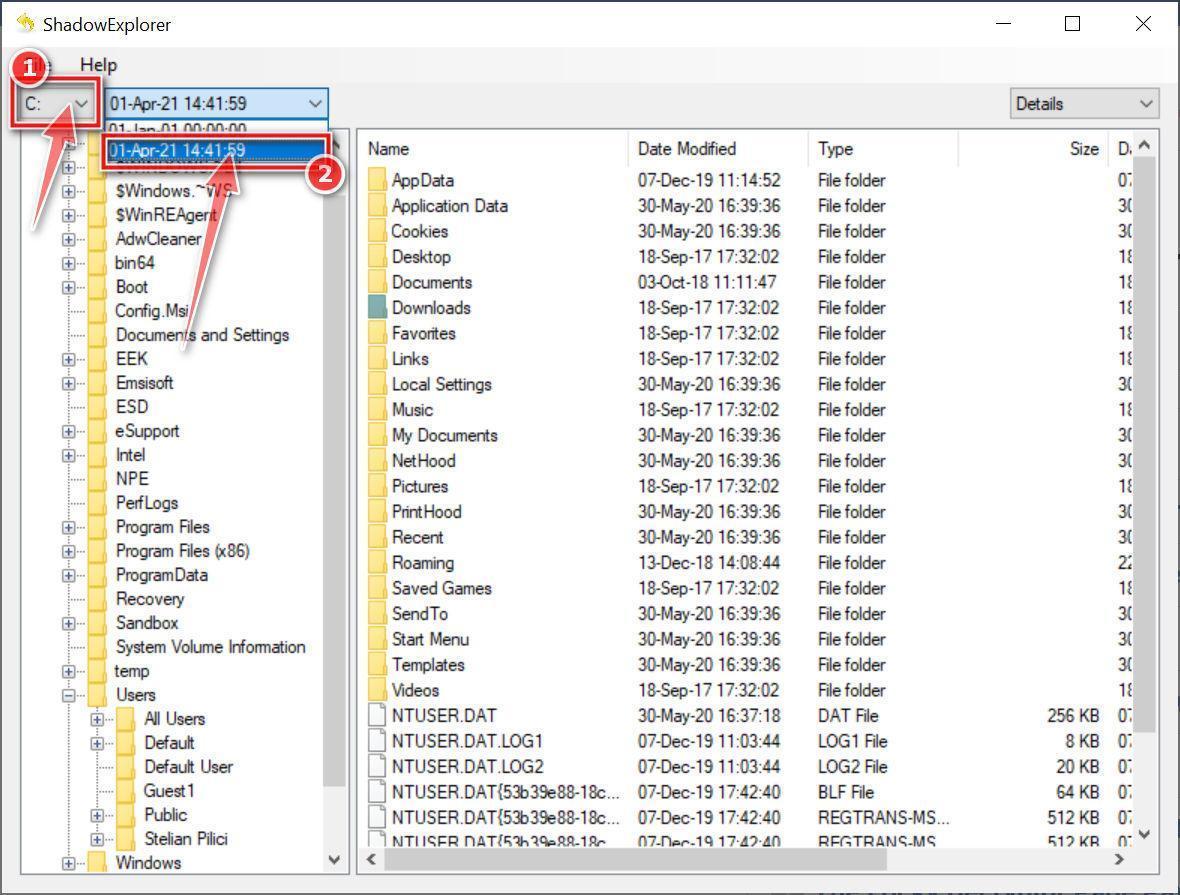
Select snapshot date.
Open ShadowExplorer and then from the top bar select the drive where the files that you want to save are located, then select from the snapshot available one previous to this infection.
-
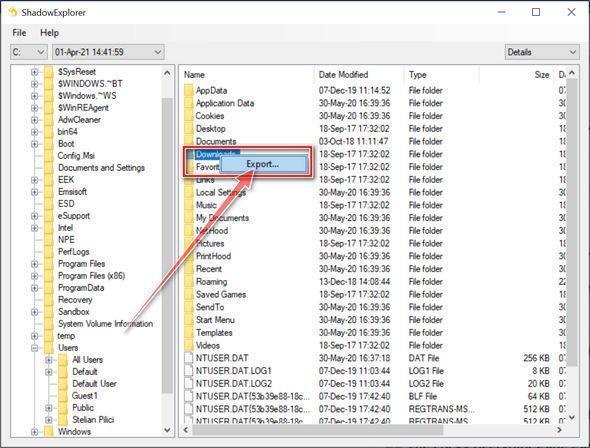
Export the files that you want to recover.
Once you have found a copy of the original file or folder, right-click on it and the select “Export”. A window will prompt you where you want to save the file or folder.
Your computer should now be free of the Your Files Are Encrypted ransomware infection.
If you are still having problems with your computer after completing these instructions, then please follow one of the steps:
- Run a computer scan with Emsisoft Emergency Kit
- Ask for help in our Malware Removal Assistance for Windows forum.
