Media Miner (offered by Vimshop.win) is a malicious Google Chrome extension which uses the infected computer’s resources to mine digital currency (Bitcoin, Monero, Dashcoin, DarkNetCoin, and others) without user permission.

When the Media Miner is installed and Google Chrome is running, it will inject an in-browser miner from coin-hive.com. While running, this miner will utilize your computer’s CPU power to mine for digital currency.
Victims may notice that CPU usage is going up whenever Chrome is open because the Media Miner Chrome extension utilizes over 50% of the CPU while the browser is running. This will cause the CPU to run at very hot temperatures for extended periods of time, which could shorten the life of the CPU.
When infected with the Media Miner CPU Miner common symptoms include:
- Google Chrome will connect to coin-hive.com
- The Media Miner extension is installed in Google Chrome
- Very high CPU and graphics cards usage
- Task Manager will show the Chrome process utilizing large amounts of the CPU.
- Google Chrome will take longer than normal to open or may close unexpectedly
- Windows minimize and maximize slowly, and programs run slower.
- Programs don’t launch as quickly.
- General slowness when using the PC.
How to remove Media Miner Chrome Extension (Virus Removal Guide)
Please perform all the steps in the correct order. If you have any questions or doubt at any point, STOP and ask for our assistance.
- STEP 1: Reset Google Chrome settings to remove the Media Miner Extension
- STEP 2: Use Malwarebytes to remove the Media Miner Trojan
- STEP 3: Use HitmanPro to Scan for Malware and Unwanted Programs
- STEP 4: Double-check for malicious programs with Zemana AntiMalware Free
STEP 1: Reset Google Chrome settings to remove the Media Miner Extension
Google Chrome has an option that will reset itself to its default settings. Resetting your browser settings will reset the unwanted changes caused by installing other programs. However, your saved bookmarks and passwords will not be cleared or changed.
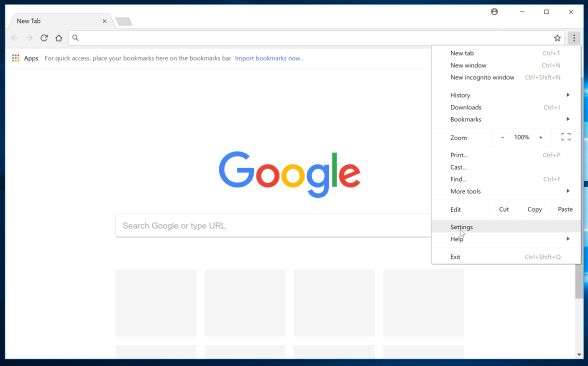
- Click on Chrome’s main menu button, represented by three horizontal lines. When the drop-down menu appears, select the option labeled Settings.
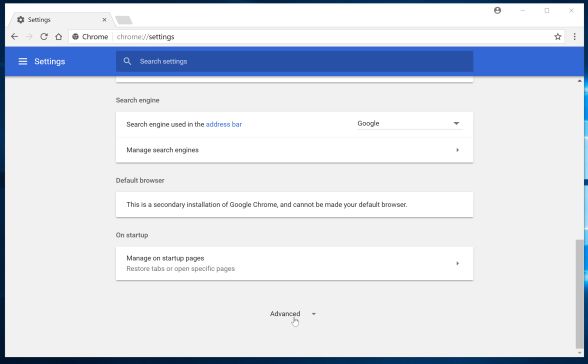
- Chrome’s Settings should now be displayed in a new tab or window, depending on your configuration. Next, scroll to the bottom of the page and click on the Advanced link (as seen in the below example).
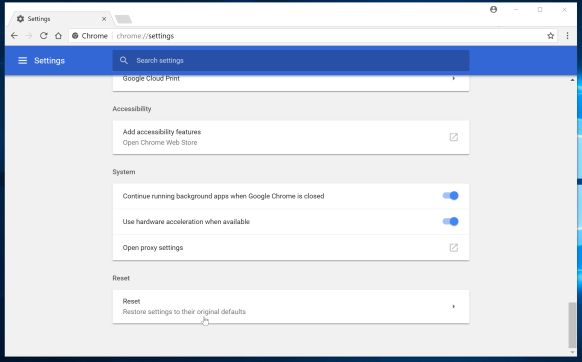
- Chrome’s advanced Settings should now be displayed. Scroll down until the Reset browser settings section is visible, as shown in the example below. Next, click on the Reset settings button.
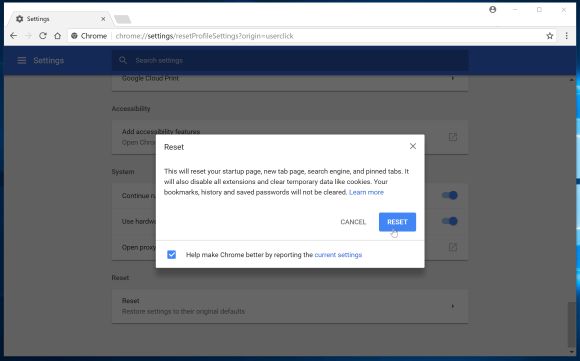
- A confirmation dialog should now be displayed, detailing the components that will be restored to their default state should you continue on with the reset process. To complete the restoration process, click on the Reset button.
STEP 2: Use Malwarebytes to remove the Media Miner Trojan
Malwarebytes is a powerful on-demand scanner which should remove the adware responsible for the Media Miner Trojan. It is important to note that Malwarebytes will run alongside antivirus software without conflicts.
- You can download download Malwarebytes from the below link.
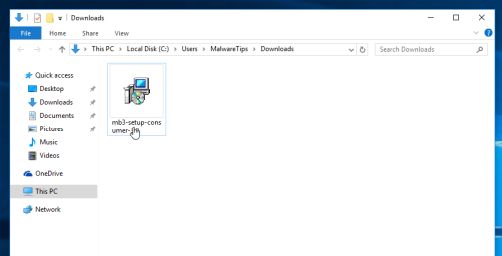
MALWAREBYTES DOWNLOAD LINK (This link open a new page from where you can download “Malwarebytes”) - When Malwarebytes has finished downloading, double-click on the “mb3-setup-consumer” file to install Malwarebytes on your computer.
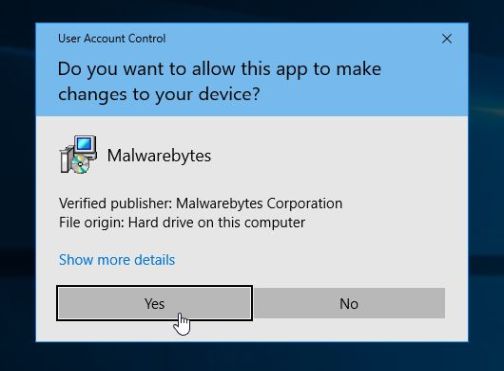
You may be presented with an User Account Control pop-up asking if you want to allow Malwarebytes to make changes to your device. If this happens, you should click “Yes” to continue with the installation.
- When the Malwarebytes installation begins, you will see the Malwarebytes Setup Wizard which will guide you through the installation process.
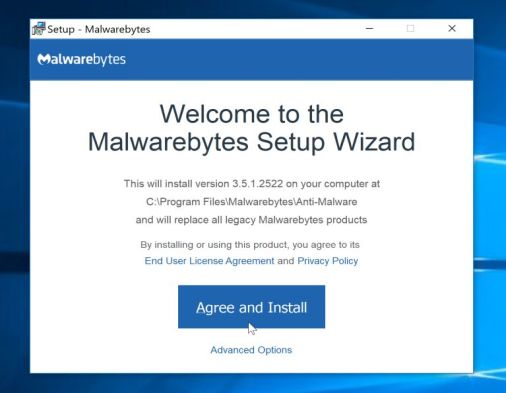
To install Malwarebytes on your machine, keep following the prompts by clicking the “Next” button.
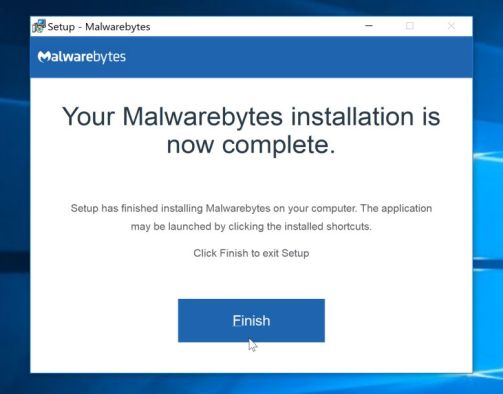
- Once installed, Malwarebytes will automatically start and update the antivirus database. To start a system scan you can click on the “Scan Now” button.
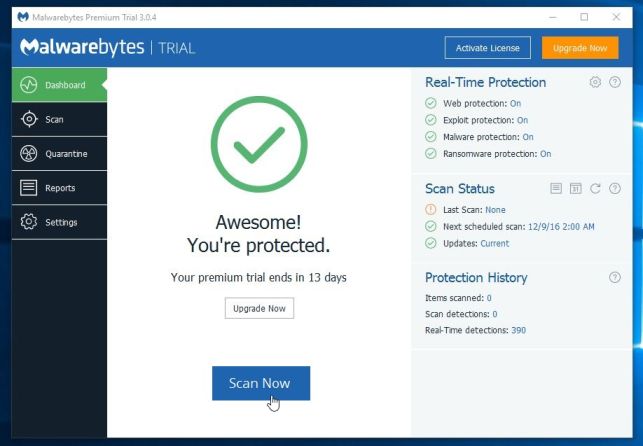
- Malwarebytes will now start scanning your computer for malicious programs.
This process can take a few minutes, so we suggest you do something else and periodically check on the status of the scan to see when it is finished.
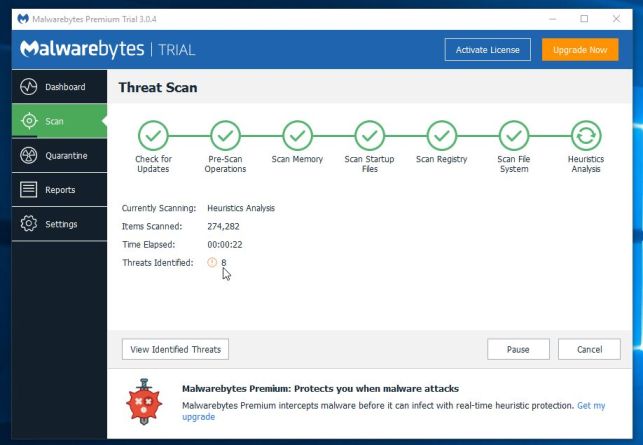
- When the scan has completed, you will be presented with a screen showing the malware infections that Malwarebytes has detected.
To remove the malicious programs that Malwarebytes has found, click on the “Quarantine Selected” button.
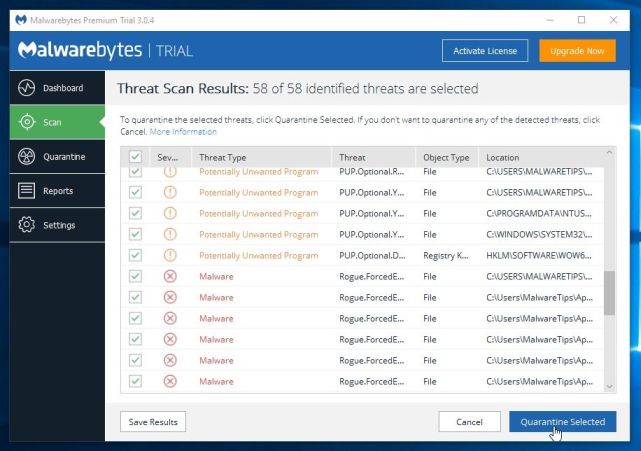
- Malwarebytes will now quarantine all the malicious files and registry keys that it has found.
To complete the malware removal process, Malwarebytes may ask you to restart your computer.
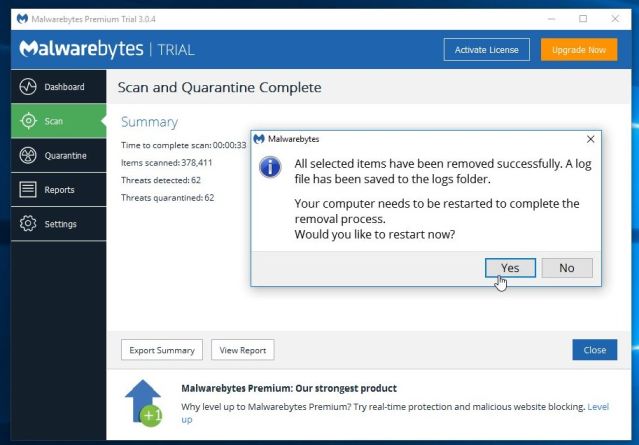
When the malware removal process is complete, you can close Malwarebytes and continue with the rest of the instructions.
STEP 3: Use HitmanPro to Scan for Malware and Unwanted Programs
HitmanPro can find and remove malware, adware, bots, and other threats that even the best antivirus suite can oftentimes miss. HitmanPro is designed to run alongside your antivirus suite, firewall, and other security tools.
- You can download HitmanPro from the below link:
HITMANPRO DOWNLOAD LINK (This link will open a new web page from where you can download “HitmanPro”) - When HitmanPro has finished downloading, double-click on the “hitmanpro” file to install this program on your computer.
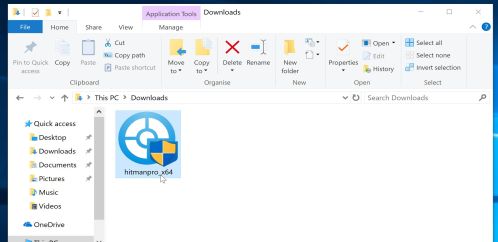
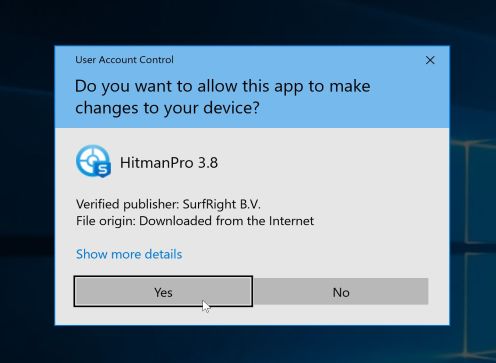
You may be presented with an User Account Control pop-up asking if you want to allow HitmanPro to make changes to your device. If this happens, you should click “Yes” to continue with the installation.
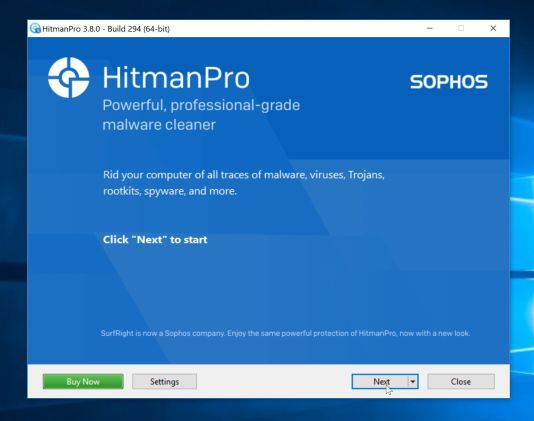
- When the program starts you will be presented with the start screen as shown below. Now click on the Next button to continue with the scan process.
- HitmanPro will now begin to scan your computer for malware.
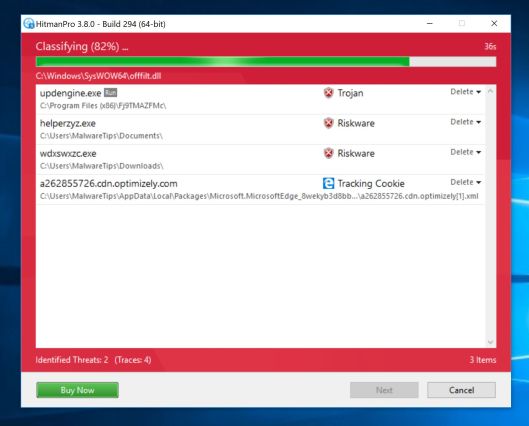
- When it has finished it will display a list of all the malware that the program found as shown in the image below. Click on the “Next” button, to remove malware.
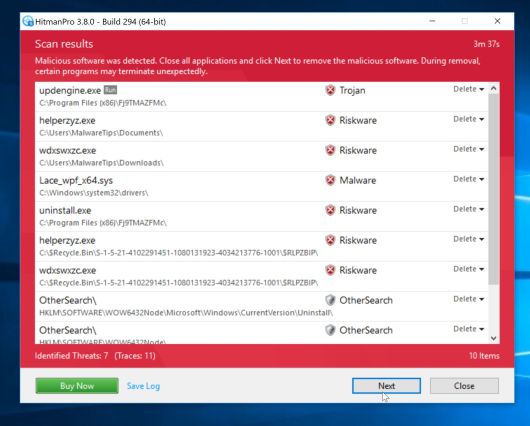
- Click on the “Activate free license” button to begin the free 30 days trial, and remove all the malicious files from your computer.
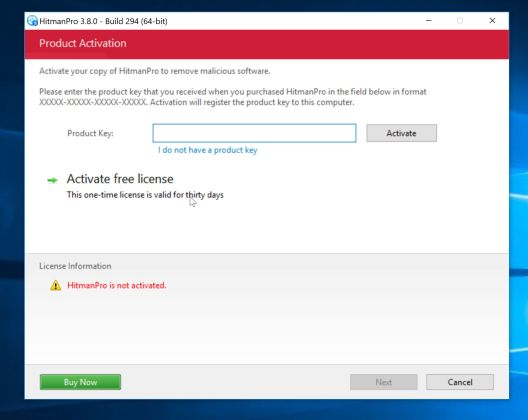
When the process is complete, you can close HitmanPro and continue with the rest of the instructions.
STEP 4: Double-check for malicious programs with Zemana AntiMalware Free
Zemana AntiMalware is a free utility that will scan your computer for the Media Miner adware and other malicious programs.
- You can download Zemana AntiMalware Free from the below link:
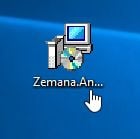
ZEMANA ANTIMALWARE FREE DOWNLOAD LINK (This link open a new webpage from where you can download “Zemana AntiMalware Free”) - Double-click on the file named “Zemana.AntiMalware.Setup.exe” to start the installation of Zemana AntiMalware.
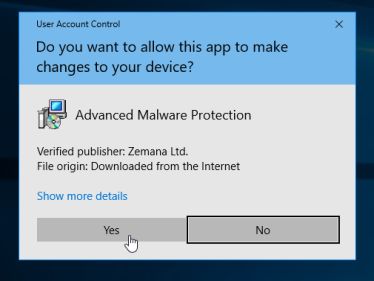
You may be presented with a User Account Control dialog asking you if you want to run this file. If this happens, you should click “Yes” to continue with the installation.
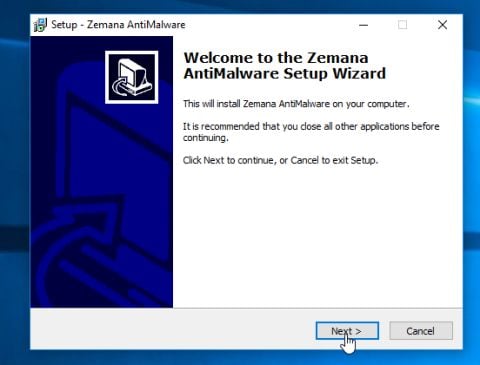
- Click on the “Next” button, to install Zemana AntiMalware on your computer.
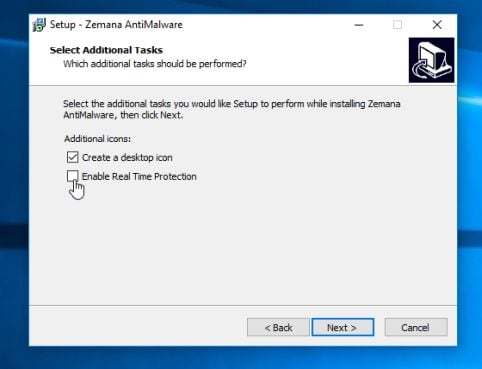
When you reach the “Select Additional Tasks” screen, you can opt-out the “Enable Real Time Protection” option, then click on the “Next” button.
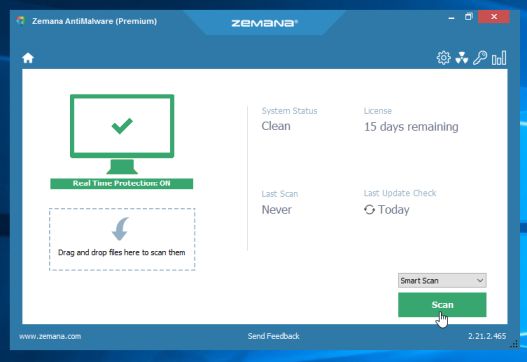
- When Zemana AntiMalware will start, click on the “Scan” button.
- Zemana AntiMalware will now scan computer for malicious files. This process can take up to 10 minutes.
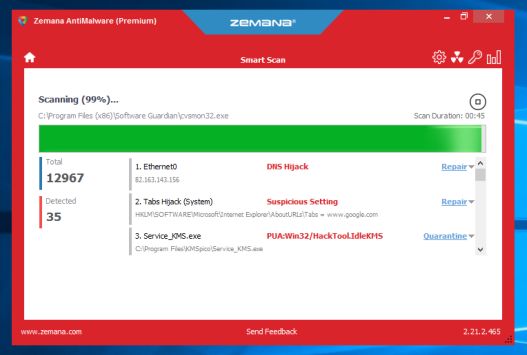
- When Zemana AntiMalware has finished it will display a list of all the malware that the program found. Click on the “Next” button, to remove the malicious files from your computer.
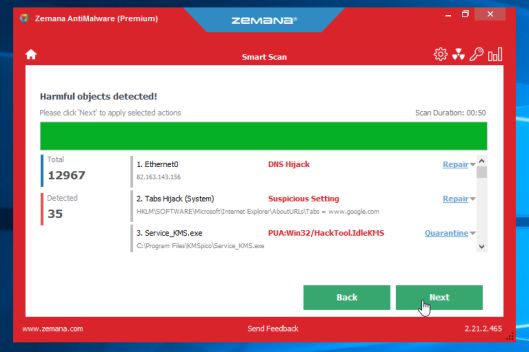
Zemana AntiMalware will now start to remove all the malicious programs from your computer. When the process is complete, you may need to restart your computer.
Google Chrome should now be free of the Media Miner malicious extension. If you are still experiencing problems while trying to remove Media Miner extension from your Google Chrome, please do one of the following:
- Run a system scan with Emsisoft Emergency Kit
- Ask for help in our Malware Removal Assistance forum.

![Remove MarioSearch.com Redirect [Virus Removal Guide] 4 1 55](https://malwaretips.com/blogs/wp-content/uploads/2025/11/1-55-290x290.jpg)


