

You download a Mac app to listen to podcasts or handle a PDF. It opens, does the job, and gives you little reason to question the installation.
Later, Chrome starts taking an unfamiliar route through search results. The useful-looking app may deserve a closer look before you open another private document inside it.
Overview
A working application can carry an unwanted second job
FlutterShell is a macOS backdoor associated with a malicious advertising campaign called Operation FlutterBridge. The danger is installed software, not merely a suspicious browser message.
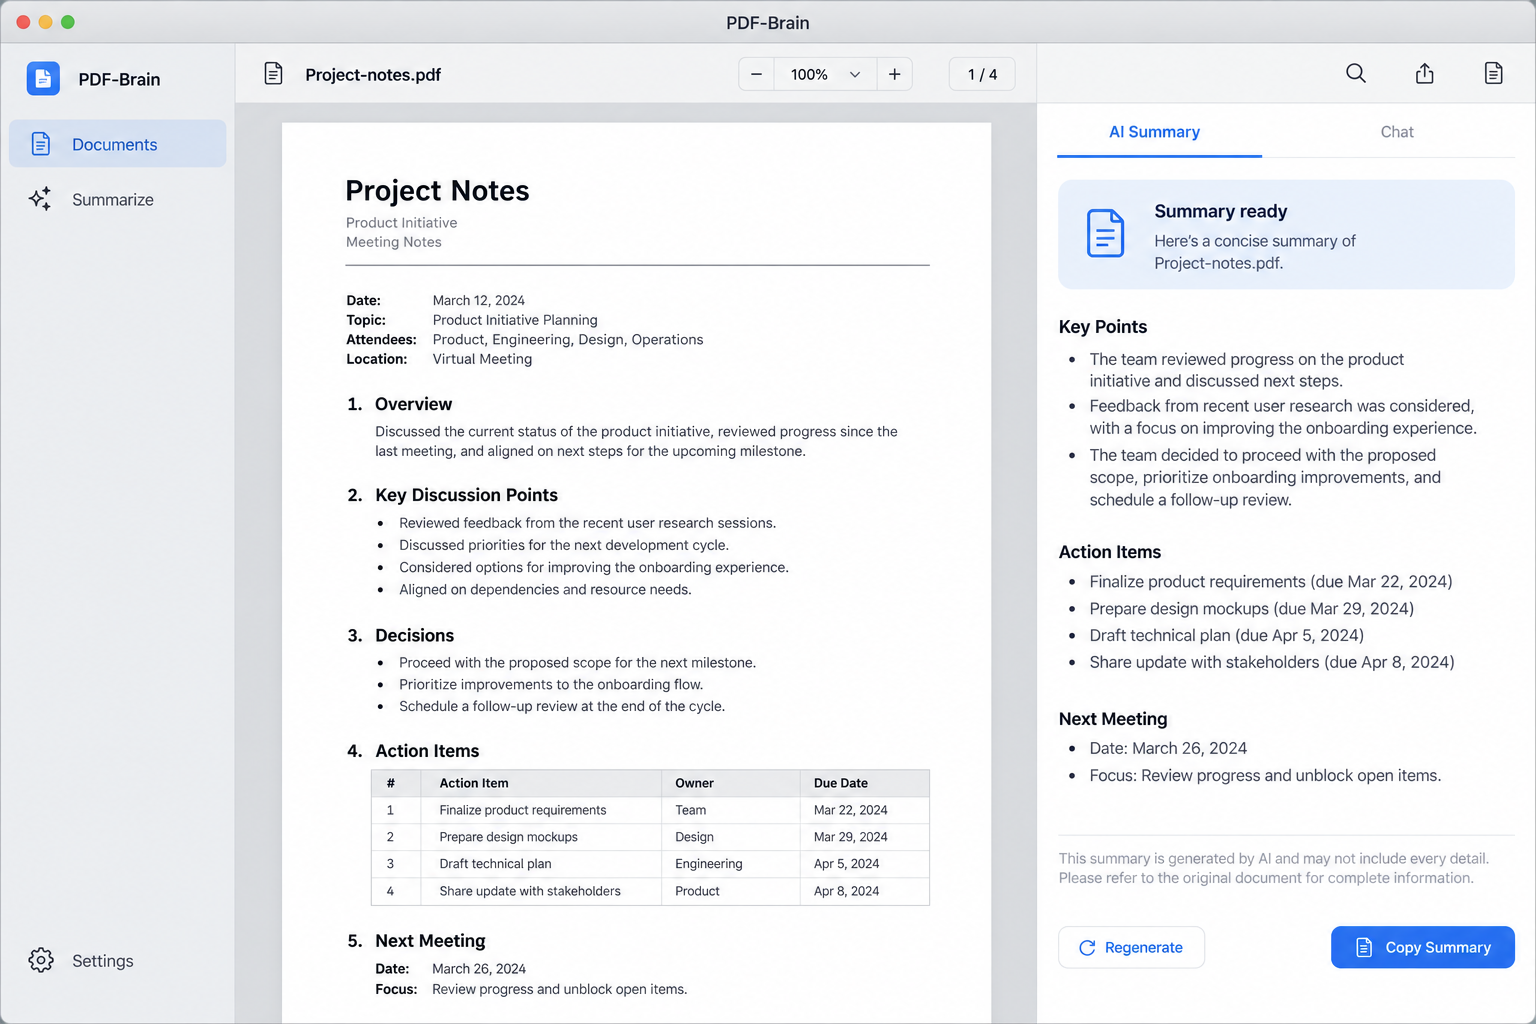
Documented disguises include PodcastsLounge, PDF-Brain, and PDF-Ninja. The applications can provide useful features while exposing the computer to behavior the user never intended to authorize.
The ordinary-looking interface illustrated here is representative, not a captured malicious sample. Appearance alone cannot identify which application build someone installed.
Search hijacking is not the whole security question
Unit 42 documented Chrome search changes alongside remote-command and file-access capabilities. Some PDF variants routed content submitted for summarization through attacker-controlled infrastructure.
Those findings describe analyzed variants and capabilities. They don’t establish that every similarly named program copied every file from every affected Mac.
A suspected installation still deserves prompt containment and examination. Fixing a search preference is not a complete response to possible backdoor access.
Choose Mac cleanup, then assess exposed accounts and documents
Use trusted macOS security tools and your organization’s response process where applicable. Windows cleanup instructions do not fit this operating system.
If a malicious build ran, account and document review may be necessary alongside software removal. A clean scan cannot retrieve a document already sent elsewhere.
- Stop using the suspicious application, especially for confidential files.
- Preserve its download source, installation details, and security findings.
- Use the Mac instructions in our scanning block below.
- Restore browser settings only as one part of the broader cleanup.
Why an App That Works Can Be Harder to Question
A broken download is frustrating and suspicious. A working download rewards the decision to install it.
That is particularly effective with small utilities. You wanted to open one file or listen to one episode, so a successful result can end your investigation.
But functionality and trust are different questions. A program can complete your requested task while also communicating or making changes outside that task.
Consider a confidential contract. Seeing the document render correctly tells you the viewer supports the format; it doesn’t tell you how a summary feature handles its contents.
Before submitting sensitive material to an unfamiliar tool, identify its developer and processing arrangements. A convenient feature isn’t permission for an unknown operator to collect your work.
A clean interface also doesn’t tell you how the installer arrived. A sponsored search result can look like a normal shortcut to the software you wanted.
The download should be checked against an established developer, not just a convincing advertisement. Search placement and software authenticity answer different questions.
Don’t keep running a suspect app to see whether it behaves badly again. Repeating the task can expose more material without providing a reliable diagnosis.
How a FlutterShell Infection Can Unfold
Step 1: A software search becomes an installation decision
The documented campaign promoted utility applications through malicious advertisements. Its route exploited the moment when a reader was already looking for something to install.
The practical warning is to slow down at the download decision. Check who maintains the application and whether you’re on that developer’s established distribution route.
An advertisement isn’t a promise from your operating system that the download is harmless. Its position above other results should not settle your choice.
If you only viewed a promotion, that is different from installing its software. Record which actions occurred before deciding what recovery is needed.
Step 2: Successful features make the installation feel settled
Once the app opens, a working interface can create trust. The user may continue using it for additional files without revisiting the source.
For a personal Mac, that could include documents unrelated to the original task. For a work Mac, approved software rules matter even when a utility seems helpful.
Make a list of files you opened or processed with the suspect application. Distinguish viewing a local document from submitting it to an online feature.
That record is useful for incident assessment. You don’t need to assume all actions had the same effect to take the potential exposure seriously.
Step 3: Hidden activity can matter beyond what the window shows
FlutterShell’s design separates parts of its behavior from the visible utility. The observed backdoor architecture allows remotely supplied logic to influence what the app does.
For the user, the consequence is straightforward: watching the interface isn’t enough to establish that nothing else happened.
A quiet system doesn’t rule out unauthorized activity. Conversely, a slow computer alone cannot identify this particular malware family.
Let security findings, the installed build, and relevant system records guide identification. Avoid diagnosing the infection from one unfamiliar process name.
Don’t remove random system files because a forum comment says they look suspicious. That can damage ordinary software and destroy information a responder needs.
Step 4: Browser changes bring the problem into everyday use
Search redirects are noticeable because people repeat searches throughout the day. An unexpected route can be the clue that finally draws attention to a recent installation.
Use it as a reason to investigate, not as a complete diagnosis. Browser extensions, account-managed policies, and other unwanted software can also affect search.
Write down the unfamiliar hostname already visible. Don’t follow more redirects to explore the operator’s pages.
After cleanup, check the preferred search engine and installed extensions. If the change returns, report that behavior rather than repeatedly resetting the same preference.
Step 5: Cleanup must restore trust, not just remove an icon
Moving an app out of sight doesn’t establish that the Mac is ready for sensitive work. Relevant remnants, access, and settings still need assessment.
Use the scan results to guide removal, and retain a record of what was detected. For business machines, responders may need evidence before cleanup begins.
Recovery also includes decisions about credentials and processed documents. Treat those as separate tasks with their own owners and records.
If system integrity remains uncertain, discuss a controlled erase and rebuild with trusted assistance. That is a planned recovery option, not a casual first step.
What Apple Security Checks Do and Do Not Tell You
Keep the built-in protections enabled
Apple uses multiple defenses, including Gatekeeper, notarization, and XProtect. Keep macOS and its security updates current rather than disabling checks to make an installer run.
Apple’s safe-app guidance explains the warnings you may encounter when opening software. An instruction to bypass one deserves scrutiny.
These protections are important, but they don’t replace checking the developer and download source. No single approval screen should become your entire software-selection process.
A historical signature is not a personal safety guarantee
The analyzed FlutterShell samples included signed and notarized applications. That finding illustrates a limit, not a reason to abandon the protections.
Apple can update detections and revoke known malicious software. Historical results are not a current verdict on every file sharing an application name.
If you have the installer, let trusted security assistance identify the exact build. Don’t download another copy from the suspect site to compare them yourself.
Permissions should match what an application needs
Review the access you granted through macOS Privacy & Security. Look carefully at permissions involving sensitive files, screen recording, or control of other applications.
Not every unfamiliar permission proves an attack. Some legitimate apps require access for their functions, and managed equipment may have administrator-controlled settings.
Ask about entries you can’t explain. Revoking an unnecessary permission can limit future access, but doesn’t establish what happened before the change.
What to Do If You Installed a Suspected FlutterShell App
Stop using the application. Don’t open more files or submit another summary to test whether it behaves normally.
If you suspect active compromise, disconnect the Mac from networks and contact trusted support from another device. Business responders should guide evidence-preservation decisions.
Gather the installation record. Note the application name, approximate install time, source address, and any security alert already shown.
Keep the original installer where appropriate for investigation. Don’t launch it again, upload confidential files to public scanners, or erase evidence before your team reviews it.
Run trusted Mac security scanning. Obtain Malwarebytes for Mac through a genuine route and follow its current scan and quarantine instructions.
Use the Mac section in the block below. Save the scan report and follow any restart requirement rather than assuming the first completed scan proves everything is resolved.
Remove identified unwanted software and review startup access. Let verified findings guide the changes instead of deleting arbitrary Library folders.
Apple’s login-item controls can help review software that starts automatically. Coordinate with IT before changing approved background services on a managed Mac.
Repair the affected browser after cleanup. Check the search provider, extensions, and account-managed configuration.
Use Chrome’s documented reset process if needed. A browser reset changes browser settings; it doesn’t replace scanning or establish that backdoor access has ended.
Protect accounts from clean equipment. Review important sign-ins and replace credentials assessed as exposed during the incident.
For a developer or business Mac, tell the responsible team about accessible service credentials. Keys and tokens may need their own revocation process, not just password changes.
Assess documents processed by the utility. List sensitive files and features used, including any online summarization.
Give that list to the owner or incident team. Avoid declaring every document stolen, but don’t assume deleting the app recalls material that already left the device.
Confirm the recovery plan before returning to sensitive work. If suspicious activity persists or integrity is doubtful, arrange qualified assessment and consider a controlled rebuild.
AdGuard can help limit some malicious advertising afterward. It is browsing protection, not a FlutterShell removal tool or a way to recover leaked information.
Is Your Device Infected? Run a Free Malware Scan
Slow performance, constant pop-ups, or strange behavior? These are classic signs of a malware infection. The fastest way to find out is to scan your device with Malwarebytes Free — one of the most trusted malware removal tools available.
The free version detects and removes the most common threats, including:
- Adware — the cause of those annoying pop-ups
- Browser hijackers — unwanted redirects and changed homepages
- Trojans and spyware — hidden programs stealing your data
- Potentially unwanted programs (PUPs) — software you never asked for
👉 Select your device below — Windows, Mac, or Android — then follow the simple steps to download Malwarebytes, scan your system, and remove any threats it finds. The scan usually takes 5 to 20 minutes.
Run a Malware Scan with Malwarebytes for Windows
Malwarebytes is one of the most popular and trusted anti-malware tools for Windows — and it’s completely free for removing infections. It catches threats that many antivirus programs miss, including adware, browser hijackers, and trojans. Follow the steps below to scan and clean your PC in just a few minutes.
Download Malwarebytes
Click the button below to download the latest version of Malwarebytes for Windows from the official source. The free version is all you need — it will scan your computer and remove adware, browser hijackers, and other malicious software at no cost.
Download MalwarebytesOfficial installer for Windows 11 and 10. Your download starts right away.Want real-time protection? See Malwarebytes Premium Malwarebytes Free for WindowsScans and removes malware at no cost
-
Install Malwarebytes
When the download finishes, open your Downloads folder and double-click the MBSetup file. If Windows shows a User Account Control pop-up, click “Yes” to allow the installation.

Follow the On-Screen Prompts to Install Malwarebytes
The setup wizard will walk you through a few quick screens:
-
Choose where you’re installing the program — “Personal Computer” or “Work Computer” — then click Next.

-
Malwarebytes will now install on your device. This usually takes under a minute.

-
When installation is complete, the “Welcome to Malwarebytes” screen will open automatically.

-
On the final screen, click Open Malwarebytes to launch the program.

-
Enable “Scan for Rootkits”
Before scanning, turn on rootkit detection so Malwarebytes can find even the most hidden threats. Click the Settings gear icon on the left side of the screen.

In the settings menu, find “Scan for rootkits” and click the toggle so it turns blue.

Done? Click “Dashboard” in the left pane to return to the main screen.
Start the Scan
Click the blue Scan button. Malwarebytes will automatically update its virus database and start checking your computer for malware.

-
Wait for the Scan to Finish
The scan checks your entire system for browser hijackers and other malicious programs, so it can take 5 to 20 minutes depending on your computer. Feel free to do something else — just check back occasionally to see the progress.

-
Quarantine the Detected Threats
When the scan is done, you’ll see a list of everything Malwarebytes found — malware, adware, and potentially unwanted programs. Click the “Quarantine” button to remove all of them at once.

Malwarebytes will now remove the malicious files and registry entries and move them safely into quarantine.

-
Restart Your Computer
Some threats can only be fully removed after a reboot. If Malwarebytes asks you to restart, click Yes. Once you’re logged back in, Malwarebytes has finished removing the threats it found.

That’s it — your Windows PC is now clean of trojans, adware, and other malware, and should be back to running smoothly.
If you are still having problems with your computer after completing these instructions, then please follow one of the steps:
- Run a computer scan with ESET Online Scanner
- Ask for help in our Windows Malware Removal Help & Support forum.
Run a Malware Scan with Malwarebytes for Mac
Malwarebytes for Mac is a free on-demand scanner that removes the malware other security software tends to miss — adware, browser hijackers, and unwanted programs included. Cleaning an infected Mac with Malwarebytes has always been completely free, and it’s our go-to recommendation. Follow the steps below to scan and clean your Mac in just a few minutes.
-
Download Malwarebytes for Mac
Click the button below to download the latest version of Malwarebytes for Mac.
Download MalwarebytesOfficial installer for macOS. Your download starts right away.Want real-time protection? See Malwarebytes PremiumMalwarebytes Free for MacScans and removes malware at no cost -
Open the Malwarebytes setup file
When the download finishes, open your Downloads folder and double-click the setup file to begin the installation.

-
Follow the On-Screen Prompts to Install Malwarebytes
The Malwarebytes for Mac Installer will guide you through a few quick screens. Click “Continue” and keep following the prompts until the installation completes.



When the installation is complete, Malwarebytes opens to the Welcome to Malwarebytes screen. Click “Get started“.
-
Select “Personal Computer” or “Work Computer”
Malwarebytes will ask what type of computer you’re installing it on. Click either Personal Computer or Work Computer, whichever applies.

-
Start the Scan
Click the “Scan” button. Malwarebytes will automatically update its detection database and begin checking your Mac for malware.

-
Wait for the Scan to Finish
Malwarebytes will scan your Mac for adware, browser hijackers, and other malicious programs. This can take a few minutes, so feel free to do something else — just check back occasionally to see the progress.

-
Quarantine the Detected Threats
When the scan is done, you’ll see a list of everything Malwarebytes found. Click the “Quarantine” button to remove all the threats at once.

-
Restart Your Mac
Malwarebytes will now remove all the malicious files it found. Some threats can only be fully removed after a reboot — if Malwarebytes asks you to restart, allow it. Once you’re logged back in, your Mac is clean.

That’s it — your Mac is now free of adware, rogue browser extensions, and other potentially harmful software.
If you are still experiencing problems while trying to remove a malicious program from your computer, please ask for help in our Mac Malware Removal Help & Support forum.
Run a Malware Scan with Malwarebytes for Android
Malwarebytes for Android automatically detects and removes dangerous threats like malware and ransomware so you don’t have to worry about your most-used device being compromised. Aggressive detection of adware and potentially unwanted programs keeps your Android phone or tablet running smooth.
-
Download Malwarebytes for Android.
You can download Malwarebytes for Android by clicking the link below.
Get Malwarebytes for AndroidOpens Google Play in a new tab.Want real-time protection? See Malwarebytes Premium for AndroidMalwarebytes for AndroidScans your phone and removes malware at no cost -
Install Malwarebytes for Android on your phone.
In the Google Play Store, tap “Install” to install Malwarebytes for Android on your device.

When the installation process has finished, tap “Open” to begin using Malwarebytes for Android. You can also open Malwarebytes by tapping on its icon in your phone menu or home screen.

-
Follow the on-screen prompts to complete the setup process
When Malwarebytes will open, you will see the Malwarebytes Setup Wizard which will guide you through a series of permissions and other setup options.
This is the first of two screens that explain the difference between the Premium and Free versions. Swipe this screen to continue.
Tap on “Got it” to proceed to the next step.
Malwarebytes for Android will now ask for a set of permissions that are required to scan your device and protect it from malware. Tap on “Give permission” to continue.
Tap on “Allow” to permit Malwarebytes to access the files on your phone.
-
Update database and run a scan with Malwarebytes for Android
You will now be prompted to update the Malwarebytes database and run a full system scan.

Click on “Update database” to update the Malwarebytes for Android definitions to the latest version, then click on “Run full scan” to perform a system scan.

-
Wait for the Malwarebytes scan to complete.
Malwarebytes will now start scanning your phone for adware and other malicious apps. This process can take a few minutes, so we suggest you do something else and periodically check on the status of the scan to see when it is finished.

-
Click on “Remove Selected”.
When the scan has been completed, you will be presented with a screen showing the malware infections that Malwarebytes for Android has detected. To remove the malicious apps that Malwarebytes has found, tap on the “Remove Selected” button.

-
Restart your phone.
Malwarebytes for Android will now remove all the malicious apps that it has found. To complete the malware removal process, Malwarebytes may ask you to restart your device.
That’s it — your Android phone is now clean — no more malicious apps, adware, or browser redirects.
If you are still having problems with your phone after completing these instructions, then please follow one of the steps:
- Restore your phone to factory settings by going to Settings > General management > Reset > Factory data reset.
- Ask for help in our Mobile Malware Removal Help & Support forum.
Stay Protected: Block Ads and Malicious Sites
Now that your device is clean, keep it that way. Most infections start with a malicious ad or a fake download button — so blocking them at the source is your best defense.
We recommend AdGuard, which blocks malicious ads, phishing pages, and dangerous redirects before they can reach you.
👉 Download AdGuard and browse safely
Make the Cleanup Fit the Mac You Actually Use
Startup entries are clues, not automatic deletion targets
Review Login Items & Extensions in System Settings. Compare unfamiliar entries with the applications you installed and the information in your security report.
Apple’s login-item instructions explain the controls. Their location can differ between macOS versions.
Keep a note of changes. If a legitimate feature stops working, that record helps support restore the right configuration without reinstalling the suspicious utility.
A browser reset needs a broader follow-up
Google’s Chrome reset guidance explains which settings are reset and which personal data remain.
Before changing browser configuration, record the symptom and check whether the browser is organization-managed. Your employer may intentionally enforce settings you cannot edit.
After remediation, repeat an ordinary search through your known browser. Check whether the unexpected route returns without revisiting the suspected malicious page.
Rebuilding is a decision about integrity and data
Before choosing a rebuild, identify what exists only on the Mac. Unsynced work, local archives, and application-specific records may need a careful preservation plan.
Keep trusted backups separate from the suspect environment while deciding what to restore. Don’t overwrite an older useful backup simply because the latest copy looks more complete.
Tell your responder whether you use the Mac for client work or cloud administration. That helps identify who should review potential service access and document handling.
A personal owner and a business incident team may choose different recovery routes. The decision should fit the evidence and importance of the affected data.
An erase can destroy local files and evidence. Preserve needed material and coordinate the process before choosing it.
Apple’s erase-and-reset instructions depend on the Mac and operating system. Use the procedure that actually matches the equipment.
Restoring an entire old environment may reintroduce the unwanted application. Prefer a controlled selection of verified data and fresh installers when trusted assistance recommends rebuilding.
Also review accounts from clean equipment. A newly installed operating system doesn’t invalidate someone else’s previously obtained access to an online service.
Frequently Asked Questions
Is FlutterShell just a search-redirect problem?
No. Documented variants have backdoor capabilities as well. Repairing a search preference should not be treated as complete malware remediation.
Can the malicious application still open PDFs or play podcasts?
Yes. Useful features can coexist with unwanted behavior. Successful document viewing doesn’t authenticate the installed software.
Does every PDF-Brain or PDF-Ninja download contain the same malware?
Don’t infer identical behavior from the name alone. Have the exact installed build assessed, and avoid obtaining new copies from an untrusted source.
Should I use Windows removal steps on my Mac?
No. Choose the Mac guidance and a compatible security application. Operating-system-specific controls and cleanup procedures are not interchangeable.
Does a clean scan prove confidential documents were never exposed?
No. Current malware findings and historical document exposure are separate questions. Assess the files and features involved with trusted responders.
Will AdGuard remove the backdoor?
No. It can help reduce certain advertising risks while browsing. Existing malware and possible account exposure need their own response.
The Bottom Line
Stop using a suspected FlutterShell installation and arrange trusted Mac cleanup. A functioning app or repaired search setting is not sufficient assurance.
Review the accounts and documents involved, then return to sensitive work only after the recovery plan addresses both the device and any separate exposure.








