


Several files on a Windows computer now end in .fable. In the same folder, a text file named RecoveryNotice.txt says this is bigger than a file problem.
Before anyone starts restoring folders or responding to the note, establish what changed and who needs to take charge. Those first decisions shape the recovery.
Overview
Two clues point to the documented Windows ransomware
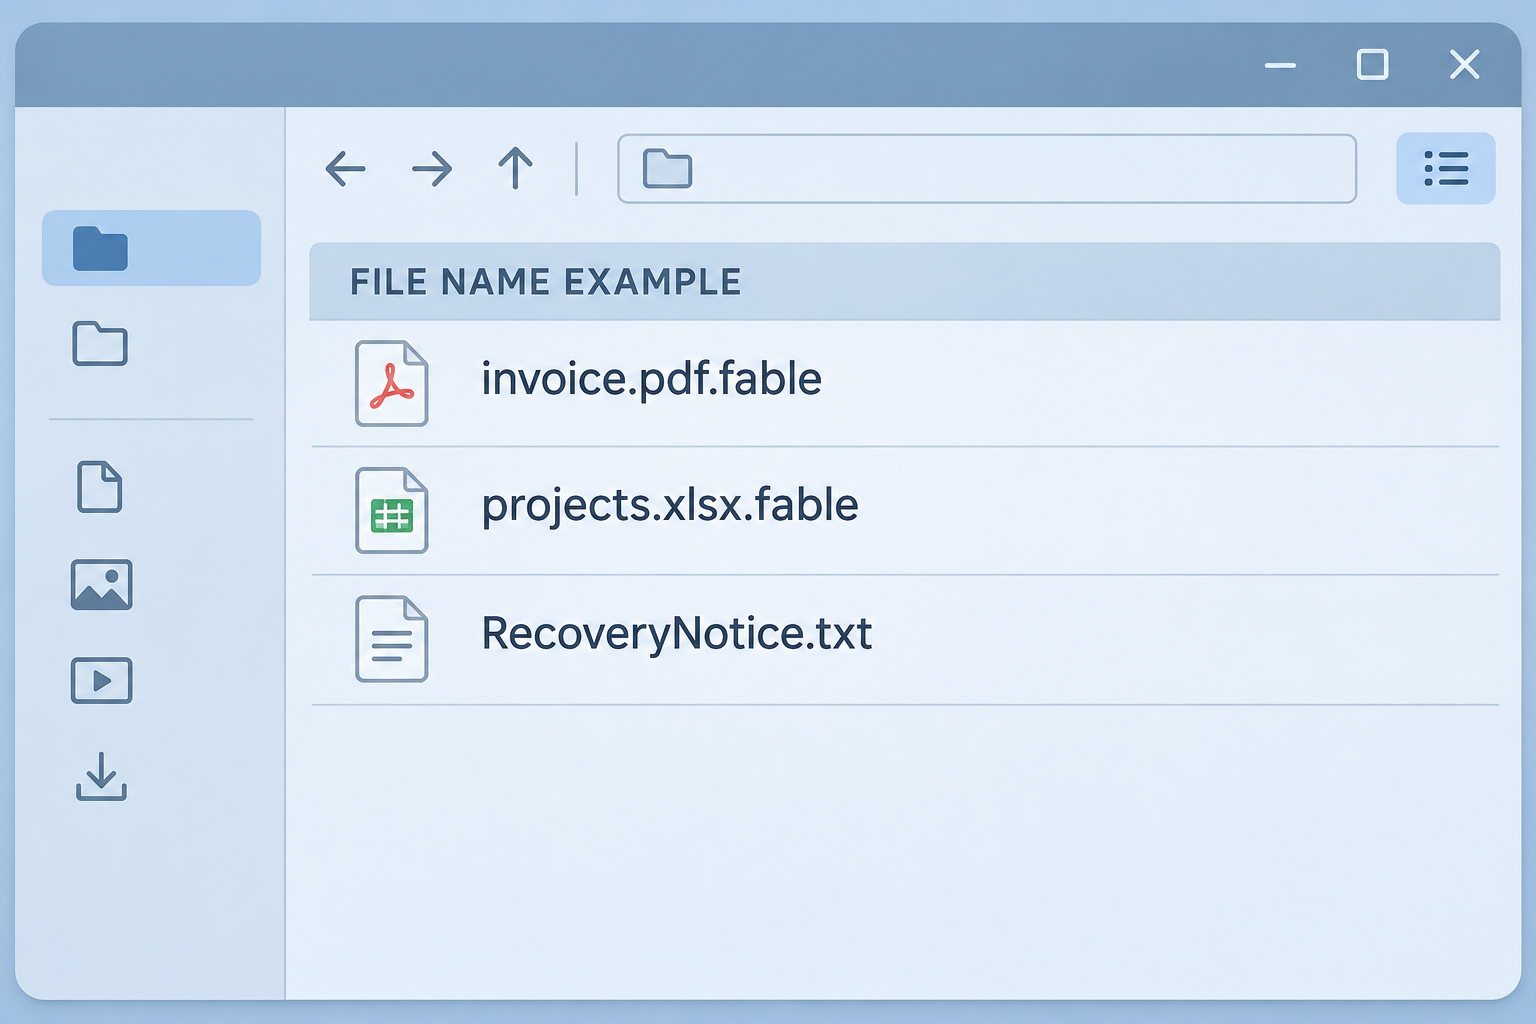
Fable ransomware appends .fable to filenames after encrypting them. You might see invoice.pdf.fable where an ordinary PDF opened the day before.
The examined sample also left a demand titled RecoveryNotice.txt. That name is generic enough to be reused, so compare it with the extension and the message it contains.
A single file with that suffix doesn’t identify an incident. A sudden wave of changed documents, accompanied by the matching note, is a reason to isolate the affected Windows computer.
Keep these details for the person handling the incident:
- Which folders or drives contain newly renamed files.
- Whether staff can still access the original documents elsewhere.
- When someone last opened a healthy copy.
- The exact note name and what it claims, kept in a private record.
The demand makes claims that the files cannot confirm
The note addresses a university. It demands $25,000 and threatens disclosure if the organization doesn’t respond quickly. It also claims some backups were deleted.
The wording tells you whom the note is designed to pressure. It doesn’t establish a named university breach, prove that any particular data was copied, or show that backups failed.
Encryption was observed in sample testing. The note’s story about stolen records needs a separate investigation. Neither the .fable suffix nor an extortion deadline answers that question.
File restoration won’t settle whether data left the network
An intact backup may bring a department’s files back. It cannot determine whether a mailbox, shared drive, or database was accessed before encryption started.
That means a response can have two workstreams: restoring services and investigating possible disclosure. Give each a named owner if you are coordinating an organization’s response.
The CISA ransomware response guide provides a starting point for both tasks. For an isolated personal PC, preserve the evidence and work through the recovery options below.
What to Do When You Find RecoveryNotice.txt
-
Isolate affected computers immediately.
Disconnect Ethernet and Wi-Fi where you can do so safely. On a managed network, use your incident plan and let responders coordinate isolation for servers and shared services.
Don’t plug in backup drives or ask other staff to see if they can open the affected share.
-
Report the incident through a trusted channel.
If you are at a school or business, use the published emergency IT number or another known route. Don’t coordinate the response from an account you suspect is compromised.
Give the team the first observed time, the suffix, the note name, and whether shared folders or cloud sync were involved.
-
Preserve files, notes, and logs before changing systems.
Keep the original demand and a record of affected hosts. Leave volatile evidence and full-disk capture decisions to the people responsible for incident response.
Capture the facts without putting an unredacted note, student record, or encrypted sample into an unrelated public support thread.
-
Verify that backups are safe from a separate management plane.
Have the backup owner check logs, deletion activity, credentials, and retention. Don’t use the affected workstation to browse or test backup copies.
If possible, protect healthy restore points from further change before attempting a live restore.
-
Don’t respond or pay based on the note’s deadline.
Preserve it for your responders. If you’re responsible for an organization, follow its reporting process and ask its legal and security leads about applicable obligations.
Establish which services are actually affected
An endpoint, a shared folder, and a backup system are three separate things to check. Don’t infer the status of one from what happened to another.
Ask each owner what they observed and when. A file server may still have readable historical copies even when a workstation’s synced folder contains locked files.
Record which shared folders were reachable from the first affected machine. Pass that to your responders instead of asking staff to browse questionable directories to confirm the damage.
Avoid broad announcements that identify a supposed breach before your team has verified it. Give staff practical instructions for reporting symptoms and accessing any temporary services you provide.
Where a service can’t stay offline, have its owner identify a clean alternative. Bring the necessary data into that environment only after checking the source and access permissions.
How to Remove Fable Ransomware From Windows
Step 1: Choose a recovery target before you run anything
On a managed endpoint, let the response team decide whether to capture evidence, quarantine, or replace the machine. Don’t assume a consumer scan is the proper first action.
On a personal PC, keep the original drive as it is if you need to recover irreplaceable files. A professional may recommend imaging it before installation, cleanup, or a restart.
If you have verified backups and the original install can no longer be trusted, rebuilding on a clean system is generally safer than putting the old environment back into service.
Step 2: Install Malwarebytes only when scanning is appropriate
Use a known clean computer to obtain the Windows installer. Keep installation media separate from data backups, and leave the affected computer off the regular network.
Windows ransomware cleanup
Download Malwarebytes for Windows
You do not need to buy a subscription to run a Threat Scan.
In File Explorer, locate the known installer you obtained. Open that copy, verify the publisher in the Windows confirmation prompt, and follow setup only if it matches what you expected.
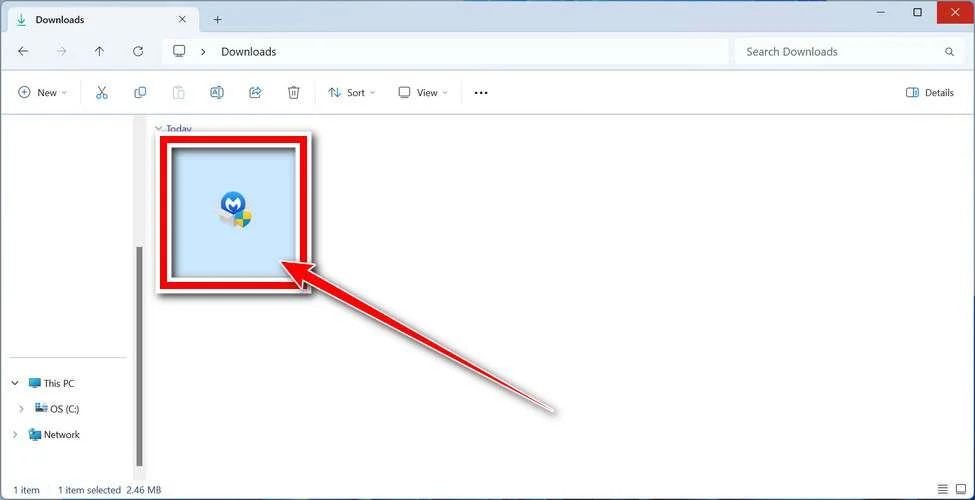
The manual scan doesn’t require a paid protection subscription. The protection link is a separate option, not a way to restore files.
If setup requests network access you can’t provide safely, don’t make an exception for the affected computer. Ask a technician whether to continue in a controlled environment or rebuild.
Step 3: Check the Threat Scan report before quarantining
Launch Malwarebytes and select Scan in the scanner panel. Wait for it to finish and make sure the results are for the current run, not an older report.
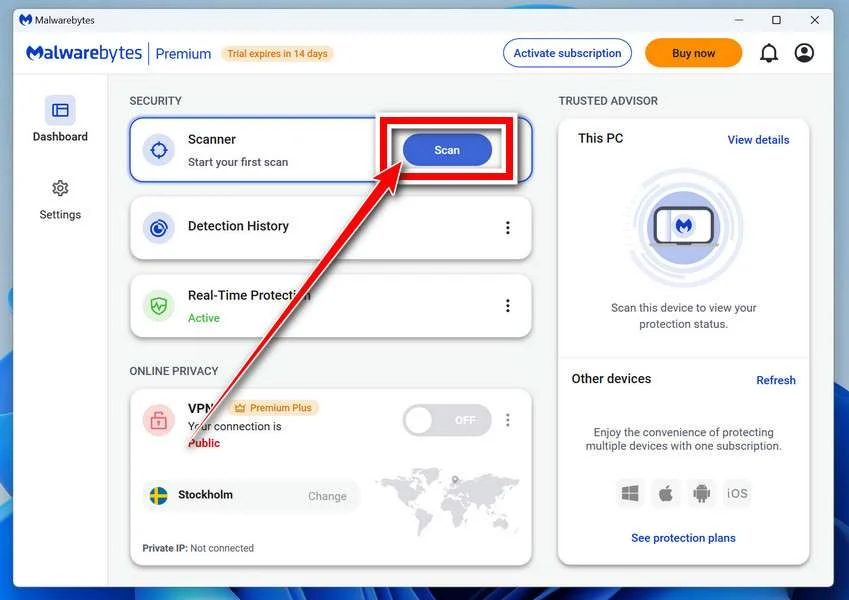
Record what the scan found. On a managed system, send findings to the security team using its approved method; file locations can contain employee names or sensitive project details.
For a personal system after preservation, review the detection list. Select identified threats and use Quarantine. Ask for help if a detection concerns something you can’t confidently assess.
The button below is shown on an example report. The entries pictured are not Fable detections. Your case may show different labels or no detection at all.
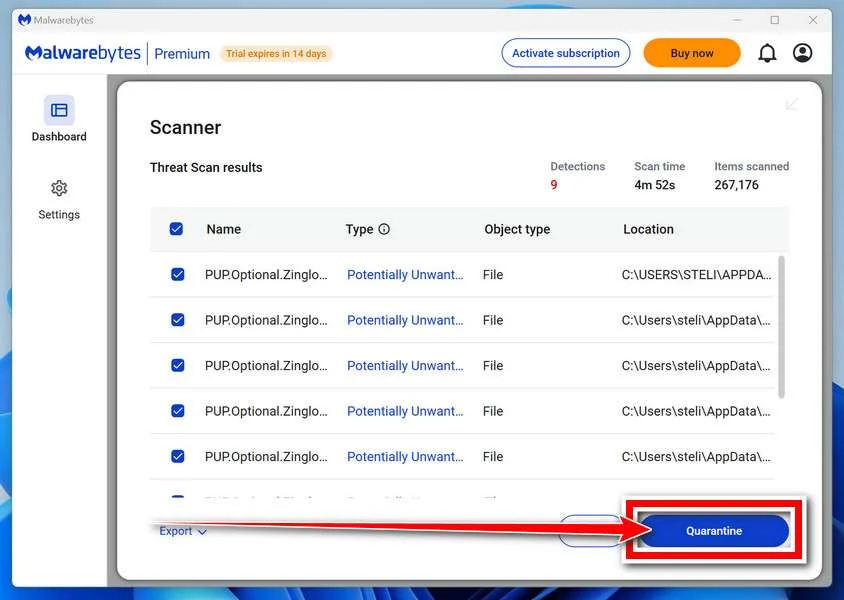
If the scanner requests a restart, confirm you’re cleared to proceed. A second scan can reveal recurring detections, but it doesn’t establish that every system is safe.
Step 4: Return only trusted systems to service
If encryption continues or a threat reappears, do not reconnect the endpoint. Escalate to your security team or the MalwareTips Windows removal-help forum.
For a personal rebuild, use Microsoft’s Windows installation-media instructions on a trusted computer. Confirm your preservation and backup plan before using a destructive install option.
Before restoring a business system, verify that the identity and administration services it will depend on are trustworthy. An endpoint rebuild doesn’t protect reused or already exposed administrator credentials.
Install updates and restore applications from trusted sources. Avoid importing a whole Windows profile, unknown installer, or old scheduled software configuration just to make the rebuilt machine look familiar.
Recovering .fable Files Without Trusting the Ransom Note
Restore to a clean staging location first
Pick a restore point that predates the earliest signs, not just the time someone reported the incident. The first observation might be hours after the first change.
Start with a small, representative set of files. Verify they open and that the contents make sense. Where a service depends on a database, check the application as well.
Test access controls before restoring a departmental share. Sensitive folders should retain the right permissions. A successful copy that exposes records to everyone creates a new incident.
The ransomware note’s backup claim is not a reason to skip this check. The backup team’s logs, retention history, and restored samples are the evidence that matters.
Check surviving versions and snapshots without overwriting current work
On a clean device, look for cloud versions or administrator-controlled snapshots from before the incident. The existence of a recent sync doesn’t guarantee an unencrypted copy.
For OneDrive, Microsoft’s restore instructions distinguish earlier file versions from a wider rollback. A whole-drive rollback can also affect legitimate work done after the selected time.
When Windows has usable Previous Versions, open the older folder to inspect it before restoring. On managed storage, have the administrator copy samples to a controlled location instead.
Write down the date and source of every recovered set. A decision log makes it easier to identify gaps without turning an untested restore into the next production copy.
Use variant-specific tools only when a trusted publisher confirms a match
The No More Ransom decryption catalog did not show a verified Fable match. A product using the same word in its name isn’t evidence it works on these files.
If a verified tool appears, ask what sample and variant it supports. Test copies in a controlled place and keep the original encrypted set.
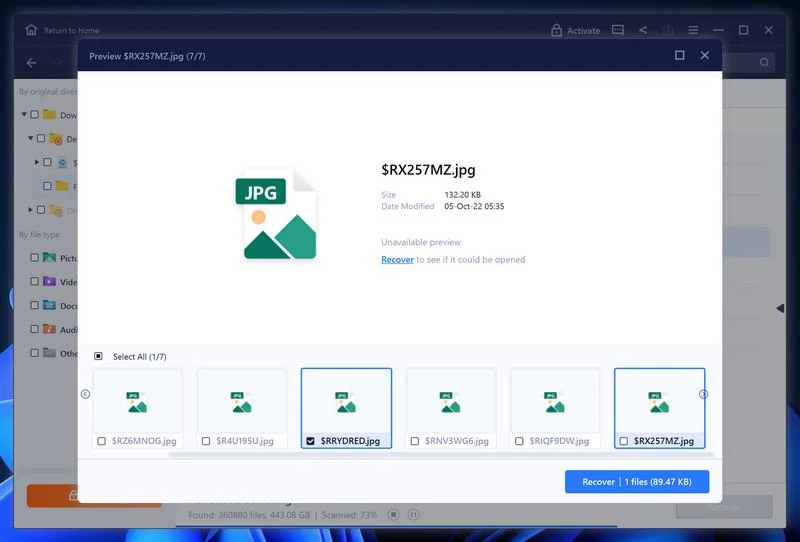
Deleted-file recovery is a different option. It can help only if a separate original was deleted and recoverable traces remain. It won’t decrypt a .fable file.
If those conditions fit, use a separate recovery disk. The EaseUS recovery walkthrough shows where to check candidate files and select Recover without promising that every preview works.
Bring essential systems back in the right order
Check identity, storage, and database dependencies before reopening a service. An intact data folder is only one part of a working system.
Have the application owner run an ordinary transaction in the restored environment. For example, confirm a test user sees only the records they’re allowed to see.
Don’t run the same account or job that was in use when the system was compromised without first reviewing its access. A working restore can still inherit unsafe settings.
Record what wasn’t recovered. People may need to recreate recent transactions from separate records. Preserve the damaged originals while the response team confirms which material is missing.
Checking the Claim About Stolen Data
Keep this investigation open even if every recovered document looks fine. A successful restore answers an availability question, not whether anyone read or copied those records.
Start with systems that can provide independent evidence: authentication logs, file access records, backup audit history, and network monitoring that was running before the incident.
Preserve any evidence of unexpected account access or large transfers. The absence of a useful log can limit what responders know; it is not proof either way.
Review timing from more than one system where possible. The account may show one sign-in time, while the backup platform or file service records an earlier or later change.
If the note claims records were taken, identify which categories were accessible from the affected systems. That assessment can help the response team decide where to look first.
A threat to release records doesn’t make every listed record real. If the attackers present a sample, responders should assess it privately rather than distributing it to prove the point.
Keep a running distinction between confirmed loss of access, confirmed disclosure, and unresolved claims. That makes later updates more accurate as logs, backups, and restored files become available.
Let your incident lead decide who needs to be informed and when. Don’t publish a note’s allegations as confirmed findings or treat a promise to delete data as verifiable assurance.
Frequently Asked Questions
What is a .fable file after a ransomware incident?
The documented sample added .fable after encrypting existing files. If you see it alongside RecoveryNotice.txt and multiple documents stop opening, isolate the computer and preserve the evidence.
Does RecoveryNotice.txt prove a university was breached?
No. The note addresses a university and threatens disclosure. That text isn’t proof that an identified institution was compromised or that sensitive records were copied.
Can I undo the damage by removing the suffix?
No. Renaming the file won’t restore its contents. Keep the original and recover a known good copy to another location where possible.
Does an antivirus scan decrypt Fable files?
No. The scan looks for malicious software. Decryption and restoring a verified backup are separate recovery tasks.
What if the note says the attackers deleted my backups?
Check backup audit records and test a restore from a trusted system. Don’t assume the copies are gone, but don’t restore from a version that hasn’t been tested.
Should I pay to prevent a leak?
Don’t rely on a payment promise. A ransom note can’t guarantee decryption or deletion of copies. Report the incident through the channels responsible for your system.
The Bottom Line
Isolate affected Windows systems, preserve RecoveryNotice.txt, and don’t pay based on its threats. Remove the malware or rebuild from a trusted source before restoring files.
Test clean backups away from the affected system. If the note claims data was stolen, have responders verify that separately rather than letting a successful restore close the investigation.

Join the discussion
0 commentsShare your experience or ask a question about this article.
Your progress
Did these steps help?
Let us know how the guide worked for you.
Describe what you see and the step you reached. Keep passwords and other private information out.
Discussion
Start the conversation
Have a question or something useful to share? Add the first comment.