


An image-search extension has been useful for months. Then an update arrives, and familiar websites begin showing a Google-looking warning that refuses to leave.
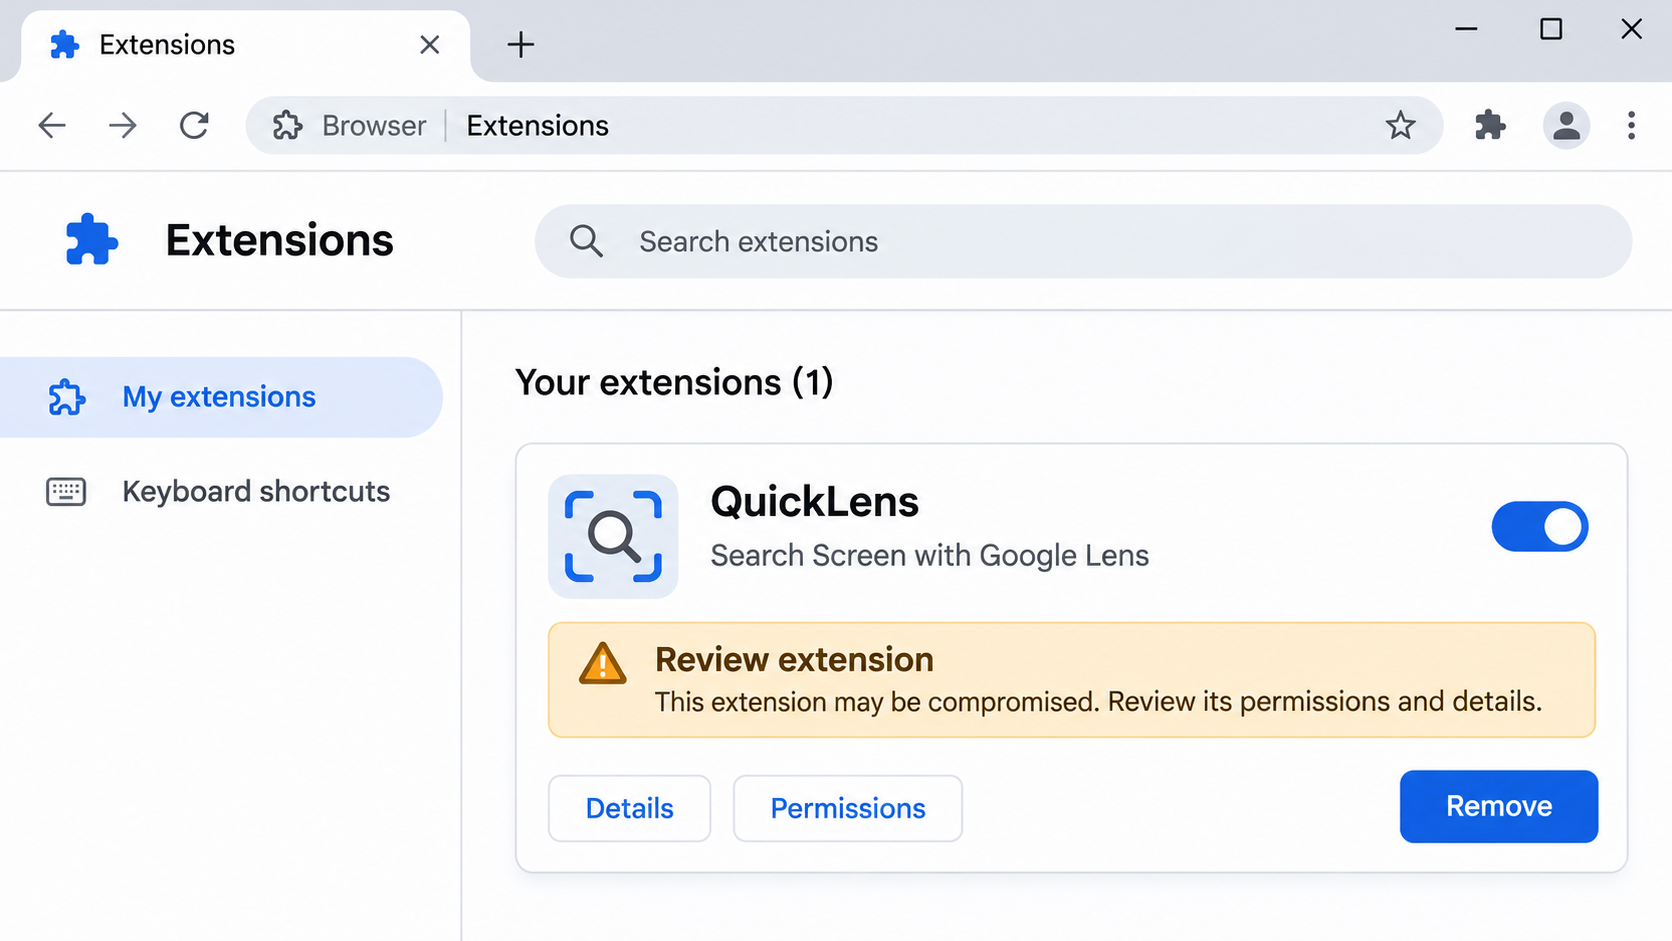
When QuickLens is involved, the question is bigger than whether the browser needs an update. Start by checking the extension that is running inside it.
Overview
A previously useful extension received a malicious update
QuickLens, titled Search Screen with Google Lens, began as a working visual-search extension. The incident concerns a later malicious version, not Google’s Lens service itself.
Annex’s code comparison identifies version 5.8 as the turning point after an ownership change. The added functionality included a remote instruction channel and website-security-header manipulation.
The exact Chrome extension identifier is kdenlnncndfnhkognokgfpabgkgehodd. Use that identifier alongside the full name, rather than assuming every similarly named visual-search tool is involved.
The browser itself became an injection point
The compromised extension could obtain JavaScript instructions and execute them within visited pages. A trustworthy website could therefore display content introduced by an untrustworthy browser add-on.
Subsequent analysis described fake update prompts and attempts to collect credentials, form information, and wallet-related data. The risk was not limited to unwanted advertisements.
Separate three kinds of exposure:
- The extension was installed and could access browsing activity.
- A fake update or verification prompt asked you to run something.
- A downloaded program or pasted command actually executed outside the browser.
Removal does not automatically undo account or wallet exposure
Reporting at the time described removal from the Chrome Web Store and automatic disabling. Check your own profiles rather than relying on an old announcement.
An already stolen password, session, or recovery phrase needs its own response. Uninstalling an extension cannot make a copied secret private again.
How to Remove QuickLens and Check for Additional Windows Malware
For a work or school computer, contact its IT or security team before installing tools or restarting. Its investigation may need evidence from the running system.
Remove QuickLens first. The Windows scanner steps apply only if you also executed a fake update or suspect an additional Windows infection.
Start with Malwarebytes. HitmanPro and ESET are optional second opinions for unresolved findings or continuing symptoms. Run one scanner at a time.
- STEP 1: Remove the QuickLens extension
- STEP 2: Scan and quarantine threats with Malwarebytes
- STEP 3: Optional: Check unresolved threats with HitmanPro
- STEP 4: Optional: Run a second-opinion scan with ESET
Step 1: Remove the QuickLens extension
Open Chrome’s three-dot menu, choose Extensions, then Manage extensions. Find QuickLens: Search Screen with Google Lens.
Match the extension identifier kdenlnncndfnhkognokgfpabgkgehodd. Click Remove and confirm, even if Chrome has already disabled it.
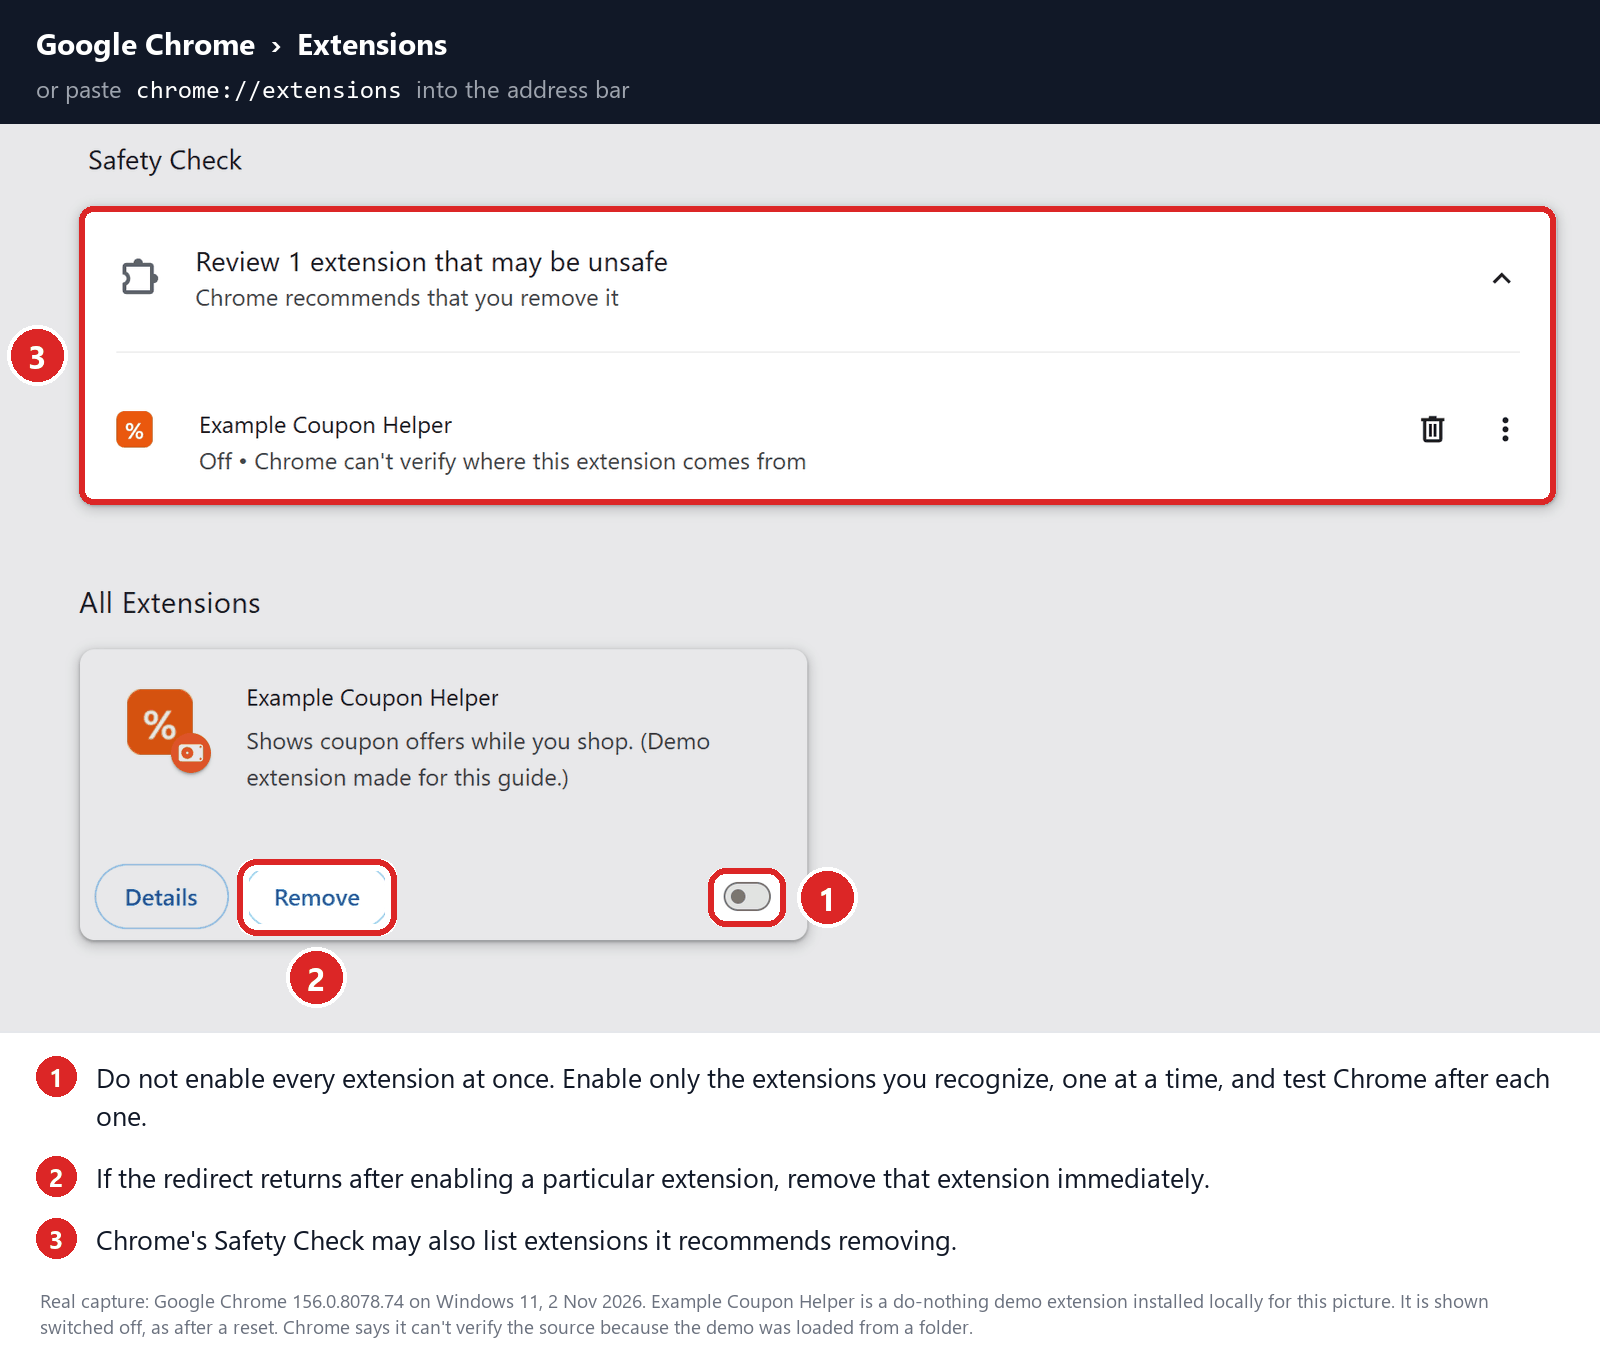
Check each profile and Chromium-based browser where you installed QuickLens. Do not remove unrelated extensions simply because their names resemble it.
If your employer manages the extension, contact its administrator. Do not erase browser policies or profile folders to bypass that restriction.
If you also ran a fake update, pasted a command, or opened a downloaded program on Windows, continue with the Windows cleanup below.
Step 2: Scan and quarantine threats with Malwarebytes
Malwarebytes for Windows can scan for malware and quarantine detected threats. Use the free Custom Scan below; a paid plan is not required for this cleanup.
Download Malwarebytes
Click the button below to download Malwarebytes for Windows. Paid real-time protection is optional.
Download MalwarebytesMalwarebytes free scanner informationOfficial installer for Windows 11 and 10. Your download starts right away.Want real-time protection? See Malwarebytes PremiumMalwarebytes Free for WindowsScans and removes malware at no cost-
Install Malwarebytes
When the download finishes, open Downloads and double-click MBSetup. If Windows asks for permission, check that the prompt identifies Malwarebytes, then click Yes.
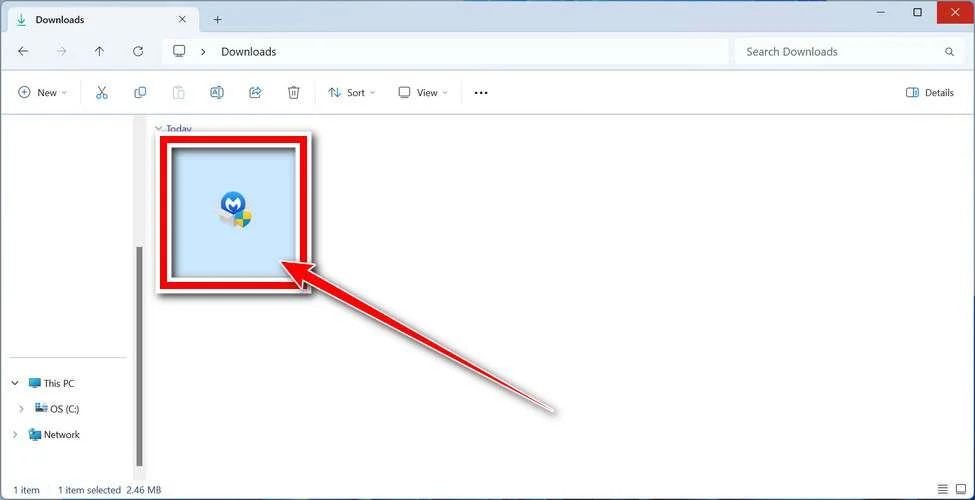
Follow the On-Screen Prompts to Install Malwarebytes
The setup wizard will walk you through a few quick screens:
Installer screens and optional offers vary. Skip unwanted Browser Guard, trial, or paid-plan offers. The free Custom Scan remains available; Threat Scan may require a paid plan.
-
Choose Personal for your own computer, then click Next. For a work-managed device, use your organization’s approved response instead.
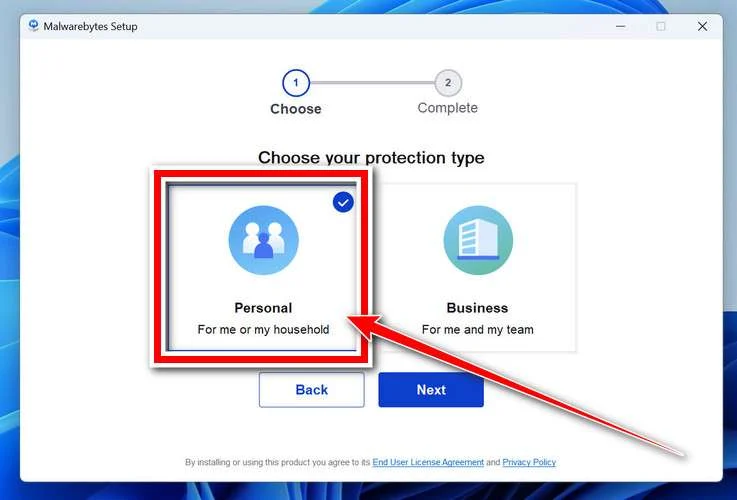
-
Wait for installation to finish.
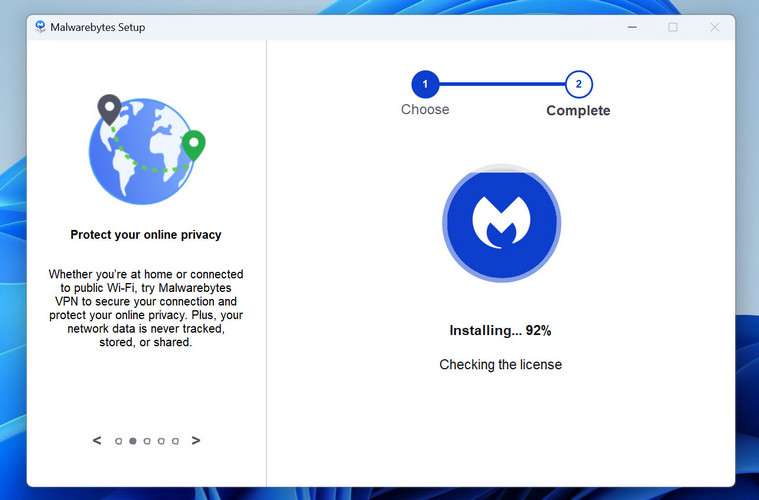
-
If the Welcome to Malwarebytes screen appears, click Get started and follow the remaining prompts.
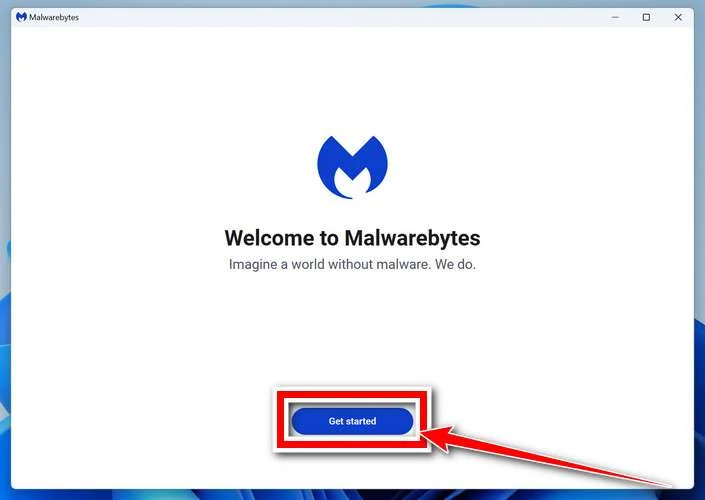
-
On the final screen, click Open Malwarebytes to launch the program.
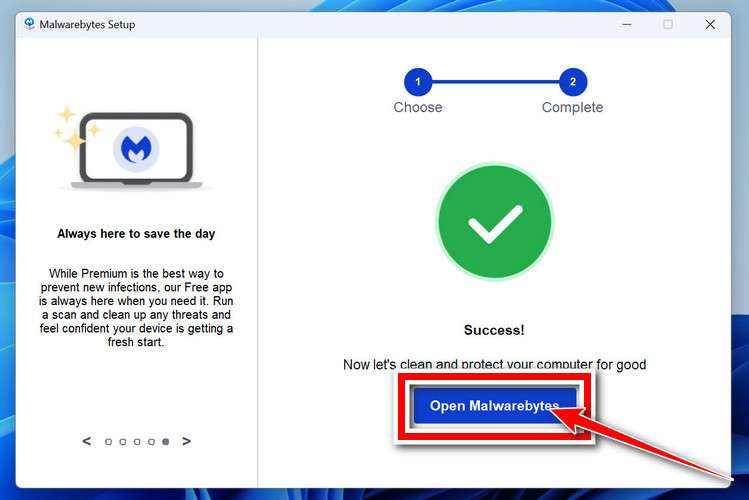
-
Choose the scan type and optional rootkit check
On the Scanner tile, click the three dots, choose Advanced Scan, then Custom Scan.
Expand the folder selector and select the C:\ system drive. Include any other drive where the suspicious files were stored.
If Scan for rootkits is available, you can enable it. This setting is unavailable on Windows ARM devices; leave Windows security protections enabled.
Review how potentially unwanted programs and modifications will be handled. Keep detection enabled rather than automatically ignoring these items.
Start the Scan
Click Start Custom Scan. Allow Malwarebytes to update its detection information if prompted.
-
Wait for the Scan to Finish
Wait for the Custom Scan to finish. The time required depends on the selected locations and the amount of data.
-
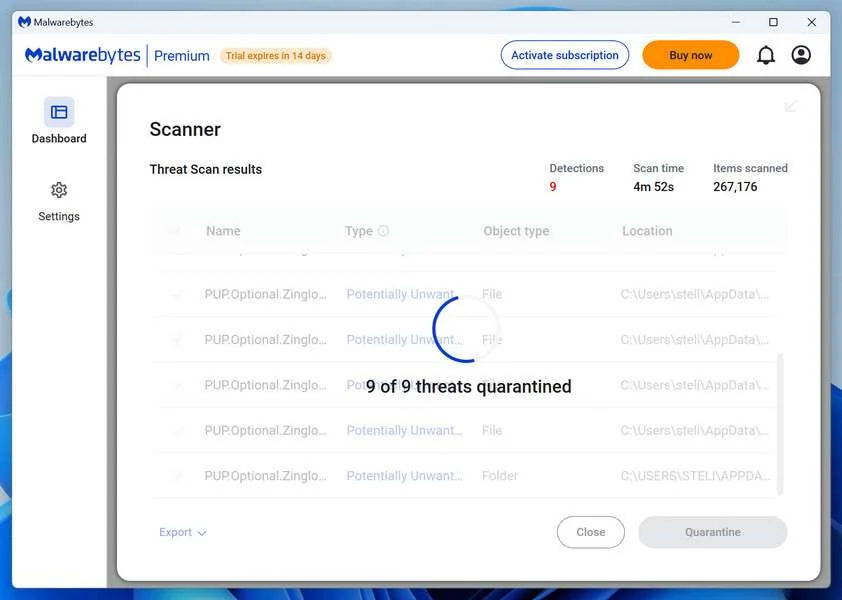
Quarantine the Detected Threats
When the scan finishes, review the detections and keep the threats you want removed selected. Click Quarantine.
If a detection is unclear, save the report and ask for help before excluding or restoring it.
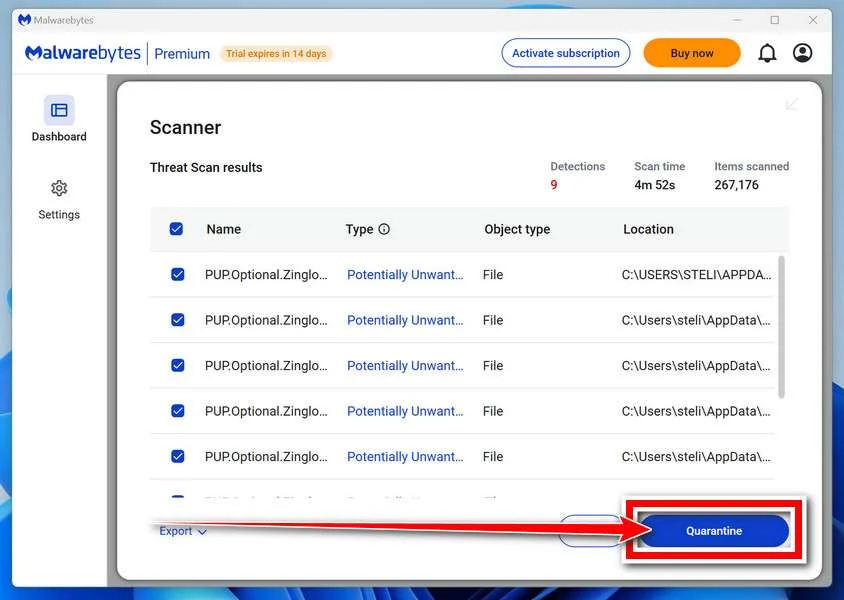
Wait while Malwarebytes quarantines the selected items. Do not restore a file merely because an unfamiliar name appears in the results.
-
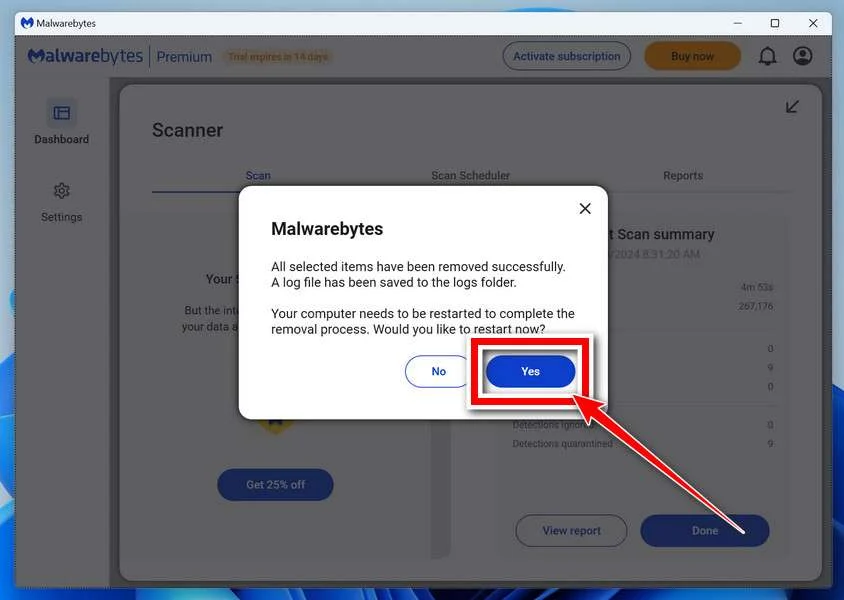
Restart Your Computer
If Malwarebytes asks for a restart, save your work and click Yes. After signing back in, reopen Malwarebytes and check the report for unresolved detections.
Step 3: Optional: Check unresolved threats with HitmanPro
HitmanPro is a second-opinion scanner for Windows. It examines suspicious files using cloud analysis, including SophosLabs. An internet connection is needed for that check.
Scanning is free. Removing detections requires an eligible one-time 30-day trial or a paid license.
A computer that already used its trial may not qualify again. You do not have to buy HitmanPro to follow the Malwarebytes cleanup above.
-
Download HitmanPro
Click the button below to download HitmanPro if you want a second opinion on unresolved symptoms or detections.
Download HitmanProFree scan. Removal requires an eligible 30-day trial or a paid license. Opens the official HitmanPro page in a new tab.HitmanProSecond-opinion malware scanner from Sophos -
Install HitmanPro
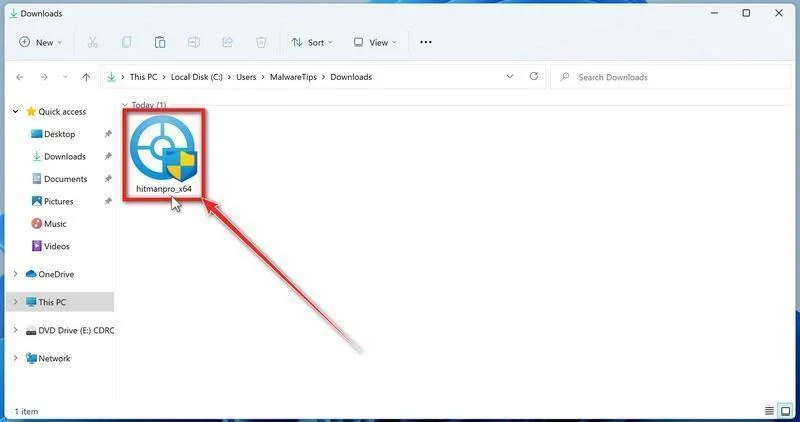
When the download finishes, open your Downloads folder and double-click the file: “hitmanpro.exe” on 32-bit Windows, or “hitmanpro_x64.exe” on 64-bit Windows.
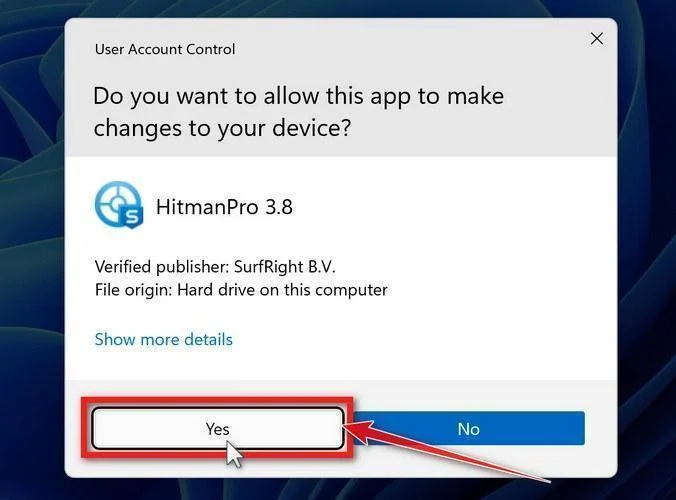
If a User Account Control pop-up asks whether HitmanPro can make changes to your device, click “Yes” to continue.
-
Follow the On-Screen Prompts
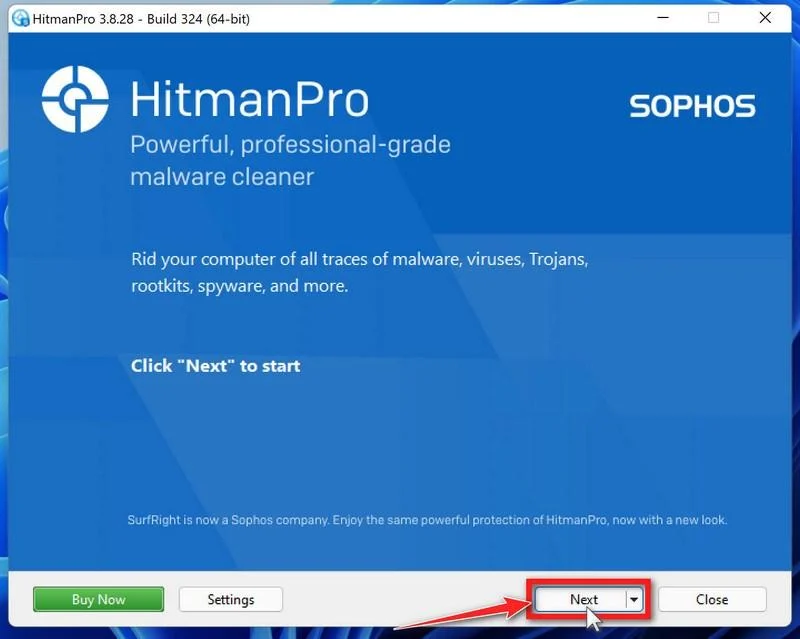
On the HitmanPro start screen, click Next. Read and accept the terms if you agree, then continue.
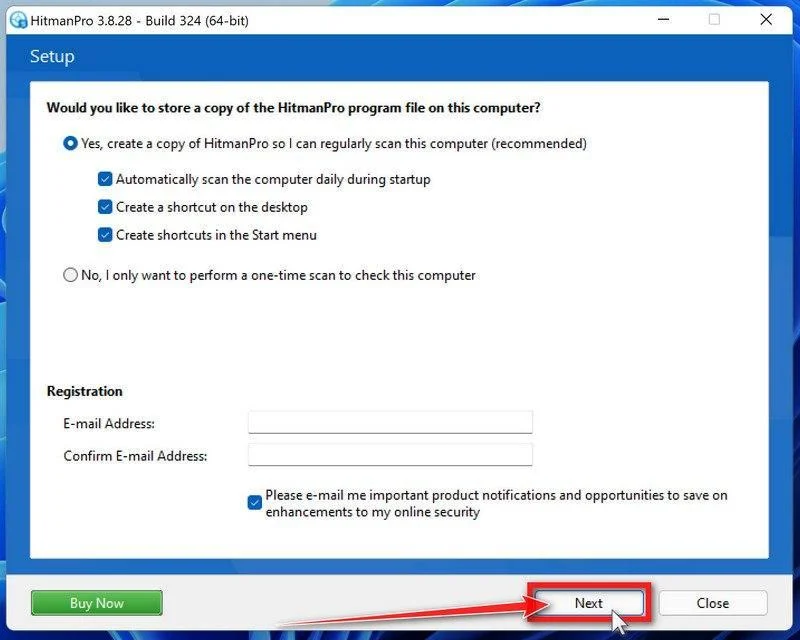
Choose whether to keep a copy for later use or run a one-time scan. Review optional startup and email preferences, then click Next.
-
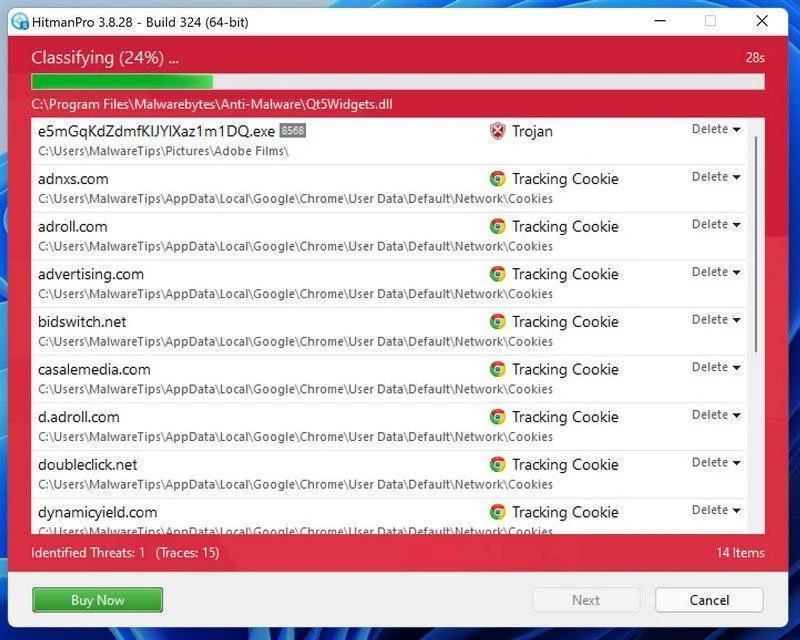
Wait for the Scan to Finish
Let HitmanPro finish scanning. Review its findings once the scan has completed.
-
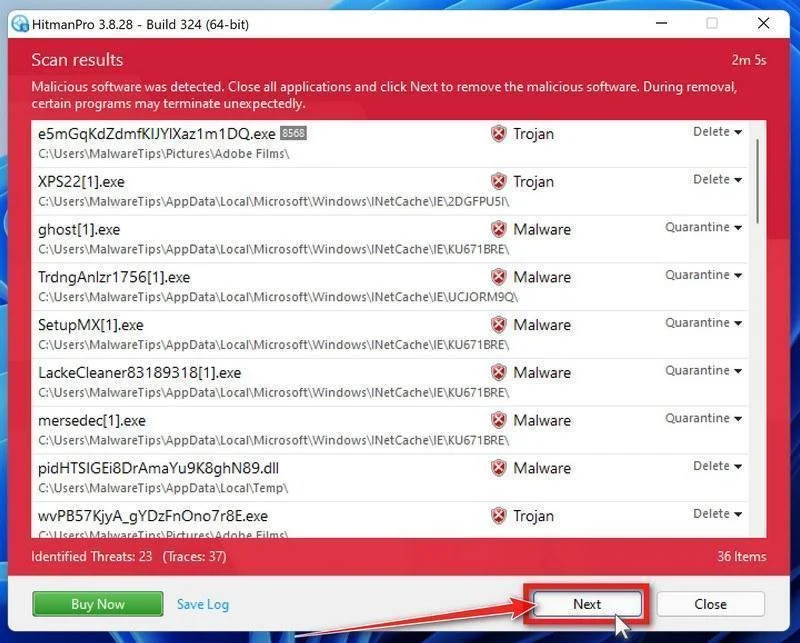
Review the Results and Click “Next”
Review the detected items and their proposed actions. Save the log if you need help with an unfamiliar detection, then click Next to proceed.
-
Click “Activate Free License”
If this computer qualifies, click Activate free license and follow the activation prompts.
If no trial is available, use an existing license or save the report for assistance. Do not assume a purchase is necessary to continue cleanup.
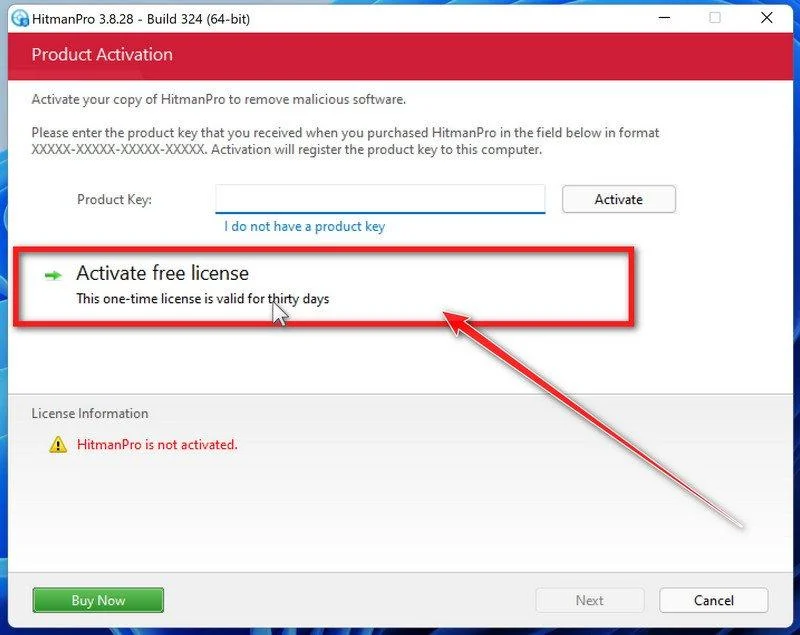
After removal, review the summary and click Next. Choose Reboot if requested, or Close if no restart is needed.
If detections return or the original symptoms persist, keep the reports and ask for help. A clean scan cannot rule out every threat.
Step 4: Optional: Run a second-opinion scan with ESET
ESET Online Scanner is a free second-opinion scanner for Windows. Use it if you need another check after cleanup, rather than running several scanners together.
-
Download ESET Online Scanner
Click the button below to download ESET Online Scanner.
Download ESET Online ScannerOpens the official download page in a new tab.ESET Online ScannerFree one-time malware scan from ESET -
Run the Installer
When the download finishes, open Downloads and double-click esetonlinescanner.exe. Approve the Windows permission prompt after checking that it identifies ESET.
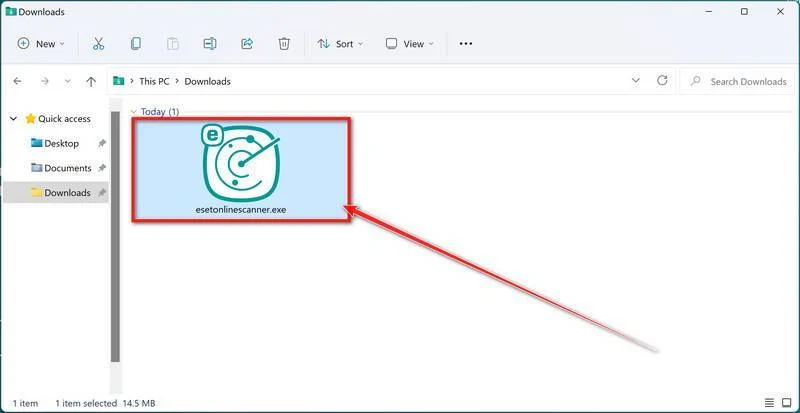
-
Install ESET Online Scanner
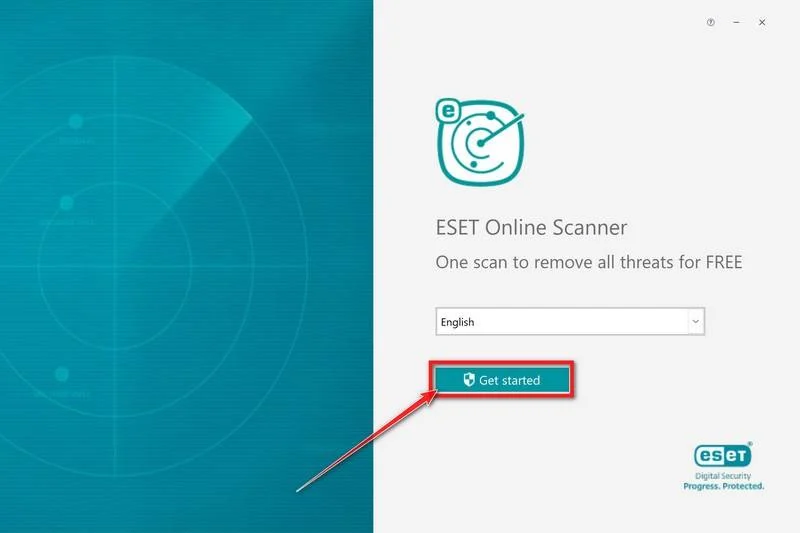
On the start screen, select your language from the drop-down menu and click Get started.
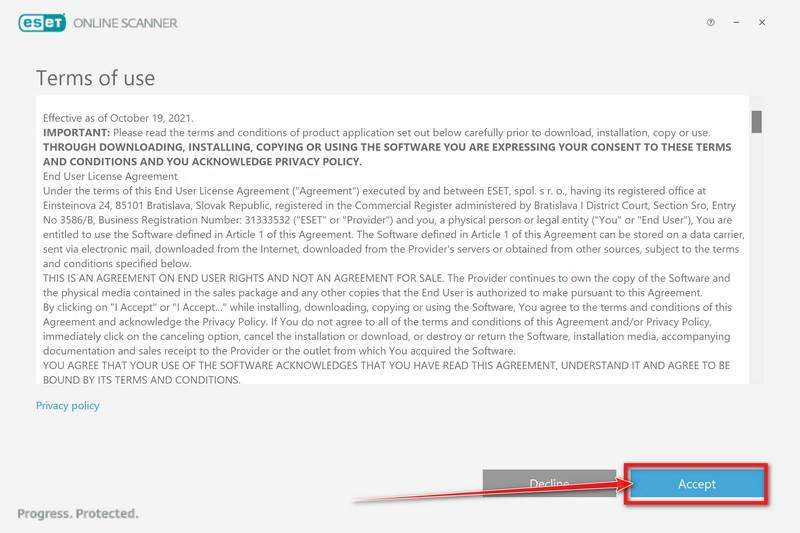
Read the Terms of use. Click Accept if you agree, then Get started if that screen appears again.
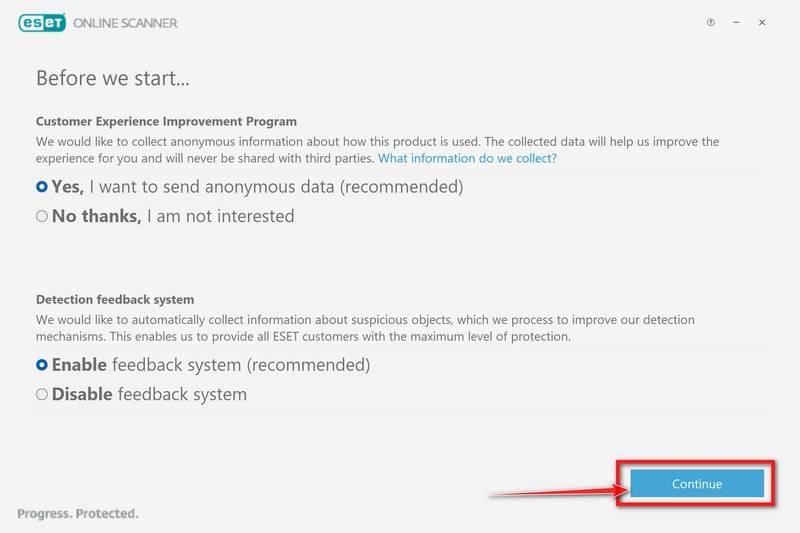
Choose your preferences for the Customer Experience Improvement Program and the Detection feedback system (either choice is fine), then click Continue.
-
Start a Full Scan
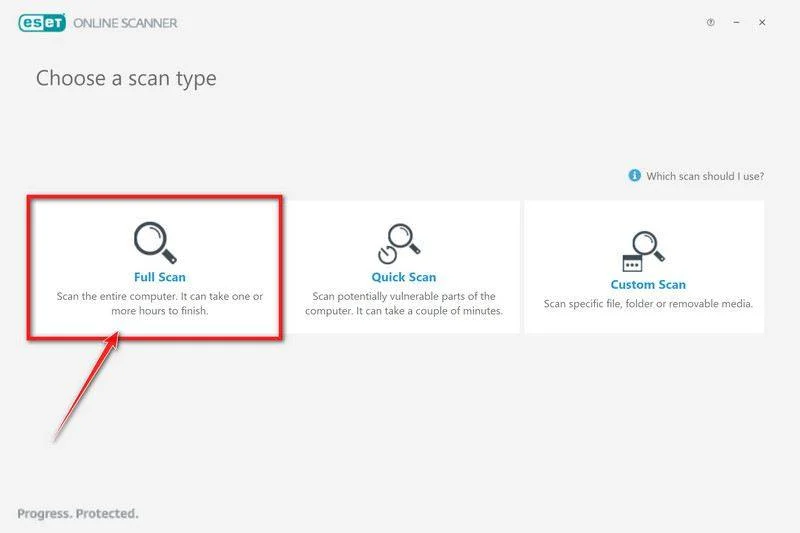
Click Full Scan for a broader check than the quick-scan option.
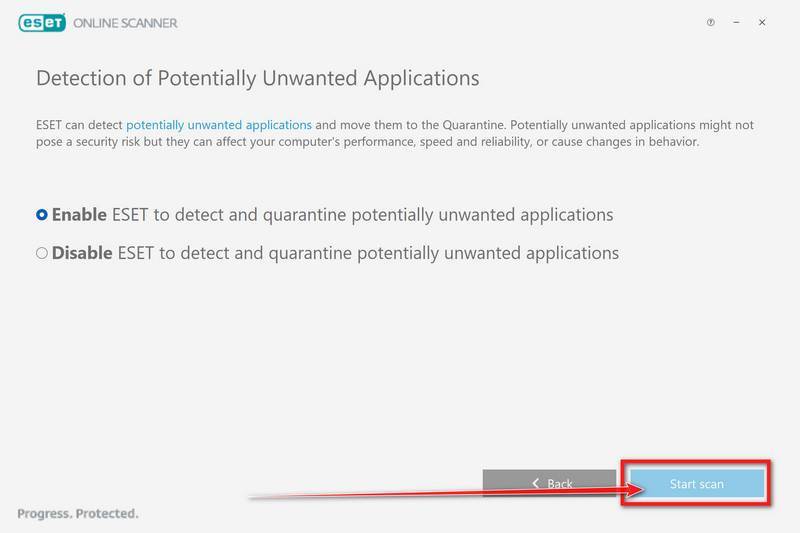
Select Enable for Detection of Potentially Unwanted Applications. Then click Start scan.
-
Wait for the Scan to Finish
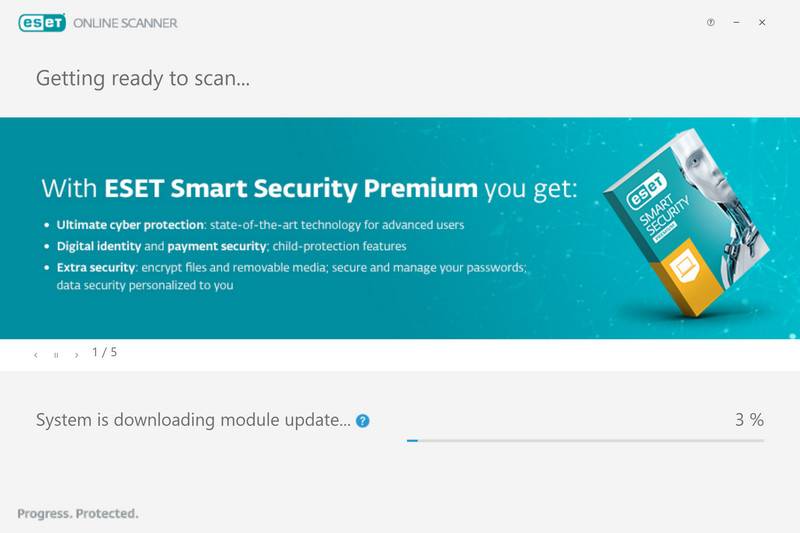
Allow the detection modules to download and update. The file scan begins afterward.
Leave the scan running until it finishes. A full scan can take an hour or longer, depending on your computer and the data being checked.
-
Review the Results
When the scan finishes, open View detailed results and check the action recorded for each detection.
ESET attempts to clean and quarantine detected threats. If an item remains unresolved, keep its details for assistance.
Click Save scan log to keep the results. Then click Continue.
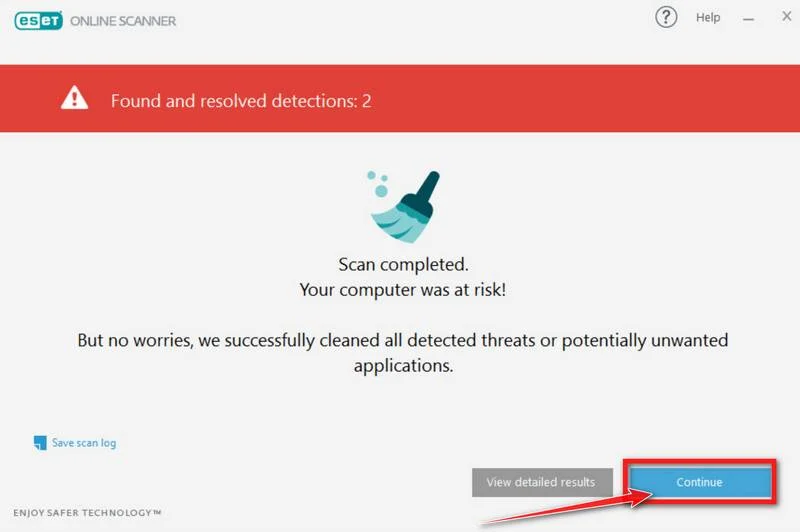
Restart if ESET requests it. Afterward, check whether detections or the original symptoms return.
If problems continue, keep the scan reports and ask for help in the MalwareTips removal forum. Do not repeatedly restore quarantined files.
Technical Details Worth Knowing
Existing trust carries forward into a different release
QuickLens already had users who knew it as an image-search utility. A later release could reach that installed audience through the extension-update process.
The original search functionality could keep working while unrelated code was added. A successful image search was therefore not a test for the absence of malicious behavior.
New permissions support broader changes to webpages
The analyzed release added permissions used to alter response headers and observe requests. Those technical changes expanded what the extension could do around visited pages.
Headers such as Content-Security-Policy help a site restrict certain kinds of injected code. Removing them weakens protections the website expected the browser to enforce.
This does not mean the website’s own server was hacked. The interference happens through software installed in the person’s browser.
A remote service supplies instructions
The extension contacted an external instruction server and periodically checked for updates. Annex documented a five-minute polling interval in the analyzed code.
Injected prompts try to move activity outside the browser
Observed fake Google Update prompts led into ClickFix-style instructions. Instead of supplying a normal browser update, the prompt tried to make the user execute code.
Running a pasted command or a downloaded program creates another exposure beyond the extension. Seeing the prompt is not the same as completing that action.
Browsing secrets can become usable account access
Malicious page code can attempt to capture forms or information displayed during browsing. Reported payloads also targeted wallet-related secrets and online-service data.
That does not establish that every installed wallet lost funds. Actual impact depends on the received payload, available information, and actions taken during the affected period.
What to Do If You Had the Compromised QuickLens Extension
Stop using the affected profile for sensitive browsing. Remove the exact extension and check its presence in other profiles before returning to account recovery.
Record any additional action. Write down whether you downloaded an update, pasted a command, ran a file, or entered a password after the unusual prompts began.
Recover important online accounts. From a clean environment, change exposed credentials, review connected applications, and end sessions you cannot recognize.
Respond carefully to wallet-secret exposure. If a recovery phrase or private key was exposed, seek official wallet guidance about a fresh wallet created securely.
Review unauthorized activity. Preserve suspicious payments, account changes, advertising spend, or messages. Contact the relevant provider through its established support route.
Check for installed payloads when warranted. Use Malwarebytes or an appropriate platform tool after fake-update execution. AdGuard can reduce some malicious advertising, not remove this add-on.
Why a Browser Update or Ad Blocker Is Not Enough
Keeping Chrome updated matters, but it does not legitimize an installed extension’s remote instructions. Browser maintenance and extension removal solve different parts of this incident.
An ad blocker is not an account-recovery tool either. A malicious add-on operating inside the browser can have access that ordinary page advertising does not.
Use the official wallet or account provider when deciding which sessions, connected applications, or secrets need replacement. Do not give a recovery phrase to a helper.
Beware of private messages offering guaranteed crypto recovery for an upfront payment. Preserve the original transaction information rather than sending more funds to demonstrate ownership.
Frequently Asked Questions
Is Google Lens itself malicious?
No. The case concerns the compromised QuickLens extension. Its use of Google’s visual-search service did not make the malicious update a Google product.
Was QuickLens always malware?
Annex’s comparison described an earlier functional version and later malicious changes. The relevant finding is the compromised release, not an accusation against every past version.
Can a real website show a fake update because of an extension?
Yes. An installed add-on can inject content into pages it can access. That does not establish that the website itself produced or approved the prompt.
Does the extension automatically run Windows malware?
Page-context script execution and operating-system execution are different. The observed ClickFix route attempted to persuade users to take an additional action outside the browser.
Should every wallet user assume funds were stolen?
No. Review actual activity and possible secret exposure. An exposed recovery phrase requires a stronger response than merely removing a browser permission.
Is the automatic Chrome disable warning enough?
Check that the extension is removed, assess what happened while it was active, and address any exposed accounts or executed downloads separately.
The Bottom Line
Remove the compromised QuickLens extension and do not follow webpage instructions to run a supposed browser update. Its earlier useful functionality does not excuse the malicious release.
If you used it during the affected period, review account and wallet exposure. If you also ran code, complete the appropriate device cleanup before trusting that computer again.

Join the discussion
0 commentsShare your experience or ask a question about this article.
Your progress
Did these steps help?
Let us know how the guide worked for you.
Describe what you see and the step you reached. Keep passwords and other private information out.
Discussion
Start the conversation
Have a question or something useful to share? Add the first comment.